

Tweak the hell out of that Ouya Lineage.
This article dives into your Ouya's afterlife that now that you have loaded the Lineage OS your game console isn't necessarily customized for that some settings may need to be played with to make the experiencing a little more acceptable for general use. We can't go through every possible scenario as that would make a few-minute video turn into hours and hours of video and further drive this blogger down the path of insanity. But we hope to at least answer some of the more commonly asked questions throughout this article.
Read on if you want to know more.
"Note: If you get a black screen but the audio is playing. Or you got a potato PC and it's studdering. We have fallback Links below."

Video tutorial fallback mirrors:
In case you have no-script enabled or for some reason cannot see the title video on this website. We have provided direct links for these videos. For more information about the standards we use on this site click here if you would like to know more.
AV1       - Link
MP4/.h264 - Link
OGV       - Link
Prerequisites:
This tutorial assumes that you have performed the following tasks from previous blog entries. Describing everything in a solid blog article would tend to lead down the path of insanity as it would be 10,000+ words and over 27 minutes of video that some more experienced users may or may not need.
 Setting up your Raspberry Pi to begin ADB on Ouya.
The Samba and SSH section is completely optional but if you want to access your Raspberry Pi wireless it is super-handy to do.
 Set up Raspberry Pi with SSH and Samba for wireless remote access ADB.
If your Ouya OS is bricked or you cannot gain access to it in any normal fashion ADB sideloading might be a better option for you.
 ADB Sideloading from Raspberry Pi/Linux over to your Ouya.
If your Ouya OS is fine and you don't mind losing a few hundred megs while saving a lot of headaches going back and forth. The Push Method might be for you.
 ADB Push files from the Raspberry Pi to your Ouya.
If you have done none of these previous blogs then this tutorial may not help you..... At all...
It all begins...
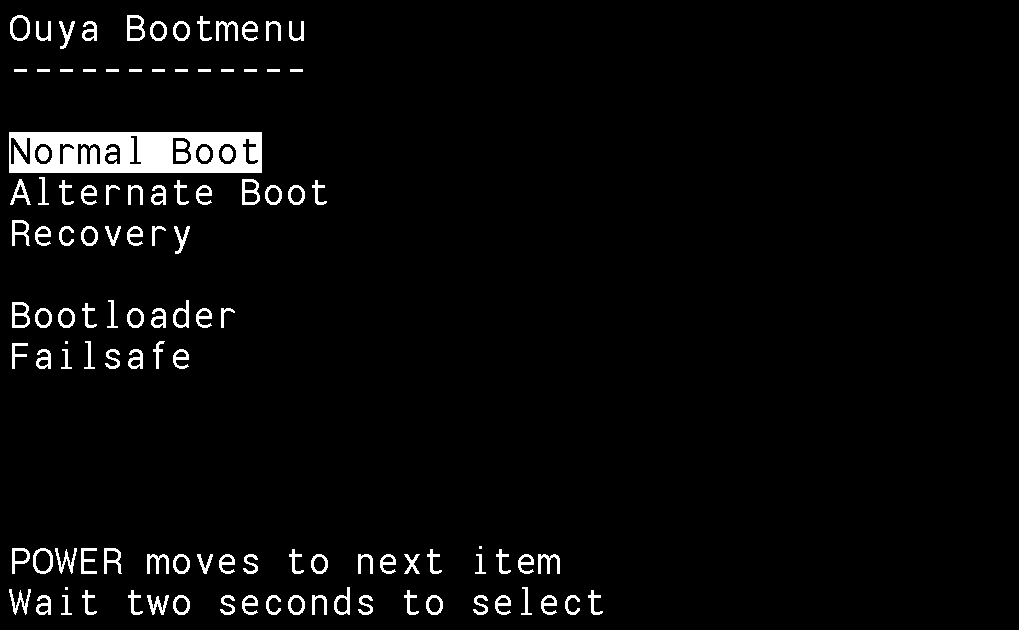
With powering on your newly flashed Ouya you will be greeted with your Ouya Boot menu. Leave it alone and let it boot up.

Lineage will begin loading there after.
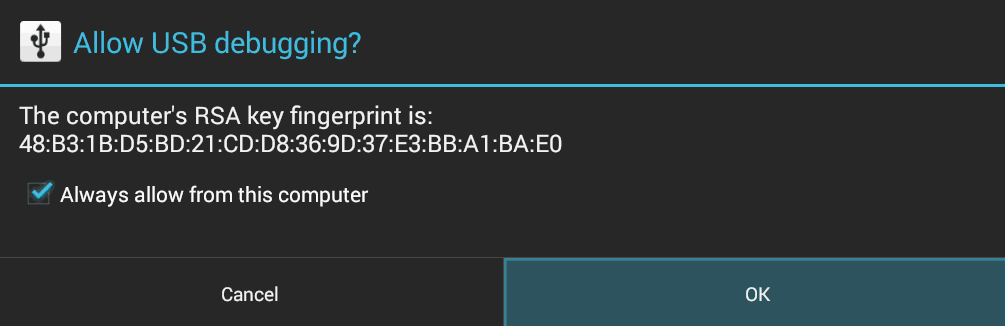
Now, if this is your first time powering up Lineage and you left your Raspberry Pi plugged in you may be greeted with this screen. Don't worry it just wants you to permit the Raspberry Pi to continue giving ADB control over Lineage. Check the box to "Always allow from this computer" and then hit the "OK" button.
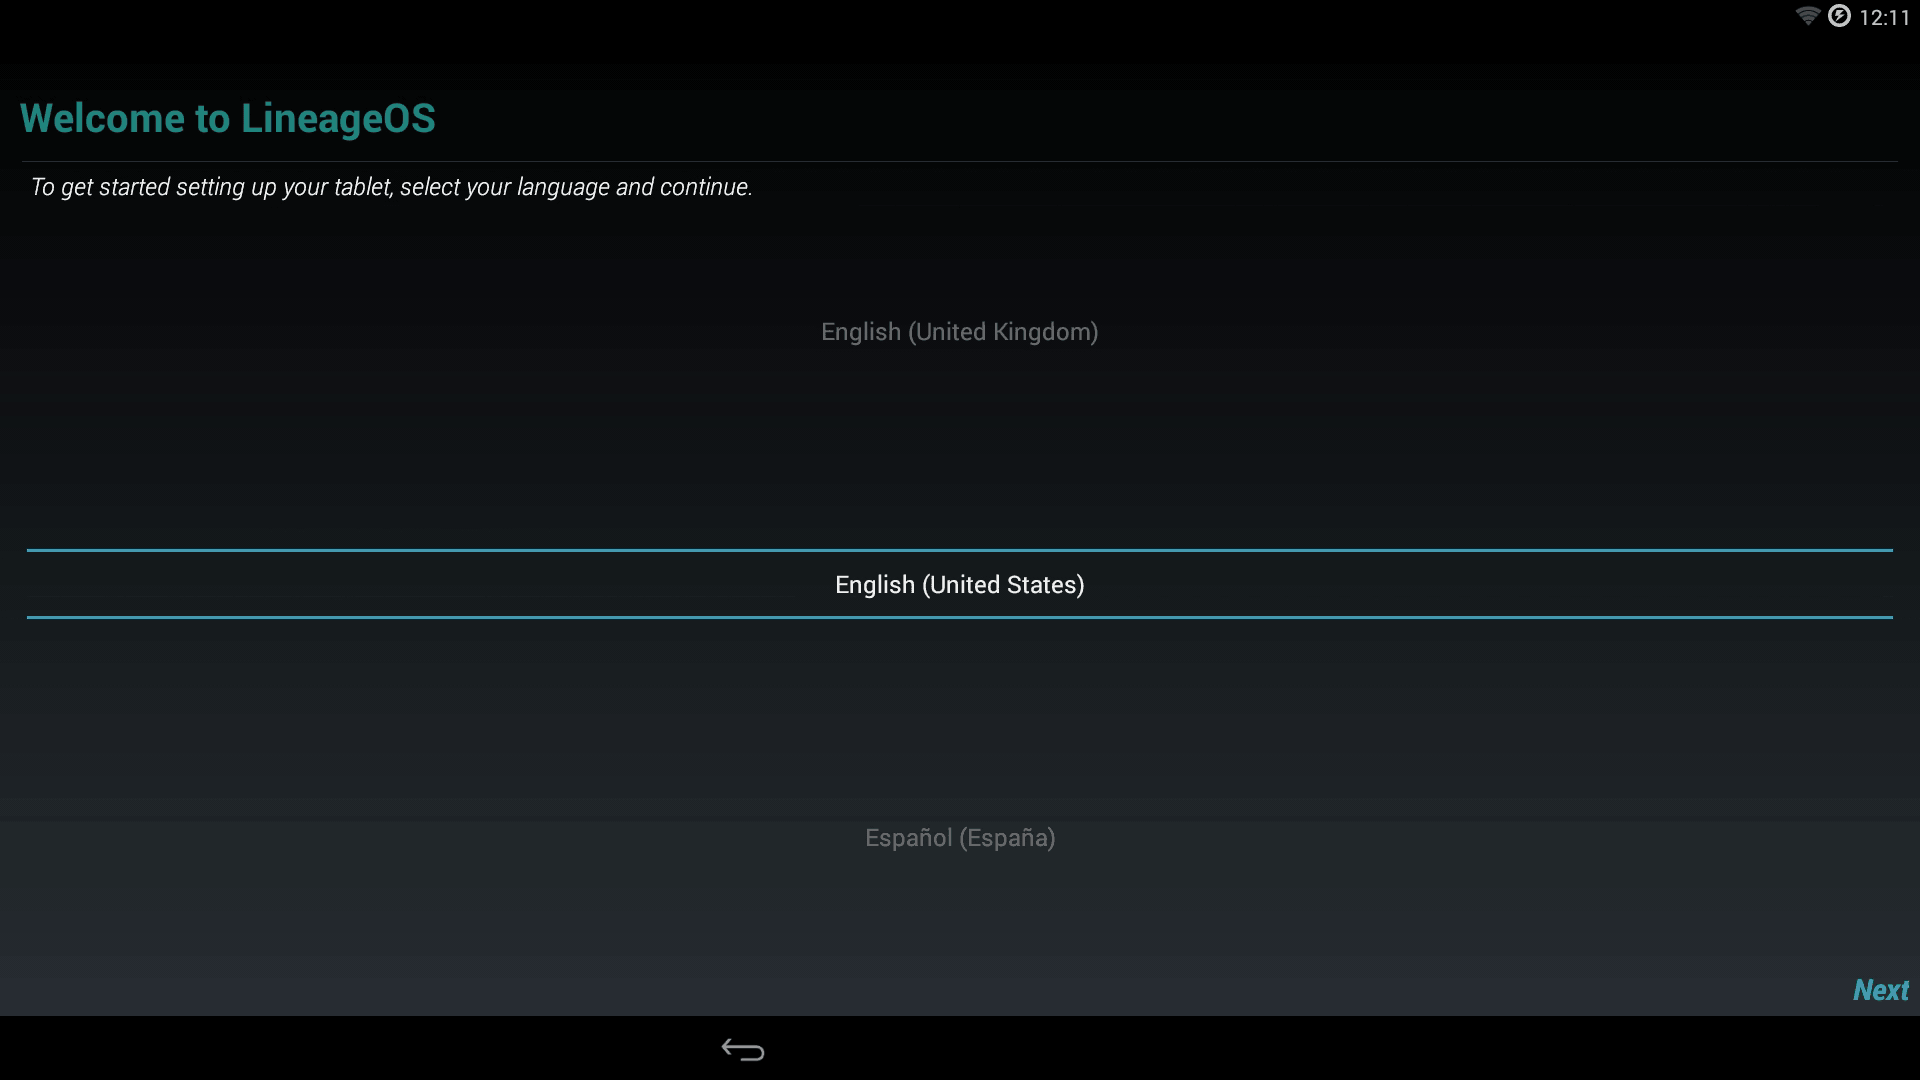
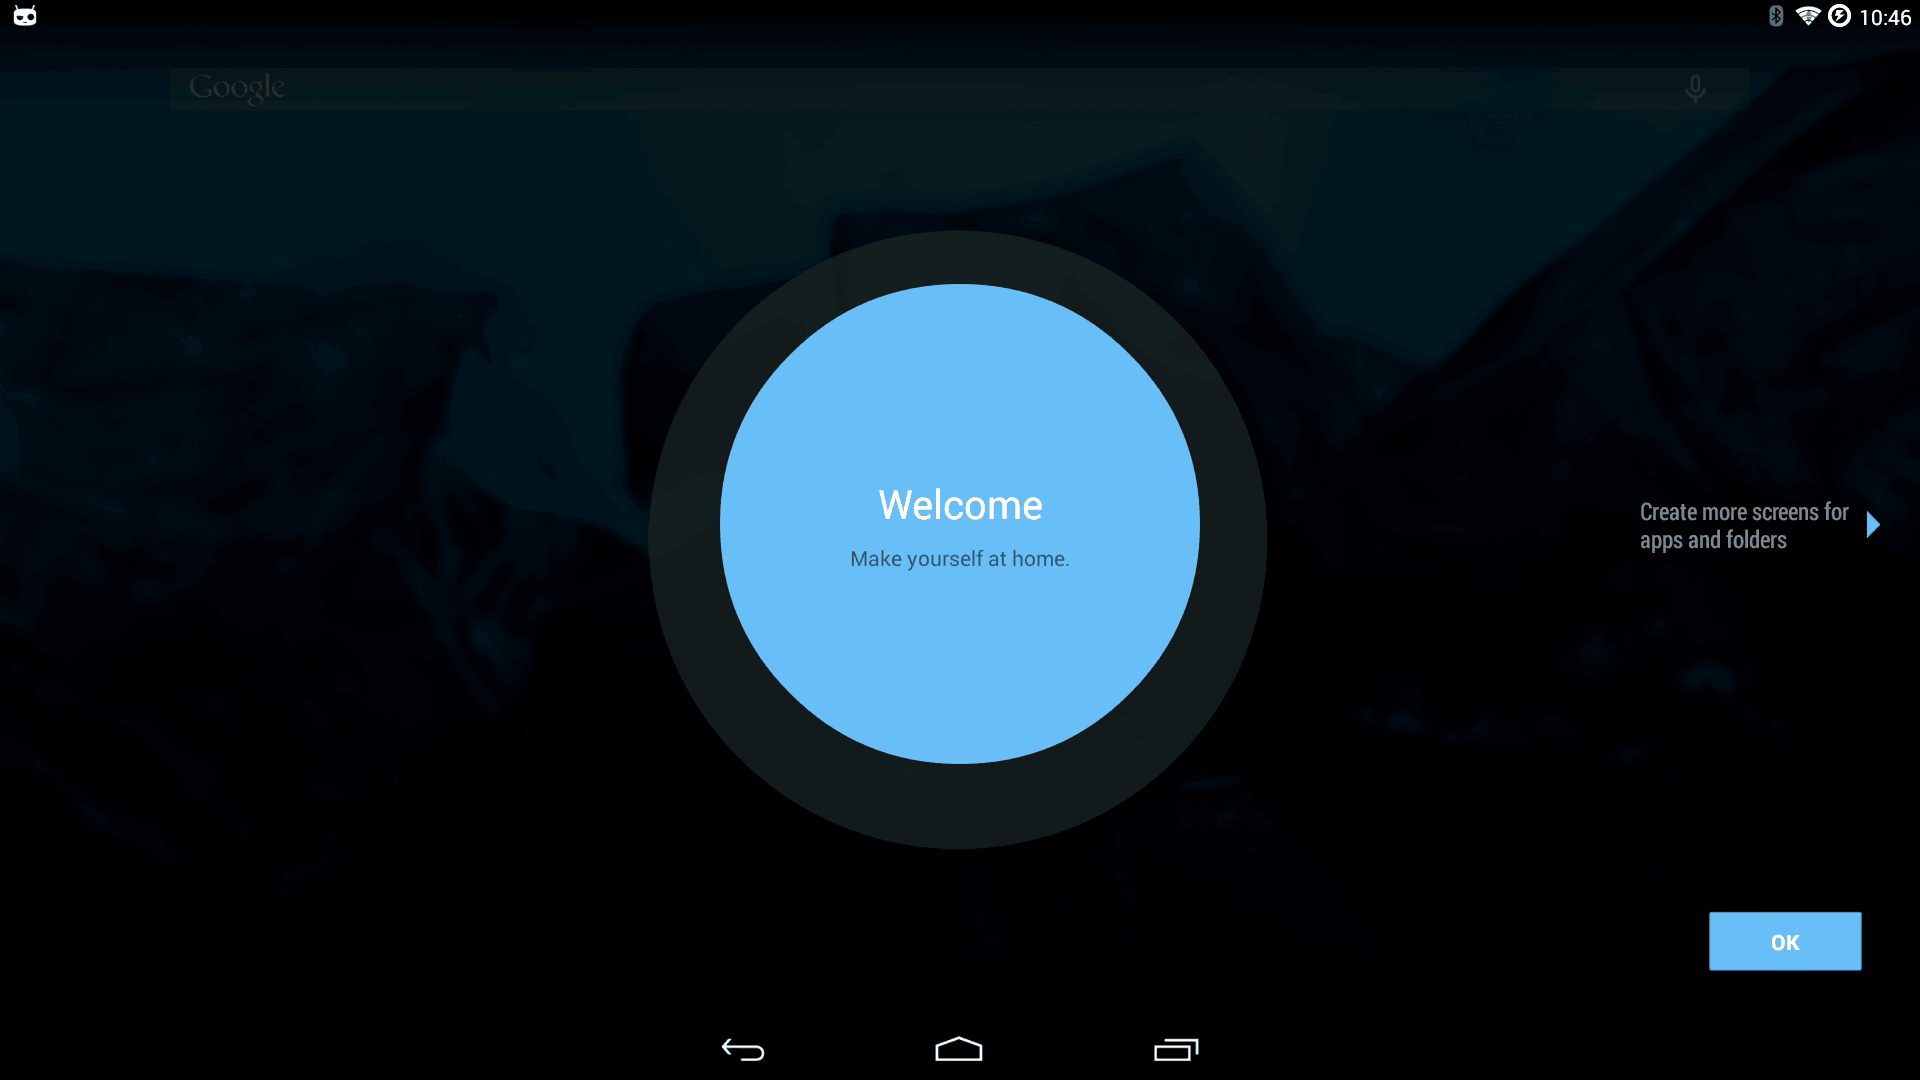
After that is all done you'll be greeted with the fabulous Welcome screen asking for our language preference to which our adventure begins here. At this point, you should have a keyboard plugged into the back of your Ouya. We tend not to use a mouse for this because in the past using a USB mouse knocked out the touchpad on the Ouya Controllers which we still want to keep. Simply use arrows and the tab key to navigate about these menus until we get to the main screen.
Google Apps crap.
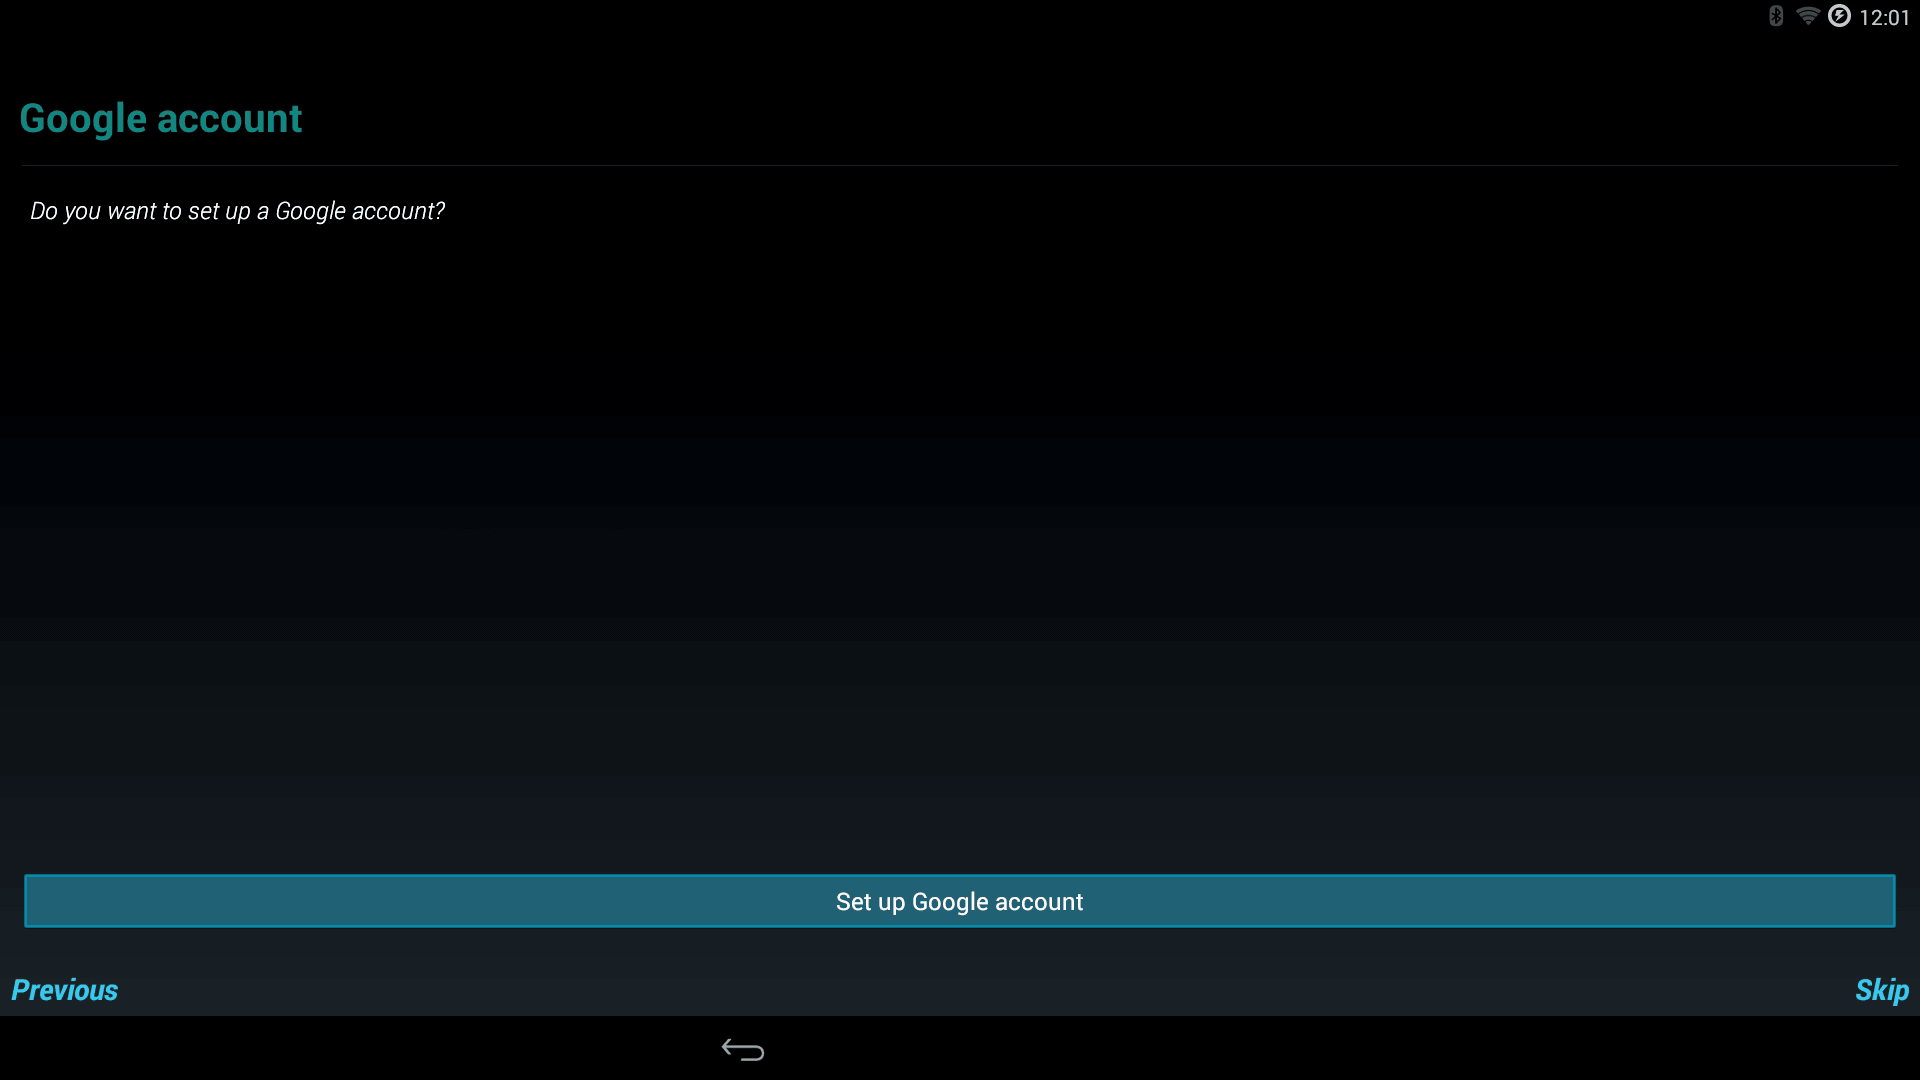
Note: if you did not load the gapps file during ClockWorkMOD you will probably not see this.
If you did load gapps then the wizard will ask you for your Google login credentials.
Just as a note you could skin this part. But for the sake of this tutorial, we'll go through everything here.
Setting up a wireless network on Android.

Before Google can continue however it does not have some sort of connection to the net. Now if you have hooked up your Ouya wired you will probably not see this screen at all. Since ours is wireless we have to first set up our wireless connection before Google Apps can ask for any more information.
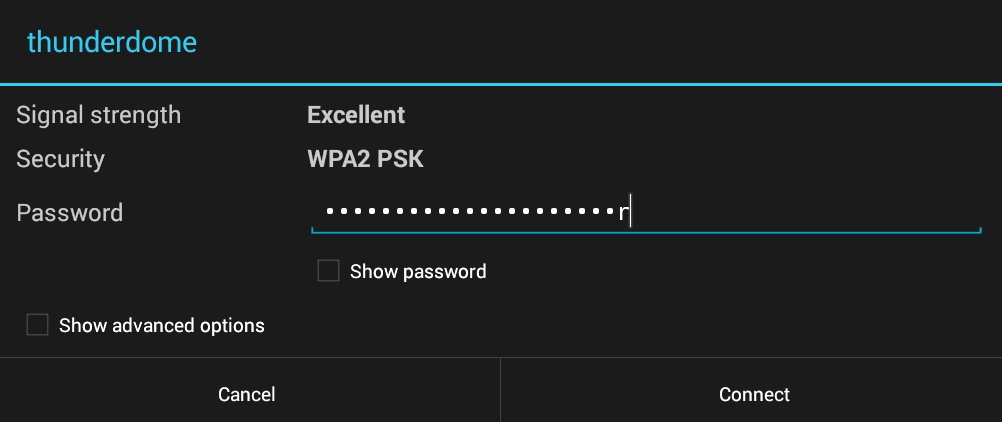
Simply set up your AP, in our case, it was Thunderdome and then enter in your secret sauce wireless password to continue.
![]()
It will eventually switch from "Obtaining IP address" to "Connected."
Back to the Google Apps crap.
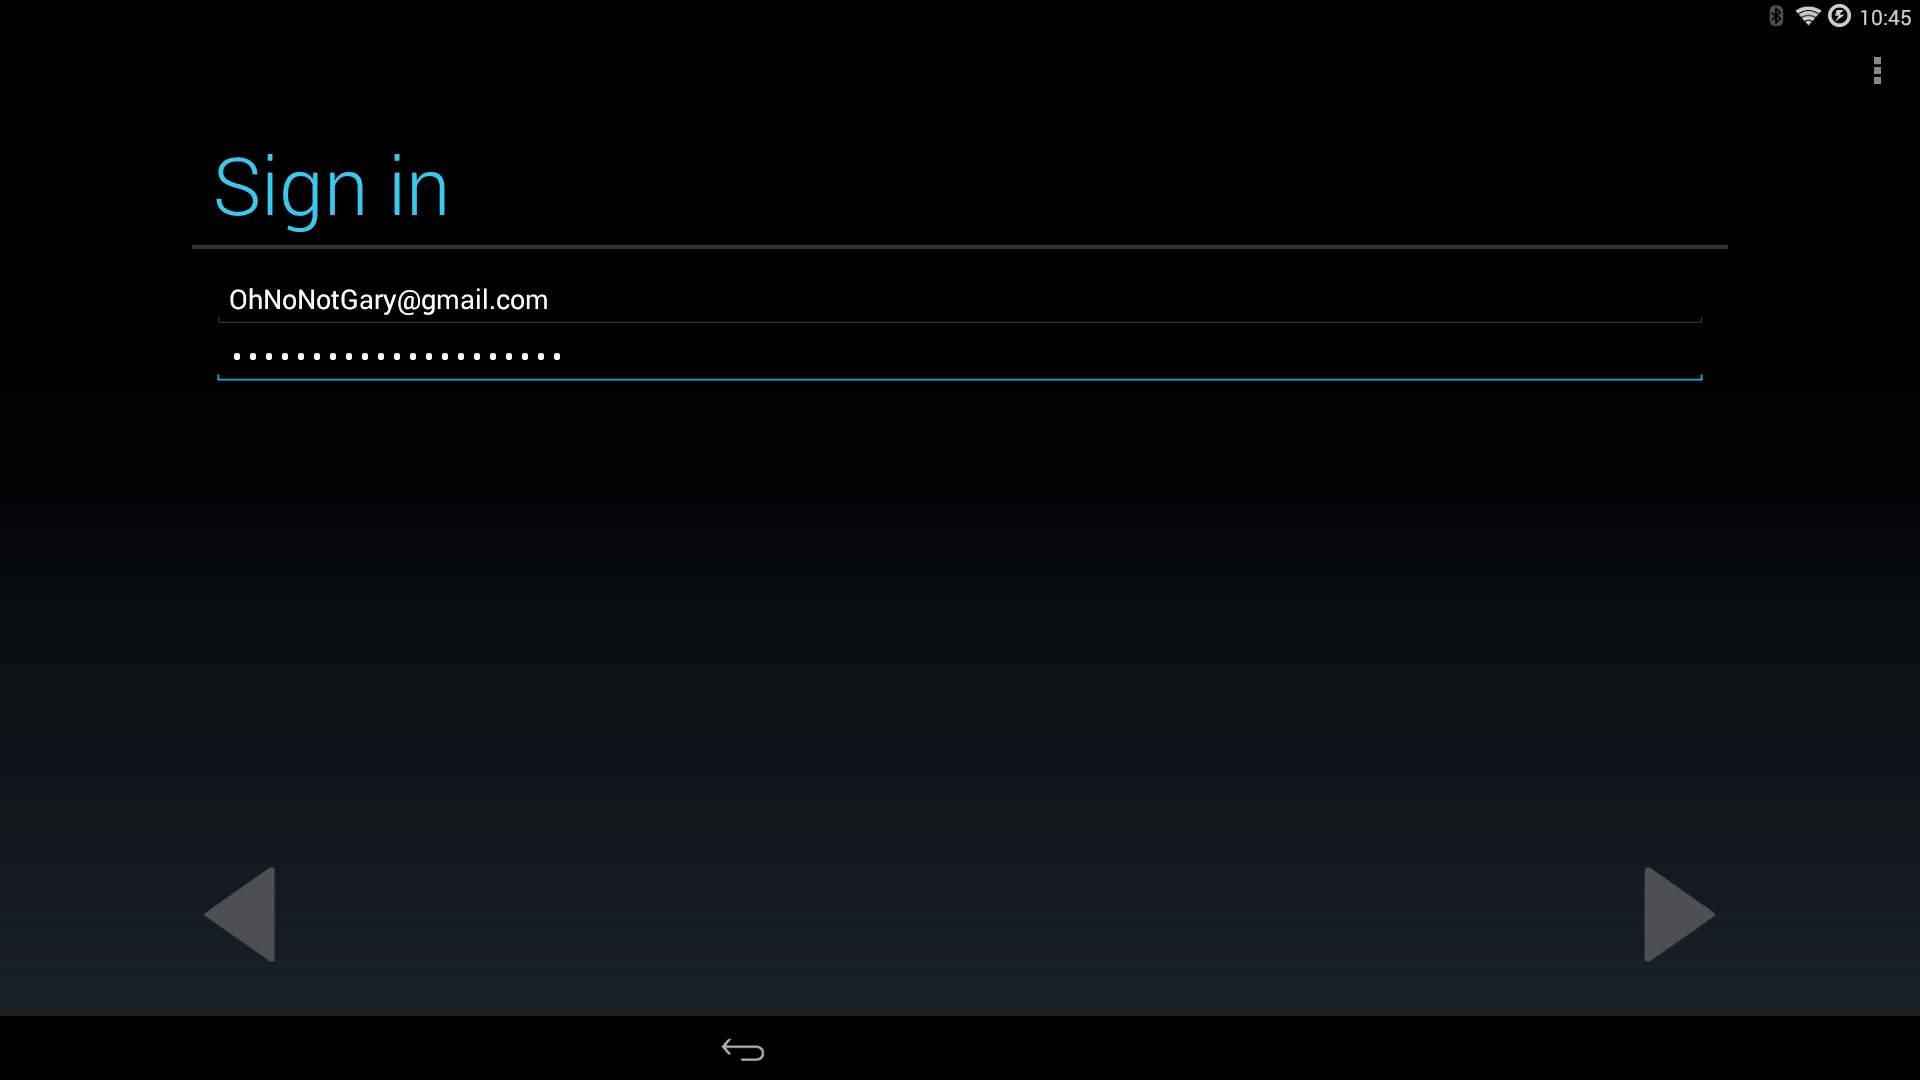
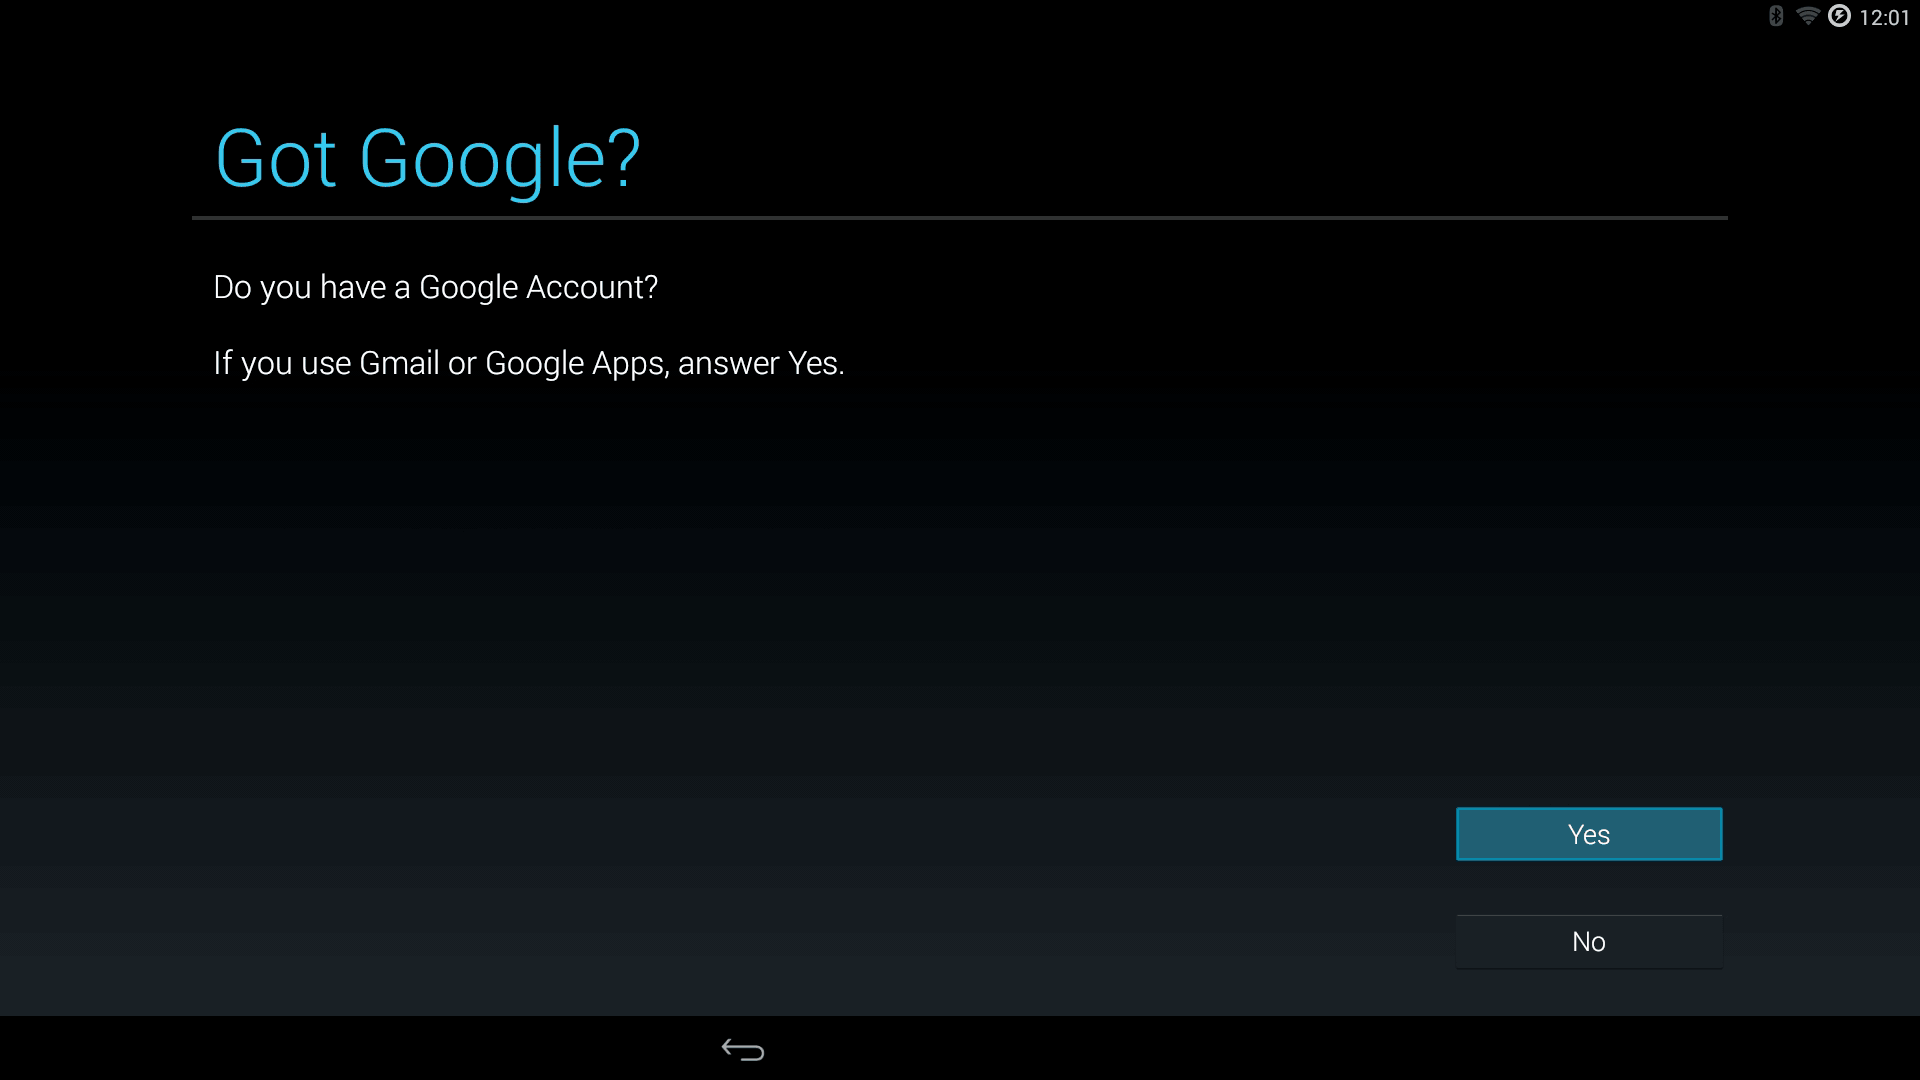
After you get past the basics of connecting your Ouya to the internet it will then ask for your Google Sign-In to continue. (provided of course you even installed the GAPPS files)
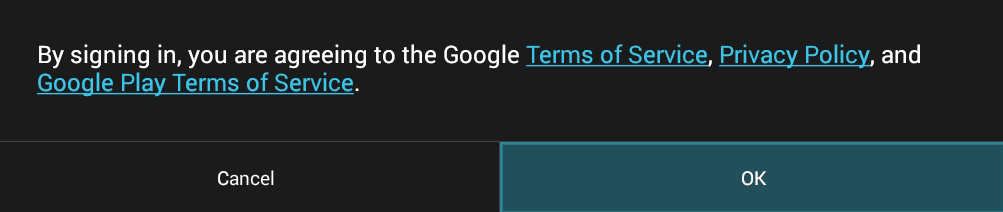
This is the point where you sign your Ouya's soul away to Google Which, in retrospect is probably not the worst thing the Ouya has done. Press "OK" or die.
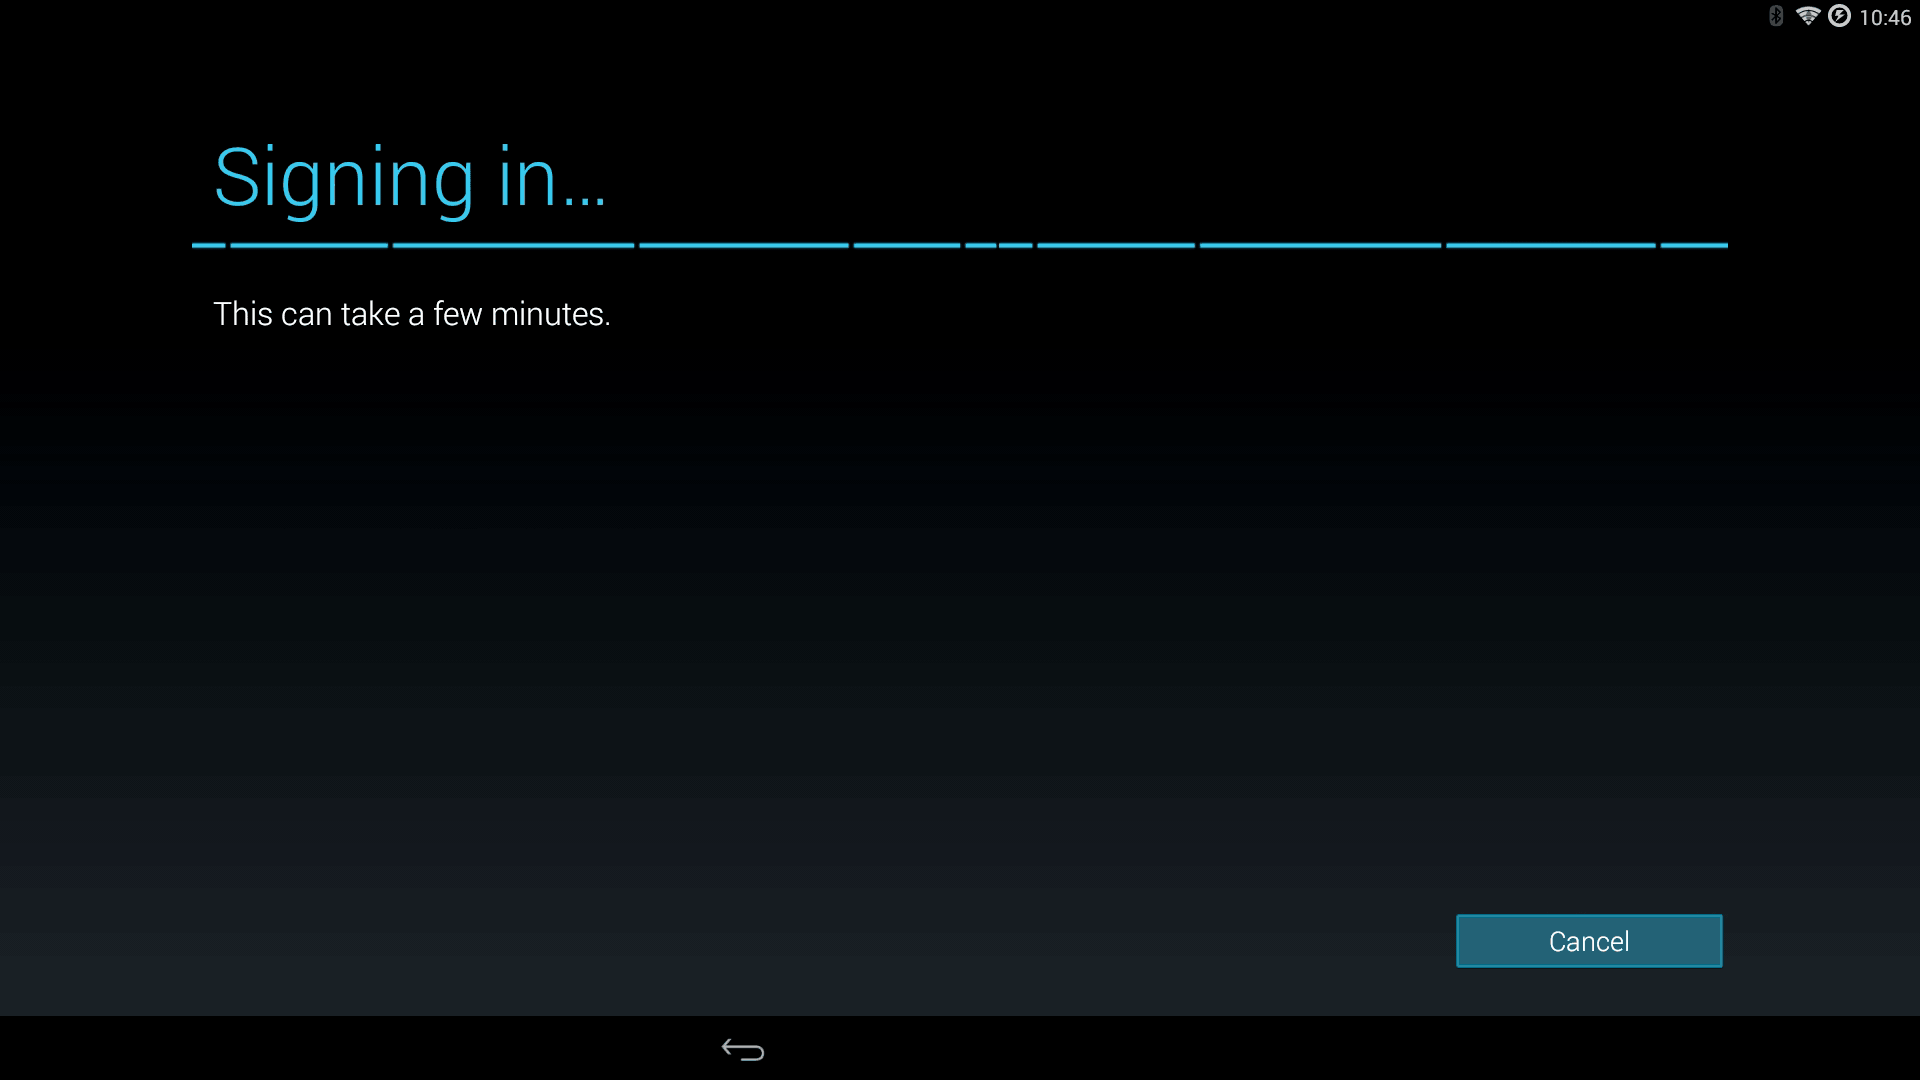
This may take a few seconds to talk to Google.
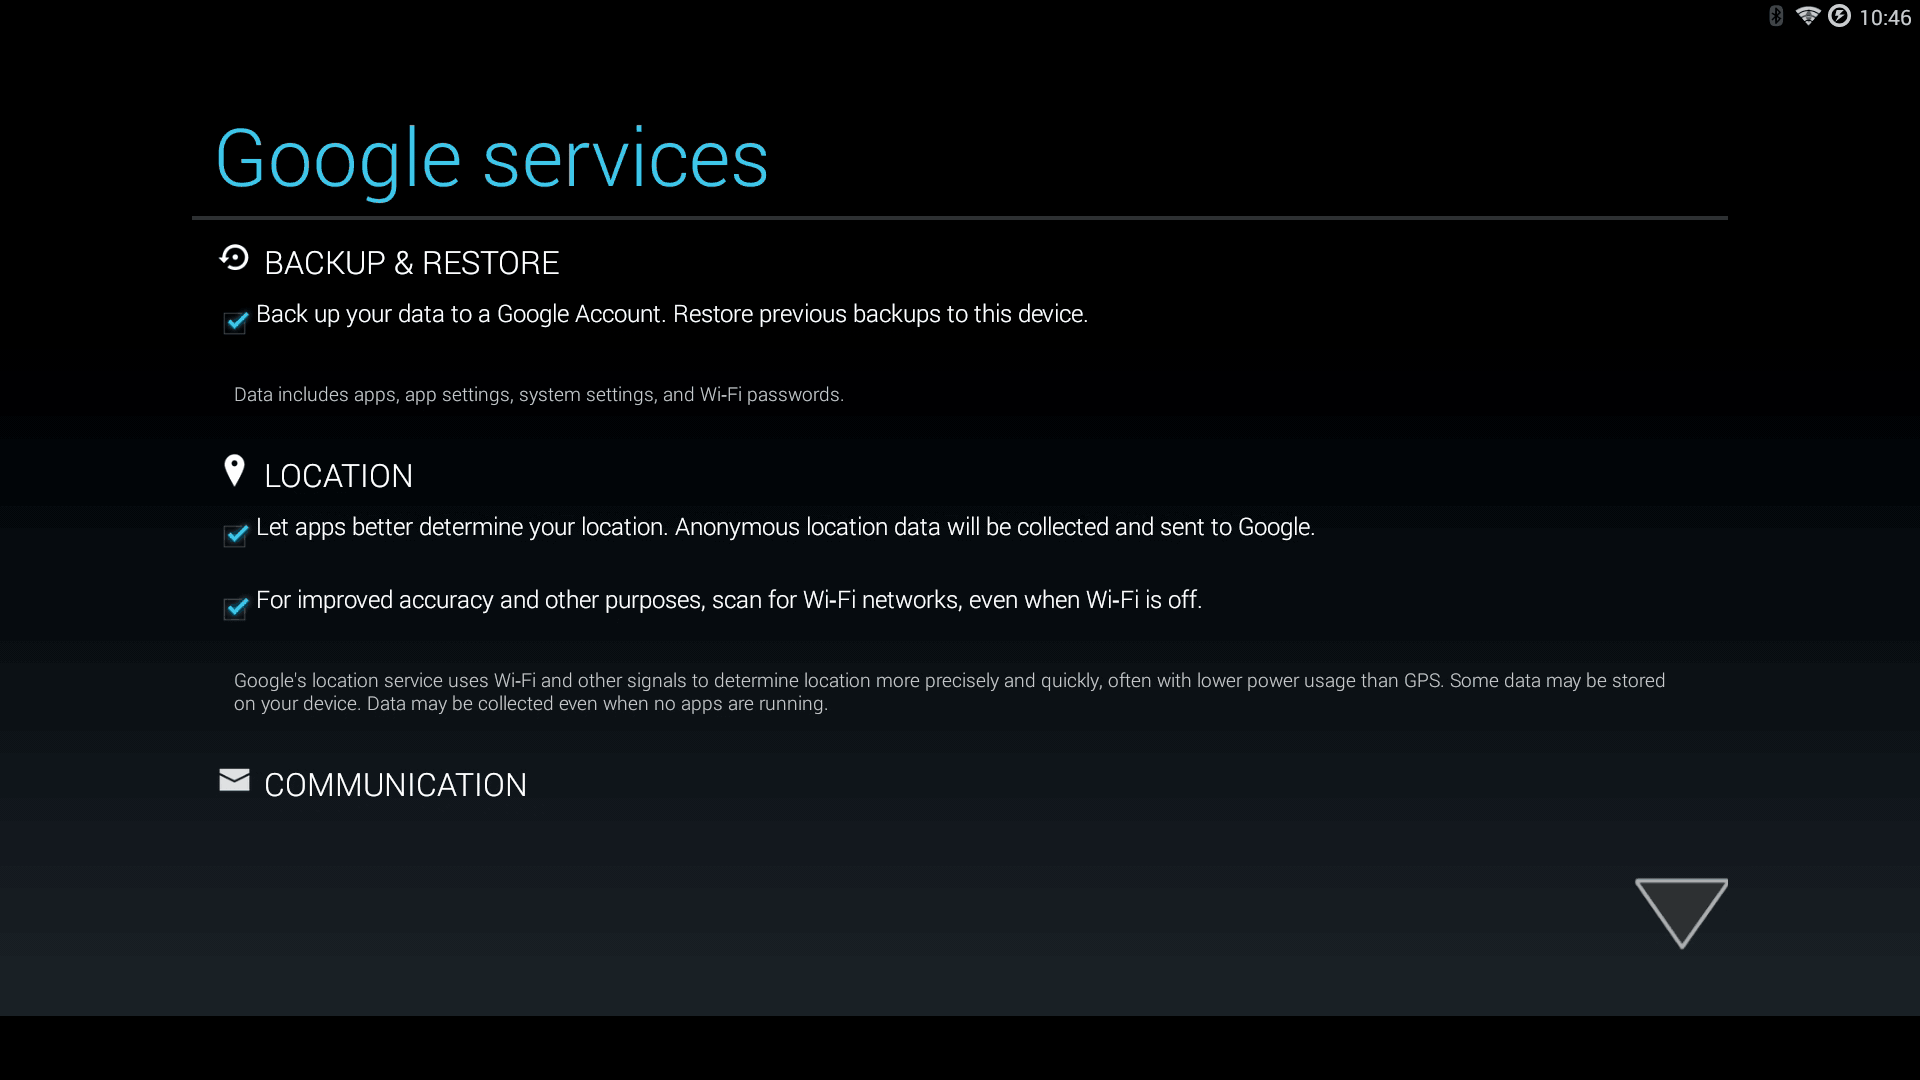
You can probably uncheck all of these boxes. Backup and Restore aren't necessary, after all, that is why you hooked a Raspberry Pi or Linux box to your Ouya. Location services are pointless on a set-top box. Tab until you get to the down-arrow box to continue.
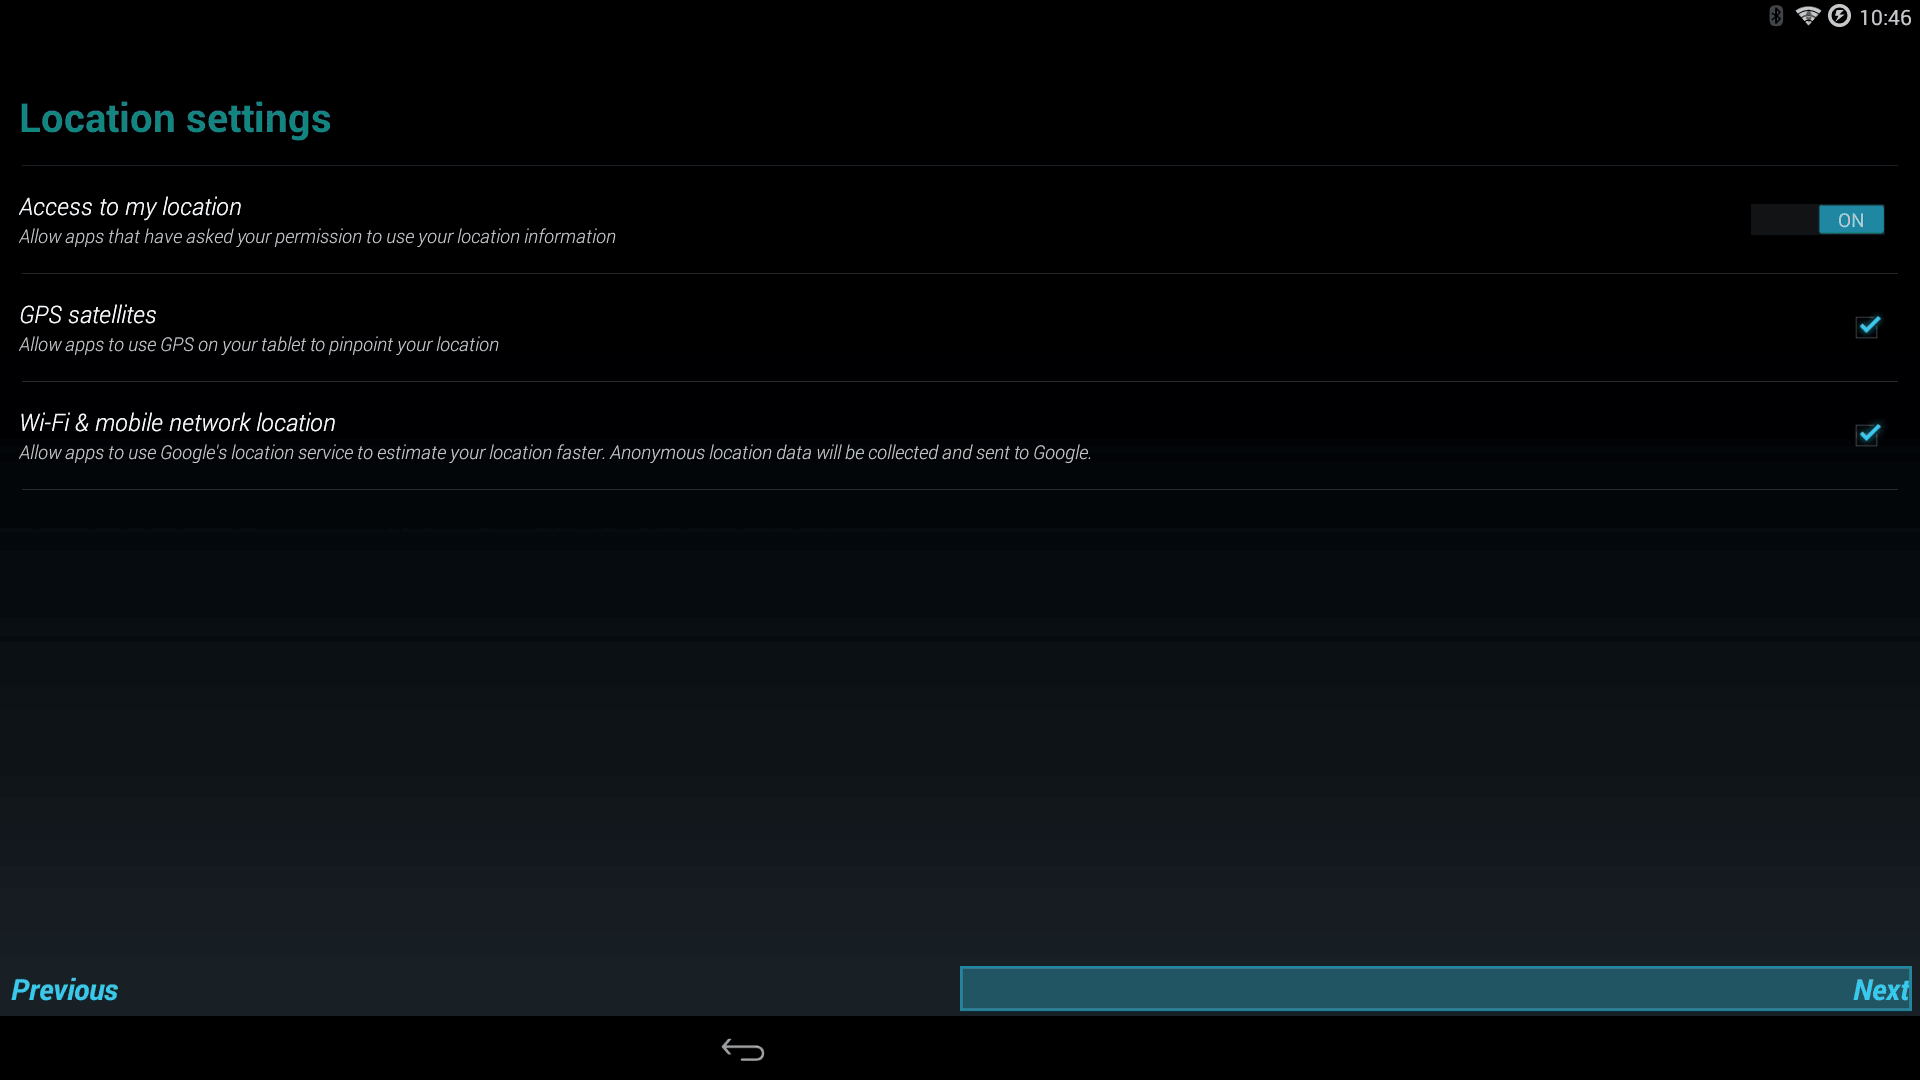
Uncheck all of this garbage as well. Once again if we were on a cellphone location is important. On a game system? Really? Once done click "Next" to continue.
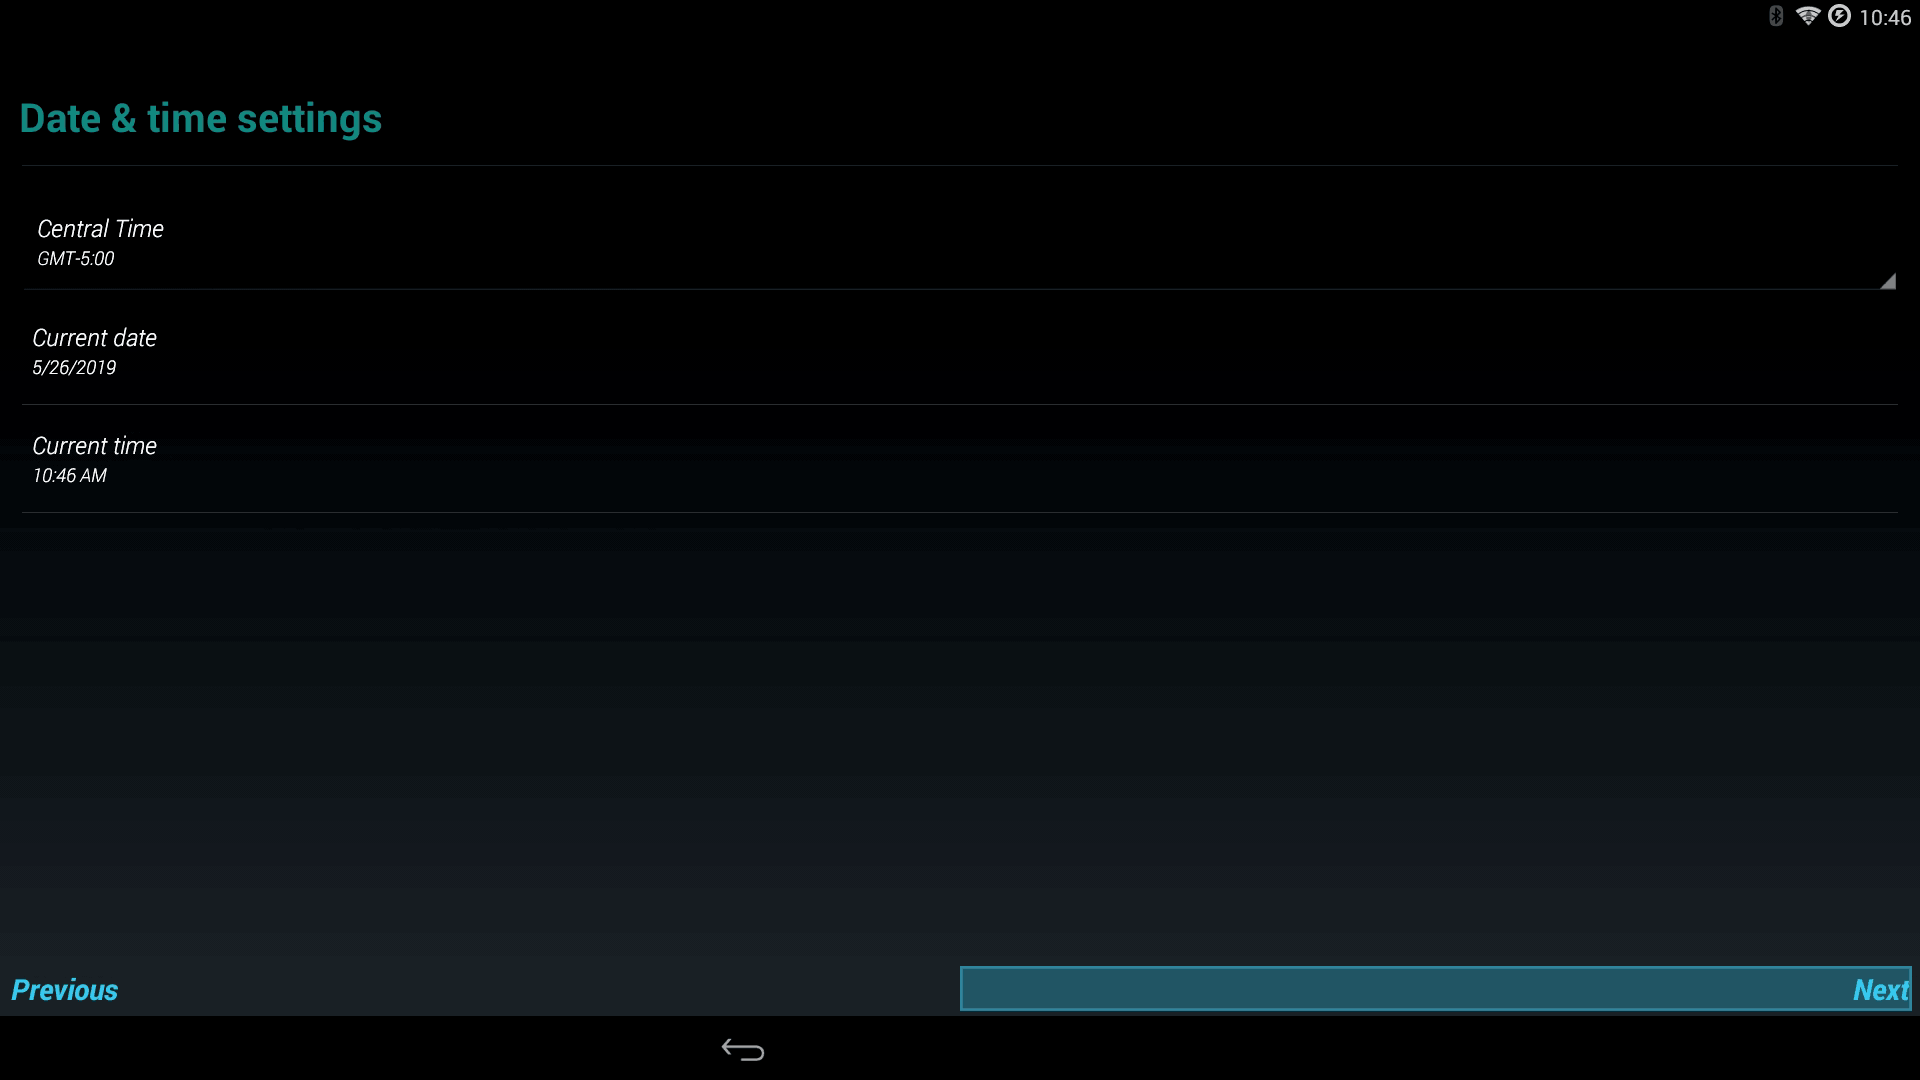
The date and time are kind of important. You should probably adjust that. and click "Next" to continue.
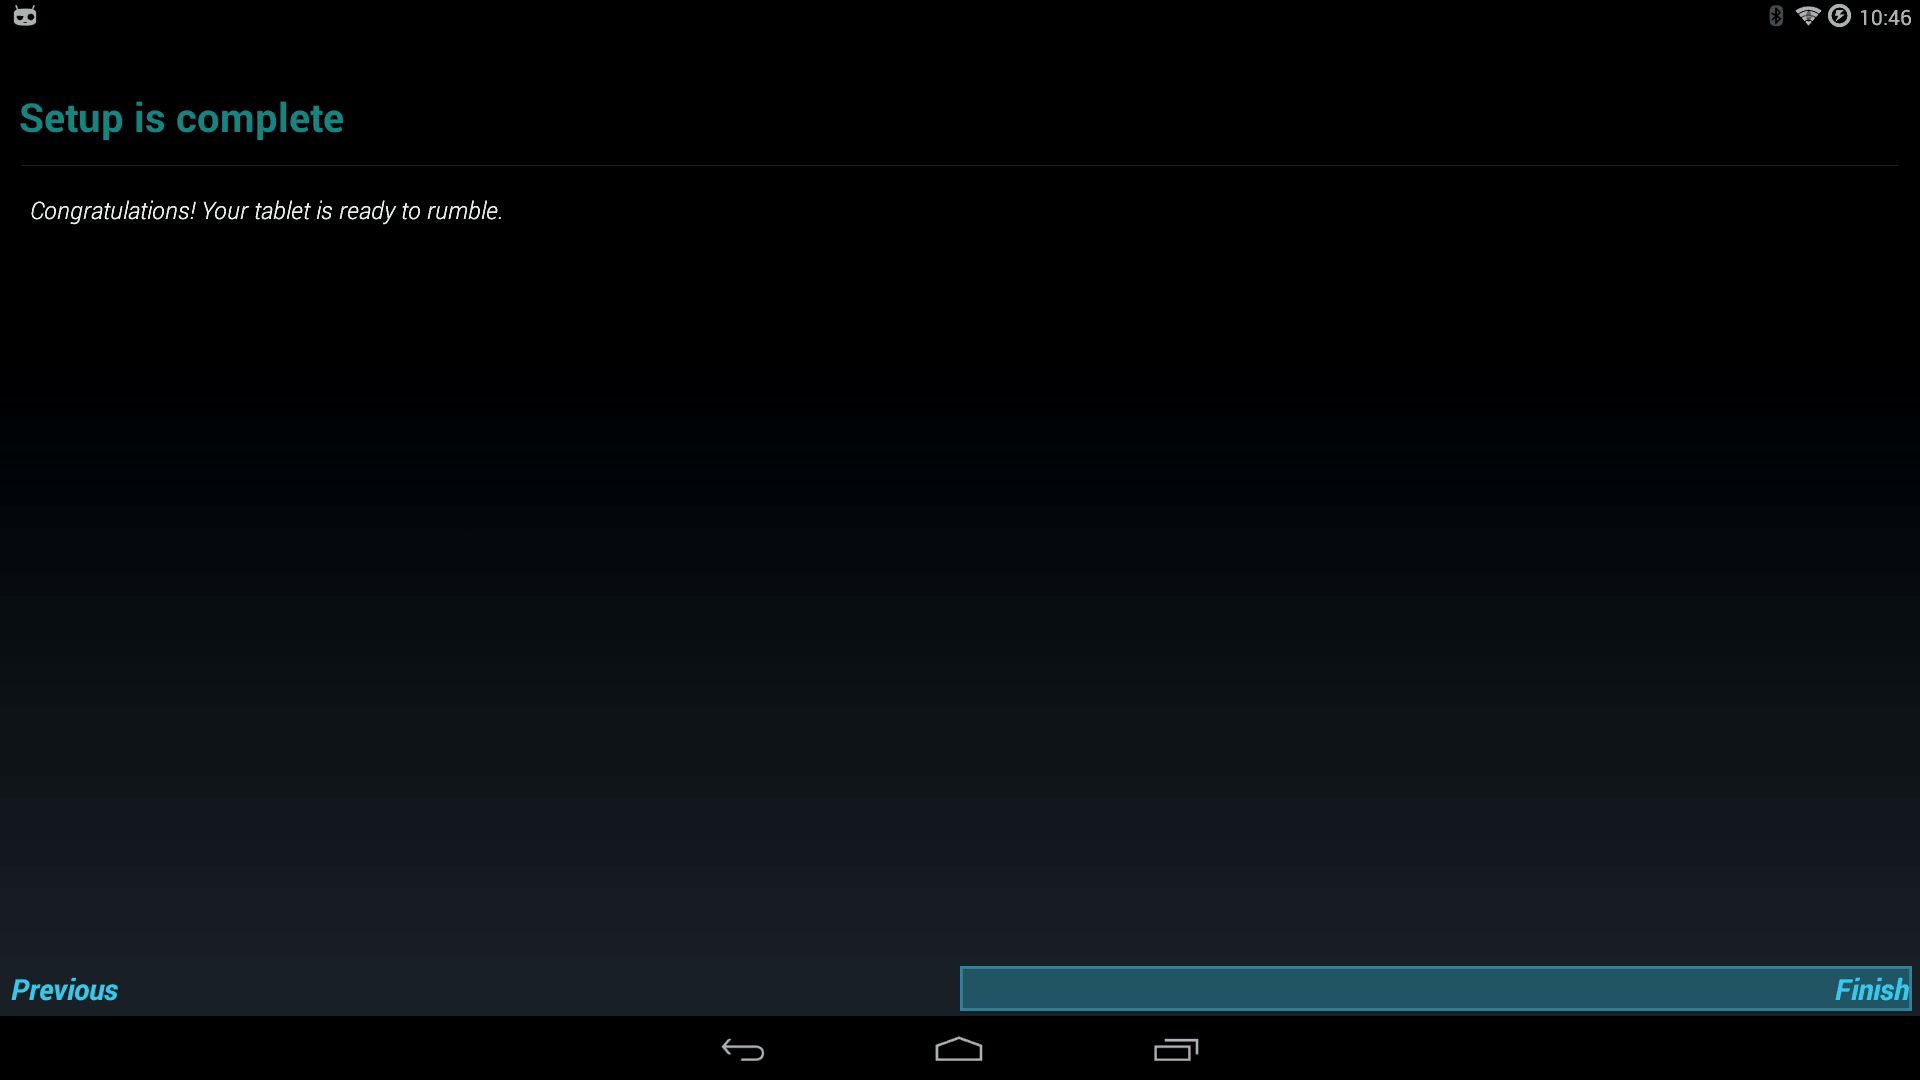
The barrage of questions from Google is now over. You can now tab over to "Finish" to begin using Lineage.
Tab over the "OK" button to begin using the Lineage OS.
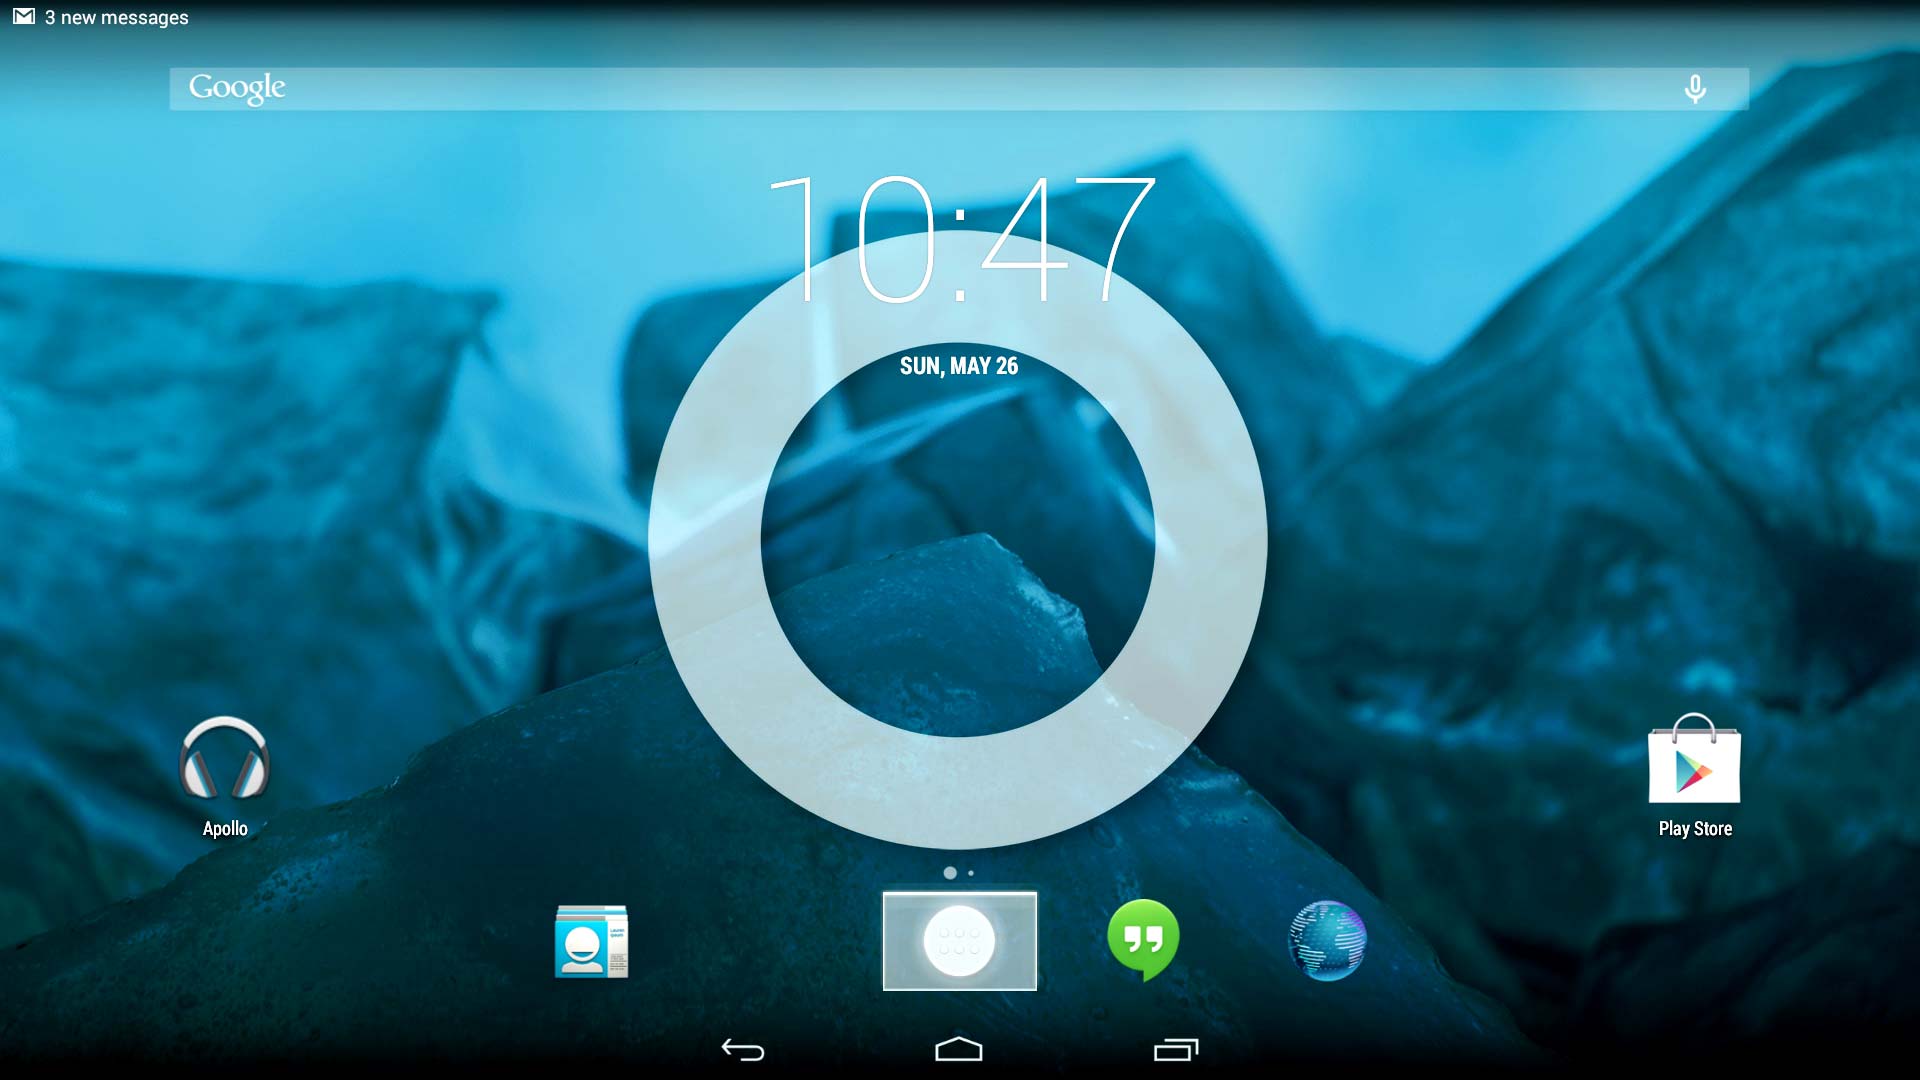
Behold all of the glory that is the Lineage desktop. Finally, you can change the background on your Ouya. But we're not going to waste much time taking it all in. You'll have plenty of time for that later. We're just going to dive right into our applications icon in the lower center part of our window.
Using the arrow keys in the applications folder we want the "Settings" icon.
Pairing the Ouya Controller.
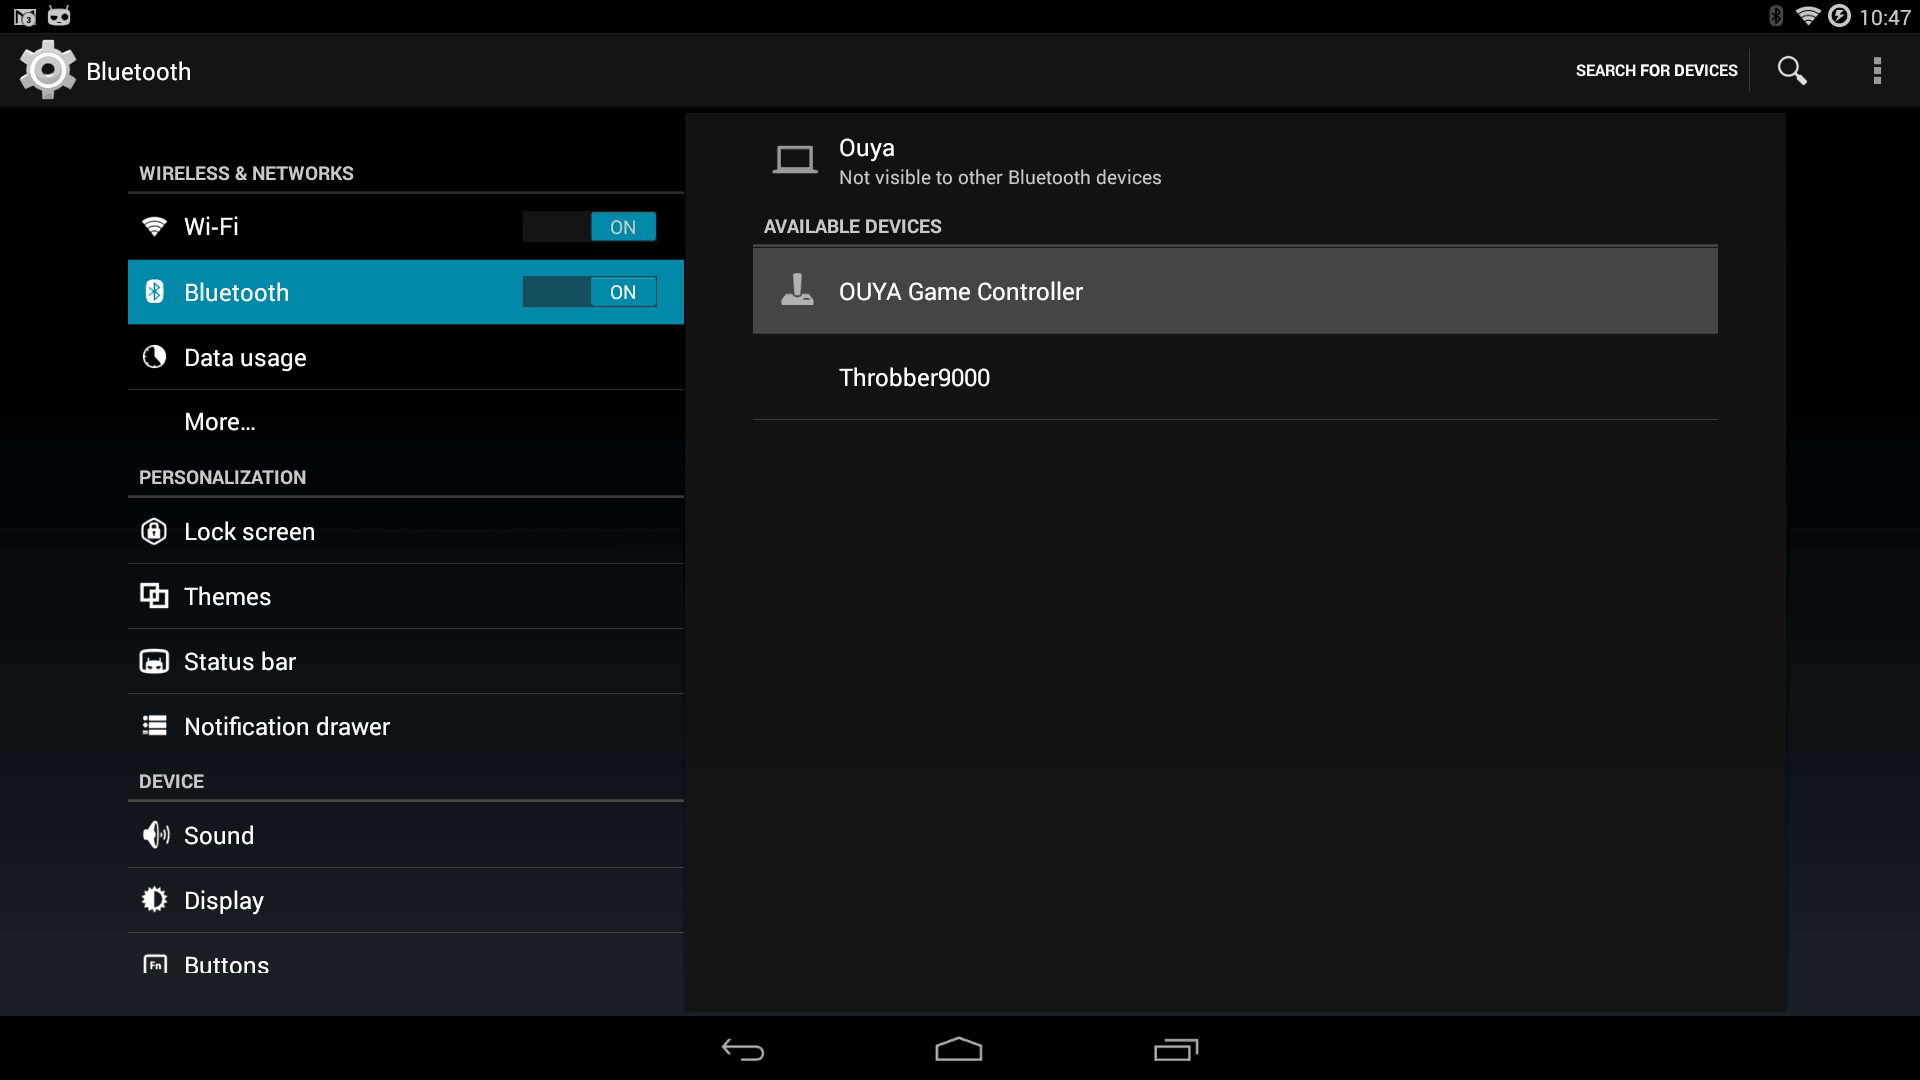
Inside of Lineage System Settings, the first thing we'll probably want to do is get your Ouya controller online so that you don't have to deal with having a giant keyboard plugged into the back of your Ouya. Simple arrow down to "Bluetooth" and make sure that it is on. and begin scanning for your devices.
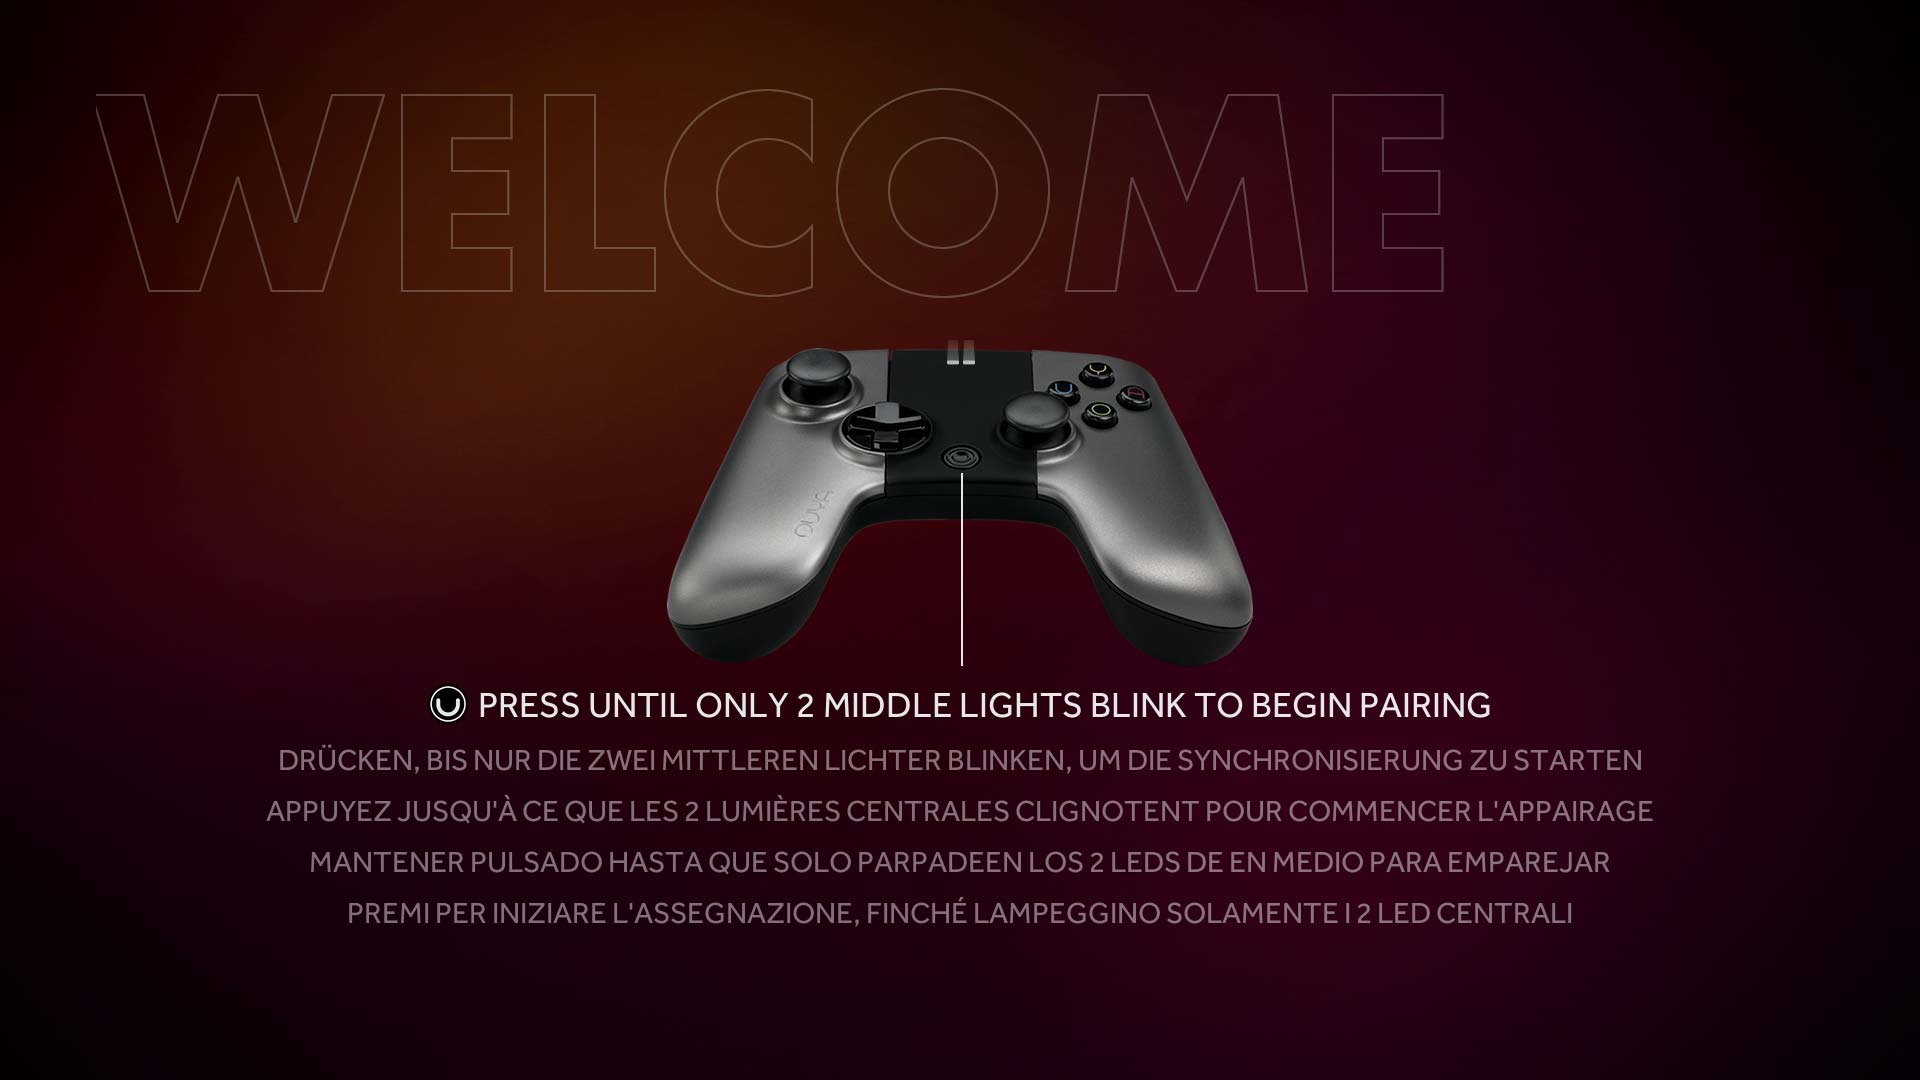
Remember that welcome screen that you used to see telling you to pair your controller? Well! Lineage doesn't have that. Good thing we kept a screenshot of the instructions huh?

Once the Ouya Controller is visible you can use the keyboard to press enter to attempt to pair with the Ouya.

If all goes well you should see something above. The Ouya Game Controller is now connected. Your Ouya Controller will probably not give a player assignment but that's okay. At least it's online right now. You can now use your controller to navigate the menus and put away your keyboard at this point.
Developer Options.
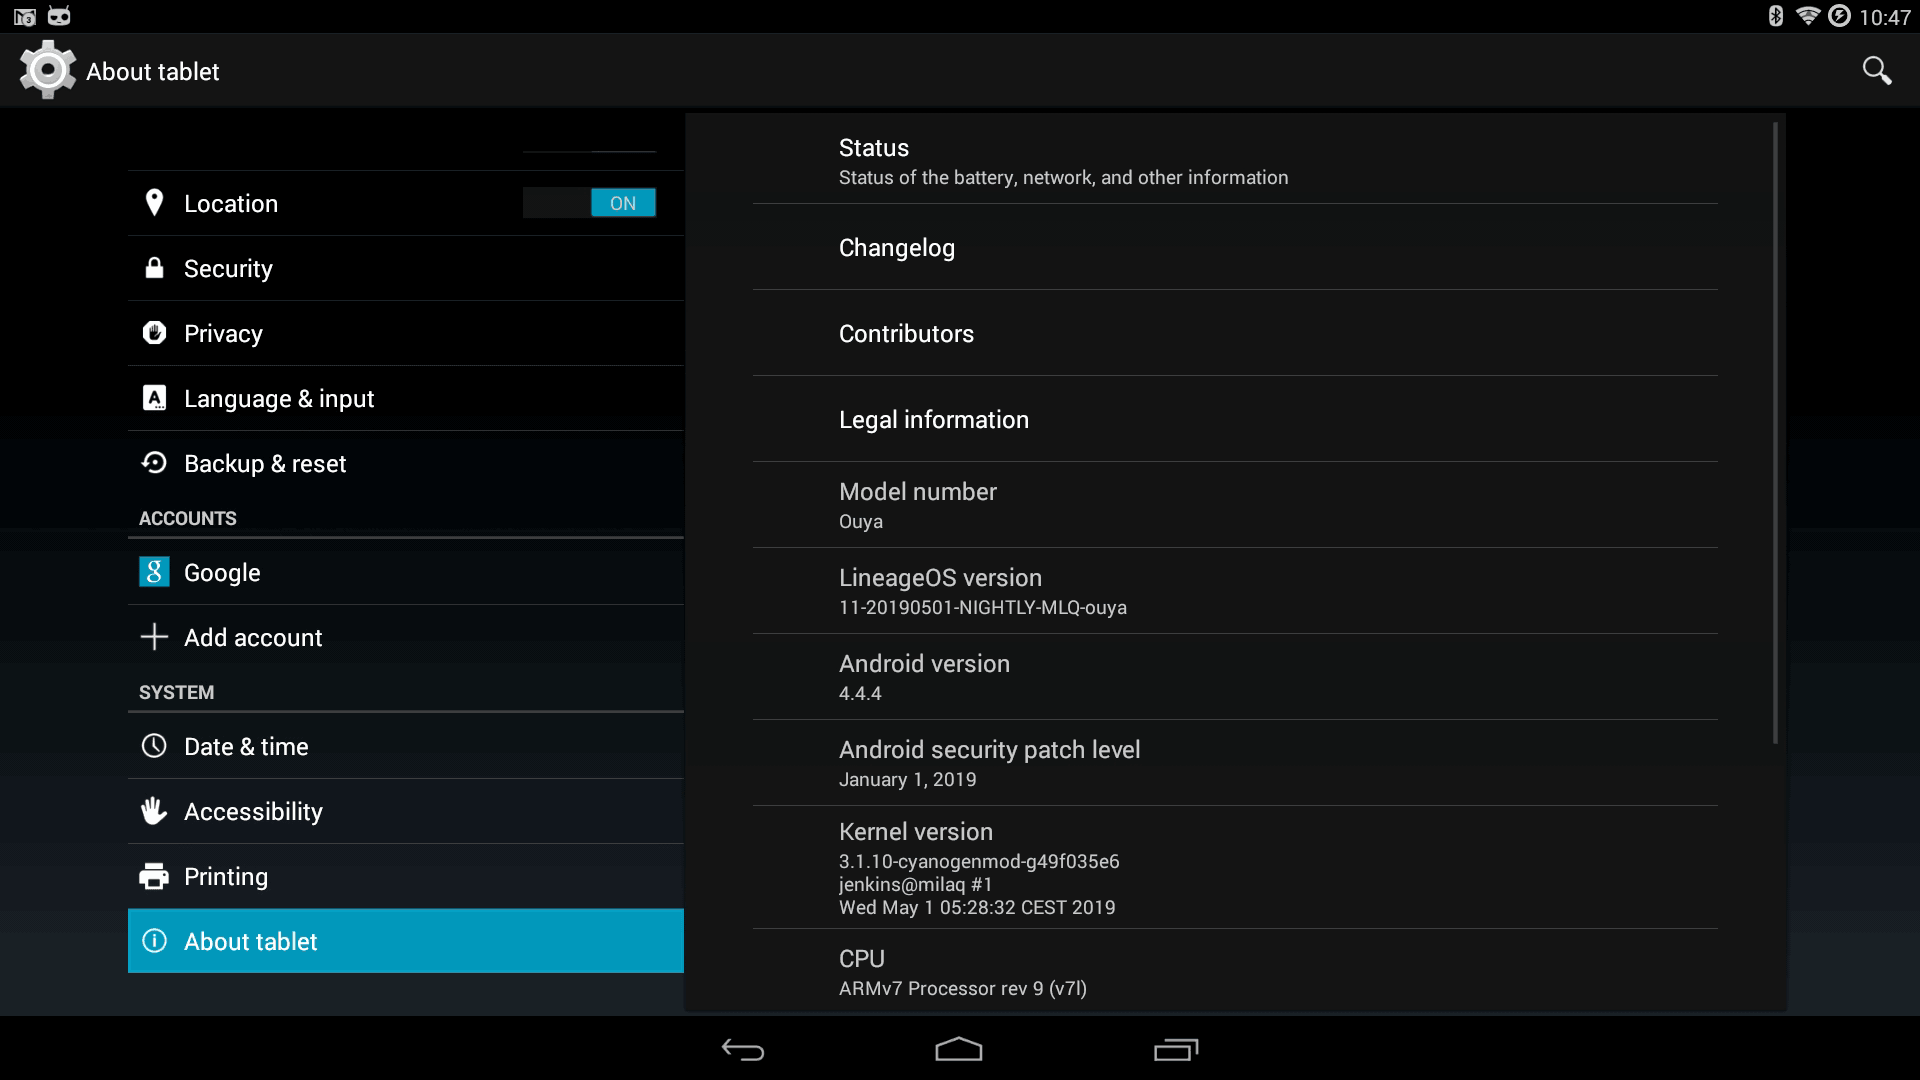
Next, we're going to turn on some features that are only available in developer mode. However, we need to get into developer mode now do we? Arrow down to About Tablet in the Android System Settings and find the build number.
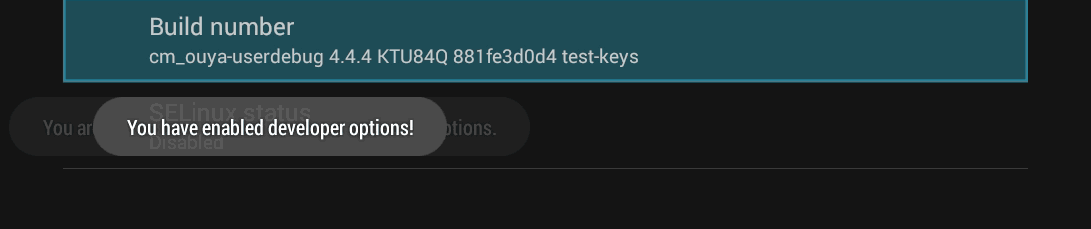
Smash that build number multiple times until your Lineage Ouya box tells you that you have enabled developer options.
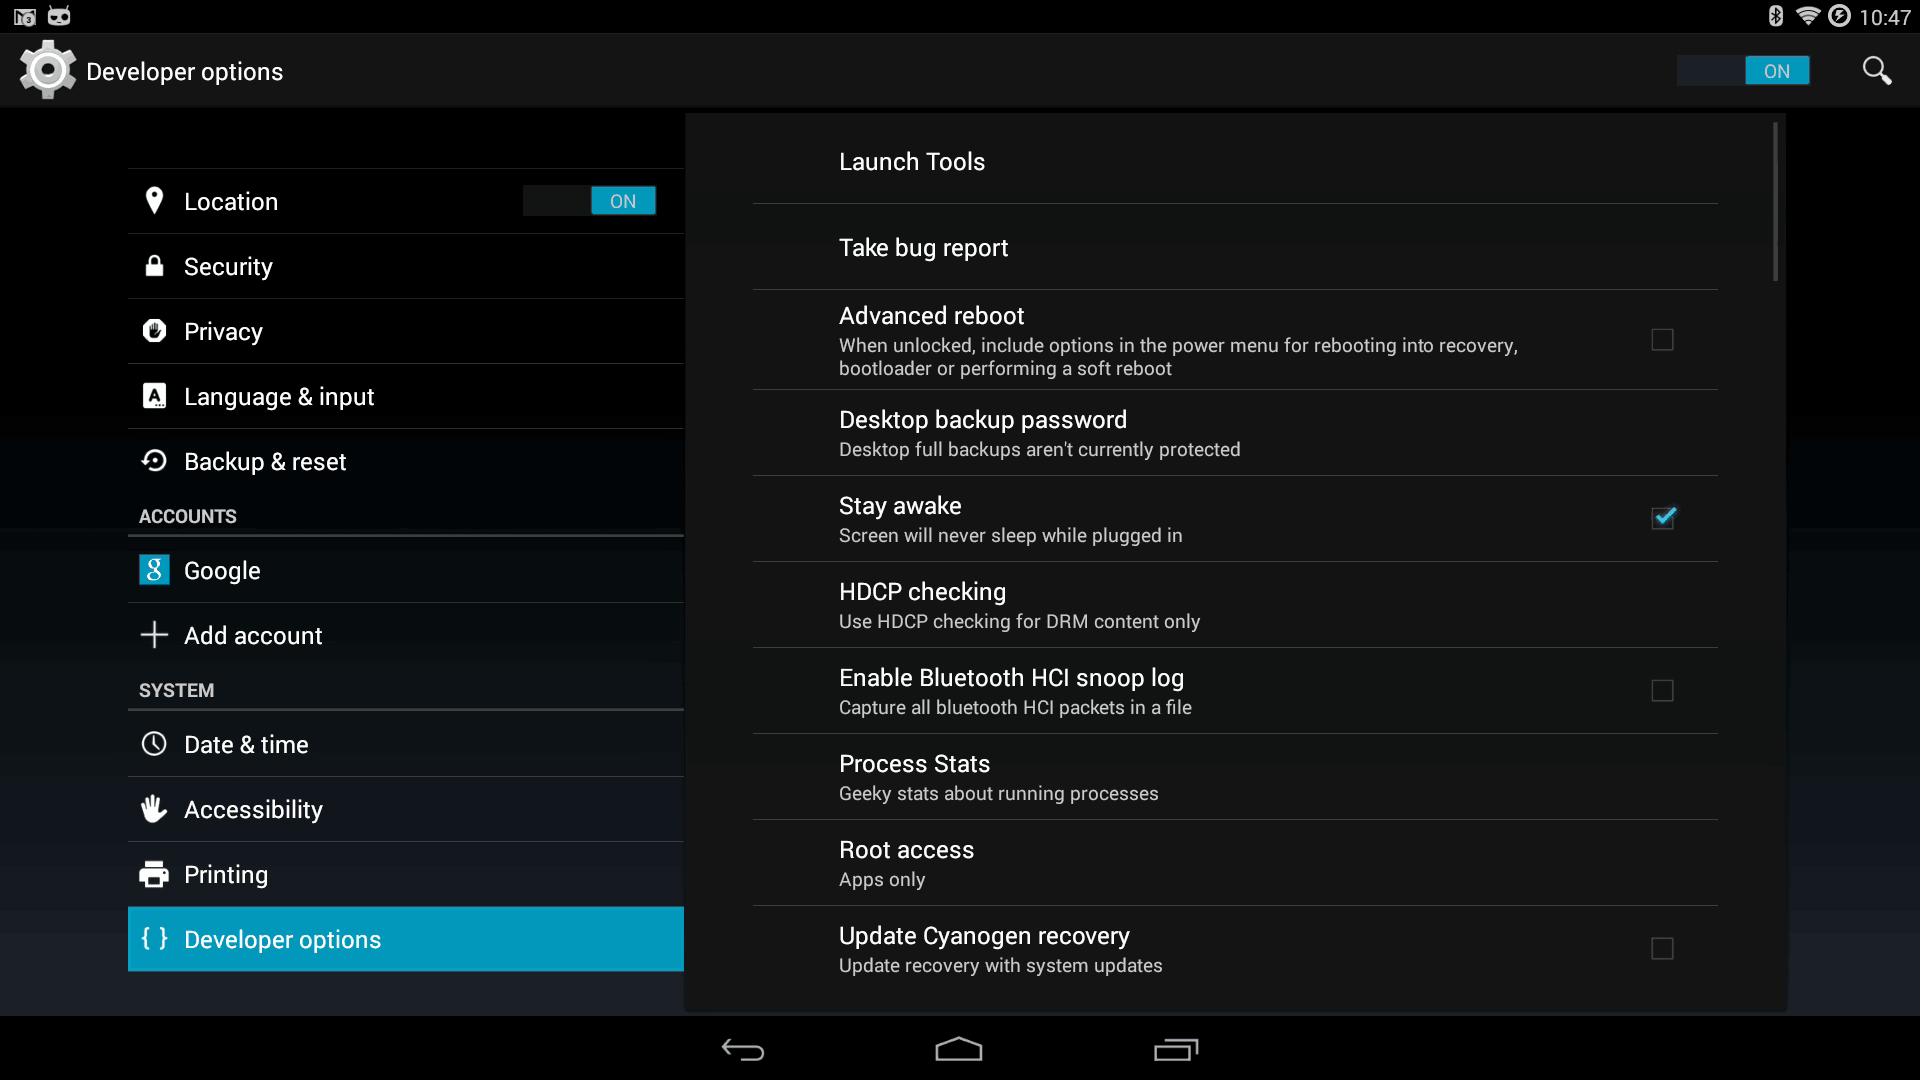
You should see a new section for Developer options that has not been there before. We're going to dive into this folder and change a few settings.

In the Developer options menu, we're going to jump over to the Root access portion and click on it.
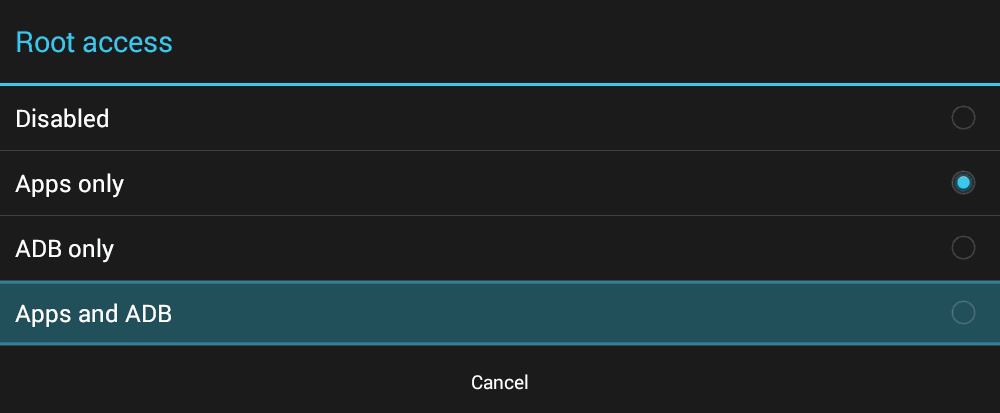
We want to give ADB root-level access so that we can modify whatever we want whenever we have logged into the Raspberry Pi and/or Linux workstation that is connected to our Ouya. Once selected it should back us to the Developer options menu.

ADB over the network is a nice option to have enabled if you don't feel up to powering on your Raspberry Pi all of the time and just want to ADB from any PC. Which is great for screen captures and ADB installing APKs. but not great if you have to run recovery via ADB/Fastboot.

We do believe in letting the Ouya processor do as much as possible for the OS. which is why we Force GPU Rendering for 2d drawing. It also helps in certain games from Google Play as well.

Another thing we do is force the GPU to do overlays as well. Which as documented in a previous blog helps with Subtitling in Kodi but also helps with seeing the text in other games as well.
Processor tweaking Lineage and the Ouya.
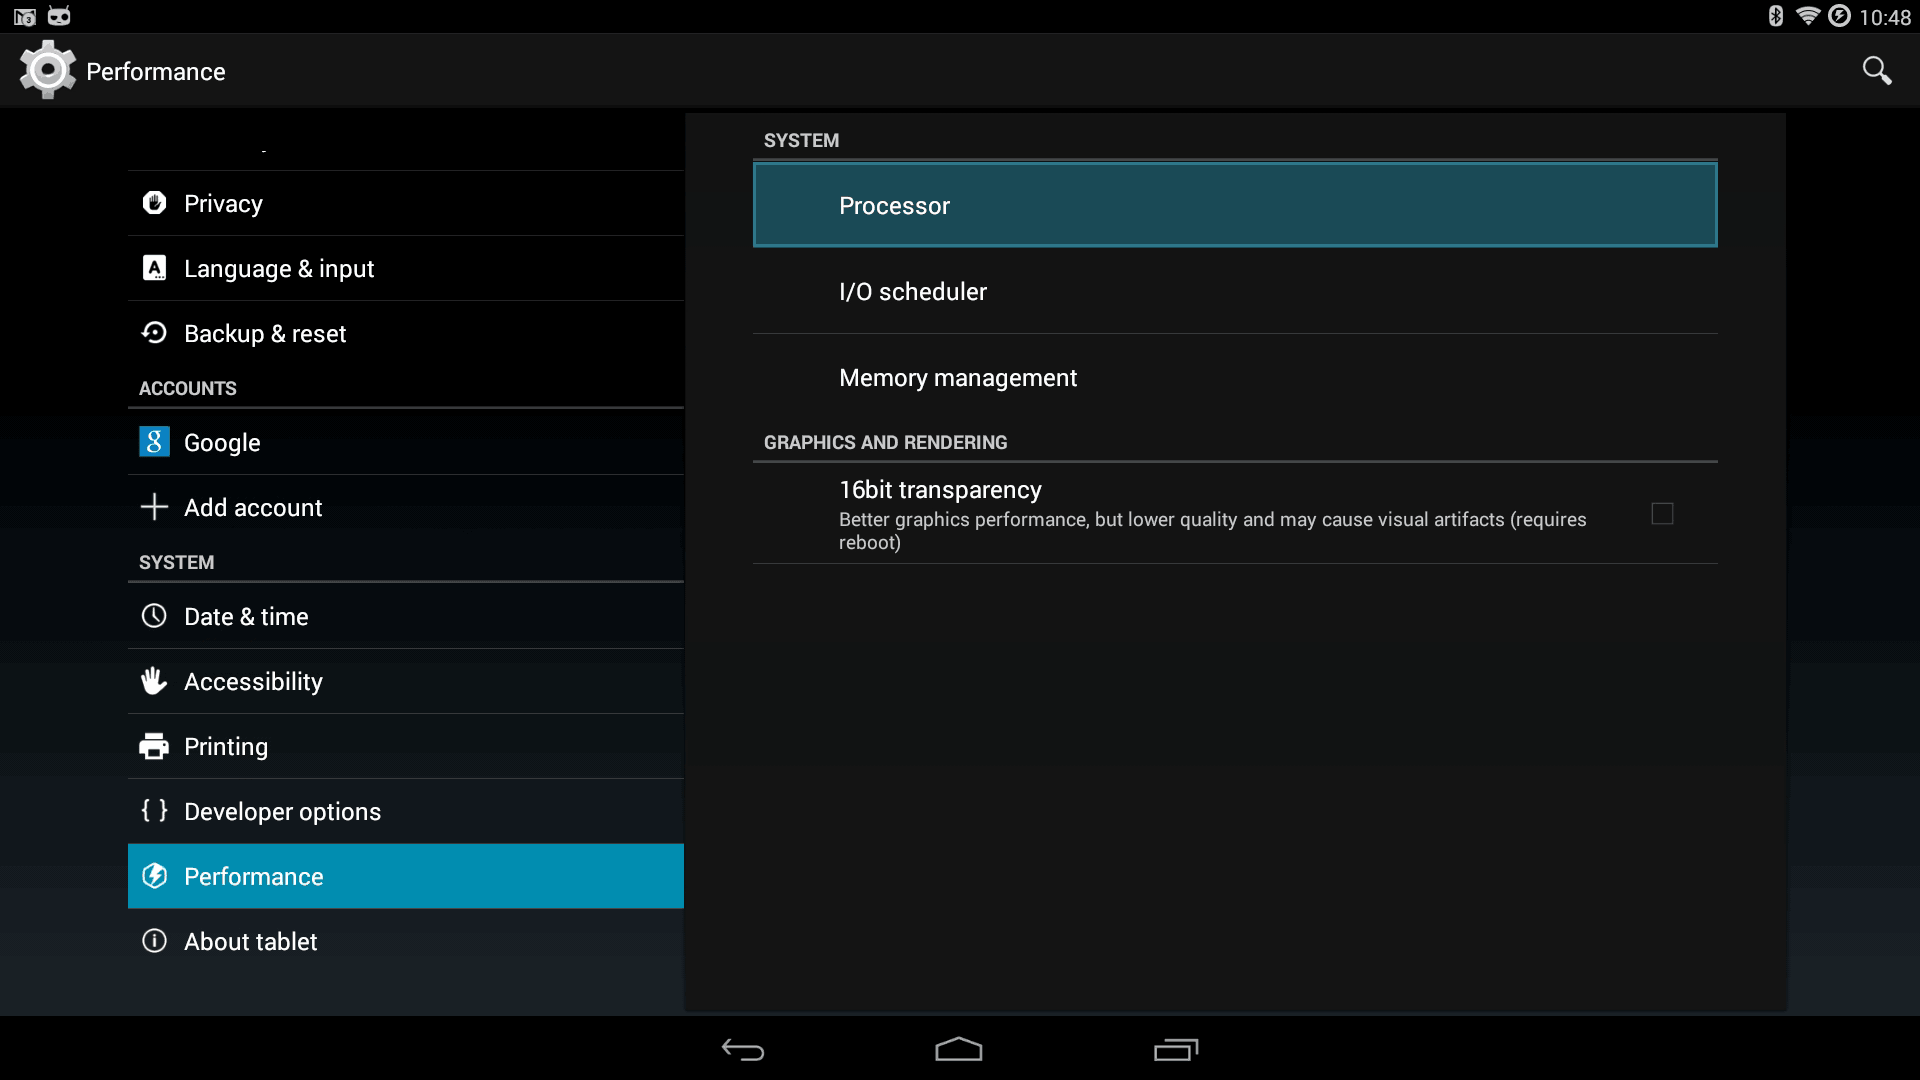
Next, we're going to do the thing the Ouya Corporation slaved so hard to do. Which is to unlock the processor so it runs at %100 all of the time. This Tweak helps with some of the menus and even some games. It helps but isn't as big and magical as they said it was. :)
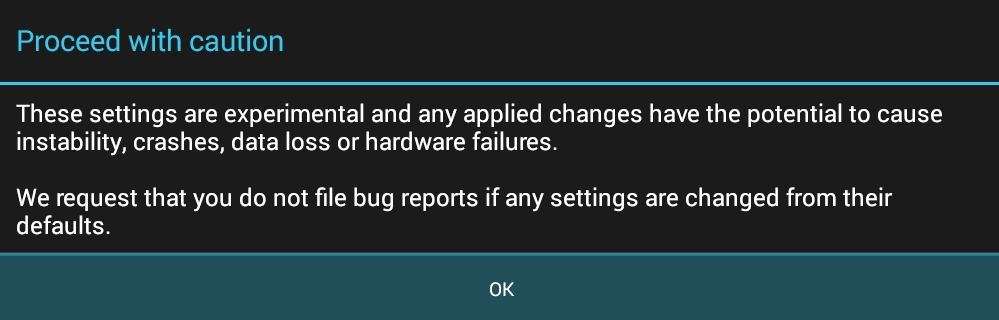
In most cases, this warning is legit as Lineage is usually loaded onto cel-phones which have almost no room for cooling. But since we have a fan and a heatsink on our Ouya. We're confident that the tweaks aren't going to affect us. So press "OK" to begin.
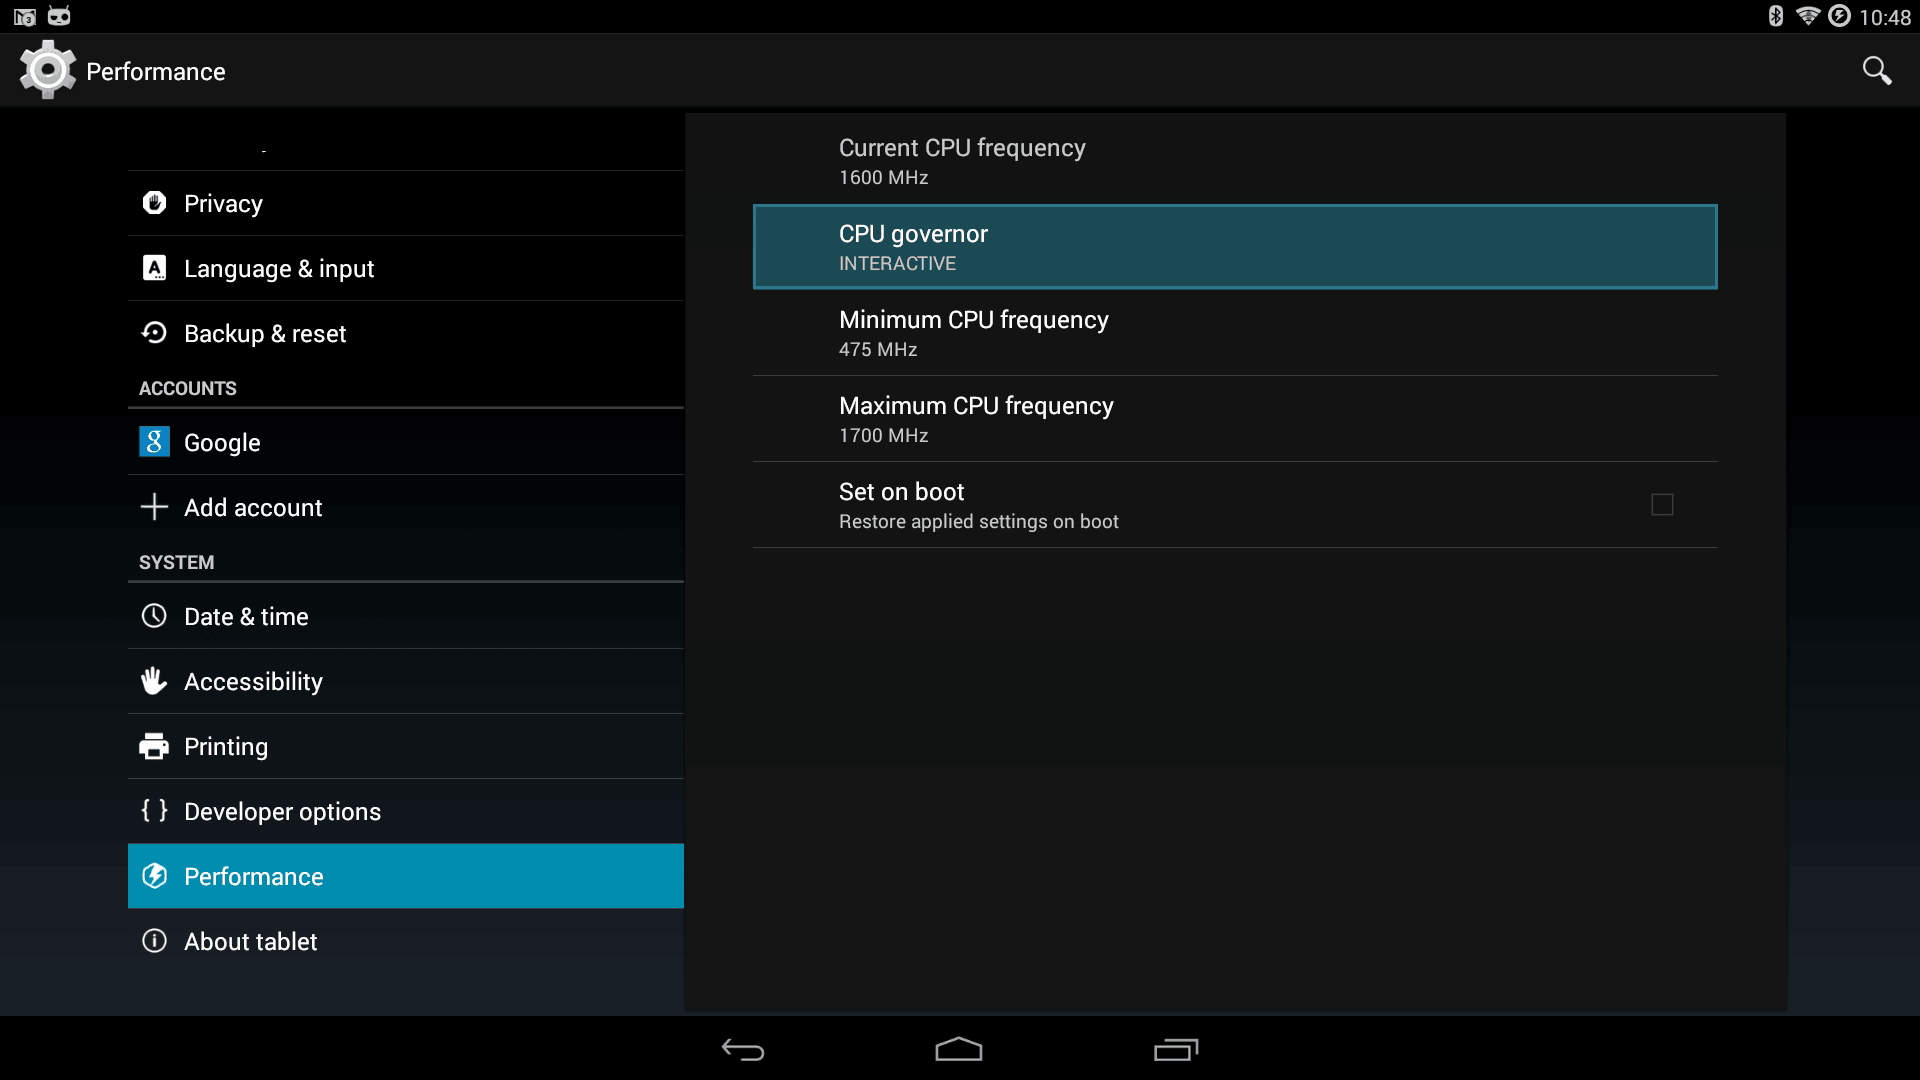
First, let's jump into the "CPU governor."
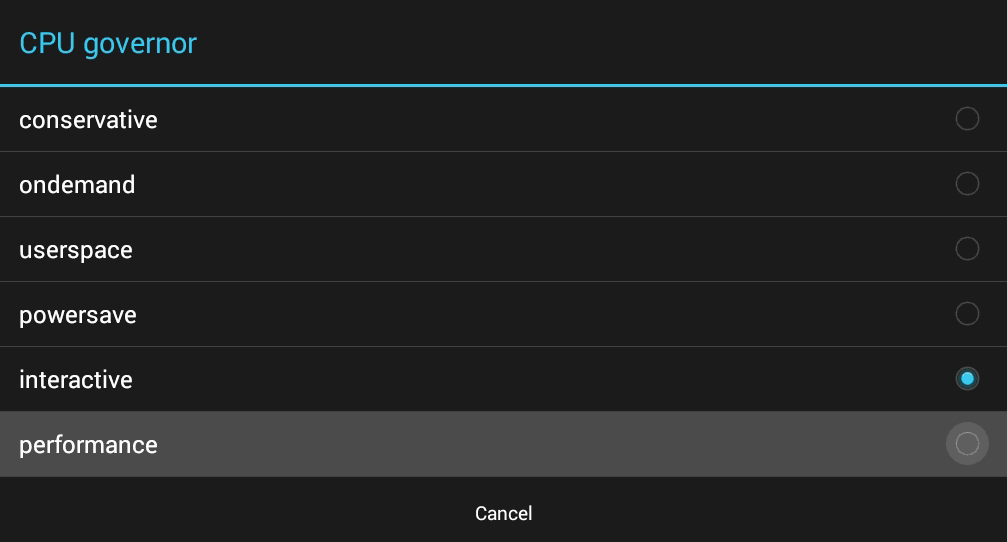
We're going to want to switch this to "performance" indicating that we're not out to conserve a battery that does not exist and if an application throttles the CPU to go as fast as you can.

It should back us out to the performance menu and arrow down to "Minimum CPU frequency."
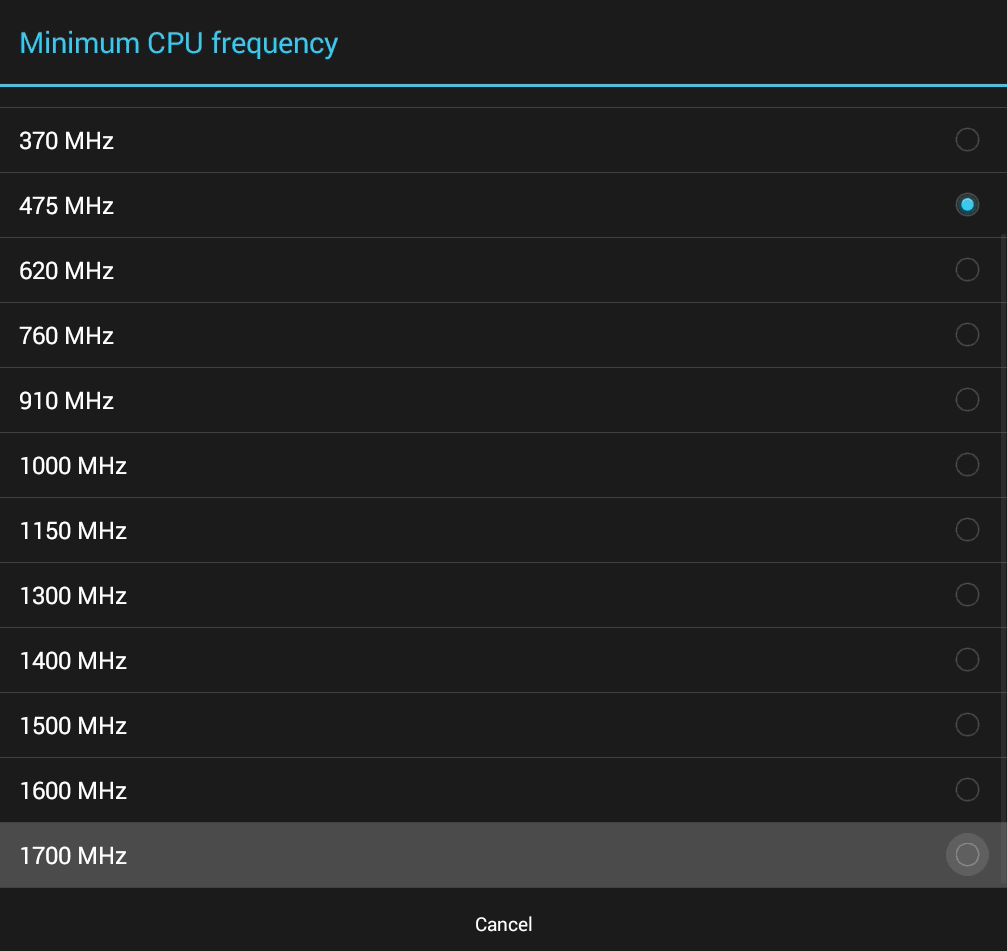
There's no reason to be nice in this category either. Crank that bad boy to 1700Mhz. After this, you can exit out of the Android System Settings app as we're all done tweaking things within the core of Android for now.

Upon backing out of this menu there is one crucial step that must be taken if you are satisfied with these CPU settings which is to Set on boot in the performance > processor menus.
SuperUser Time!
Provided that you installed this App during the ClockWormMOD load SuperSU is an incredibly valuable program in respects that it handles all root access for applications. Launch this application to begin.
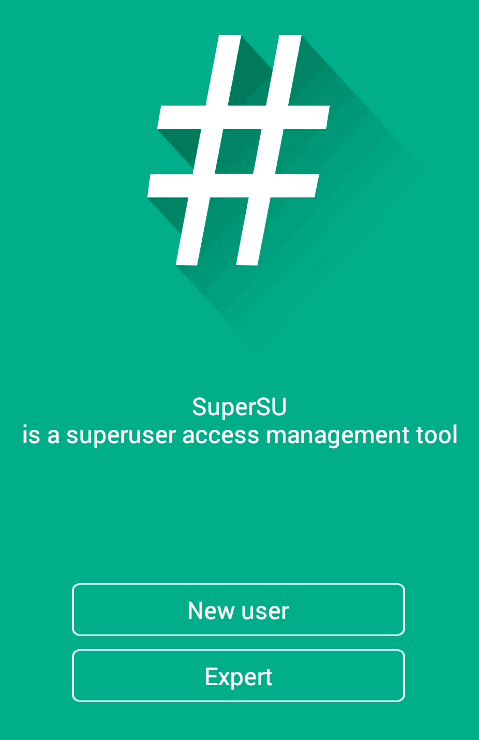
You may have to use that d-pad mouse on this but you're going to want to select New User.
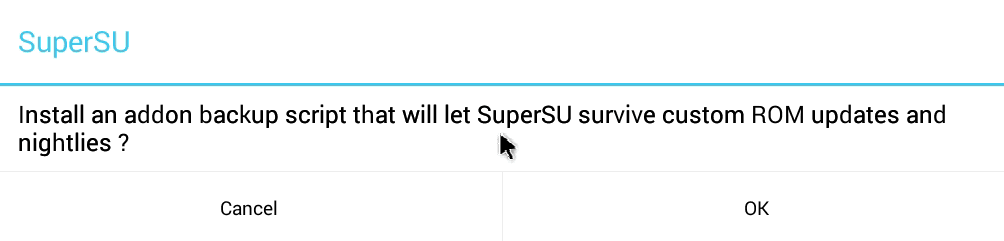
This is up to you. We didn't enable this because we're responsible for our nightly updates via ClockWorkMOD. Once you've answered all the questions and let SuperSU do its thing you can close out of the app.
Now, we need to test this, don't we? Let's jump back to the Raspberry Pi and ADB Install something.
cd /d0/lineageouya/apk/
adb start-server
adb install Quickboot.apk
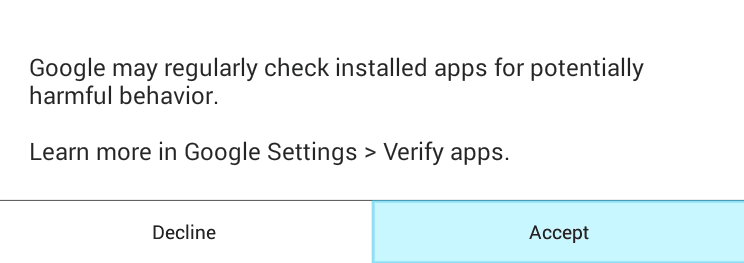
This window may appear the moment you pass your first ADB install command. Simply hit "Accept" as we know exactly where this app install is coming from.
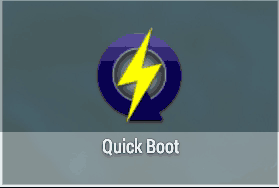
Once the install is complete an icon for Quick Boot will appear on your apps menu. Let's test it out as this application does require root access to perform its function.

We're going to try to power off the Ouya as that will require root access to accomplish.
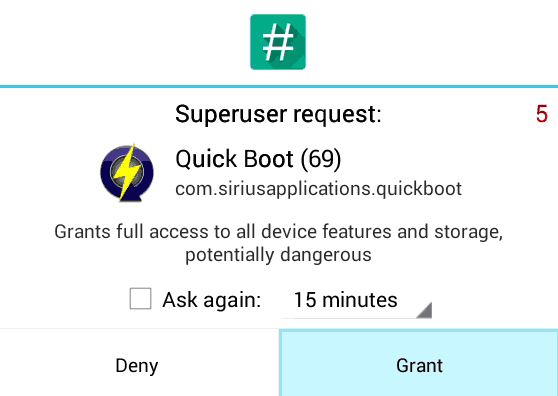
If you see this window pop-up this is a good sign. This is to let you know that SuperSU has taken over and wishes to grant your application root access to perform its job. Simple Press "Grant" and it will shut down your Ouya if it works.
Now..... Power back on that Ouya. We're not done yet!:)
Overscan issues.
Overscan is what happens when you hook your Ouya up to an HDTV and some of the text falls off of the screen and/or it's completely invisible. In the Ouyas case, it always lived with Overscan but the OS didn't allow any of its GUI to go anywhere near the ends of the screen. There was even a handful of games that allowed you to adjust overscan before play so you can see the corners in case enemies were sitting there.
In lineage, you take care of overscan similar to Android 5.0. By jumping into ADB and passing the following commands.
adb shell wm overscan 15,30,10,20
Each of the numeric values represents how many pixels you want the GUI to slide inward.
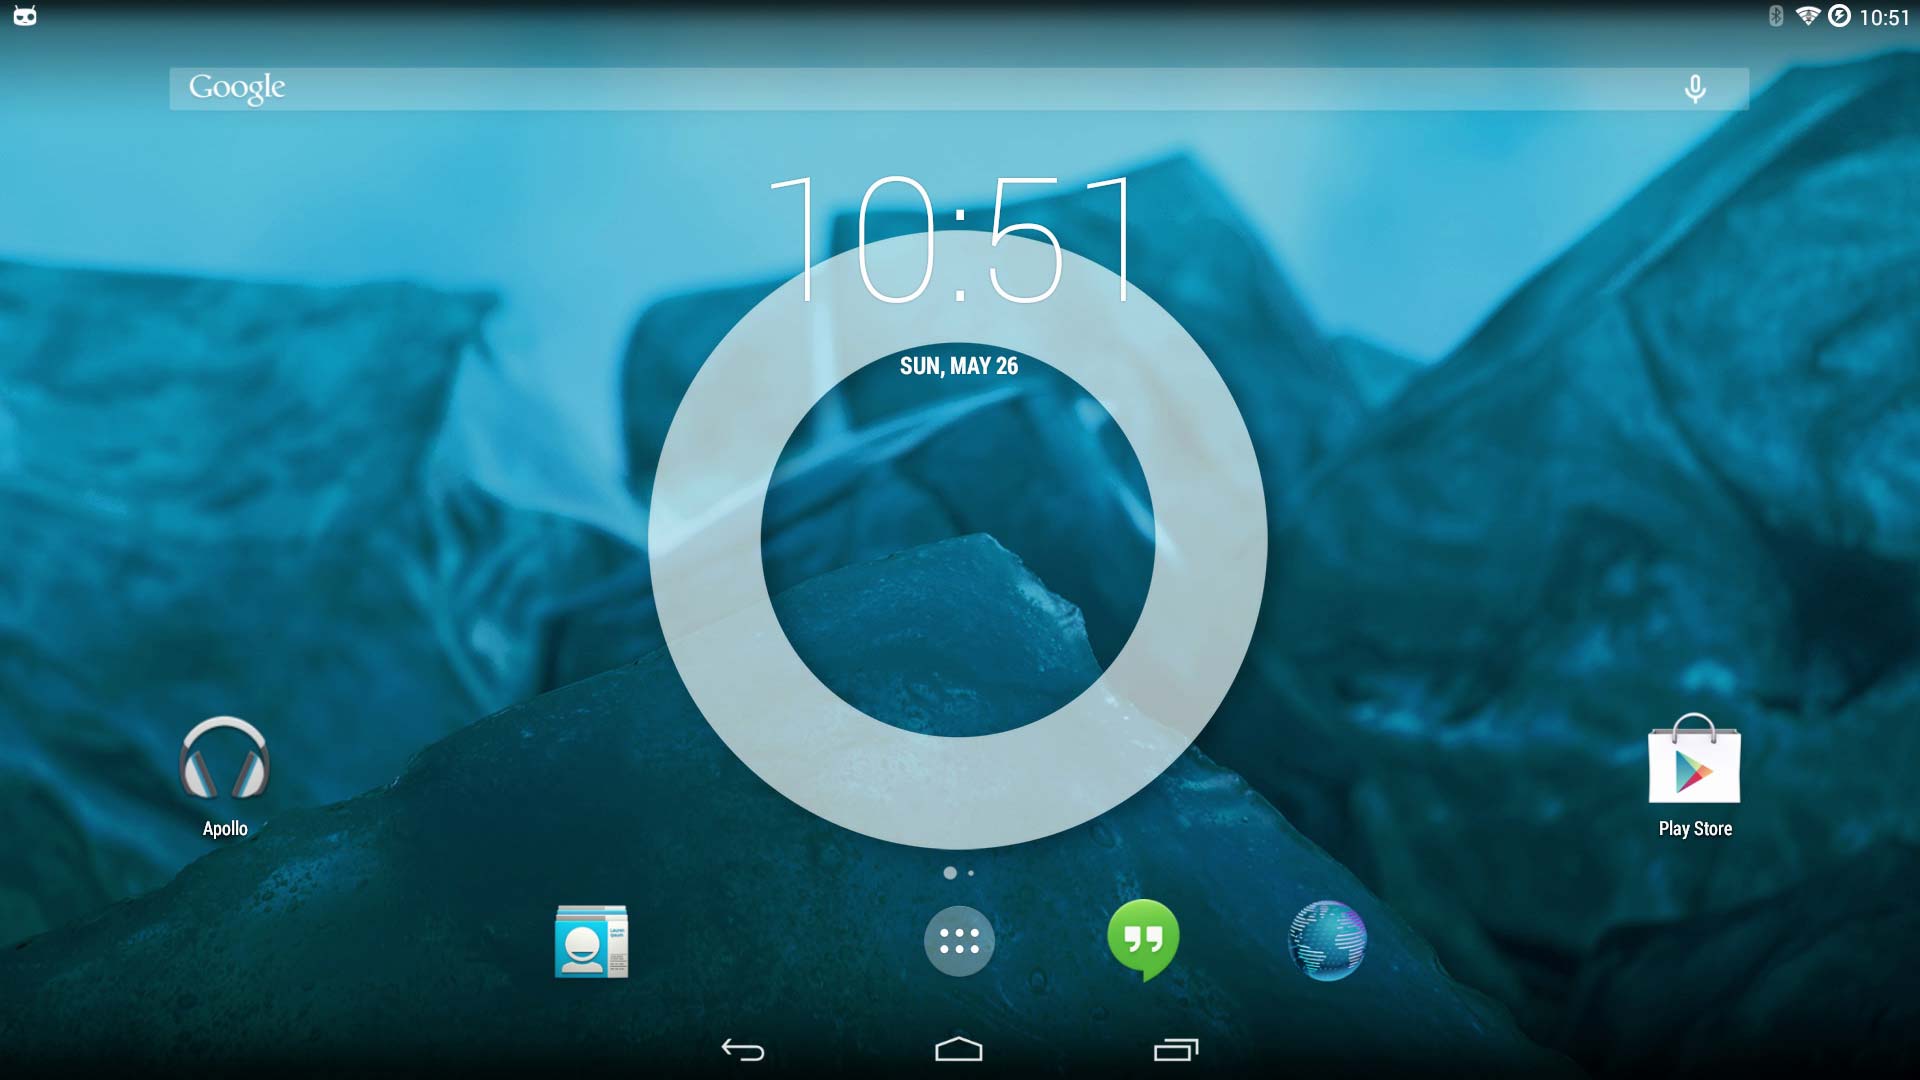
This is what Lineage looks like without wm overscan.
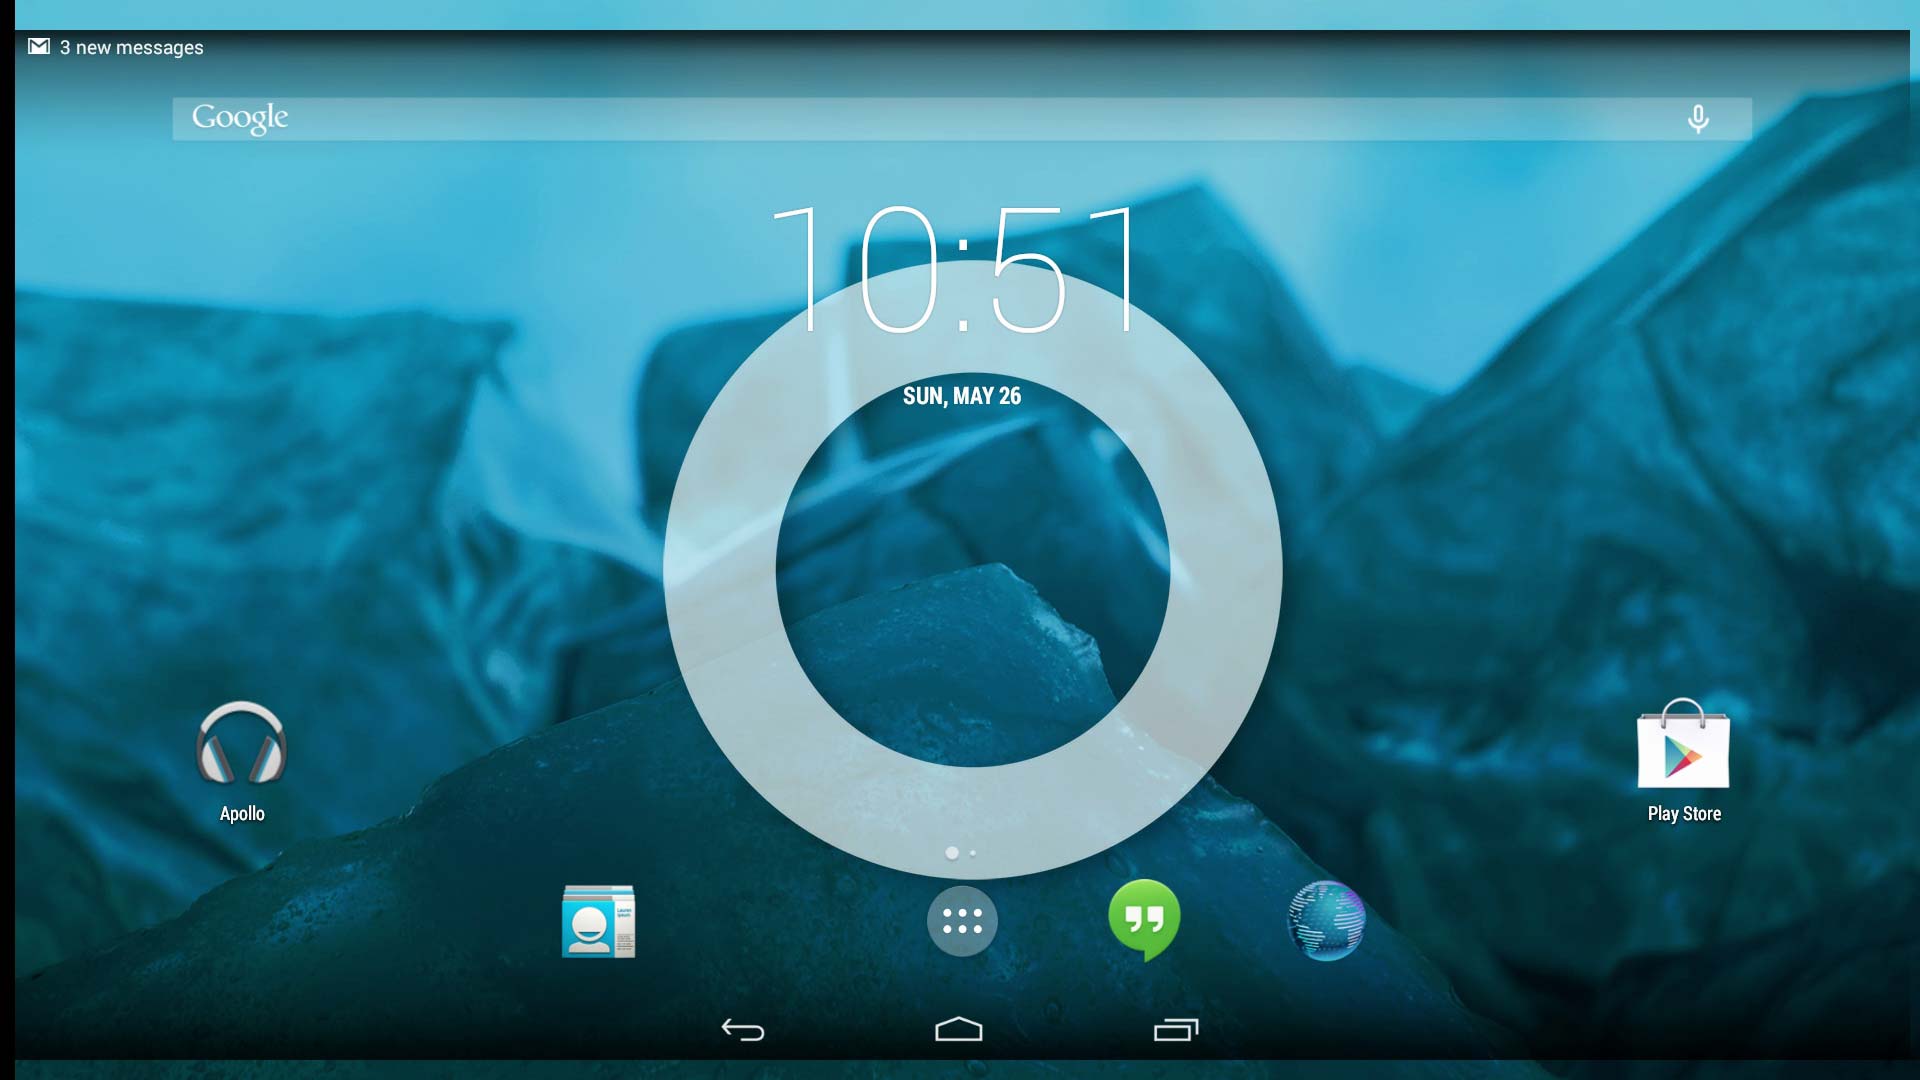
This is what Lineage looks like with wm overscan enabled.
As you can see it does not change the display like what you did in Cyanogen as much as it simply shrinks the GUI and that's it. Which for the most part is okay because Kodi has it's own overscan options. and for most games, you're probably not going to worry about the edges of the screen.
Final Thoughts.
This is nowhere near all of the tweaks you can do to this OS. These are just some of the ones that have come up over the years that users have asked us how to do and how to get working. We hope that you found this tutorial helpful until then.
 This tutorial is apart of a series on how to ADB Lineage with a Raspberry Pi.
May server protect you.
+++ END OF LINE.
Hi,
About the part when you talk about the subtitles, doesn't disable HW Overlay.
Instead, put this line in build.prop:
persist.sys.hdmi.videoview=0
The subtitles will be shown on the screen flawless.
I used your original tutorial as a base of mine:
https://forum.outerspace.com.br/index.php?threads/t%C3%93pico-oficial-ouya-lixo-ou-luxo.458082/page-41#post-15181508
Very awesome tutorial. We especially liked the whole explanation of Ouyas original settings with the build.prop file.
When it came to hardware overlay I dedicated a blog about it here. because I think I found another way of dealing with it by just shutting down the SurfaceFlinger service which is responsible for subtitles failing with HW-overlay enabled.