

Mouse feet and where to find them.
We did an article about repairing the Corsair Scimitar mouse, but there was one thing that we forgot to cover upon rebuilding that mouse, which is the mouse feet. Otherwise known as mouse skids or even mouse skates. But mouse feet from most manufacturers are made from 0.6mm of a substance known as PTFE (Polytetrafluoroethylene or in America, it can also go by its copy-written name "Teflon") Then, a layer of VHB (very high bond) double-sided tape is applied to the bottom. The Teflon is probably sodium-treated so that the VHB can bind to the back without peeling away immediately due to its natural properties. But we won't get into the chemical science of it all because we just want to get our mouse feet restored! Would you like to know more?
Why mouse feet of all articles?!?!
The inspiration for this article was a series of events that were going on. The first event is that we took our repaired Corsair to a few hotels for random LAN gaming. After leaving the second hotel and packing it into our bag, we found that one of the mice's feet was missing. I initially thought to myself:
Whatever, i'll just pay $5 for another set from china. Not a big deal.
After a bit of searching. We quickly found out there is no such thing as Corsair Scimitar mousepads! Not even knock-off versions! We could find aftermarket Corsair M65 pads easily enough, but not the Scimitar. Oh, and don't even bother going to Corsair's site. Razer, for as much shit as we gave that company, at least tried to supply replacement mouse feet as an aftermarket part to their customer. Corsair just asks if the mouse is under warranty and if not, pound sand and buy a new mouse. This is called hyper-consumerism, and this is what environmentalists should be fighting. Pushing for a world where you spend a lot of money on a mouse because it does have an environmental impact, but afterward it will last you 20+ years because you make it more serviceable. Instead, Corsair and companies like them make people spend lots of money on a mouse that fails in a little over a year. Like my M65, and like the Scimitar that we received. So a giant fuck you to Corsair as well! You're no better than Razer! My next gaming mouse and keyboard will probably be some Chinese knock-off. Just cut out the middle man in the whole process! The final aspect of hyper-consumerism at its finest is presenting our problem in a forum. Several other people said the following:
Yeah, the mouse pads fell off. I just bought another mouse anyways. I go through a gaming mouse once every 3 months. - Forum user of redacted named community
Sweet fuck man! It must be nice to spend $200(USD)+ on just mice! Maybe we're not of the same financial class as these people. But we'll be happy to accept your "Garbage" broken gaming hardware. Not a problem here!
The "Great Wall".
Our next thought process was just to go DIY. PTFE at that gauge is very easy to cut with an Exacto blade So off to work trying to find a manufacturer that could sell me a few yards of 0.6mm PTFE in sheet form. Needless to say. The Cock-blocking was hard. Even on Alibaba of all sites! There is not a single vendor that will sell you virgin PTFE at that gauge much less one that will have the VHB tape along with the backing of said material. The Chinese industrial complex is locked down on this because they realized that they can cut PTFE on a CNC machine and sell gamers a cutout of their mouse feet on a square 2x3 inch for anywhere from seven to twelve dollars. Why give away the business?
Even though they're tiny, we got some PTFE blanks.
Ultimately. I was stuck with purchasing about 8 blank sheets from China, and used my $4 first-time-buyer discount on Alibaba while we were at it, which sadly only covered shipping at this level.
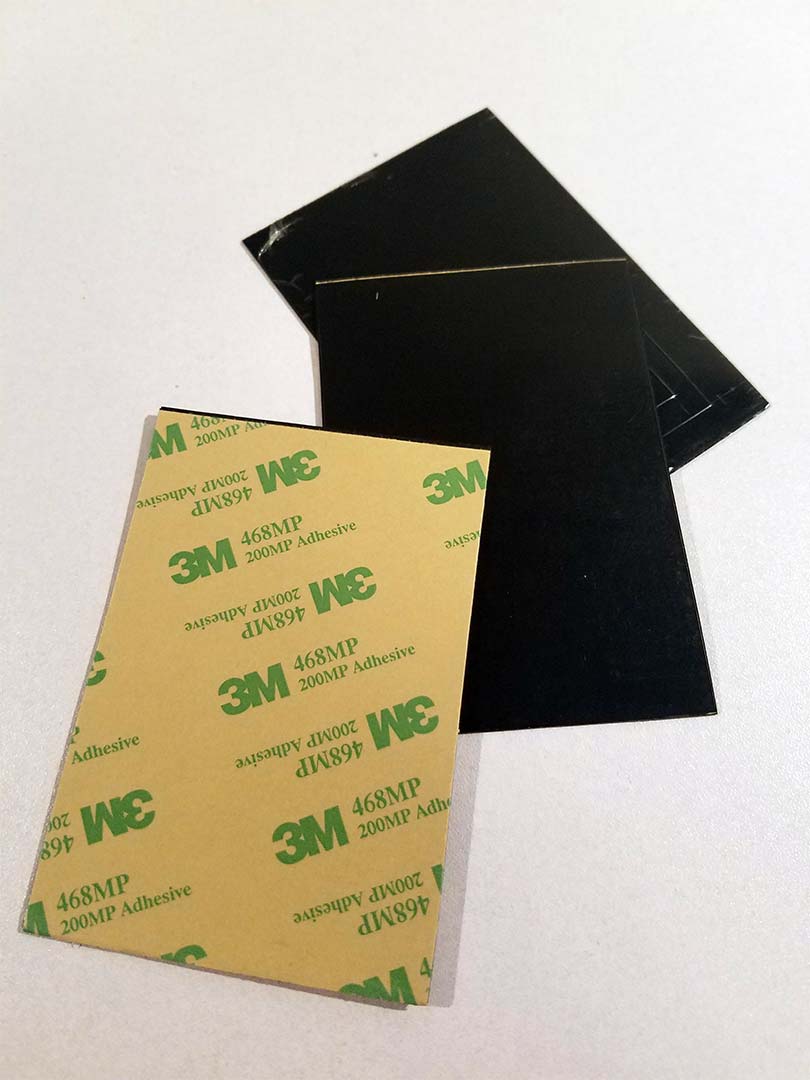
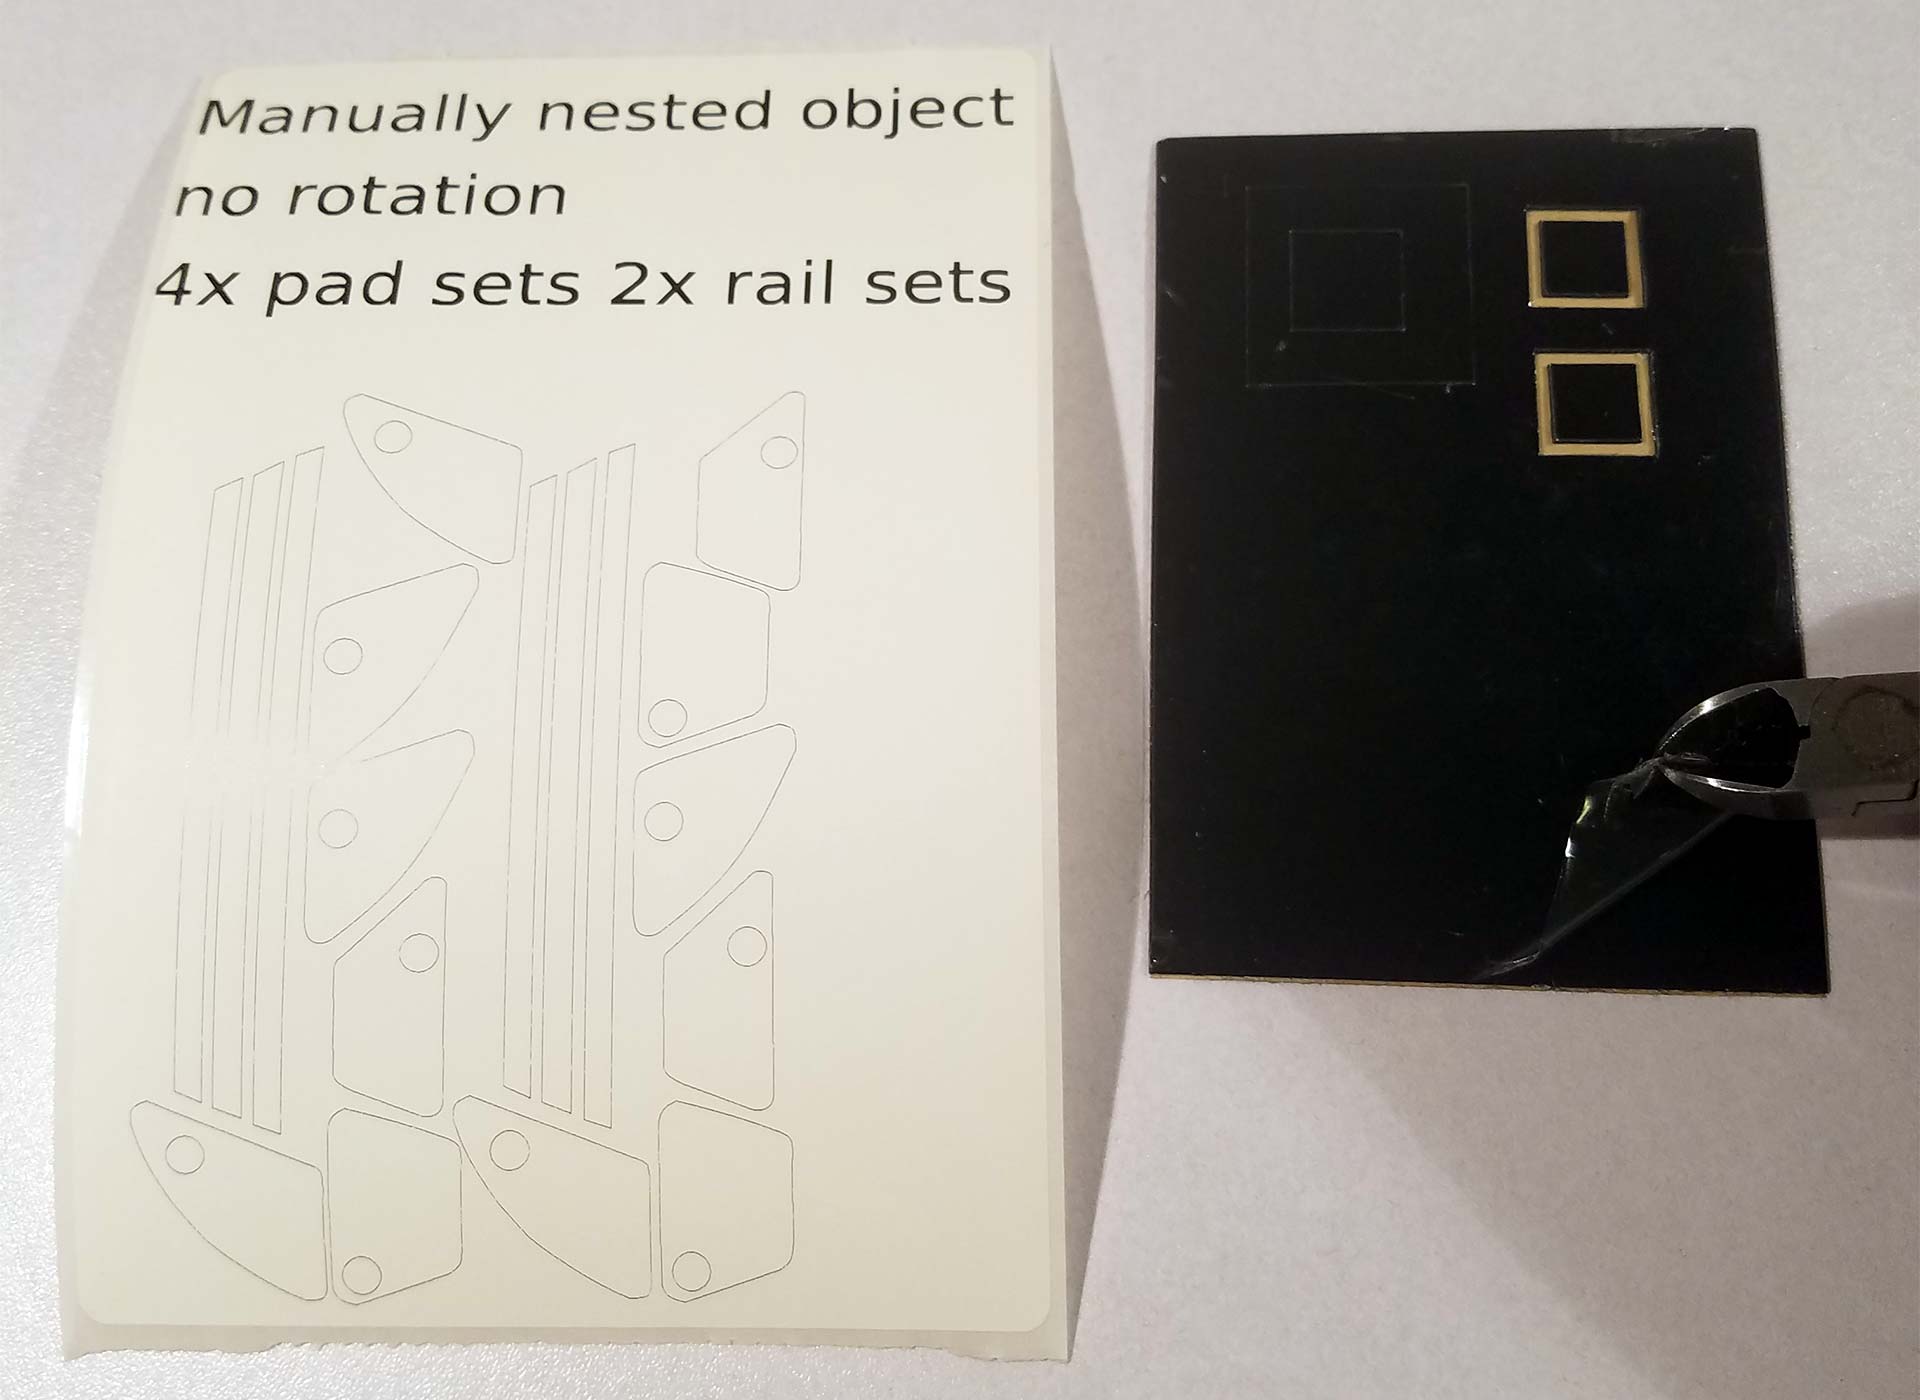
Anyhow, here is a sample of the kind of pads I got. I started to cut into one of them. But you get the idea. Black PTFE at 0.6mm with a CM 468MP/200MP adhesive which is similar to VHB tape. They cost about 90 cents each, and they were already cut up into 70mm x 100mm squares, which is super shitty. But we'll make do with what we got.
Making a template.
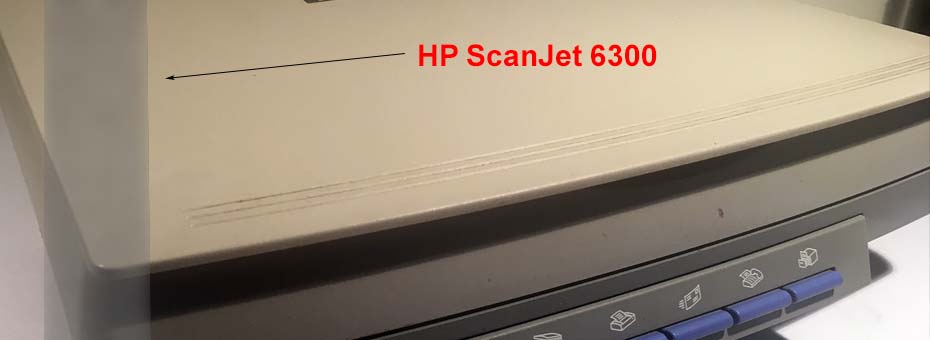
There was a previous article that dealt with me repairing an old HP scanner and some people were probably like:
Why are you spending the time on that old thing? Throw it out!!
Scanners are cool, man!
This project takes advantage of the scanner. If you have a multi-function printer with a flatbed scanner or a copier you can e-mail a PDF to yourself that works as well. The reason why we scan the bottom of the mouse instead of taking a picture with a camera or phone is that the resolution is locked upon scanning. If you scan at 300dpi; That means for every 300 pixels it detects that will be an inch no matter what. This is super-important because we will be using the scanned image of our mouse as a tracing template in a freeware vector program called "Inkscape" in a moment.

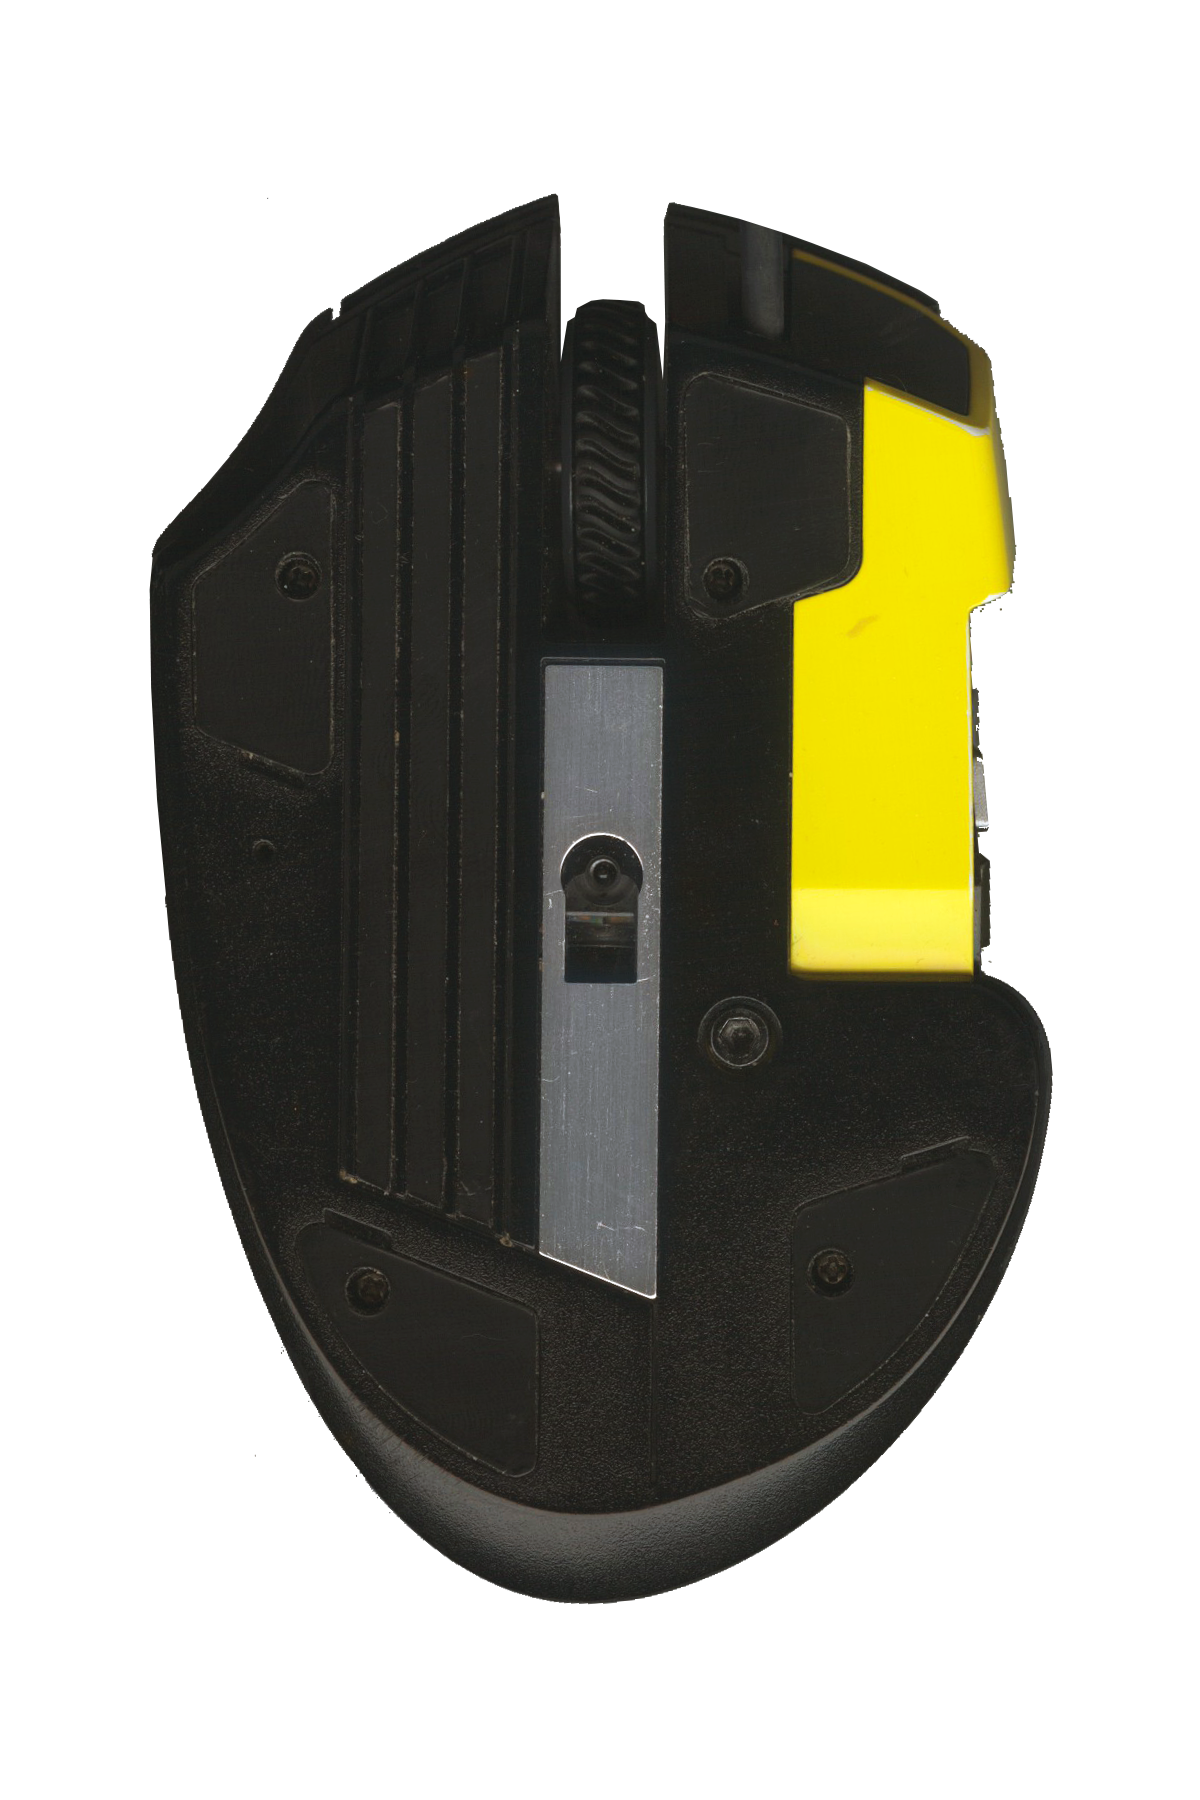
You may click on the picture above to get the full resolution of what we are working on. However, this is our Corsair Scimitar mouse with all of the pads removed. 300DPI is probably the lowest that we would do because, in certain places, the lines did get a little fuzzy throughout the process of vectorizing. But it's still readable, which is all that matters. We did pull it into GIMP to increase the canvas size to 4x6 inches, like our shipping labels. Also, paint the transparent layer purple for contrast while we are working off of this bitmap file. Finally, we did save this file as a PNG because PNG files tend to hold values such as pixels per meter. Which can also be calculated in the imperial standard of DPI (Dots per Inch)
Building our template in Inkscape.
I will attempt to go step by step in the most recent version of Inkscape. In the future, there may be newer InkScapes that surpass some of the features we are currently doing here. If it occurs we'll try our best to revise the blog to maintain readability. We guess the bonus is you get to use a free piece of software and learn about production a little bit.
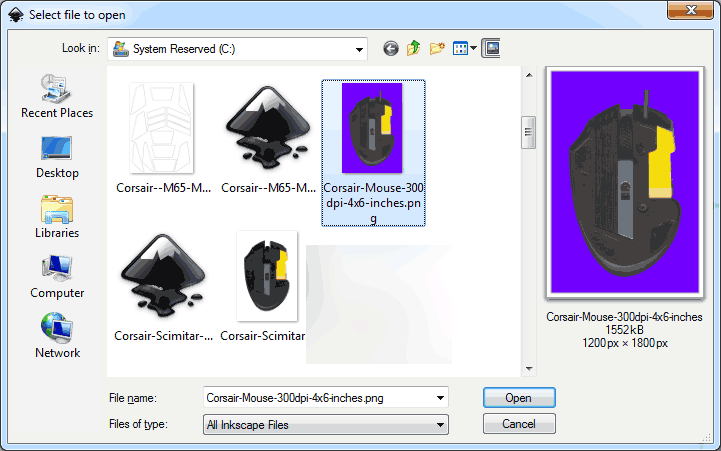
First, we will select File and Open inside of InkScape and choose our 300dpi mouse with a resized canvas to 4x6inches.
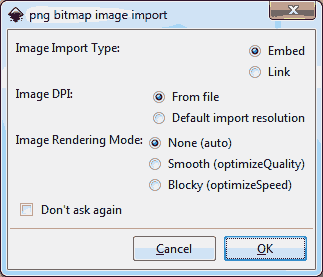
Default options are fine here; press the OK button. It's very important to specify the DPI from the file.
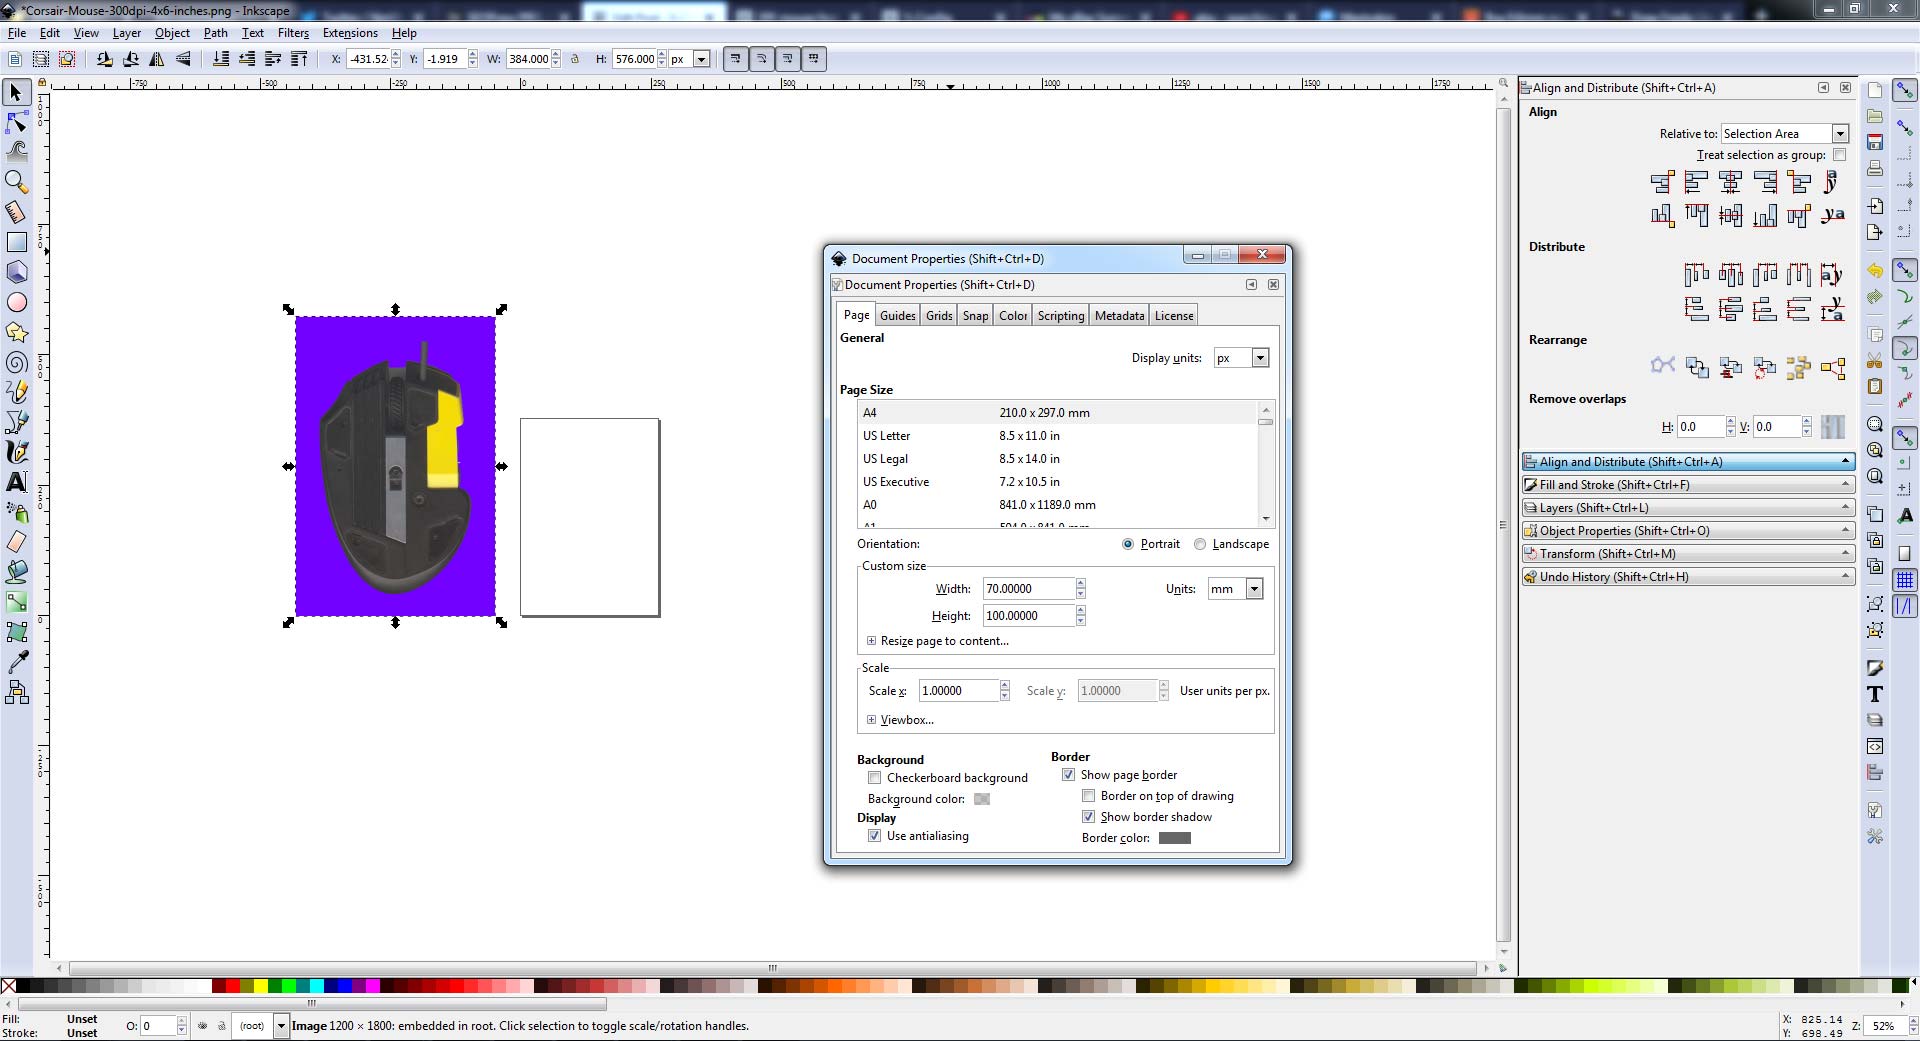
Use the Select and Transform objects arrow icon to move our bitmap file off of the page since we shall be using the image as a template for making the mouse pad in the first place. While we are at it, let's set up our page size to represent the tiny ass sheets that China gave to us by clicking on File, and Document Properties to pull up the window pictures above. Under Orientation, set the Unit size to mm for millimeters and add the width of 70mm and the height at 100mm. Once complete, you can close out of the window.
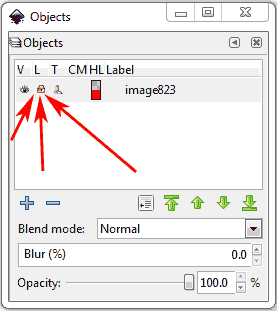
Now, click on the menu Object and finally Objects to pull up the object navigation tool. This is similar to the Object Layer tool in Illustrator. Under the "L" column, click the icon to lock our bitmap down. We do this so that the bitmap does not get in the way as we trace our mouse feet.
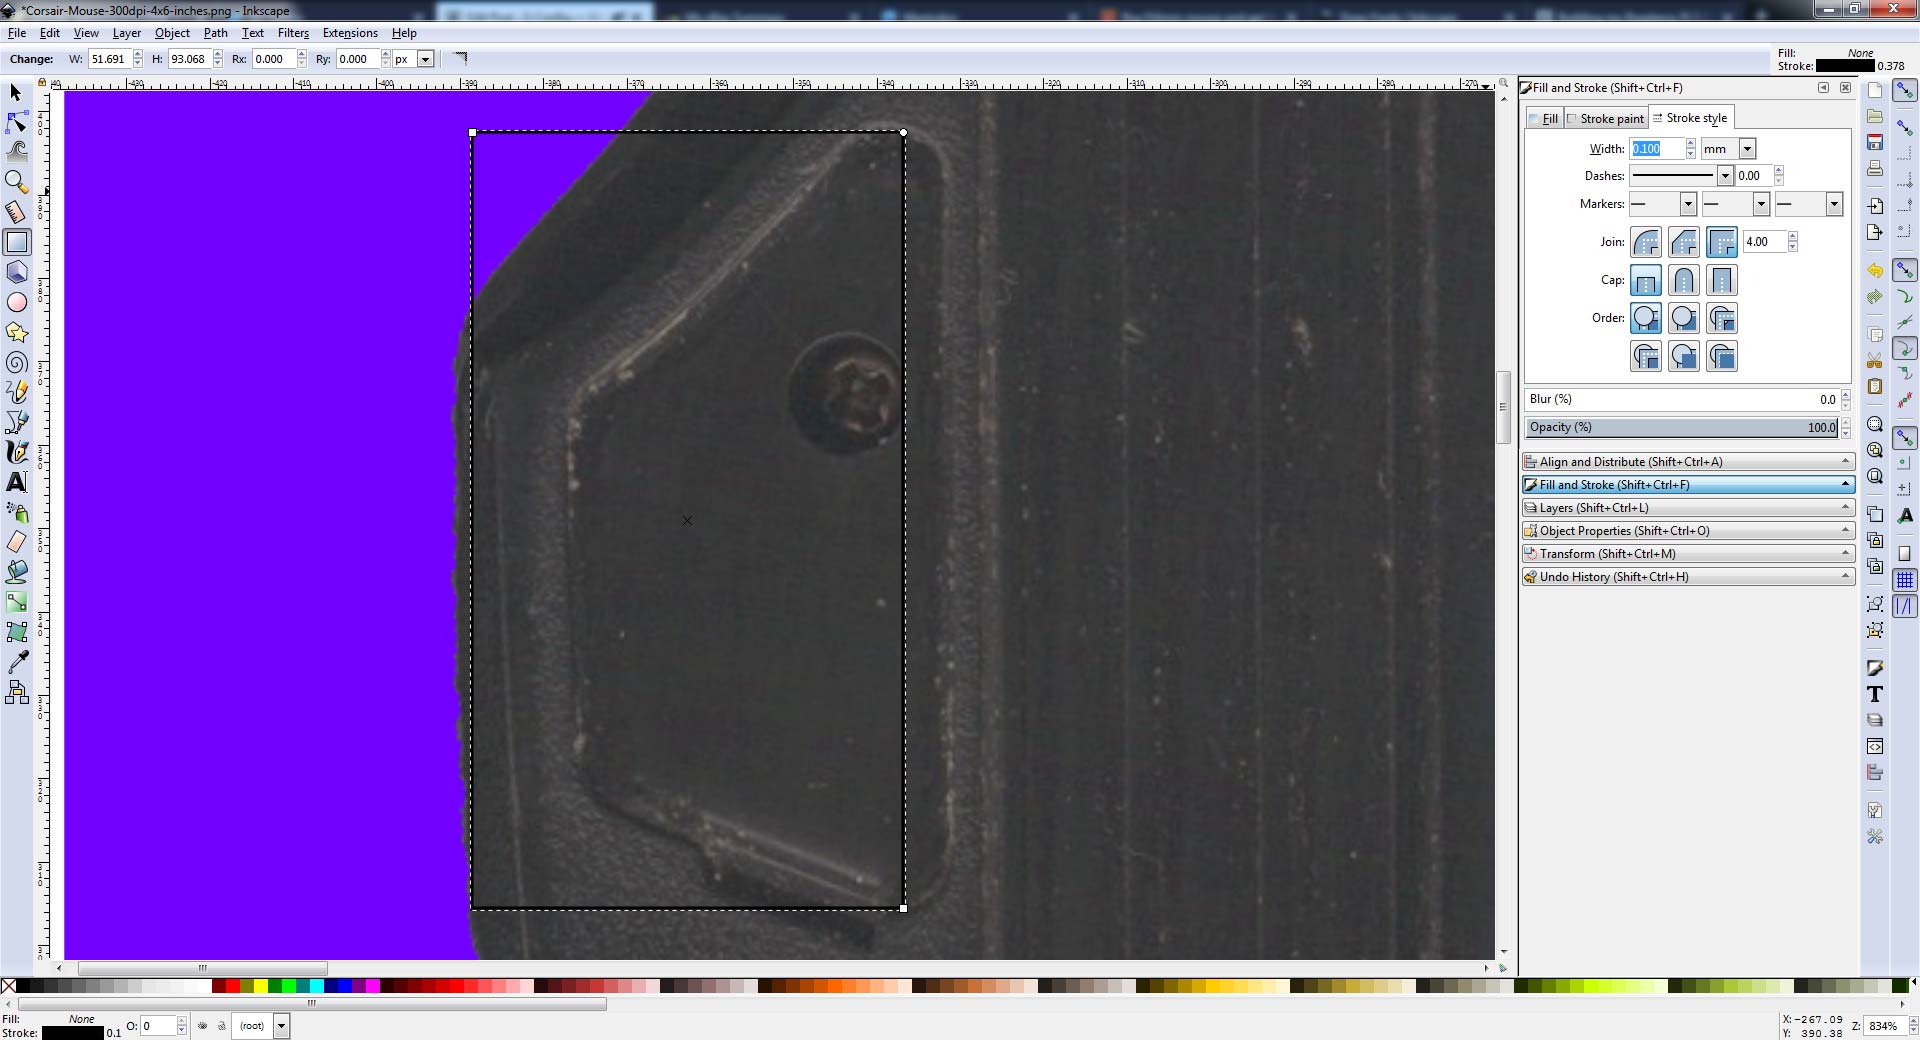
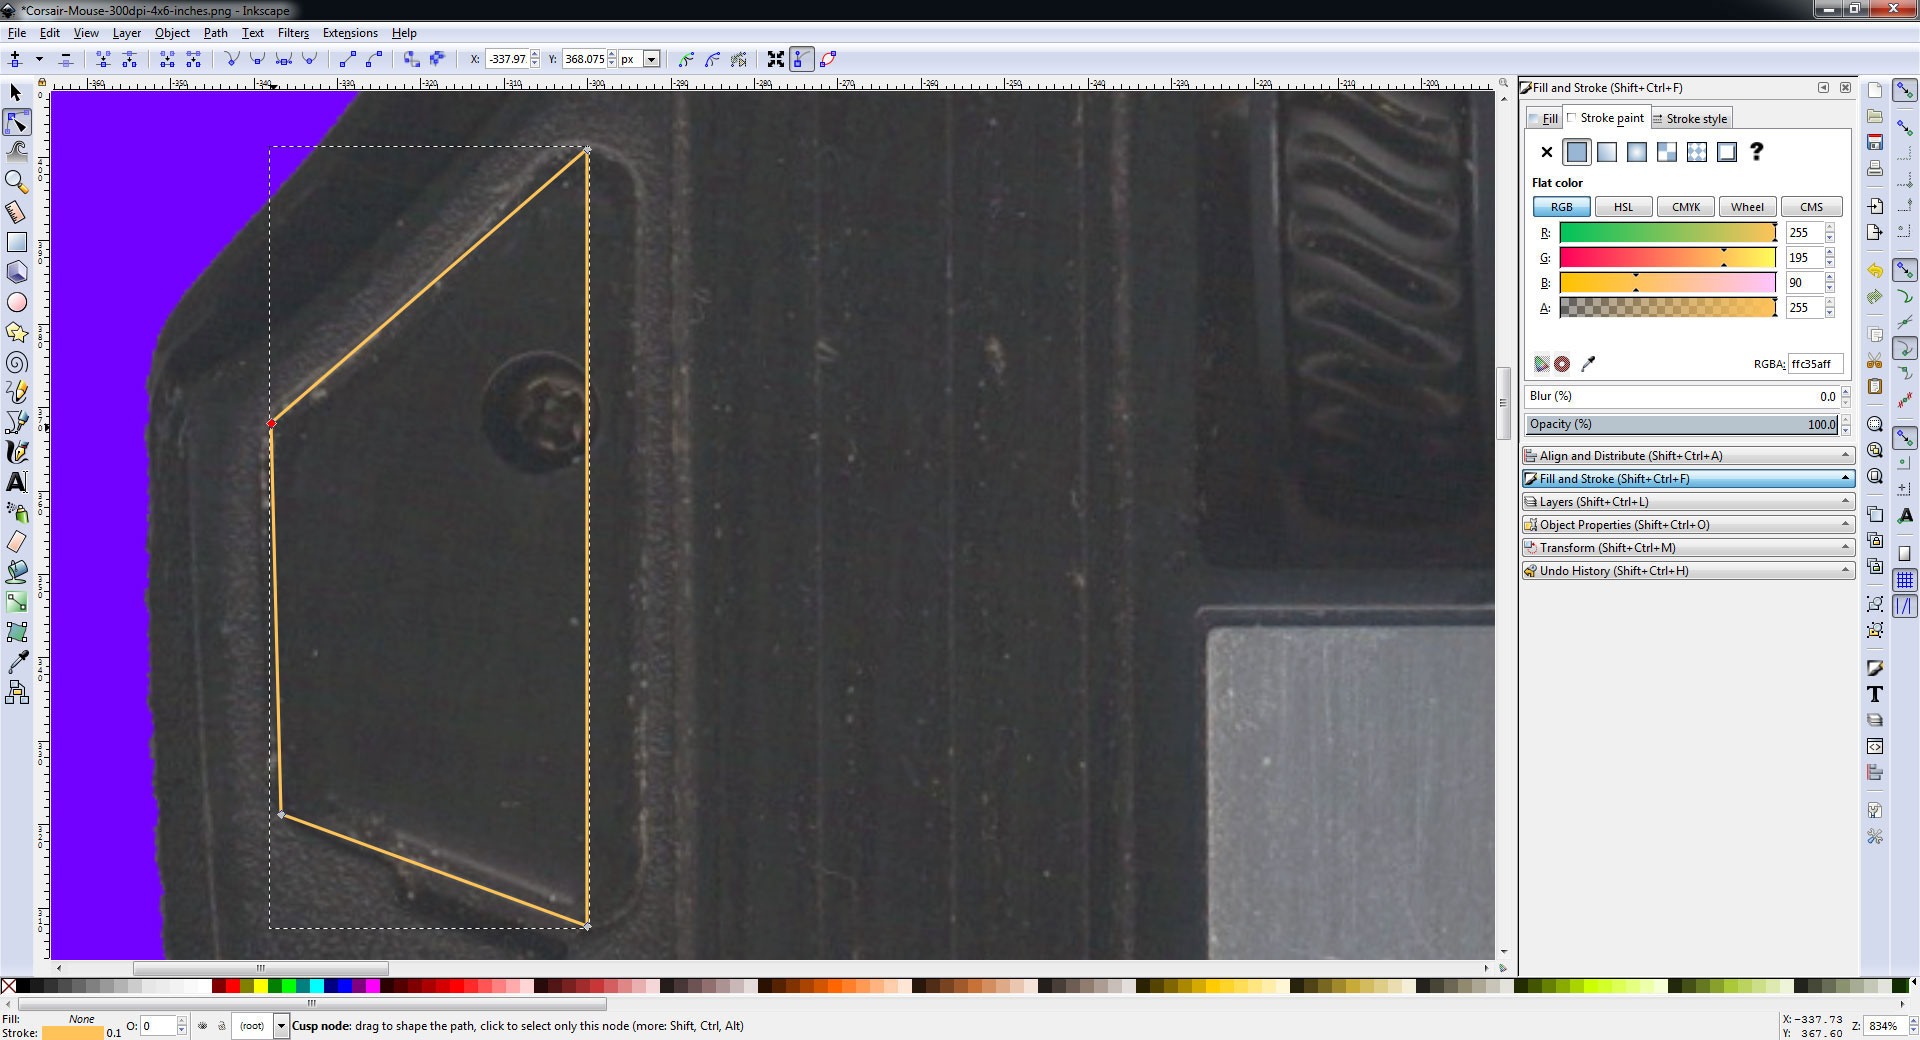
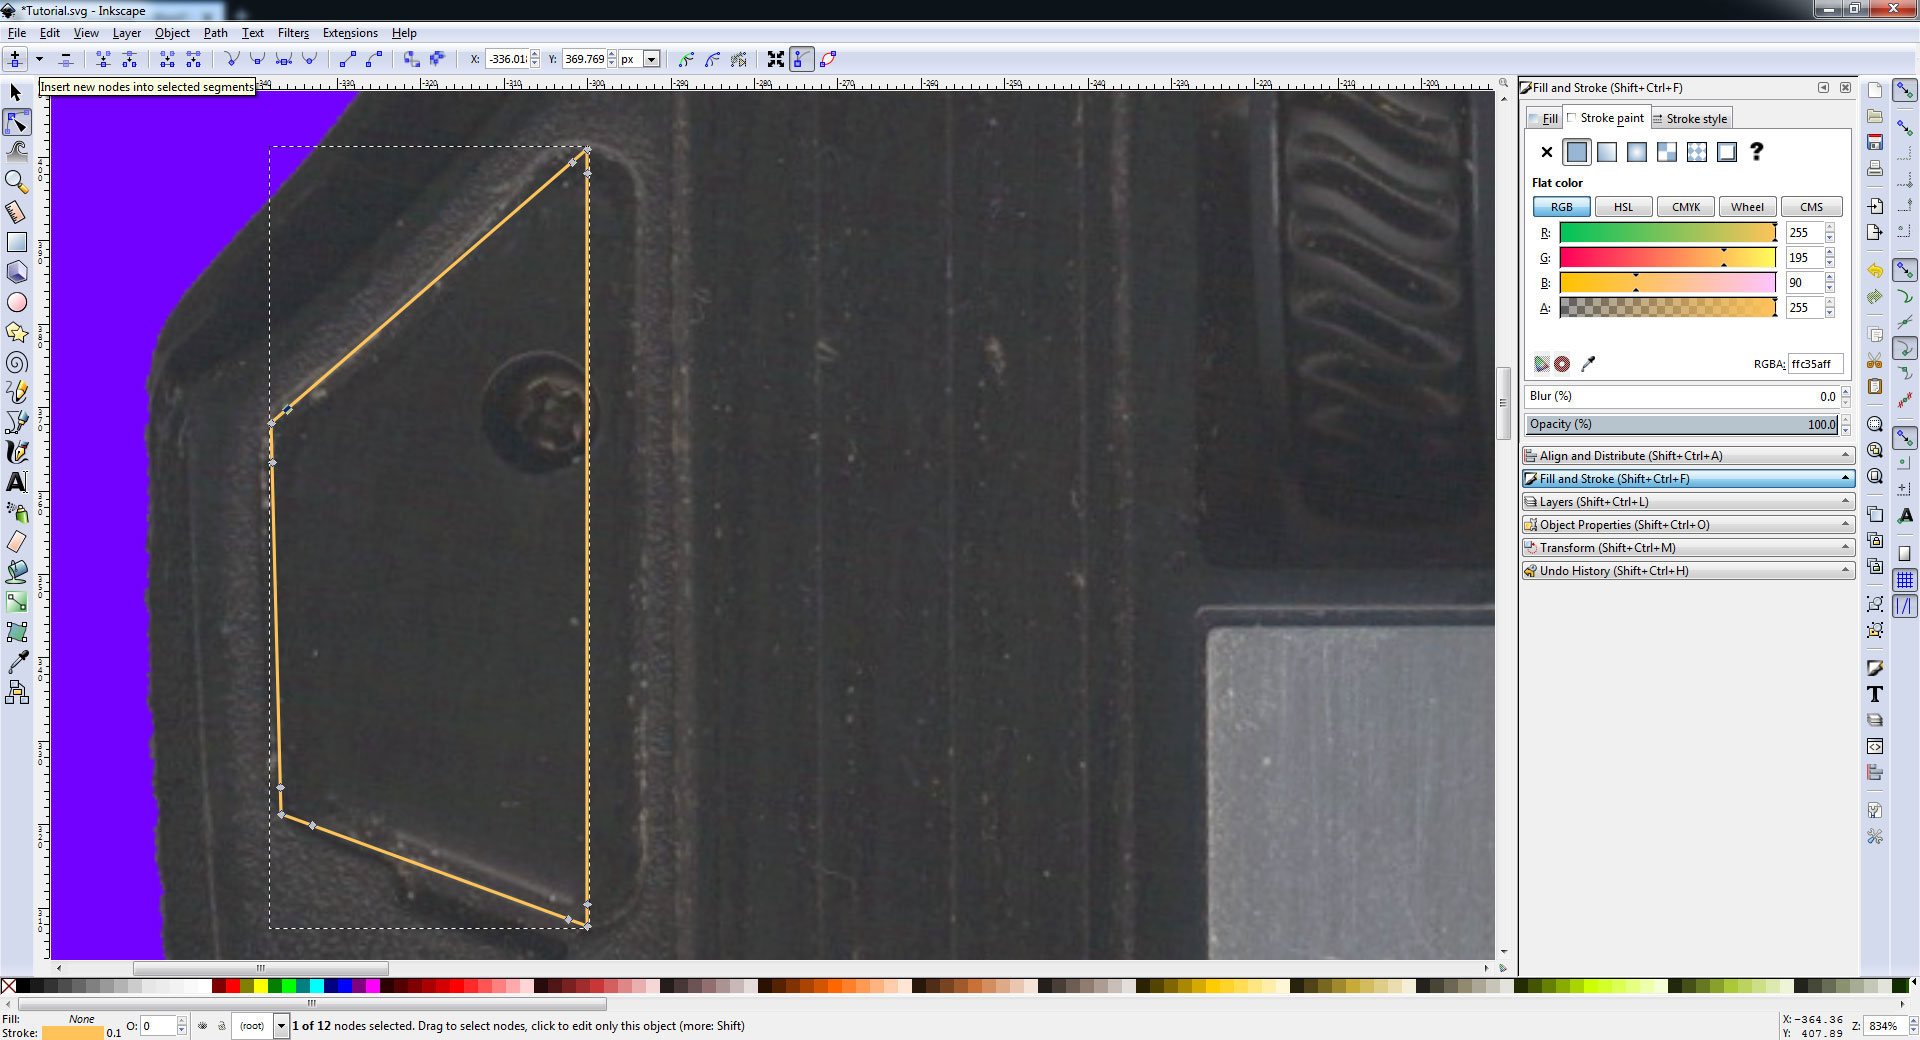
Zoom into the first mouse foot we want to trace. You can either use View, Zoom, or Zoom In. Simply press the "+" key to zoom in. Or my favorite is using a mouse that has a scroll wheel that simply holds the control key down and scrolls up to zoom into the area we are going to trace. Next, we are going to place our first object. Select the Create Rectangles and Squares icon ![]() and go to at least two corners of the mouse foot. You won't be able to go to all of them, as generally, they are always going to be trapezoids or some other weird shape to avoid copyrighting other people's works. Now, chances are, by default, you will not get just a line like what we did in the picture above. To fix that, click on the Fill and Stroke tab on your right.
and go to at least two corners of the mouse foot. You won't be able to go to all of them, as generally, they are always going to be trapezoids or some other weird shape to avoid copyrighting other people's works. Now, chances are, by default, you will not get just a line like what we did in the picture above. To fix that, click on the Fill and Stroke tab on your right.
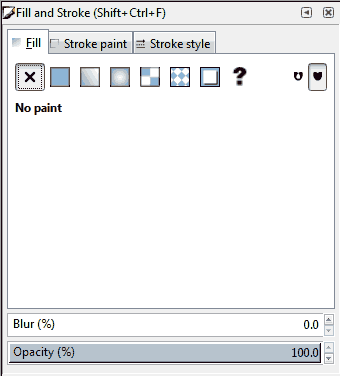
Click on the Fill tab and select the X icon for "No paint."
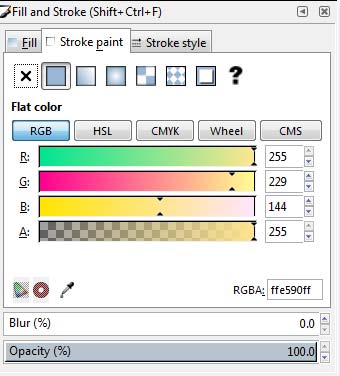
Click on the Stroke Paint tab. For the sake of visibility, we're going to choose this obnoxious peach color, but you can choose whatever color you want for your line art.
We then click on the Stroke style tab and change the width to 0.100 mm just to make it visible to us as we are editing our object.
Next, we shall click on Path and Union. Making a union will then make all of the nodes visible on our square object. Next, we shall edit the paths and nodes of our object file by clicking on its icon ![]() . Then hover over the node that you want to change until it turns red, and click-drag it to where you want to be. Right now, we are just defining the rough shape as to how we want the square to go around and place our nodes into the center of each curved corner
. Then hover over the node that you want to change until it turns red, and click-drag it to where you want to be. Right now, we are just defining the rough shape as to how we want the square to go around and place our nodes into the center of each curved corner
Next, to flesh out our object we will be adding some more nodes. Click the Insert new nodes into selected Segments icon ![]() and double-click along the lines close to each of the corners to begin adding nodes.
and double-click along the lines close to each of the corners to begin adding nodes.
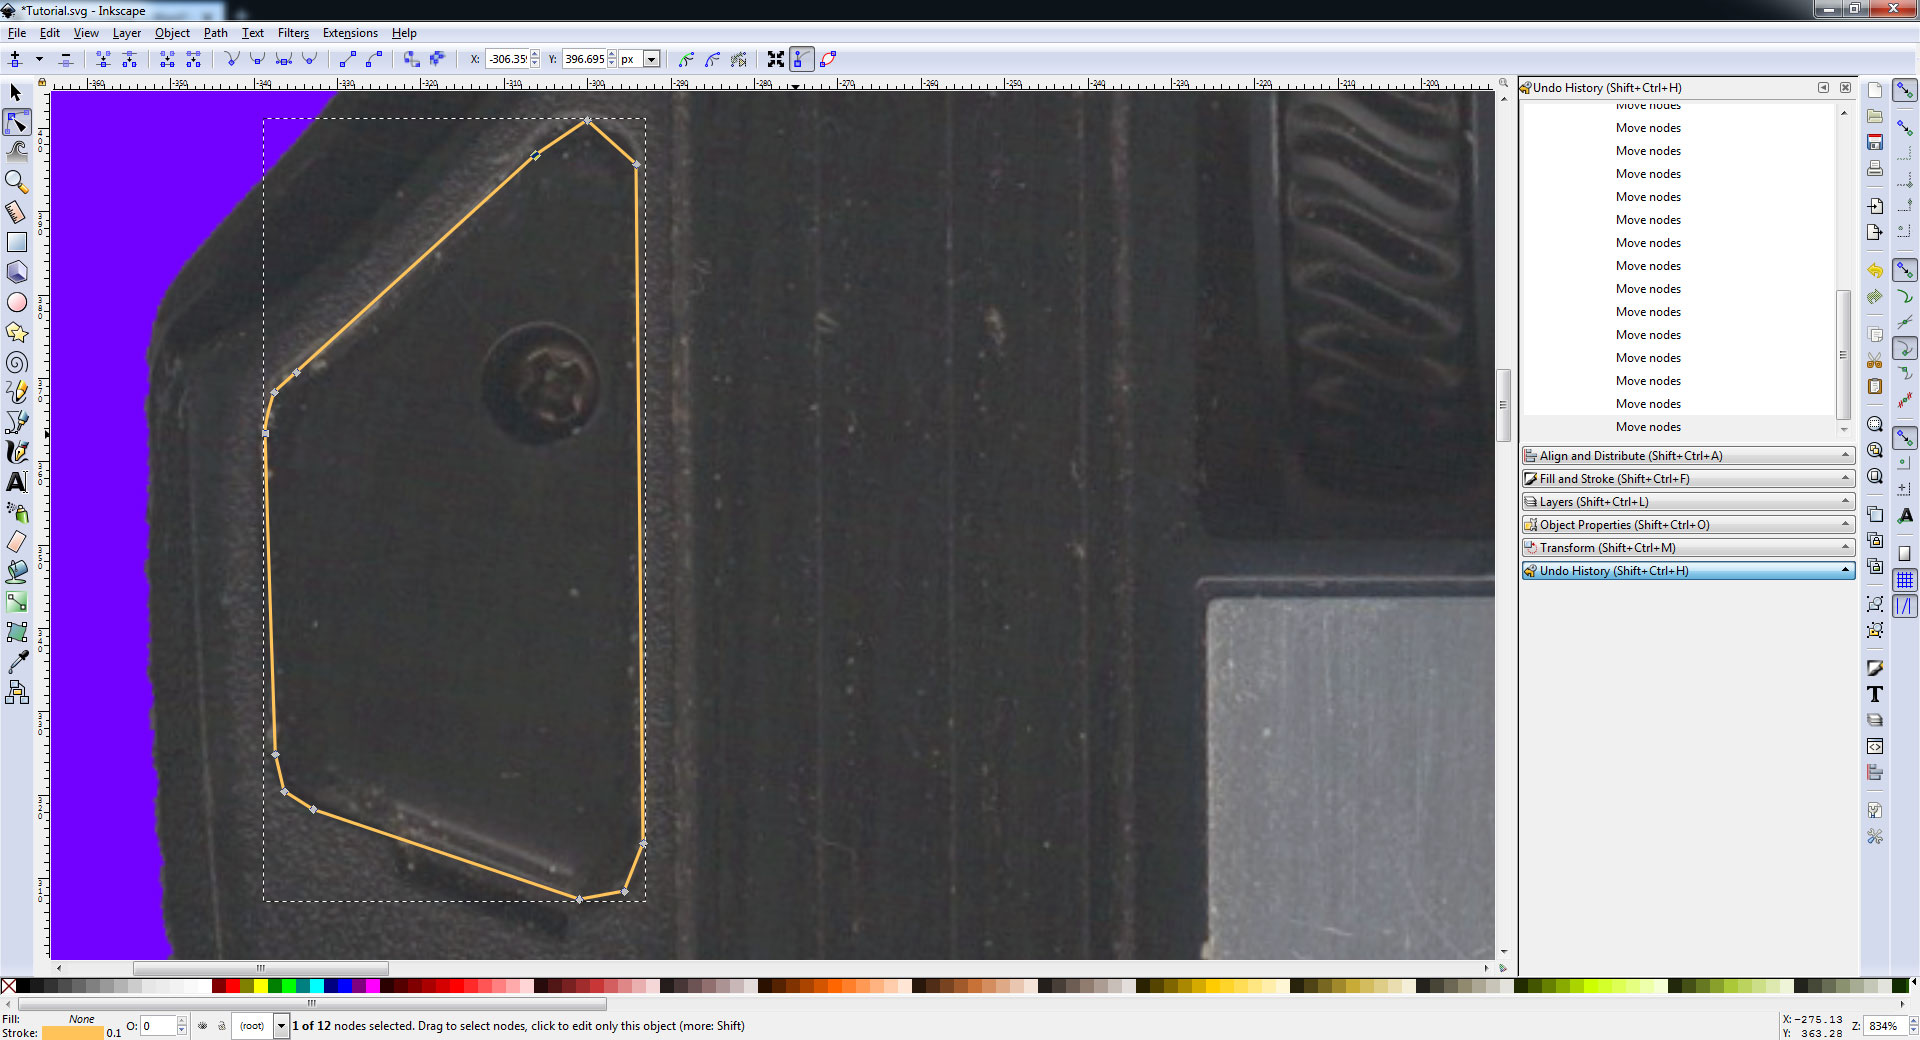
Continue moving around the added nodes with paths and nodes ![]() around the outer parameter of the mouse foot. These new nodes will serve as a separation between the straight-line vector and curved line vectors, which is what we will be creating next.
around the outer parameter of the mouse foot. These new nodes will serve as a separation between the straight-line vector and curved line vectors, which is what we will be creating next.

Now we can't get away with straight nodes on this mouse foot. It will look like shit if we go and cut it. So we are going to select the center node in each corner until it turns red and then click the "Make Selected Nodes Auto Smooth" icon to activate the smoothing of the vector lines.
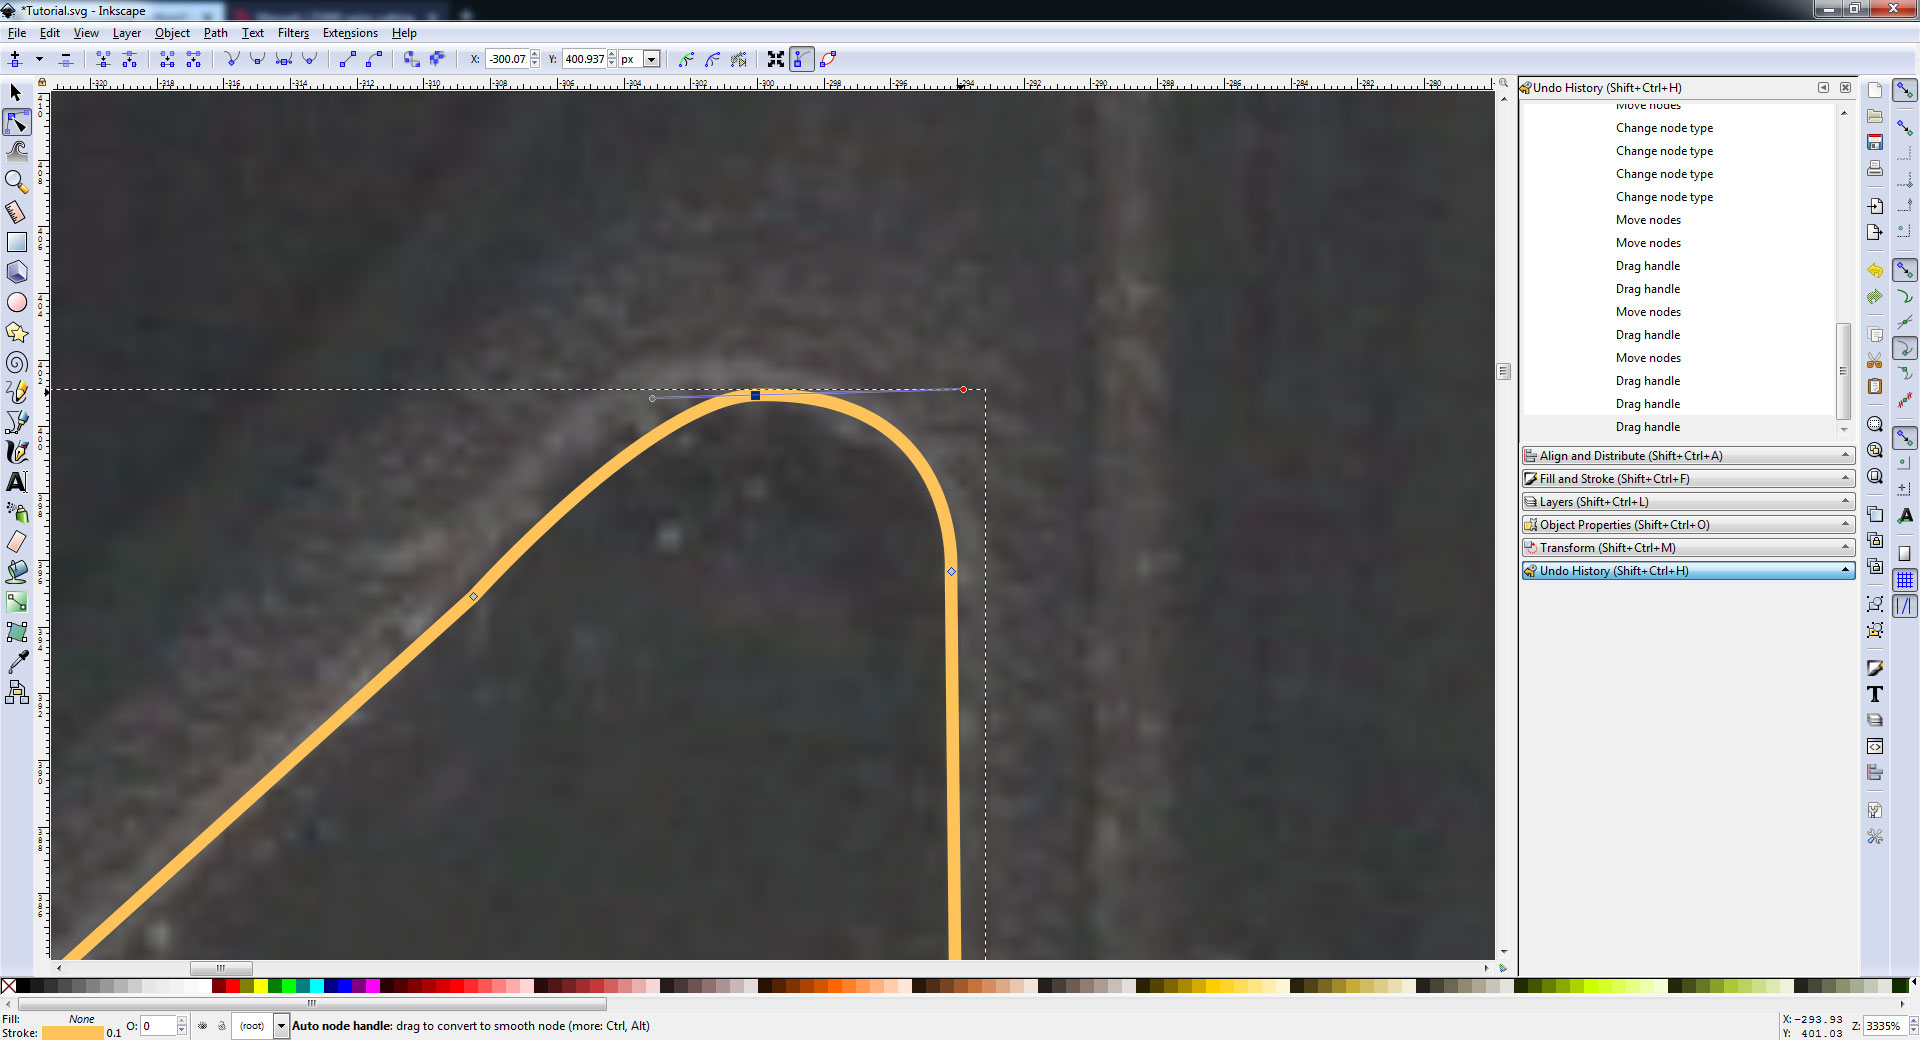
You've probably noticed that the node near the top had a rather weak curve to the design, where it wasn't covering the entire section of the mouse. If you click on our corner node again, you will see two dotted lines come out of it with circles. These are called "Smoothing Nodes." By clicking and dragging on the smoothing nodes, you can increase the intensity of the curve to your liking. Conventionally, we found that taking the smoothing node and having it line up almost vertically with the standard node below it seems to work out well.
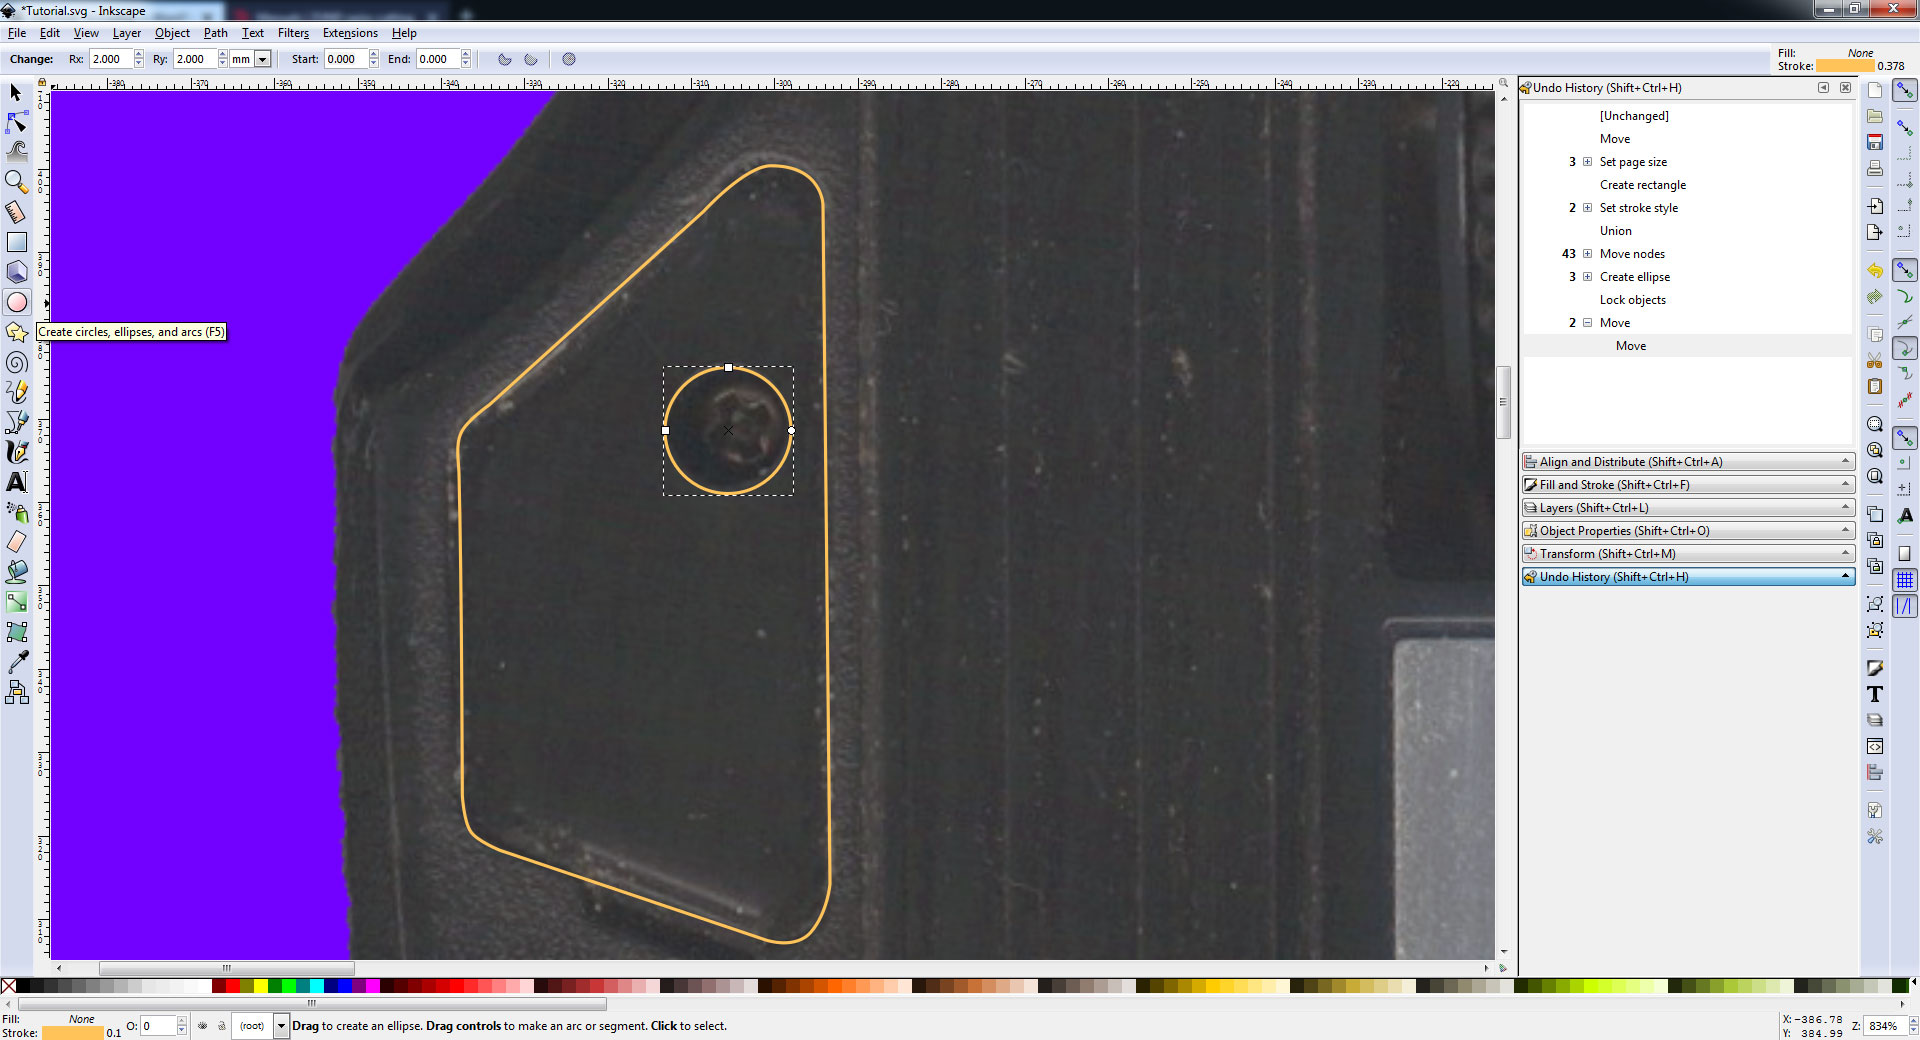
Finally, let's fix one of the reasons why we had to replace the mouse feet in the first place, which is that Corsair and Razer love putting the screw holes underneath the pads. Why? Probably because they want you to spend another $50 on a mouse would be a good reason why. So let's fix some engineering neglect. We know that the hole itself is about 4mm in diameter. So we make a circle by clicking on the "Create Circles, Ellipses, and Arcs " F5 icon ![]() . On the top of the screen, we can numerically enter the X Radius of 2mm and the y radius of 2mm. Then select and transform the icon
. On the top of the screen, we can numerically enter the X Radius of 2mm and the y radius of 2mm. Then select and transform the icon ![]() to move the circle over our hole. Congratulations! You've made your first mouse foot. Repeat these steps for the rest of your feet, and you should be doing awesome at that point.
to move the circle over our hole. Congratulations! You've made your first mouse foot. Repeat these steps for the rest of your feet, and you should be doing awesome at that point.
Object Administration.
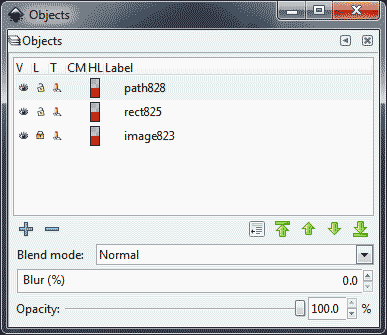
With only three objects in our file, it doesn't look like a whole lot is going on. But as you start making more feet and more pads, this object's panel will get out of hand quickly, making the file a complete mess for anyone else to modify it including yourself! So we need to take proper care of all of the vector objects we bring into Inkscape. Don't think Illustrator people are immune to this, and it's just an InkScape issue! They are the biggest offenders and are worse at administration because of how many objects are coming at them.
Renaming your objects.
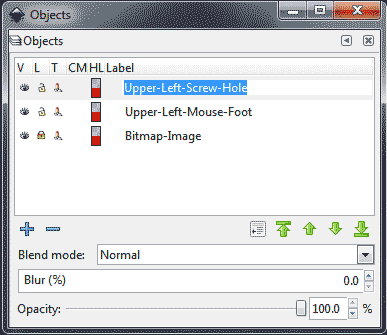
You can double-click on each of the names and they will highlight which object it is that you are renaming so that you may rename said objects appropriately.
Layering is your friend.
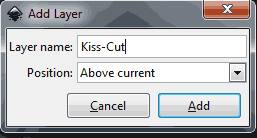
Layering helps from a grouping and also an industrial printing standpoint by telling the printer and the finisher what needs to be done on each layer to get the final piece. We won't be printing anything. But we will be finishing this either by hand with an Exacto or on a machine! Select the layer and add a layer or Shift+Ctrl+N to make a new layer.
Now that we have our layers in there, we need to assign the objects to the layers.
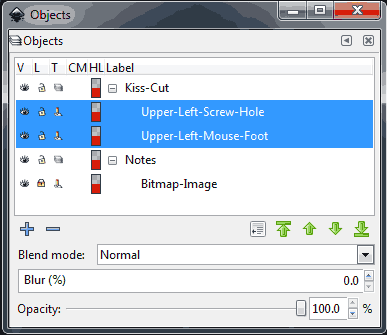
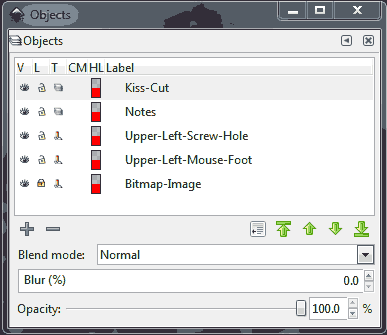
You can select multiple objects in a row by clicking and holding the shift key down, or select individual objects that you want to do selectively by clicking on the object plus hold the control key as well. As you can see, I have assigned the feet and hole to the Kiss-Cut Layer and the Bit-Map Image to the notes layer. Why did I do that? So that when it comes time to print this and/or send it to a CNC cutter robot, I could simply hide the notes layer, and it leaves just what needs to be cut. No more and no less. Also, labeling it "Kiss-Cut" is a method of telling the machine what to do as well during the import process. But if you're doing this by hand, you can label it whatever you like.
Completion and manual nesting.
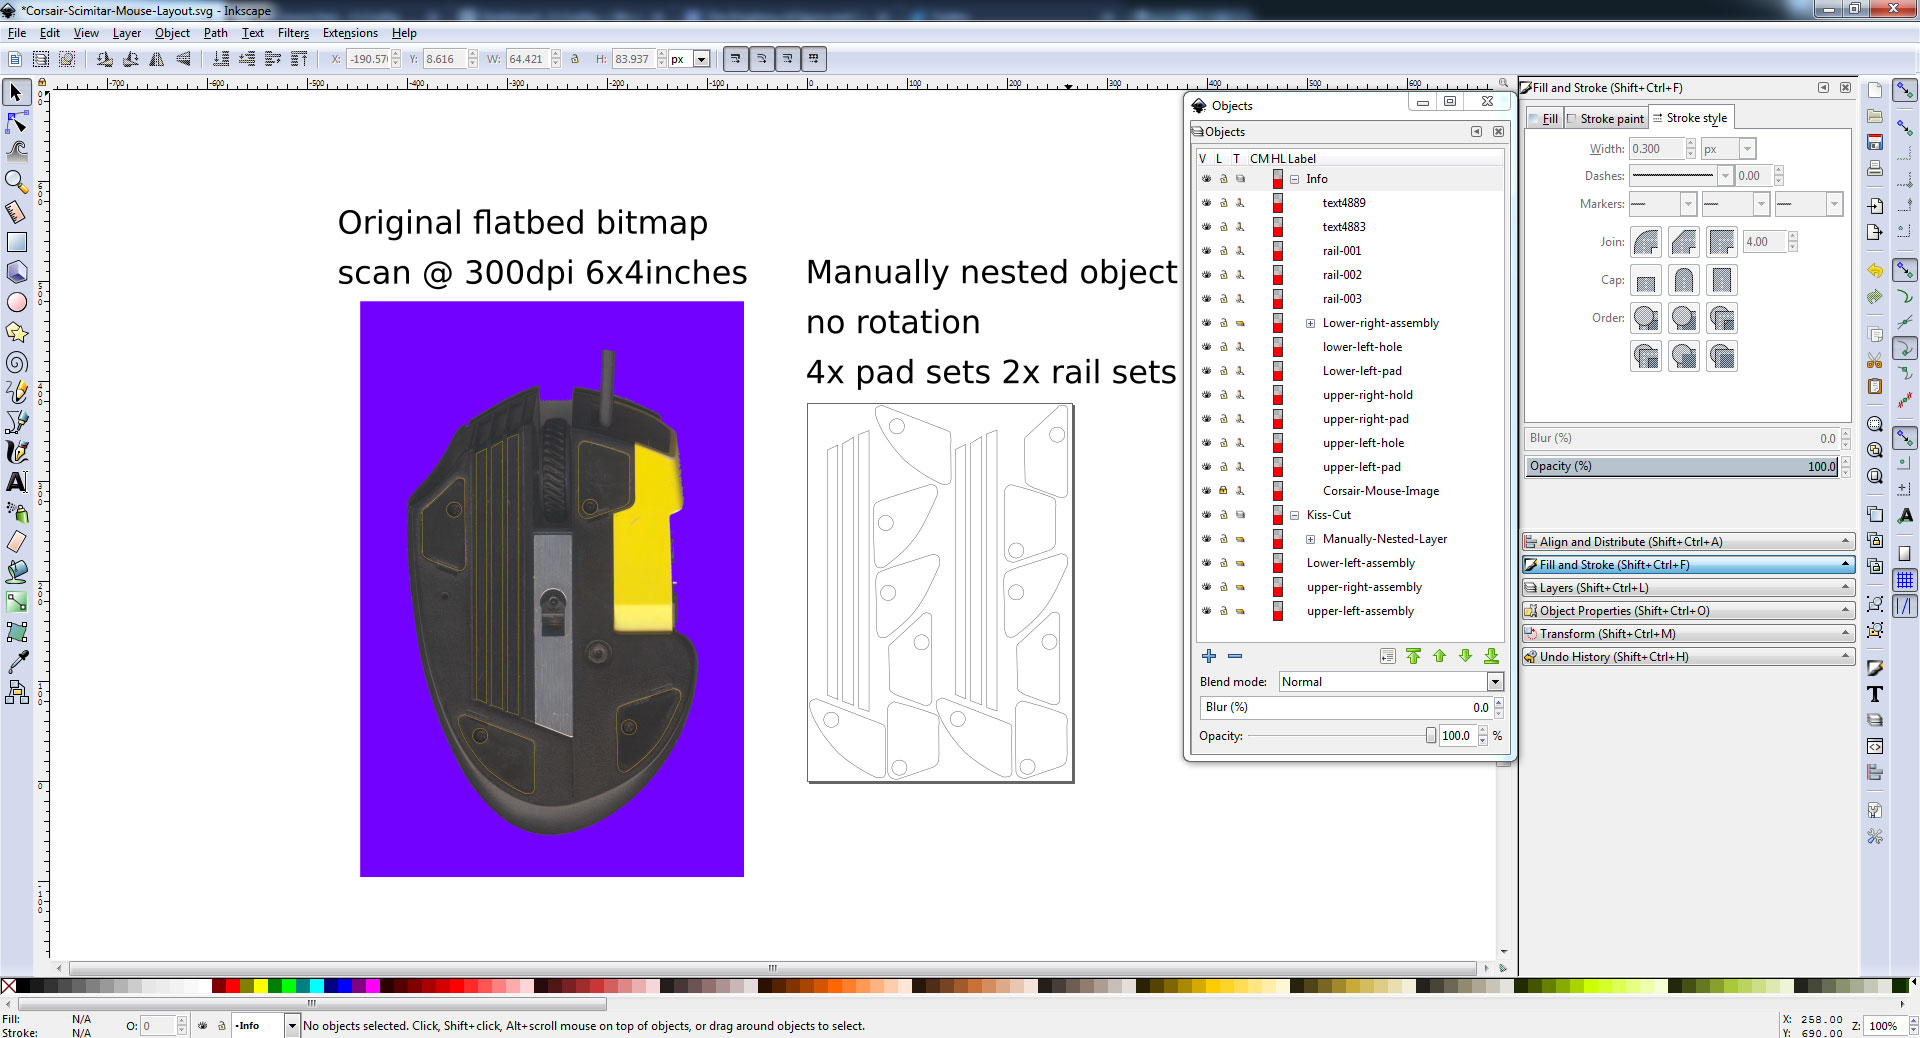
Repeat the steps above with the rest of your mice's feet until you are satisfied with your layout. Then, Click-Drag each of the feet and copy (Ctrl+C) and mouse over to where the layout will be printed and paste (Ctrl+V). Then, using the Select and Transform Icon, ![]() move each of your objects onto the layout so that you can use as much of your sheet as possible. This is called "Manual Nesting" because we are trying to get the most out of the material for what we made. We probably nested a little too close to the edges, but we'll see. Even if some of them get clipped, we will still have at least two perfect sets of mouse feet. Note: As an experiment, I made feet out of the grooves inside the mouse as well because they were the same elevation recessed into the mouse as the feet were. Not sure if it's a good or bad thing. But we'll find out the more we use the mouse!
move each of your objects onto the layout so that you can use as much of your sheet as possible. This is called "Manual Nesting" because we are trying to get the most out of the material for what we made. We probably nested a little too close to the edges, but we'll see. Even if some of them get clipped, we will still have at least two perfect sets of mouse feet. Note: As an experiment, I made feet out of the grooves inside the mouse as well because they were the same elevation recessed into the mouse as the feet were. Not sure if it's a good or bad thing. But we'll find out the more we use the mouse!
Cutting out our shapes.
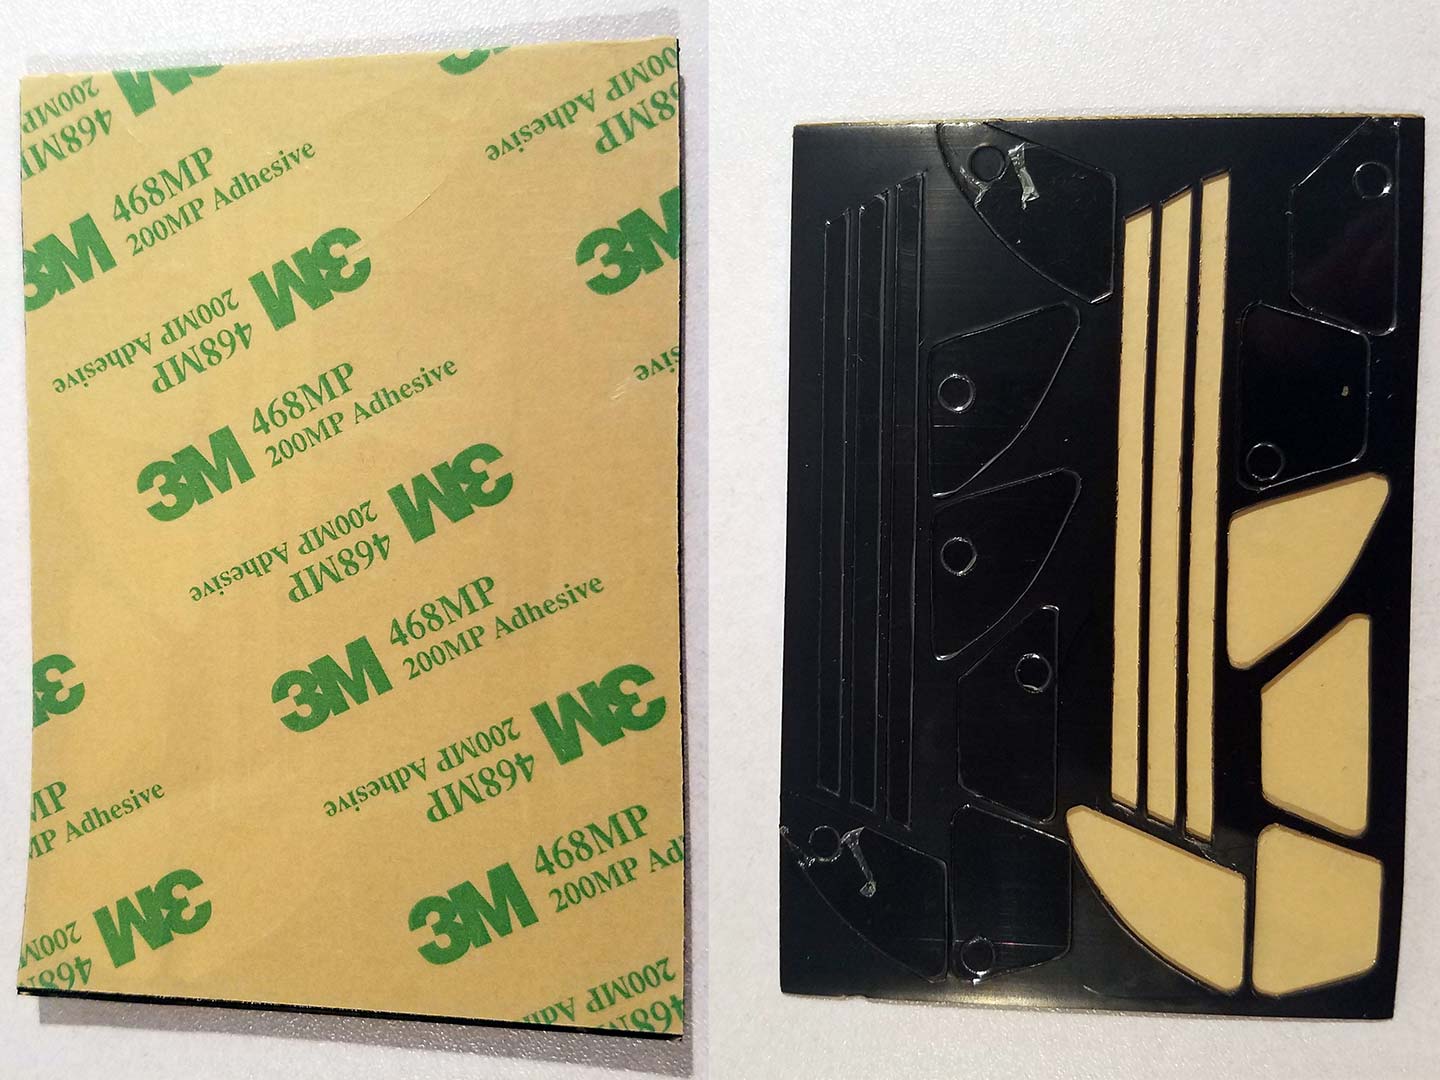
Probably 99.5 percent of my readers are cutting manually with a fine-pointed blade. This would be a good time to print out your nested page and cut it to size to fit your PTFE. I used a thermal printer; however, you can also use labels that you feed through a laser printer or inkjet, and you will accomplish the same task. Place the labels onto the black surface of the nylon. Do not worry about the label sticking to the nylon, as it's protected by a thin plastic coating to prevent any initial scratching during the shipping and manufacturing process. Make sure you have a new blade! Otherwise, it may be difficult to cut those 4mm holes properly.
WTF is kiss-cutting?!?
 The top part fell off a little. Despite this minor fuck-up it's still good!
"Kiss-Cutting" is a technique where, instead of using a straight blade, it would be classified as a "Through-Cut" or "Thru-Cut" depending on the artist. Kiss-cut has a spring inside its shaft that, as the blade presses down, it only exerts a few newtons of force as you move the blade around the substrate. It's super popular in the sticker-making industry! Also, if done correctly, the blade cuts clean through what you want but not through the backing behind it. In China, after they get done kiss-cutting something like this, they would weave the excess plastics off of the part and throw it into a 55-gallon drum so that it can be re-melted and used again for more sheets of PTFE.
The picture above shows that we removed a mouse set out after machining my part out. The backside shows the indentations, but the blade never punched through the other side, indicating a proper kiss-cut. For those interested in the technicalities of our blade. The Kiss-Cut tool required approximately 18 Newtons of force to punch through 0.6mm of PTFE without breaking the backing. This is considered excessively high but is required, unlike Vinyl stickers, which only need anywhere from 3-8 Newtons of force, depending on the thickness and substrate of the sticker.
The Results?
 You can click on the image to get nice and close. But we're super-pleased with the results. Some of the screw holes were a little bit off, and maybe we should've kicked it up to 600dpi. However, we managed to completely rebuild this Corsair Scimitar without the aid of Corsair. That's both awesome and sad at the same time. Now, about the overall performance and feel of the new pads. When we first put them on, they felt super-scratchy because the pads are perfectly cut, so the edges are square. On a hard-surface pad like what we have, it's no problem!
Fresh cut feet vs. cloth or foam mouse pads.
If you have a cloth or foam mouse pad, it's going to feel like total shit! This is why people on Amazon sometimes give aftermarket mouse feet a bad review. This happens because the edges are perfectly square and the edges are not beveled out from the manufacturer. We haven't dived into a way to smooth the pads. We was told that with fine-grit sanding paper, and if we wanted to go faster, a rotary tool with a fine sanding bit along the sides of the nylon.
Since we had a hard mouse mat, we played about 12 games of Quake 3 on it, and the scratching noise went away to almost silence after a while of playing. The edges that were causing the most noise were being buffed down by my hard mat rather quickly! Ultimately, feeling like a restored regular mouse. I consider the rebuild a success!
Downloads.
I don't believe you did this with InkScape! You Cheated! OMG!!
![]() Hey now! Slow down!. It so happens I have a download link right here for you. This is a 7-zip archive and it contains the following files:
Hey now! Slow down!. It so happens I have a download link right here for you. This is a 7-zip archive and it contains the following files:
- Corsair M65 Mouse Feet
- Corsair Scimitar Mouse Feet
- Razer Deathadder Mouse Feet
Each file comes with the original Inkscape SVG file. A PDF that is ready to print for those people not feeling up to loading InkScape onto their computers. Also, Adobe Illustrator CS6.AI file for all of the conformists out there. No shitty pop-under download sites, no getting rerouted through endless JavaScript. Just a pure and simple download! Enjoy! Print the files for yourself or start your own mouse feet-making business. I don't care! It would be nice to get a shout-out if you do make it into a business. But whatever man!
Final thoughts.
 Just as a quick note: We were able to make 3 sets of feet above on a single sheet of 70mm x 100mm. Then the profit is real.
Unfortunately, we have to go to such great lengths to keep our mice. That a simple after-market item like mouse feet is something a gamer would gladly pay $7-12 (USD) to keep their mouse sliding nice and smooth. Now the money is going off to some random manufacturer instead. We guess it's good for that company that is making the aftermarket pads and bad for Corsair. But in our opinion, we have to say:
Tough Shit! -S
To Corsair! You're not getting another $50-80(USD) for a mouse. This lesson on rebuilding is also a takeaway that we don't need expensive vector drawing software like Adobe Illustrator or AutoCAD to achieve professional results. That is the artist and as the producer. You just need time and effort. So if your mouse feet aren't being made by anyone. Buy some blanks and make them yourself!
To those who think, "Your mouse is too old."
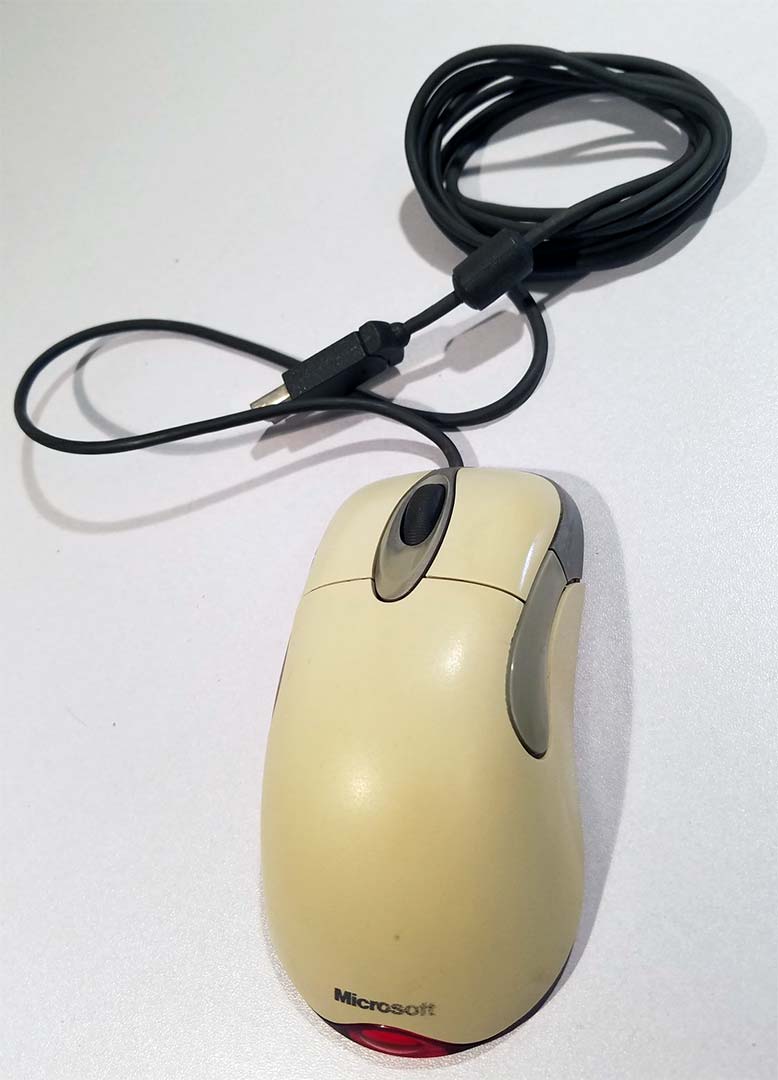
This was the gaming mouse that we purchased back in 1998 for $25(USD). To which we suppose that if you factor in inflation from then to now, it would be about $50(USD). The Microsoft IntelliMouse. We're not sure if it was version 3.0, as the sticker was long gone from it. Not that version numbers matter to Microsoft, just look at their operating systems! This mouse design was loved by the 1990s and 2000s gaming community so much that the Steel Series even had its version of this mouse. This Logitech rebranded mouse lasted for 16 years.
After 3 cable replacements and two sets of cherry switches. And about 8 times, opening this mouse over and over again to clean all of the dust and debris out of it. Even gluing the side buttons on after the 7th re-open to clean the mouse. It is still operational to this day, but now sits on our bench instead of on my desktop for gaming (Or... did it?!?). The silver paint on the side buttons is completely gone, and down to the grey ABS plastic. The shell yellowed from years upon years of UV bombardment on the plastics themselves. It's been thrown multiple times from fits of gamer rage. But this mouse still kept going!
The reason why I want to show this is the average life of a piece of electronic hardware. With Moore's law of technology, we should be at the stage where the lifespan of our mice and keyboards should be a life sentence of 25 years! With PS2/USB/Future USB adapters helping our input devices along their life journey. Instead, these gaming companies want you to believe that you need to refresh every year or else be left behind in the dust. It's simply not true! People are still winning competitions with this mouse to this day! The hardware does make a better gamer. You make a better gamer! It's up to you to keep your hardware alive as long as you can. Make it last 20-25+ years!
That's what server said......
+++END OF LINE
You are doing the lords work my friend. I was about to order $20 knock off mouse feet from aliexpress, but then found out that they sell the ptfe by the sheets. Thank you for the scimitar template.
Glad it helped you out!
and thank you for checking out this little blog.
take care now
- S
Black PTFE is not 100% pure PTFE
Pure PTFE is white!
I got a sheet of pure PTFE (with adhesive attached) from http://www.Bananas-gaming.com when I ordered a Paracord Mouse cable.
I found it easy to just stick the old feet onto the PTFE sheet and cut around them, it turned out perfect for me TT Esports mouse!
Do you have any templates for Logitech G102
Unfortunately I do not. But looking at pictures online the feet seem rather uniformed in design. There's a few ways of capturing the pattern if you do not want to use a copier method like what was described in this blog.
If you still have some feet left on this mouse, peel them off and trace them on paper.
If you have no feet left on the mouse. take a piece of paper with a pencil and press the lead all over the paper.. the pressure from your pencil should give you the contour of the shape you want to capture.
Once you have those contoured shapes you can get some blank mouse-pad material and exacto out a new set.
Good luck!
I just tried it today and the paper pencil method works! thanks a lot!