
Using GIMP for some sweet thermal printer action.
GIMP stands for GNU Image Manipulation Program. In this little tutorial we're going to show you that you don't need to purchase a stupidly expensive program in order to print labels on your thermal printer! That we are just going to use one free (yet incredibly powerful) photo editing program.
"Note: If you get a black screen but the audio is playing. Or you got a potato PC and it's studdering. We have fallback Links below."
Video tutorial fallback mirrors:
In case you have no-script enabled or for some reason cannot see the title video on this website. We have provided direct links for these videos. For more information about the standards we use on this site click here if you would like to know more.
AV1       - Link
MP4/.h264 - Link
OGV       - Link
Download the program.
Head over to the GIMP website and download the program. At the time of this blog entry, the version of GIMP is 2.8 and as such, some changes/revisions may happen in future versions that we are unable to control.
Prerequisites:
This tutorial is already going to assume that you have paid for a shipping label either via USPS, UPS, or PayPal, and that you have choosen to download the PDF file. If for some reason one of this shipping carriers do not provide you with a way of downloading the PDF and do not want to pay Adobe money you could try PDFCreator for windows.
Installation:
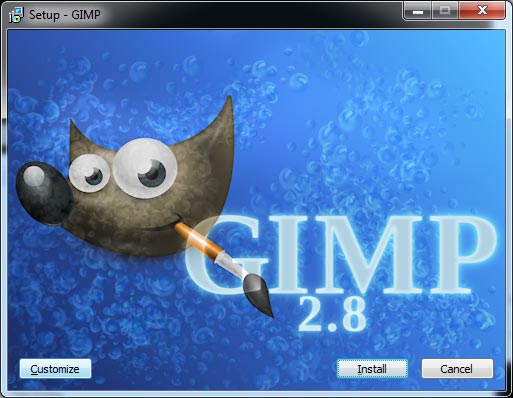 For some reason on my PC is takes a really long time to launch the installation file. Approximately 5 minutes to be exact. But it does eventually kick in allowing you to customize it. Click on the customize button to continue.
 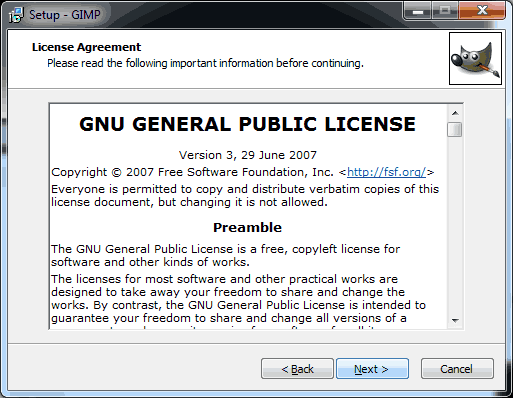 Click next to continue.
 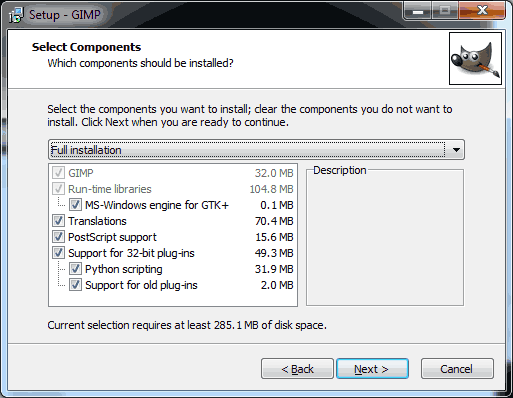 Make sure every checkbox is checked and click next to continue.
 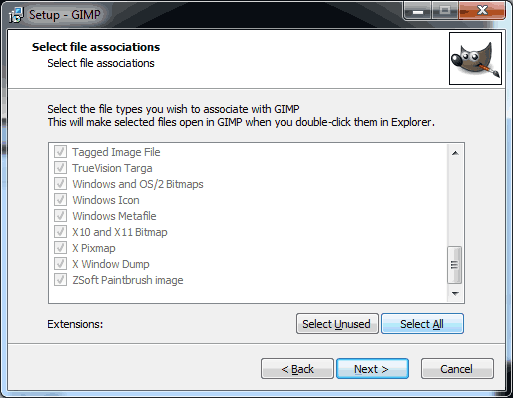 Since we've already installed all of the options ours are greyed out. Simply click on the "Select All" button and click next to continue. Adding all image formats ensures maximum compatibility with all formats out there. From here on out GIMP will begin installing your program onto your computer.
Before we launch GIMP lets go over to our printer properties.
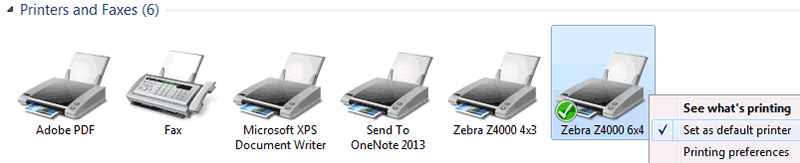 Unlike the previous Adobe Photoshop blog where the printer interface is all controlled with the program. GIMP relies more upon the preexisting settings of the print driver within your operating system. In order to ensure that GIMP will actually talk to your printer, we will now set our Zebra printer as the default by clicking on the start button and then devices and printers. Then right-clicking on the printer we want and set it for "Set as default printer". Finally, Right-click on our printer again and go into "Printing preferences."
 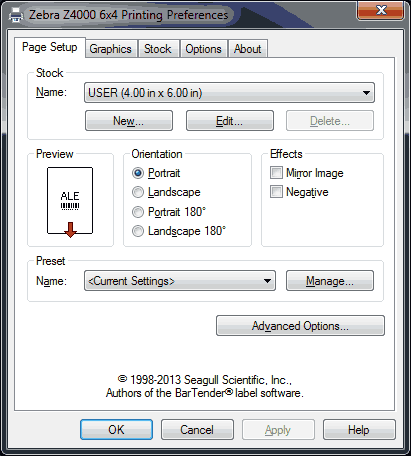 For reasons unknown GIMP wants to grab the very first setting of my printer which is "USER." Even though there's a preset for 4x6 shipping labels GIMP refuses to set to that paper type for me and for some reason will always go back to "USER".
 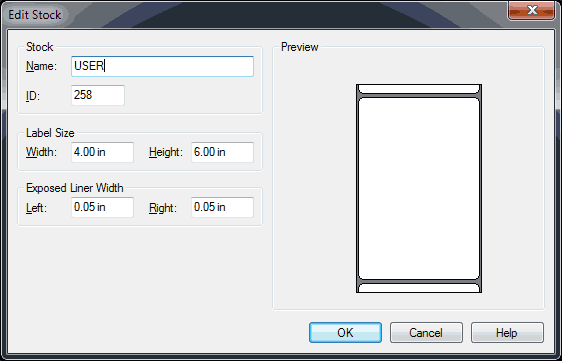 This is okay, because we can simply edit the USER label. And set the default USER profile to 4x6 labels and press OK to save. Just to note the printer setting is something you only have to do once during initial setup. afterwards you should be able to continue right along to GIMP.
Time to launch GIMP
 During initial setup it will take the longest to boot while it finds all of its plugins and scripts. After you have launched GIMP for the first time it will load a lot faster!
  Upon loading GIMP you will find windows popping up all over the place. This is incredibly messy and we don't like that. So by clicking on Windows and "Single Window Mode" we can make GIMP a little more like Photoshop by having all of the tools and widgets on a single window.
Importing the PDF file into GIMP.
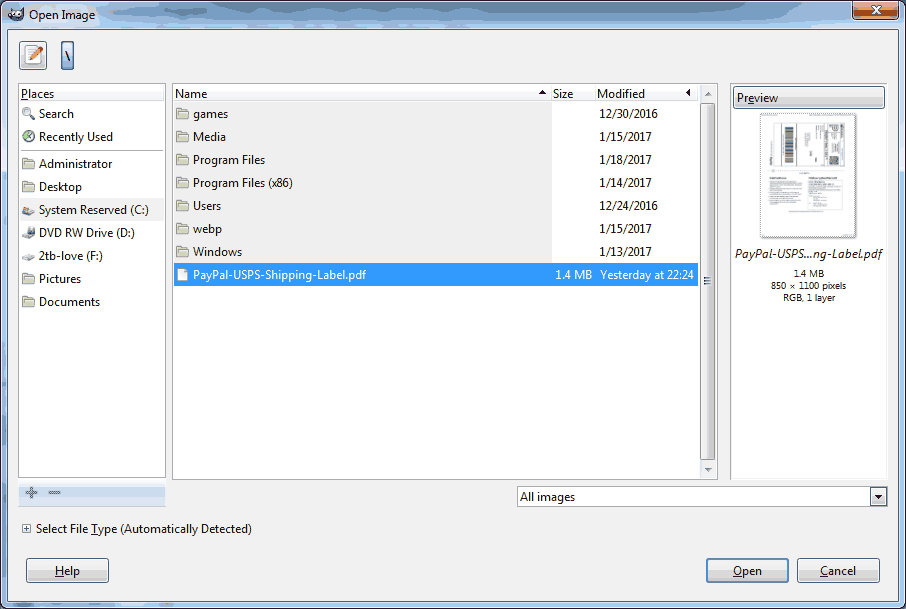 We are now going to do a file and then open. Then navigate to where our PDF shipping label is at and click on open.
 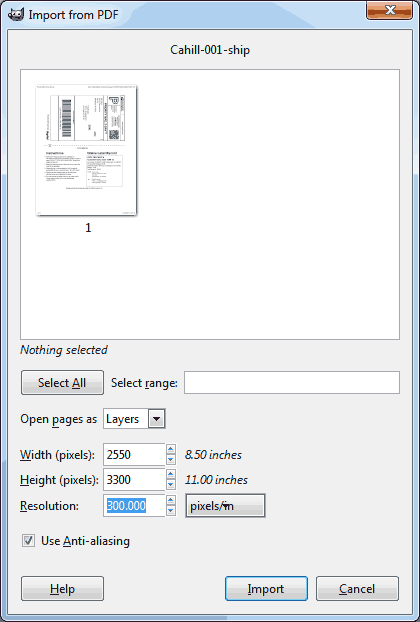 When we import the PDF into gimp it's important to set the resolution to the DPI of your thermal printer in order to get maximum clarity off on your label. In my case the Z4000 I have has a 300 dpi print-head installed. Once you have entered your resolution you will want to hit the import button to continue.
Selection and Rotation of image.
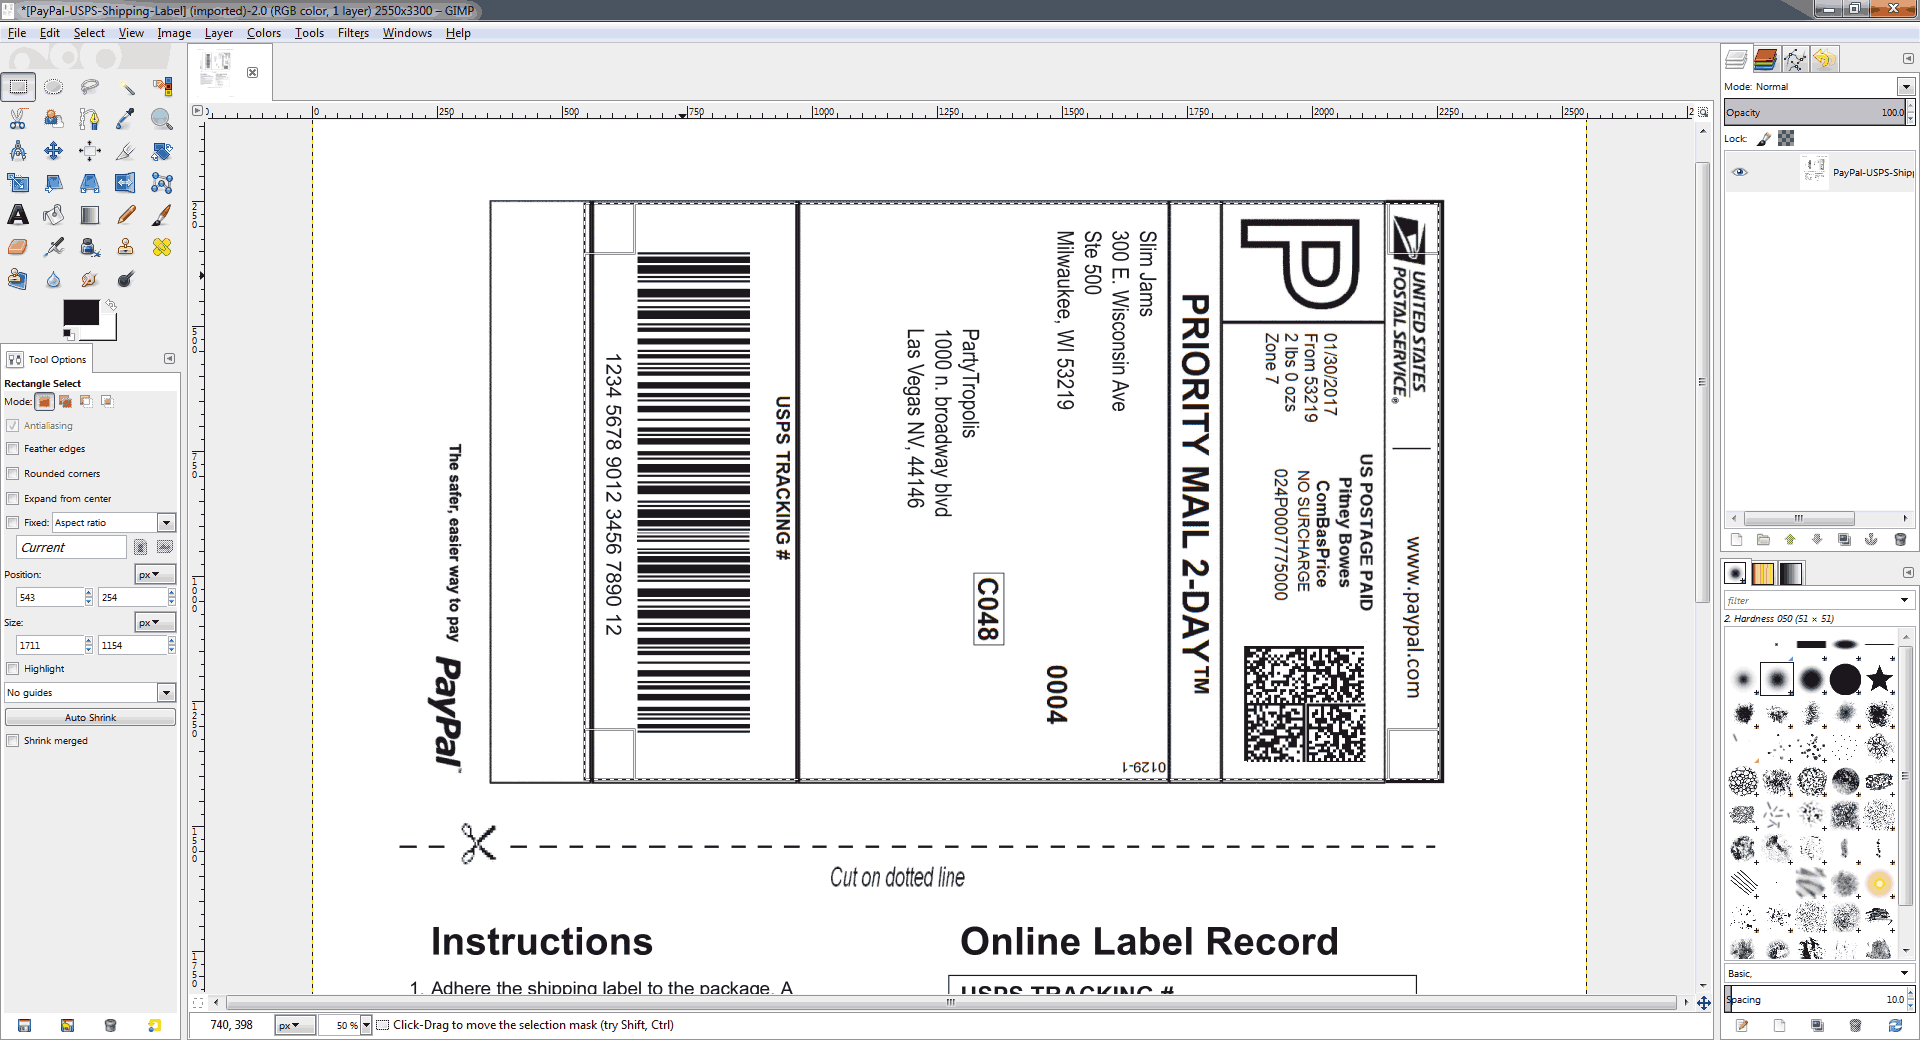 Once we got the paypal PDF imported into GIMP we want to filter out everything but the shipping label. Partially because it's not really needed. And partially because we need to prepare this to fit the dimensions of our label printer which is 4x6 inches. Using the Rectangle select tool
 ![]() We will click-drag across our label. If you need to zoom into the document you can hold down the control key while using your mouse wheel to zoom in and out.
We will click-drag across our label. If you need to zoom into the document you can hold down the control key while using your mouse wheel to zoom in and out. 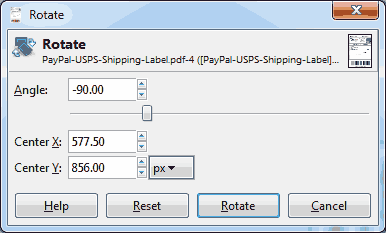 The next icon we will be clicking on is the rotate tool
 ![]() and upon clicking on the image the rotation window will pop-up. Change the angle to -90 degrees to rotate the label counter-clockwise. If for some reason the label does not auto-adjust after you enter in the value, use the small up-down arrows next to it to force a refresh. Click on the rotate button when we are done.
and upon clicking on the image the rotation window will pop-up. Change the angle to -90 degrees to rotate the label counter-clockwise. If for some reason the label does not auto-adjust after you enter in the value, use the small up-down arrows next to it to force a refresh. Click on the rotate button when we are done.
Crop canvas.
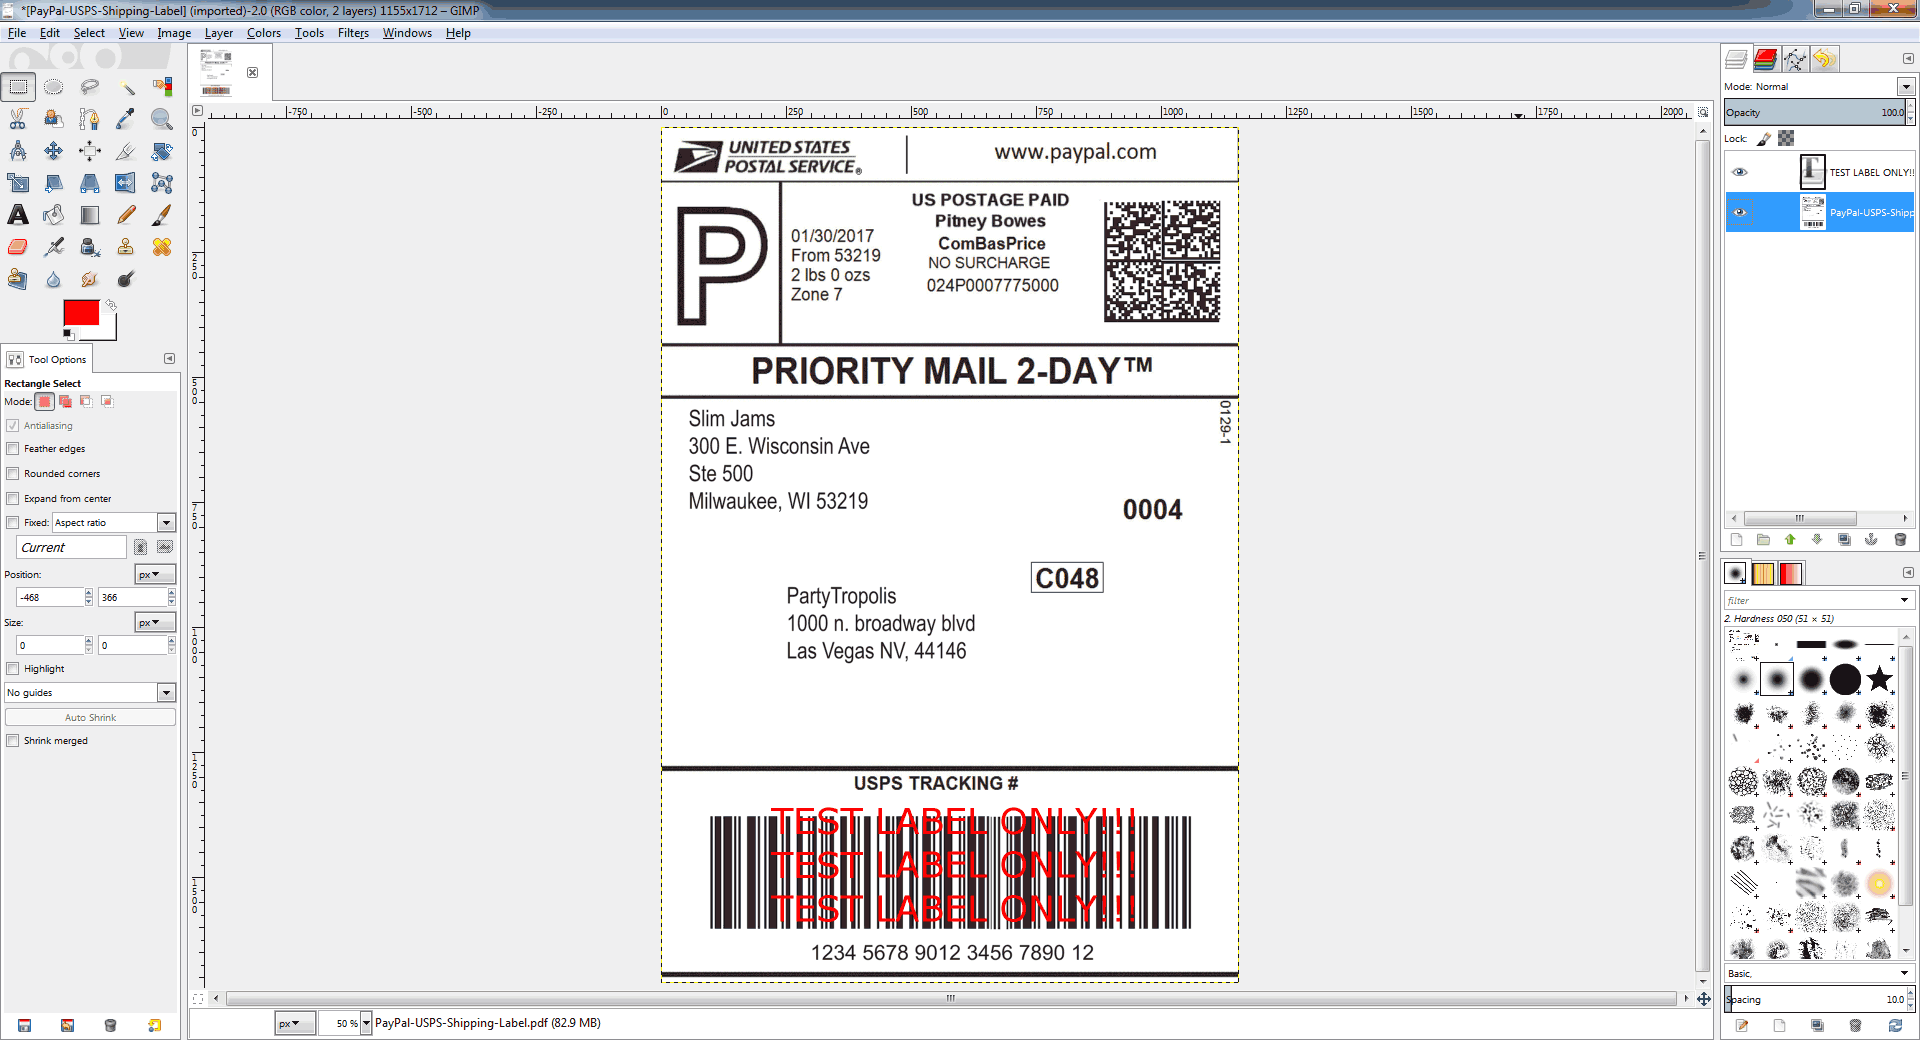
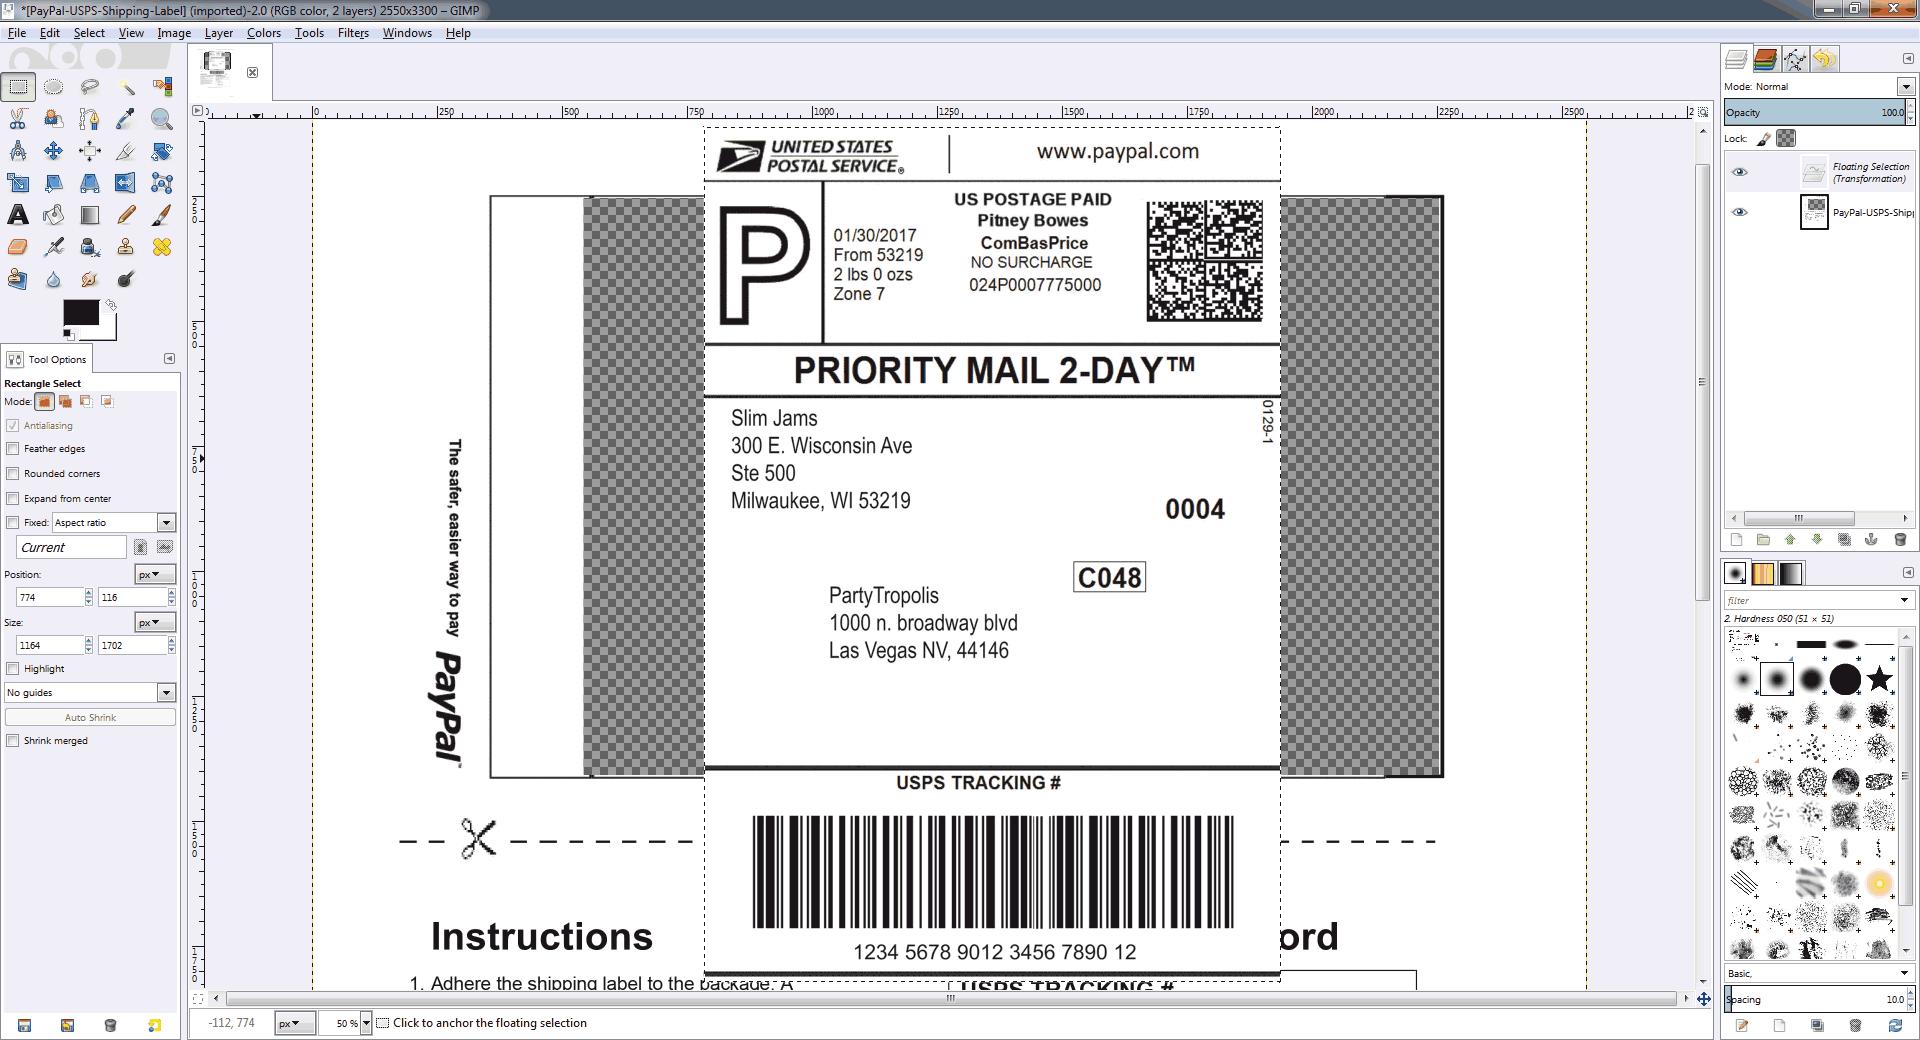 Great, we got the label rotated correctly but we need to get rid of all of the crap behind it. In photoshop we copy/past it to a new window. But GIMP has a nice feature which cuts out a a few steps.
 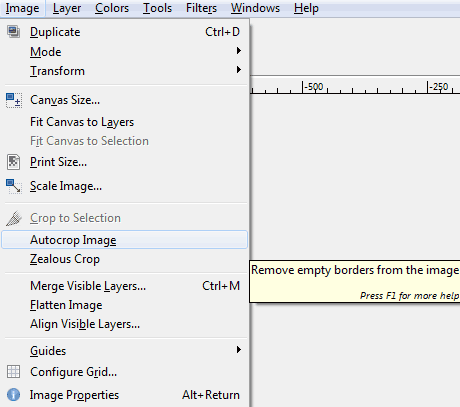 Since the label is already selected from us rotating the image. we can then click on the image menu and go down to "Autocrop Image" to get rid of all of that background noise.
 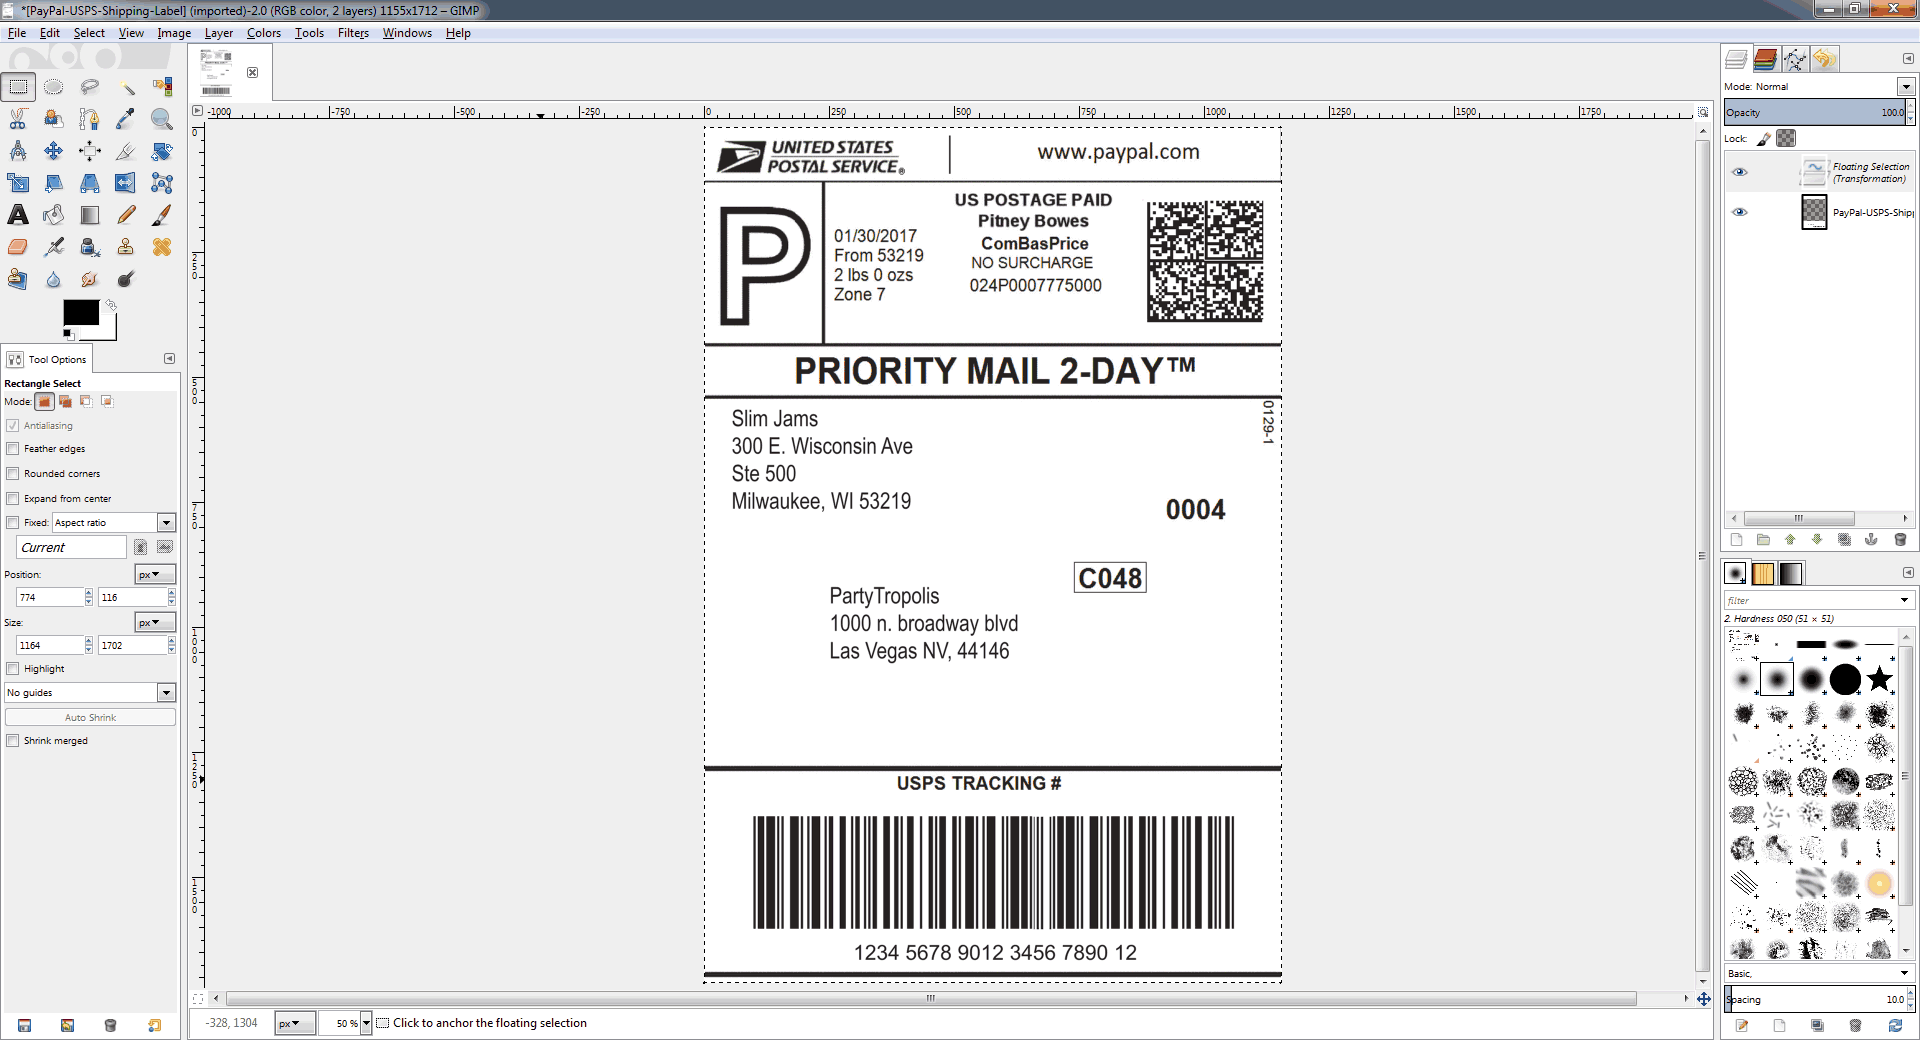 We now have something that you see above which is our label that is almost ready to be printed.
 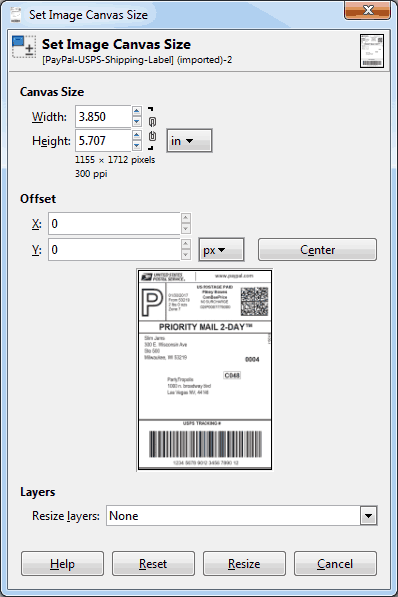 You can verify the size of your label by going under image and canvas size and then using the drop-down box to select inches. In this example the width is 3.850 and the height is 5.707 which is perfect. It can be a little under the labels size. but if it goes over then the label itself could end up getting cut off. Click cancel to exit out of this window.
Importance of indexed color within GIMP.
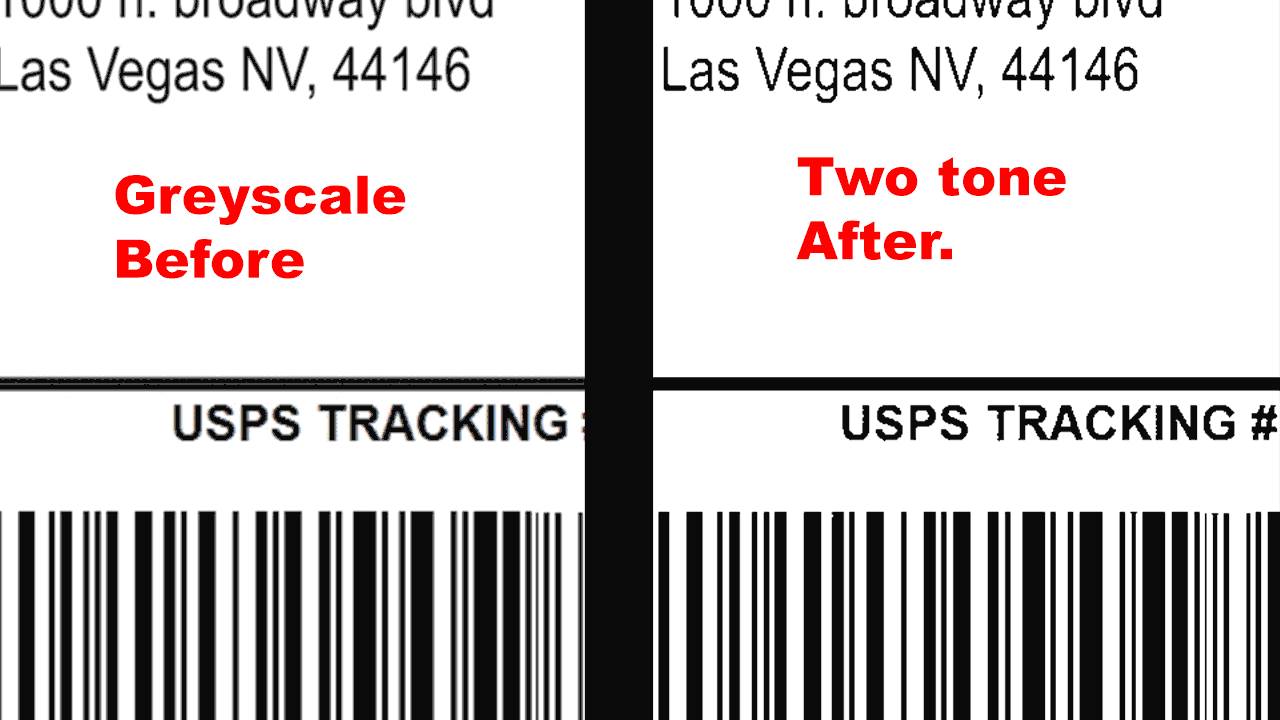 The last modification we want to do is we want to simplify the label. If we decided to print this as-is then we would be sending a lot of color data to a thermal printer which will dither the image. Dithered images are bad because it will make the bar-code appear blurry and make it hard for the parcel or carrier to scan.
 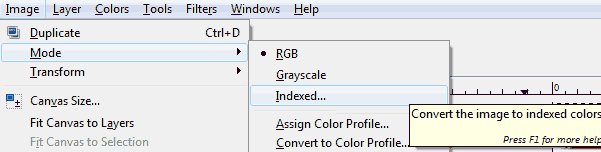 Click on image, mode, and index.
 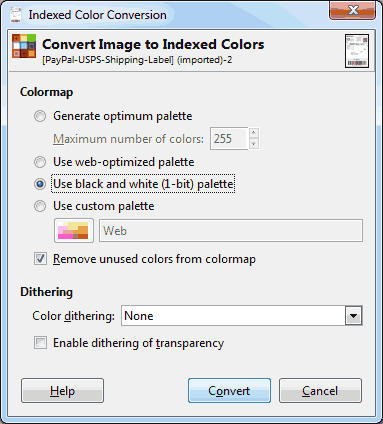 Select the radio button for "Use black and white (1-bit) palette" and leave color dithering to None. Press the Convert Button to continue.
Printing with GIMP.
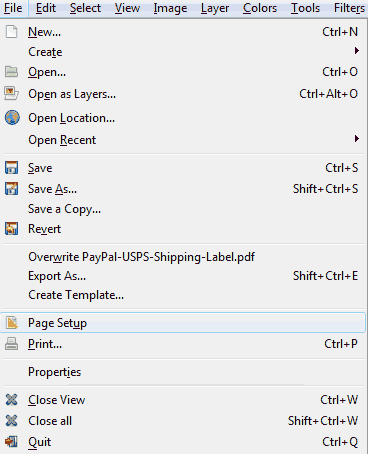 Now that we have our label all setup and ready to go we just need to check two things. the first is under file and page setup.
 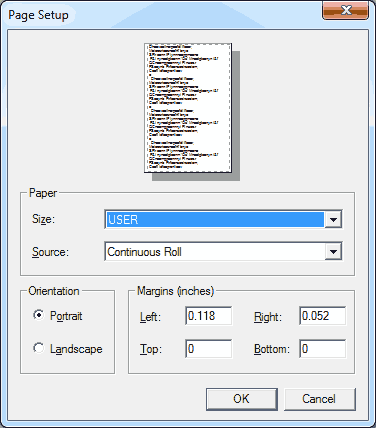 As discussed before GIMPs ability for printer manipulation is very limited. And as a result it will choose the first size it sees. In the case of my Zebra Z4000 it goes right for the "USER" setting which we setup to 4x6 inches. For some reason if you select any of the pre-defined sizes it refuses to go to them. This is annoying but it's better then being stuck on a size that your Zebra printer cannot understand!
Setting the image margins within GIMP.
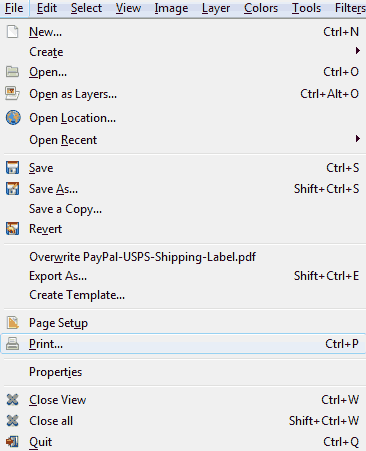 Next we will click on File and Print.
  If this were a normal printer we would simply select the printer that we want and hit the print button. But if you do that you would be in for a rude awakening as the image would be off by almost an inch. This is due to a margin value underneath the "Image Settings" tab.
 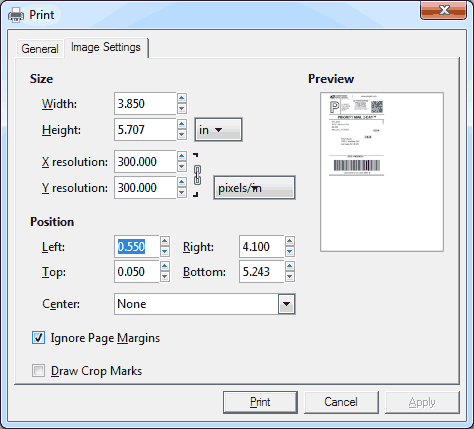 By default you will find your position off by an inch or more! This is way out of line and this is why your zebra printer give you such a skewed image. Your values may be different depending on what model of Zebra, Monarch, SATO, Epson, Okidata, Intermec, or frankly any thermal printer! For my Zebra Z4000 I found that setting the left margin to 0.550 gave it enough space to make the label print centered. and giving just a little bit of a top margin of 0.050 was enough to keep the edge of the label away from the top. Once you have set your margins you may hit print and let the magic of your shipping label come from GIMP to your label printer! It should also be noted that these instructions about margins also work if you have a laser printer and you want to print out greeting cards or odd-paper sized cards.
Final Thoughts.
 This may be totally overkill to do something as simple of a task as printing a label. If you are in a business shipping out hundreds of packages a day then we would certainly not recommend doing it this way. Instead we advise you to work with your carrier in getting a business version of their shipping software and compatible thermal printer. However, as people who occasionally use Ebay to ship out packages this technique is a lot nicer and cheaper then firing up the laser printer in order to print a shipping label. It also allows for more flexibility with getting a free label printer as described in a previous Blog. As always, if it helps you out great. If not, then we hope you find the answers you are looking for out there on the net. +++ END OF LINE.