
OpenSim + Raspian hard-float = What was once broken now works!
A while ago we decided to go on a journey with OpenSim. For those who are new to metaverse software; OpenSim (Or OpenSimulator) is a program that emulates the back-end resources of a commercial metaverse known as "Second Life". The client or front-end that connects to OpenSim are third-party clients such as firestorm and Singularity. We liked working offline from SecondLife and keeping a backup of my stuff. What better way to do this than to keep it on something low-powered like a Raspberry Pi? Read on to learn more.
"Note: If you get a black screen but the audio is playing. Or you got a potato PC and it's studdering. We have fallback Links below."

Video tutorial fallback mirrors:
In case you have no-script enabled or for some reason cannot see the title video on this website. We have provided direct links for these videos. For more information about the standards we use on this site click here if you would like to know more.
AV1       - Link
MP4/.h264 - Link
OGV       - Link
Introduction.
In my last blog about the Raspberry Pi we initially thought we fired out the pi due to overclocking but later on, found it was just power issues (USB cables too thin to carry the current). Instead of doing high-end gaming, we're going to use it for headless applications like the web and OpenSim. Because I do not know the learning curve of the average Pi or OpenSim User; It should be noted that this guide is going to be a bit long. This tutorial covers installing OpenSim as well as compiling all of the sources needed to get OpenSim functioning properly. We broke down compiling this way so that these instructions can work on any ARM processor and not just the Raspberry Pi.
Disclaimers:
As always, please refer to our FAQ for general questions. We are not responsible for any damages caused by this tutorial either physically, mentally, or financially. This will require a considerable level of time in a Linux shell. If you are not comfortable with that then you may stop right now. I should also note to please PLEASE PLEASE DO NOT bother the OpenSim dev team by submitting a mantis bug report about OpenSim and the Raspberry Pi. The dev team is primarily focused on the X86 platform. They simply lack the manpower to chase bugs on other platforms. Everything in this tutorial is bleeding edge beta and subject to change.
Let's begin!.
When you look at the server specs for OpenSim and what they suggest would be a good server for OpenSim. You would be quick to notice that your average spec for an island sim is about 2Ghz of CPU power and 1GB of ram! We later found out that the programming language "MONO" which OpenSim is based around really likes multi-core processors! Suddenly a Raspberry Pi 2 becomes a very workable unit. To those who are still rocking the single-core Raspberry Pi A or B+, you'll find that running OpenSim works. But will be very slow as physics/scripting/assets are all being bounced off of just that one armv6 700Mhz processor.
My Raspberry Pi operating in semi-headless mode. 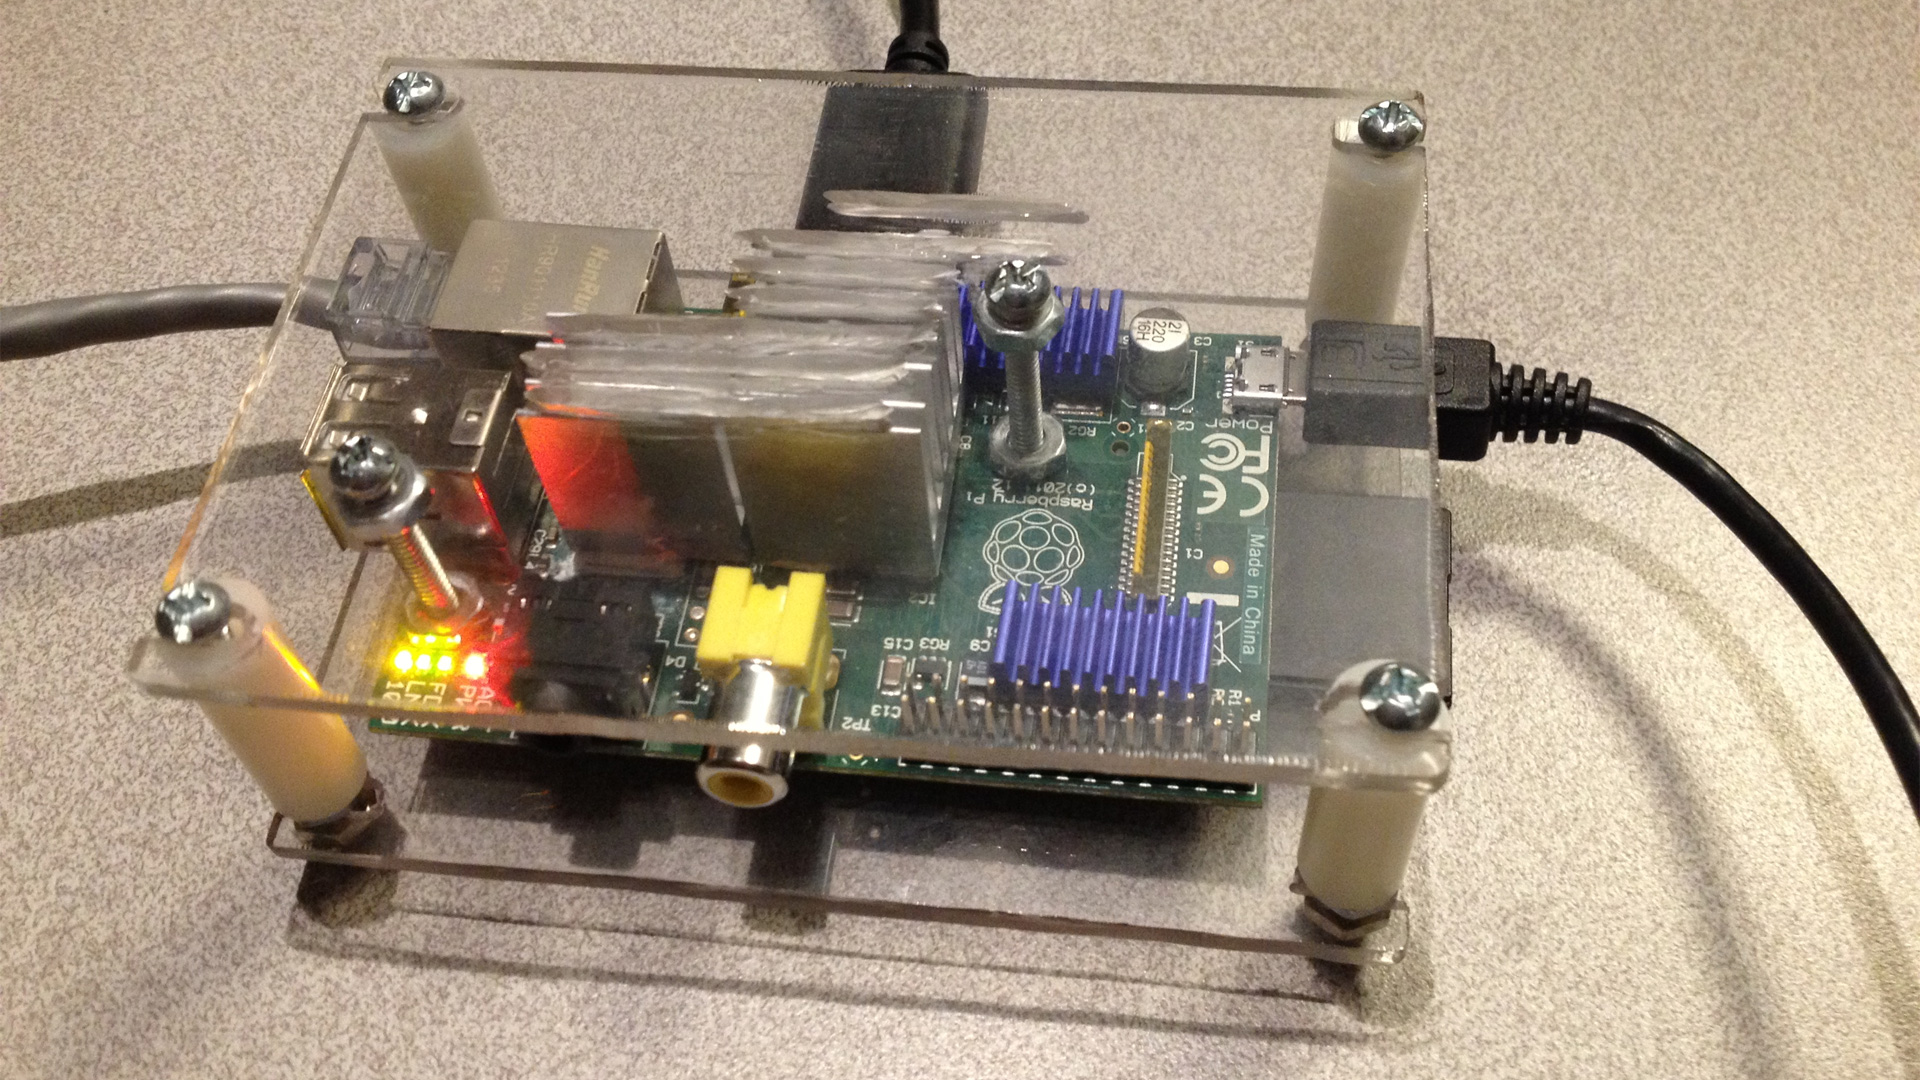
When I first tried OpenSim a long time ago. I ran into roadblock after roadblock. Eventually finding out that you cannot install MONO onto a Raspberry Pi that is running hard-float from the Debian libraries. You either had to run Wheezy or Pidora in soft-float mode. In soft-float, everything feels like you're running on a 300Mhz Pentium II desktop! It's painfully slow.
Until now!
But First! Let's do the basics and update your Pi!
sudo apt-get update
sudo apt-get upgrade sudo ldconfig sudo apt-get install libgdiplus
Use MySQL instead of OpenSim SQL-Lite!
After a bit of usage on my Pi, We noticed a lot of files not found errors flying on my console just by simply camera panning in and out on my phoenix/firestorm viewer. It seemed like the hyper-experimental Mono compile is simply having issues looking up null table references. It didn't affect moving around the sim. Once again this was an annoyance. So understanding that the build of Mono I have is experimental. The goal is to take as much as you can out of the hands of the Mono development language so that OpenSim runs smoothly and is stable.
Installing MySQL.
sudo apt-get install mysql-server
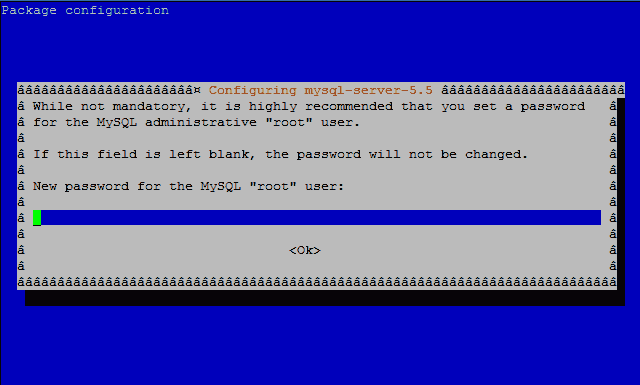 It's going to queue you for the root password for MySQL. This is really important to write this down! We will need it later in the chapter! We're going to create the initial OpenSim database for it to use and generate a userid "opensimuser" within MySQL with the password "opensimpassword". I pray you to wwwwwwwwwwwwwwwwwwwuse something slightly more original than this user / pass.
$ mysql -u root -p
Enter password:
mysql> create database opensim;

Query OK, 1 row affected (0.00 sec)

mysql> use opensim;
Database changed
mysql> create user 'opensimuser'@'localhost' identified by 'opensimpassword';
Query OK, 0 rows affected (0.01 sec)

mysql> grant all on opensim.* to 'opensimuser'@'localhost';
Query OK, 0 rows affected (0.01 sec)

mysql> quit
Mono Language installation onto your Pi.
Pass the following commands to merge the mono-project repositories into your Pi:
 sudo apt-key adv --keyserver hkp://keyserver.ubuntu.com:80 --recv-keys 3FA7E0328081BFF6A14DA29AA6A19B38D3D831EF
echo "deb http://download.mono-project.com/repo/debian wheezy main" | sudo tee /etc/apt/sources.list.d/mono-xamarin.list
sudo apt-get update
sudo apt-get upgrade
If you are getting the following errors stating that Mono 4.0 packages are being "held back" if you are using an older Linux kernel like Debian wheezy. Then WITH EXTREME CAUTION pass the following command. If no errors happen after passing the apt-get upgrade you don't need to do a full dist-upgrade then.
sudo apt-get dist-upgrade
Pinning/Downloading to a more stable version of Mono for OpenSim
Update 8/19/2016 Since mono development is rather fluid in its upgrades there will be times when downgrading to a more stable version of mono is preferred for OpenSim. At the time of this update, Mono version 4.2.2.11 is released and although it takes less memory to run OpenSim it increases its idle processor to %50 and crashes every few hours. This is not cool. If you have any previous and/or newer versions of MONO then we are going to blow up any previous versions of Mono that exist on our pi.
sudo apt-get remove mono-complete
sudo apt-get purge mono-complete
sudo apt-get autoremove
Next, we will take an earlier snapshot from the repo tree index. We prefer version 4.0.5.1 as it was the version that was released at the time of this blog but you may try others.
sudo echo "deb https://download.mono-project.com/repo/debian/dists/wheezy/snapshots/4.0.5.1/. main" | sudo tee /etc/apt/sources.list.d/mono-xamarin.list
Finally, install mono onto this unit.
sudo apt-get update
sudo apt-get mono-complet
Note: If you are receiving an error as follows:
W: Conflicting distribution: http://download.mono-project.com wheezy/snapshots/4.2.3 Release (expected wheezy/snapshots but got wheezy)
You can try the following:
sudo echo "deb http://download.mono-project.com/repo/debian wheezy/snapshots/4.0.5.1 main" | sudo tee /etc/apt/sources.list.d/mono-xamarin.list
or
sudo echo "deb http://download.mono-project.com/repo/debian wheezy/snapshots 4.0.5.1/main" | sudo tee /etc/apt/sources.list.d/mono-xamarin.list
It really depends on the flavor of Linux that is running on your Pi. To confirm you have version 4.x or better, type in the following.
mono --version
and it should respond with something like this.
Mono JIT compiler version 4.0.4 (Stable 4.0.4.1/5ab4c0d Tue Aug 25 23:45:14 UTC 2015)
Copyright (C) 2002-2014 Novell, Inc, Xamarin Inc and Contributors. www.mono-project.com
        TLS:           __thread
        SIGSEGV:       normal
        Notifications: epoll
        Architecture:  armel,vfp+hard
        Disabled:      none
        Misc:          softdebug
        LLVM:          supported, not enabled.
        GC:            sgen
Congratulations! The mono language is now up to date and sets up properly.
Configuring OpenSim.
Continuing on we do the basics such as setup the OpenSim.ini to operate in standalone mode by default. And then we have to modify the StandAlone.ini file to switch database control over to MySQL
wget http://opensimulator.org/dist/opensim-0.7.6.tar.gz
sudo tar zxvf ./opensim-0.7.6.tar.gz
cd opensim-0.7.6
cd bin
cp OpenSim.ini.example OpenSim.ini
nano OpenSim.ini
Now go to cursor position 1064 where it says the following:
; Include-Architecture = "config-include/Standalone.ini"
Change to:
Include-Architecture = "config-include/Standalone.ini"
Ctrl-X and 'y' to save changes then:
cd config-include
nano StandaloneCommon.ini
Then Change the following lines so it shows like this.
    ; SQLite
    ;Include-Storage = "config-include/storage/SQLiteStandalone.ini";

    ; MySql
    ; Uncomment these lines if you want to use mysql storage
    ; Change the connection string to your db details
    StorageProvider = "OpenSim.Data.MySQL.dll"
    ConnectionString = "Data Source=localhost;Database=opensim;User ID=opensimuser;Password=opensimpassword;Old Guids=true;"
Effectively, you are turning off the built-in SQLite that is handled poorly by the experimental MONO package. By commenting out SQLlite and un-commenting the Storage Provider and Connection String for MySQL. We can then fill out your database name, username, and password. Save this file Ctrl-X and "y"
mono OpenSim.exe
Now it's important that when executing mono files it is case-sensitive. In this case, "OpenSim.exe" is the file we need to launch.
Choose your physics engine:
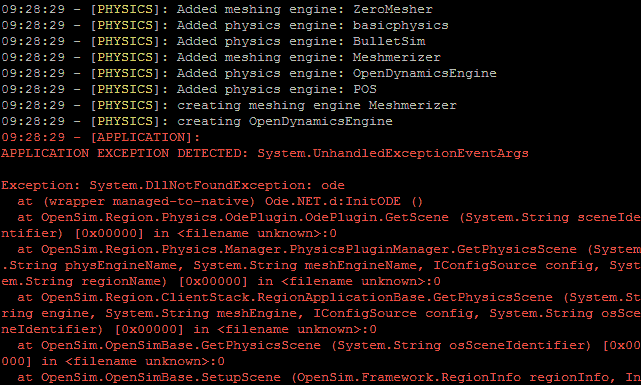 The stock version of OpenSim for Mono is expecting an X86 physics library. This will of course crash your raspberry pi as we are running upon an ARM-based architecture. Now if you want to simply test if OpenSim even loads on your Raspberry Pi you may edit the following line 250 in OpenSim.ini:
physics = basicphysics
Un-comment basic physics and add a semi-colon to comment out any of the others and save. Basic physics only pays attention to the land itself and your avatar will clip through all objects. It is however handy to know this in the event you are troubleshooting if it is a physics library that is crashing OpenSim or if there is something major going on.
 Click here to learn how to install BulletXNA onto your Pi (This is currently the default physics engine for OpenSim Regions.)
 If you want your Pi to run physics natively which means more faster collisions. You may want to choose the legacy ubODE/ODE physics. Click here to learn how to install it onto your Pi.
The LibOpenJpeg module:
This library is responsible for generating map tiles of your Region so that users can see you on the world map. It may be responsible for other functions within the OpenSim engine.
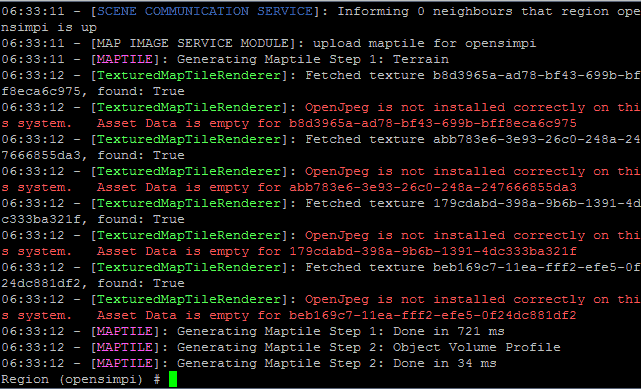 OpenSim System.DllNotFoundException libopenjpeg errors!
After you've installed and configured your estate and parcel for the first time, you'll see these annoying errors that pop up 3 times every few minutes talking about how it cannot take a snapshot of your terrain because you missing libopenjpeg now! Following the Troubleshooting section it says to do the following:
git clone git://github.com/openmetaversefoundation/libopenmetaverse.git libopenmetaverse
cd ./libopenmetaverse/openjpeg-dotnet/
I should note that the addresses on my site and the address in OpenSim troubleshooting are different. OpenMetaverse Foundation changed its file structure without telling anyone! So I updated my link. Before we continue any further! We're going to pass the command:
nano Makefile
The reason why is we have to strip the -m32 flag out or else when we pass the "Make" command it will get pissed off because we're not on an X86 processor. go to line 37 where it says the following
ARCHFLAGS=-m32
and change it to:
ARCHFLAGS=
save the file and continue to compile the library
make
cp -p libopenjpeg-dotnet-2-1.5.0-dotnet-1-i686.so /opensim/bin/lib32/libopenjpeg.so
Finally, we have to tell OpenSim where our new library is which means editing the OpenMetaverse.dll.config in the OpenSim-0.7.6/bin with nano so "nano OpenMetaverse.dll.config" to get there. This is the original file.
<configuration>
<dllmap os="osx" dll="openjpeg-dotnet.dll" target="lib64/libopenjpeg-dotnet-2.1.3.0-dotnet-1.dylib" />
<dllmap os="!windows,osx" cpu="x86-64,ia64" dll="openjpeg-dotnet.dll" target="lib32/libopenjpeg-dotnet-2.1.3.0-dotnet-1-x86_64" />
<dllmap os="!windows,osx" cpu="x86-64,ia64" dll="openjpeg-dotnet-x86_64.dll" target="lib64/libopenjpeg-dotnet-2.1.3.0-dotnet-1-x86_64" />
<dllmap os="!windows,osx" cpu="x86" dll="openjpeg-dotnet.dll" target="lib32/libopenjpeg-dotnet-2.1.3.0-dotnet-1-i686" />
<dllmap os="!windows,osx" cpu="x86" dll="openjpeg-dotnet-x86_64.dll" target="lib64/libopenjpeg-dotnet-2.1.3.0-dotnet-1-i686" />
</configuration>
And this is what mine is:
<configuration>
<dllmap dll="openjpeg-dotnet.dll" target="lib32/libopenjpeg.so" />
</configuration>
Once again, stripping out the OS detection flag and pointing it to the right folder. save your file and restart OpenSim.exe
Finishing touches on OpenSim configuration files
from the /opensim/installation/directory/bin/ folder wherever you installed it to. We are going to edit "nano /config-include/StandaloneCommon.ini" So that when we configure our viewer it will auto-populate with the correct login information and not give us any crap in terms of connection issues to it.
[LoginService]
    WelcomeMessage = "Welcome, Avatar!"
    ;; If you have Gatekeeper set under [Hypergrid], no need to set it here, le$
    ; GatekeeperURI = "http://127.0.0.1:9000"

    SRV_HomeURI = "http://opensimpi:9000"
    SRV_InventoryServerURI = "http://opensimpi:9000"
    SRV_AssetServerURI = "http://opensimpi:9000"
    SRV_ProfileServerURI = "http://opensimpi:9000"
    SRV_FriendsServerURI = "http://opensimpi:9000"
    SRV_IMServerURI = "http://opensimpi:9000"

    ;; For Viewer 2
    MapTileURL = "http://opensimpi:9000/"
You're going to want to find the [LoginService] in StandaloneCommon.ini around line 110. We are going to change it from localhost to whatever the logical DNS that your Raspberry Pi is. If you have a Domain Name for your Pi web server that automatically resolves the IP to you that is even better. In this example I am using the UNIX hostname 'opensimpi' that I configured in the advanced options in "sudo raspi-config" This will give the SecondLife client all of the information it needs when connecting to your Pi.
[GridInfoService]
    ; These settings are used to return information on a get_grid_info call.
    ; Client launcher scripts and third-party clients make use of this to
    ; auto-configure the client and to provide a nice user experience. If you
    ; want to facilitate that, you should configure the settings here according
    ; to your grid or standalone setup.
    ;
    ; See http://opensimulator.org/wiki/GridInfo

    ; login uri: for grid this is the login server URI
    login = http://opensimpi:9000/

    ; long grid name: the long name of your grid
    gridname = "Raspberry Pi OpenSim Default Load"

    ; short grid name: the short name of your grid
    gridnick = "opensimpi"
Next, go to [GridInfoService] and do the same down here which is around line 190 on my configuration. Give it a unique grid name and gridnick so that you can easily see it when you configure your SecondLife Client.
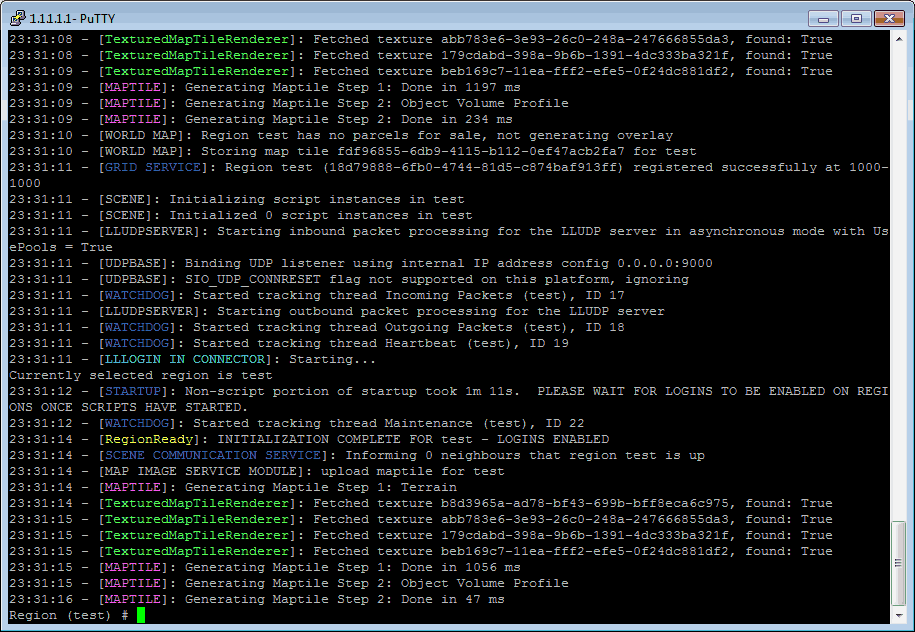
Configuration of OpenSim Complete launch it!
Which after all of this, go back into your /opensim/bin folder and mono OpenSim.exe . it should launch nice and cleanly like the window below.
The binary download of OpenSim libraries.
All of this compiling libraries and modifying configuration files sucks! Don't you have binaries for my Pi?
 For those who want a snap-shot of the configuration files that I have altered above. you may download this file and unzip it into your /opensim/bin folder to replace the .config files and add the proper .so files into your /opensim/bin/lib/ folder. We will however give you the lecture that most in the Linux community will do when it comes to binary files.
Which binary files are typically compiled for a specific environment (in our case that environment is Debian Jessie Raspberry Pi Armv7.) The results may be unstable and unpredictable if you attempt to install these binary libraries onto another Linux kernel. It should also be noted that you are trusting this website to provide the binaries instead of compiling from the source yourself which could prove dangerous. Trust no one online and whenever possible always compile your own code.
Client configuration.
In this example, I am using an older FireStorm v2 viewer so that I get mesh support and can build within the sim with something I already like on SecondLife. 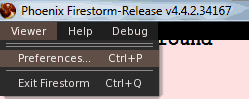 Click on Viewer and Preferences or simply hit Ctrl+P to open the FireStorm preferences menu.
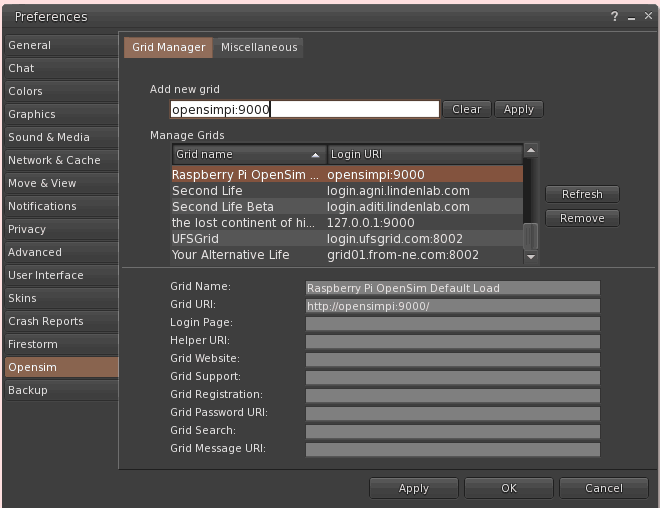
As a note the beta versions of FireStorm do not have the Opensim tab in the preferences section of their client. I really don't know why! So download the older final release and install it (Installing the final release while using the beta releases on Second Life does not conflict with each other. So you can have one configured for your Pi and the other that logs in normally.) Under Add new grid type in opensimpi:9000 or whatever YOUR hostname that you defined in the StandaloneCommon.ini file.
Once you have that typed in, you can hit the Apply button and it will disappear with an entry being added to your Manage Grids second. simply choose your new Pi and click Apply and OK.

The Log into Grid section will change to your Raspberry Pi and from there you simply type your username and password. hit Login and be patient as your OpenSim console on your Pi creates all of the assets of your new user for the first time logging in!
 Welcome!
Performance of OpenSim
If you are expecting lightning-quick action of OpenSim out of an arm7 processor that only eats a few watts of power. Well, we're simply not up to the task! You can tell just by how long it takes to make a map file. On my dual-core Pentium E6300 unit, it takes about 5ms, on the Pi 47ms. Perhaps you can run this in something like OSGrid since the number of people that visit your Sim may be only a handful at a time. But for the person that wants a DIY Metaverse and to work offline peacefully or with just a few people connecting for group projects. Then the Raspberry Pi is a great alternative to making your 24-hour OpenSim station. Building and working with prims is fast.
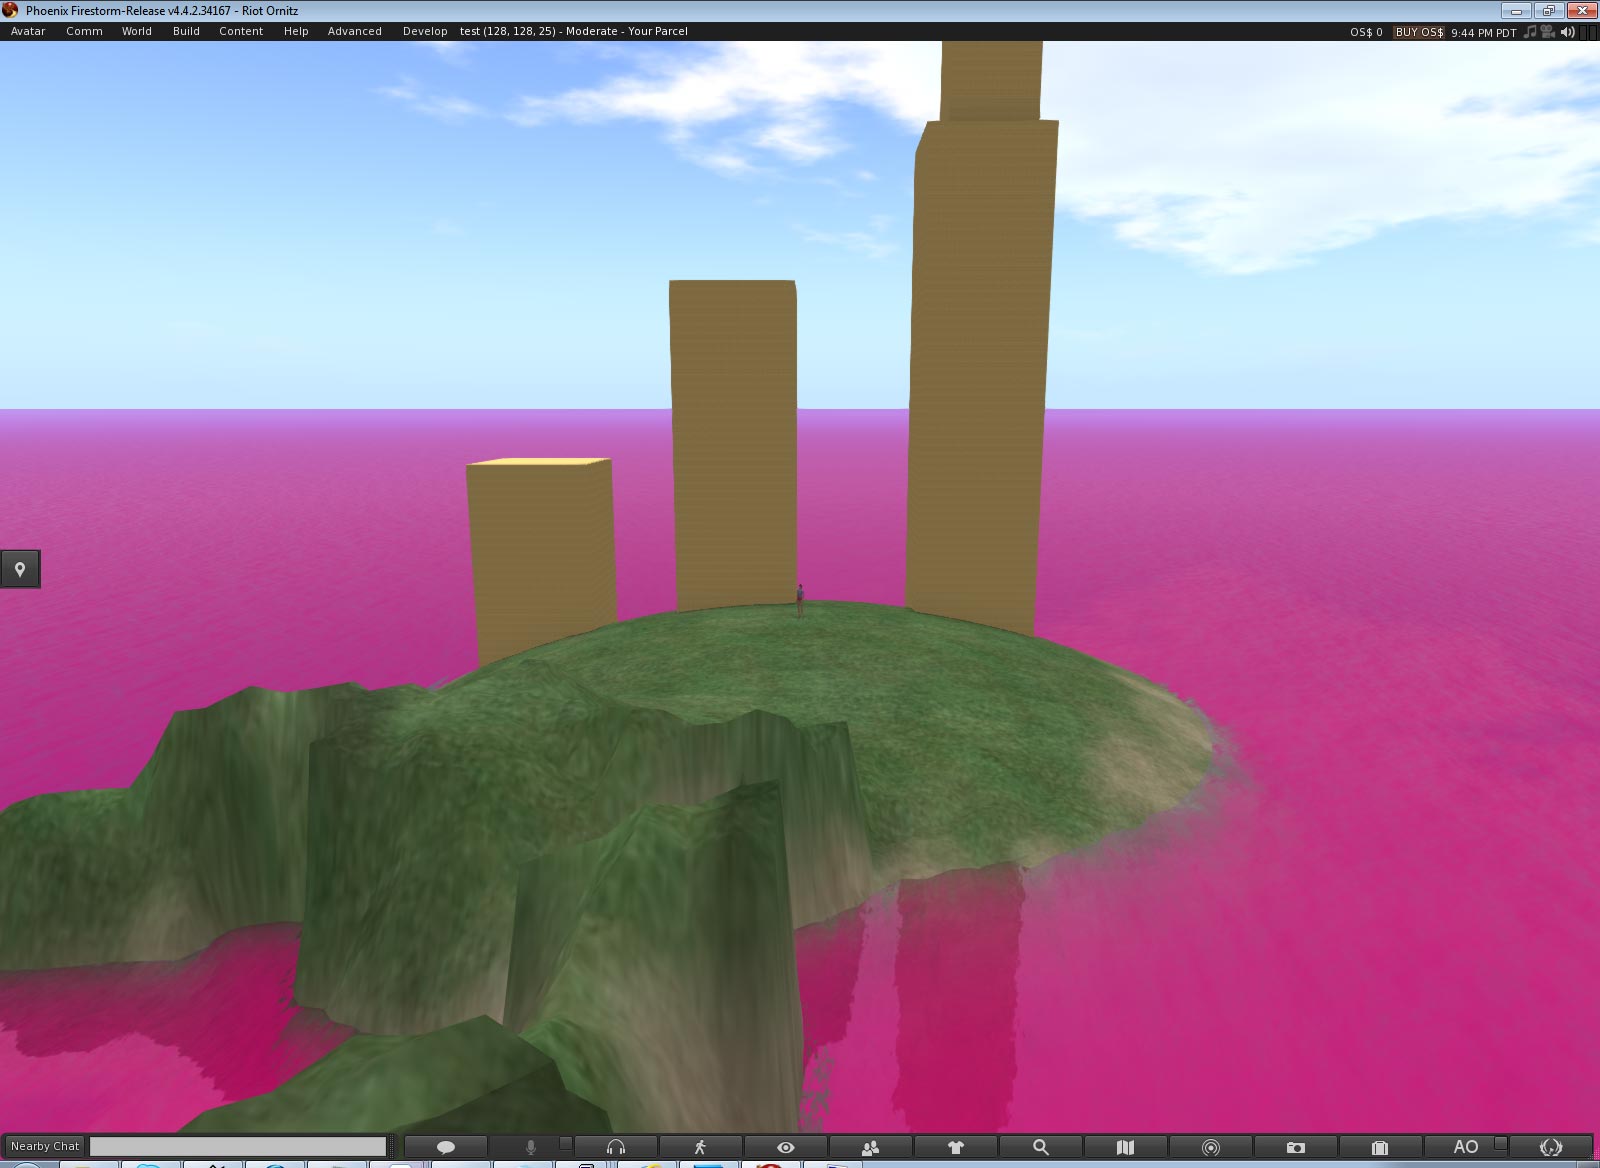
Using scripts is average but it really depends on the complexity of your SLscripts. Physics and Terra-forming is SLOW. it's really better off to modify your sims parcel on a Linux box and then port it over later to your Pi. You click on one section of the land and it takes a second for it to respond. The ODE Physics although it works could potentially lag out your entire sim by rezzing about 32 cubes and turning physics on to watch them collide with each other. You will not only find it painful to move around, but your console will start to send you warnings about latency issues between the server and the client. ![]()
Performance Update with Banana Pi
Update note 12/24/2014: I have now upgraded to a Banana Pi which is made by LeMaker. It is a dual-core ARMv7 processor that runs at 1Ghz and has a gig of ram. Which falls in line with OpenSim specifications much better than the Raspberry Pi. Terra-forming is almost real-time. Scripts now work as if I was on a low-end dual-core Pentium.
Because of the Dual-Core action as well as the DDR3 ram on the Banana Pi which is separate from the On-chip ram of the Raspberry Pi, I would say performance is about 4-5 times faster than the Pi. As for power consumption, it's actually better than my classic B pi because it uses a switching power supply similar to the Raspberry Pi B+. This means during idle it takes 320ma and when I hammer on the Sim with physics you are looking at 420-500ma which is better than the 700ma idle of the old Raspberry Pi.
For $20 extra you simply cannot beat that kind of price. I will be running my OpenSim on a Banana Pi until I can find something else. OpenSim will probably run great on the Raspberry Pi 2/3. Anything with multi-core processing helps out mono and therefore helps out OpenSim with all of its physics and processing needs. It should be noted that you really only need two cores unless you plan on running multiple regions on one ARM-based Pi.
Raspian vs. Pidora in OpenSim
I tried Pidora (Fedora for Raspberry Pi) for this procedure and the experimental mono package got even more unstable! Although it lets me log in just fine. If you shift-clicked on a prim to make a clone of a pre-existing prim in OpenSim. It would crash giving null database errors even when switching to MySQL. Although I love Pidora for its firewall features which Raspian does not have. And it DID seem to run a little faster under Pidora. The stability issues were just too much. I also tried to follow the instructions to hand-compile mono hard float and it didn't work.
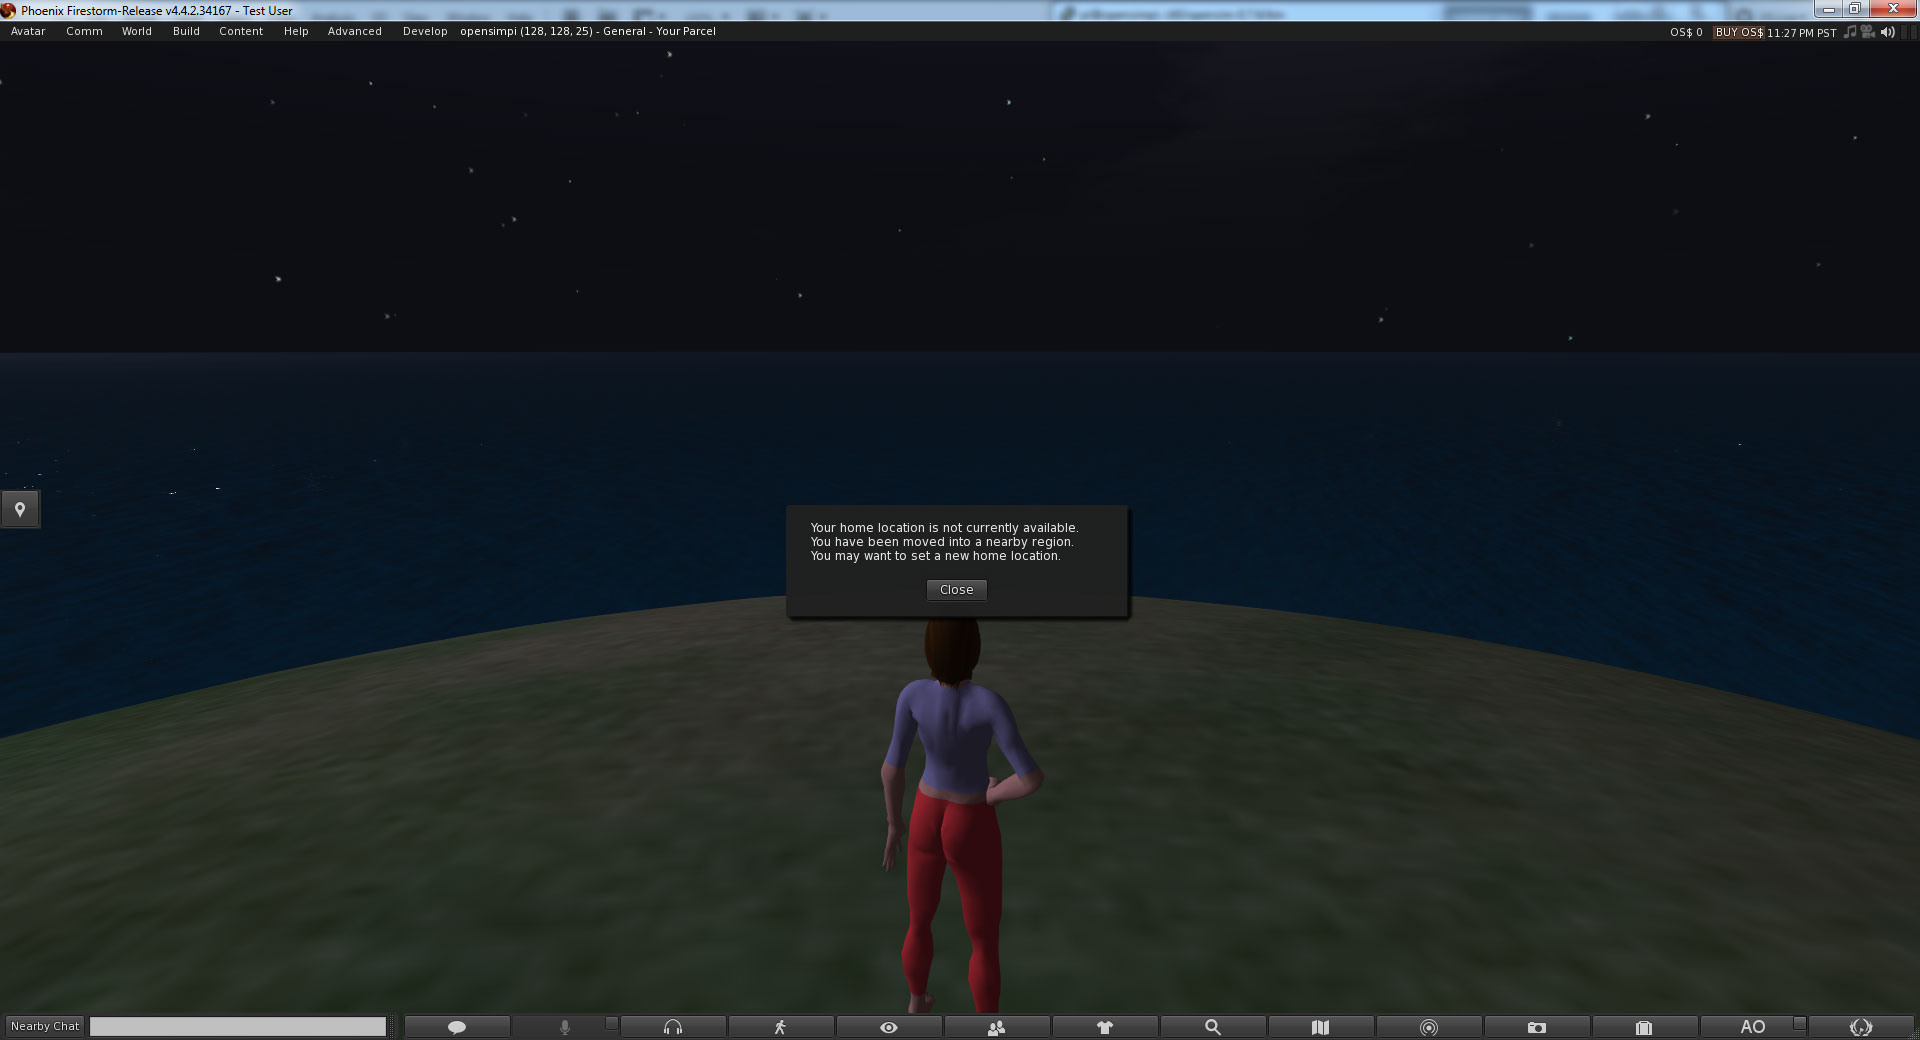
The screenshot above as to the world that is inside my Pi upon launch. We have since linked it to OpenSim as you could see my progress in this blog entry.
Some final touches to the background OpenSim so you can log off of your headless server
You probably don't want to keep an SSH connection going all of the time on another computer. You want to run your Raspberry Pi in a headless state like I am doing. Well, there's a very old Unix command that can help you with this.
sudo apt-get install screen
Screen command is a great tool allowing you to background processes so that even when you log out the process continues to perpetually run to get this started. type the following:
screen
It will just go back to a blank shell prompt then cd into your OpenSim directory and launch your application:
mono OpenSim.exe
Once that is done simply hit control+A and then control+d to detach this screen session. You can type 'top' to verify that mono is still running in the background before you log off. To restore your detached session simply type in:
screen -r
And you are right at your OpenSim console! You may want to have a script that automatically reloads OpenSim in the event of a crash (Since depending on the version of MONO Installed it may happen often) follow this script:
until mono OpenSim.exe ; do

    EXIT_CODE=$?

    echo "`date +%Y-%m-%d\ \ %T` # OpenSim crashed with exit code
 $EXIT_CODE. Restart in 10 seconds." >> crash.log

    sleep 10

done
Save this file as "opensim.sh" and then give it execution permission:
chmod 777 ./opensim.sh
Finally, you can run ./opensim.sh and it will go into a loop if there is an error or gracefully shut down if you tell it to simply shut down.
Final thoughts.
Regardless of what Pi you choose, Raspberry, Orange, or Banana, it's truly amazing that we live in the age where we can have single-chip devices powerful enough to host our own private virtual realities that people can log into. All without having to suck immense levels of power such as keeping a desktop running 24/7. There are also educational benefits of the system that Linden Labs have laid down years ago in the respect that a lot of the building and design of the world is focused around game design. By running your own personal world, you control said world. To control your information is of the up-most importance to all of us here. Hope this has helped you!
Take care and server protect you!
END OF LINE+++
S-config,
In the above post, the two 8Gb Sandisk Cards were purchased at Best Buy and I wrote the image to the disk that you posted above from dropbox. Could it be as simple as the Raspberry image won't work on a Banana pi?
That is correct. The Raspberry Pi image I generated for that user in the reply section was a very long time ago when it was still Raspberry Pi A, and B models. Which is compiled for armv6f kernel. That will not boot properly on the banana pi. The reason why I made the pre-load during the start of the Raspberry Pi kickstarter days was compiling mono 2.x on the Pi was really brutal you can't just get mono from apt-get like we do now.
I ultimately decided that I had to revise my documentation a few times over the years to lean more on acquiring libraries and compiling it because of the sheer variety of different imbedded units that are out there.
John Summers,
I like what you did with the Pi and your website, but I cannot find the link to actually buy one of your preloaded SD Cards. I'm working with a banana pi and wish to purchase a 32Gb card. Please advise.
Also, I've done the steps above on my banana pi and I can run mono OpenSim.exe just fine, but I get a message about the jpeg.so not being installed correctly and I can't log in to the sim on Firestorm. It's a standalone to be accessible only behind my firewall, until I learn more. What do I need to do?
I also bought two 8Gb cards from SanDisk and neither one is working. I formatted them in a windows 8.1 machine and the precess reported success, but the pi does nothing with it. It doesn't recognize it, it doesn't boot, nothing. Any advice?
jpeg.so ? Do you mean libopenjpeg.so? If so I did document that error and it not only has to be pointed to the right libopenjpeg.so file so it does not crash but you have to either compile it or download the pre-compiled binary of libopenjpeg.so and of course modify the OpenMetaverse.dll.config file so it can actually find the arm compiled version of libopenjpeg.so
hope it helps!
Awesome! Thanks for getting back to me so soon! I'll give that a shot as I think it might be pointing to the wrong directory. Also, do you have any ideas on why it won't allow me to log in? I'm using a Linksys WRT54G router.
I'd be interested in purchasing an SD card pre-configured and perhaps a whole pi with same and I think others might be as well, either on ebay or a website like this.
Okay, when it comes to network troubleshooting. One of the first things you can try the moment OpenSim comes up to the command prompt of your region is open up a web-browser and type in the ip-address along with the default opensim port which is typically 9000. for example, if i type in http://192.168.0.33:9000 it responds with the following 404 error:
Ooops!The page you requested has been obsconded with by knomes. Find hippos quick!
If you are trying to log-in, your link parameters should have: "-loginpage http:///?method=login -loginuri http:///" in your link
If you can get this. Then this means opensim is visible on your network! And the rest may come down to second life client configuration . the OpenSim.ini file is responsible for the UDP port assignment in case you need to change it to something else. I had to change it personally because my banana pi was also running a UPNP server where port 9000 was its interactive web-page. so i modified my opensim.ini to move it up to 9100. since you are running in stand-alone local mode there's no need to modify anything on your router. Router modification comes when you want to setup hypergrids and have opensim visible to the outside net. Also, your regions have their own UDP ports as stated in the /bin/regions/regions.ini file within opensim. You may want to change those to 9101, 9102 , etc just to keep things organized.
I'm not sure if I should be doing pre-loadeded images of OpenSim. Part of the problem is the moving target scenario. Where there's multiple distro's of bananna pi that are available and each have their own advantage/disadvantages in their own rights. The other issue is because OpenSim is also a moving target in respects that they are slowly evolving and changing to adapt to the newer mono engine and switching physics engines. That it's better for people to learn how to install it so when the next release comes out they know how to back up their region into .oar files and re-setup the updated software again.
HI, did it as instructed on my new PI, but it stills crashes at the bulletsim point, I used the latest version opensim-0.8.1, any advice you have will be welcome.
thank you
Admin
Msdcs
I actually had another blog post dealing with the troubles of compiling bulletsim for ARM on this posting. There is only two solutions can can be offered as a work-around right now until the OpenSim devs update their code to use the bullet3.so libraries directly like how ODE works. One of them is to simply let XNA take over bulletphysics at the penalty of CPU power by modifying your opensim.ini file to include the following statement.
[BulletSim]UseSeparatePhysicsThread = true
TerrainImplementation=0
BulletEngine = "bulletxna"
The BulletSim catagory does not exist in opensim.ini after 0.8.x for some reason. but telling it to run via XNA/mono does work. However, after further testing on OSGrid I've been finding out that bullet works with prims great but it kind of sucks at mesh objects with their own collisions defined.
And of course the fallback is going into opensim.ini and modifying your physics to switch to ODE and compile your own ODE library which is the most efficient physics engine on the Pi and works great with mesh but it's not great with when it deals with transferring physicals from region to region such as vehicles.
Anyhow, hope that helps!
Thank you for your prompt replay I will try that, also I am using the new quad 1 gig PI.
It worked, thank you very much, I now have to do the jpeg thing, but its is now running on my PI, have yet to try to log in yet, but thanks a lot.
Glad to hear it's working out for you. I've revised my blog to include the binaries of libode.so and libopenjpeg.so which the only thing you have to do is modify the Ode.NET.dll.config and OpenMetaverse.dll.config to point to the respective files on your Pi.
My Binaries were originally compiled on the Raspberry Pi v1 running Rasbian and when I upgraded to Banana Pi which runs Armv7 I simply transferred the .so files and it worked from there. Since Pi v2 is Armv7 as well, I don't think there will be a problem in using the binaries there either.
I still get openjpeg errors it says not installed properly and also world map fails, but it is running and scripts work, not tried much else apart from landscaping
The PI is on http://81.142.92.204/
port 9500
will the openjpeg errors and world map fails affect anything in the future.
but your help has been invaluable, thank you
the only thing that libopenjpeg.so file does is it generates the world-map thumbnail for your sim. So it just gets annoying to see that pop up in your console every 10 or so minutes or whenever you terraform your region.
Not installed properly? Hrmm. It sounds like one of your config files is not pointing towards your pre-compiled libopenjpeg.so file.
Edit: It seems I can't post code of this nature in the comments section! heheh. Okay, I made a zip file of all of the files I have modified and libraries I've compiled. if you extract this into your opensim folder overwritting the two .config files, it should correct your libopenjpeg errors, and as a bonus allow you to play with ODE physics if you so choose.
Click here to download the zip file.
Perfect, every error gone, thank you very much
Good to hear! Have fun with your opensim now!:)
You have been a great help and the sim is working fine, I am just having problems getting the php to connect to the MySQL database, I want to make my own on it for combat meters that will be in the sim, when I use $con = mysqli("localhost", "root", "password", "database"); the php script crashes, am I doing it right, I made a new database like you did for the opensim, just used my names and password, that line works fine in all my php in my main server that is a synology DS213+ it just wont work in the pi,
Any ideas, thank you.
PHP/SQL is a little beyond my scope of knowledge unfortunately. I know the basics such as transferring and backing up databases but haven't played with doing queries via PHP with it. I'll leave the question up if anyone else that reads has an answer I'll approve it right away.
It is ok now, one of the servers was down I think and not all files were installed for php, I reinstalled the php this morning and now have all the files and the database is a sweet as a nut, running perfectly, thank you so much for all your help, every thing is working, the raspberry forum was a great help.
Kind Regards.
John Summers.
Msdcs.
I like the idea of the whole website thing like you did. Where could I get the card with it all installed?
My thanks for the guidance, sir :-). I took a run at it on a new Raspberry Pi 2 - and I confess I failed dismally. I don;t think I actually got past the Physics error. Now, that's most likely me being an Idiot - it was 2AM in the morning when I was trying it (blush). However, if I may, one question - would anything be more likely to fail if I was using the current release of OpenSim (0.0.0.4)?
I was going to take a run at your DropBox link, but I'm guessing it's got a 192 address for the Pi in it, so I'll have to get me an HDMI to DVI cable to connect a screen before I try it so I can reset it to DHCP.
My thanks again for the excellent work here! :-)).
A lot of how I got OpenSIM going on my Pi was a lot of trial and error myself and this article was back in the day when we didn't have the luxury of the Mono programming language already pre-compiled with a simple apt-get.
the only major difference between when I first published this article which was opensim 0.7.6.1 and now at 0.8.0.4 is they default to Bullet Physics instead of ODE. Now the first solution you should try is simply disable all physics in your SIM on your Raspberry Pi by opening the OpenSim.ini file in nano and around line 213 you should be in the physics section of OpenSim . comment out "physics = BulletSim" and remove the comment for "physics = basicphysics" and try to run your OpenSIM.. the only thing your avatar can interact with in this state is the SIM ground and that it!
If all is working you are left with two options.. You can either follow my blog instructions to compile ODEPhysics natively and comment in "physics = OpenDynamicsEngine" OR if you don't want to play around with compiling physics engines if you look further in your OpenSim.ini file around line number 627 which will put you into the [bullet] section of the configuration.
Comment out BulletEngine = "bulletunmanaged" and remove the comment on BulletEngine = "bulletxna" what this will do is this will tell the Mono programming language to take over Physics instead of relying on your Pi's pre-compiled library files. The penalty of course is speed as Mono is a heavy handed language.
As of right now I have not figured out how to successfully compile libBulletSim.so natively for the very best results without getting a lot of float-crash errors even after following all of the compile instructions in OpenSims distro-tree. I do not receive any warnings of my compilation just crashing when Mono attempts to use the library that I compiled for it. ODE however works flawless on my Pi both raspberry and banana to this very day!.
Anyhow, hope it helps. And good luck with starting your SIM!
- S
Thanks for the reply :-). I took another run at it this weekend, with the 0.7.6.1 release, and got to a build that started up with no errors I could see. Unfortunately, when I tried to connect with a viewer, I couldn't add it as a grid. It just kept coming back with 'can't find grid info'.
I did a local port scan on the server-pi, and 9000 is reporting open. I did a net-based port scan on my public IP-9000 and my DynDns domain name-9000, and they both reported open. I tried to connect via the Dynamic Domain, the public IP and the local IP (just from my local machine), and allattempts said they couldn't see grid details. I figure I've done something dumb in the config somewhere, but I can't see it. I'll take another run at it next weekend :-).
Thanks for an excellent build page, sir! It got me to the build-run-no-errors point - the rest is, I am sure, me being stupid somewhere (blush).
Good to hear that you are making progress on your OpenSIM! Now one thing that you can try is I know port 9000 is used by other daemon programs in the past. In my case I had a Upnp media server that relied on port 9000 for its web interface. changing this port is easy in OpenSIM as all you have to go is go into /bin/region/regions.ini file and change the port name of your region in there. For example port 9001. You'll start to play with regions.ini file more if you start setting up multiple regions where each region is a different port on your network.
Also, for external hosting such as DNS resolution lookups you can also setup your "InternalAddress" and "ExternalHostName" in your regions.ini file. I ran into the region resolution not found problem before but it dealt more with a prior linux box I had configured with multiple network cards and OpenSIM simply couldn't figure out what network card it should use.
I was able to get OpenSimulator running on my Raspberry Pi v2 no problems, thanks for this guide it really helped out a lot!!
https://www.youtube.com/watch?v=t8XtFIXF77k&feature=youtu.be
Good to hear! And awesome Raspberry Pi model on your SIM BTW.:)
i tried following your instructions and for some reason the opensim.exe wont be found even after using the case sensative way of spelling it
What is the command you are passing to launch OpenSim.exe with mono? What is the error that mono reports back?
it keeps on saying it could not find opensim.exe
This looks really cool! Thank You for making this. I have wanted to have a sim that I could leave on all the time without using a lot of electricity.
Your solution generating an sim in OpenSim with the raspi is very interesting for me. Your description is fine - but I tried to install it without effort. The Simulator does not find some of the files - I know no way to succeed. Can you please send me an image of your running system? This will help me very much
Thank you for your work
Any
I just noticed the Mono experimental link was broken. I have fixed that in my article. Also incorporated some of the instructions of basic setup and MySQL too. Give me a two days to make a clean image of Raspbian running the latest OpenSim so your not stuck with all of the other projects that I have running on my Pi.:) I also realized they just came out with Mono 3 for ARM.. I'm going to play with that on my second Pi and see if it's any good.
Thanks for checking out my site. I'll reply again with a link once the image is ready for download.
Here it is. a fully operating version of my OpenSim image. Please change passwords once you have transferred the image. This image will require at least a 4GB MMC card and will need partition expanded through raspi-config.
login to Raspbian:
login username: pi
password: pi
MySQL:
username: root
pass: pi
username: opensimuser
password: opensimpass
OpenSim information:
Region Name: opensimpi
Estate name: testersim
username - FirstName: Test
username - LastName: User
password: Test
Download the 1.5GB image here: Click to be taken to my DropBox link
tried the image file my pi wont load it