
Sometimes our recommendations come back to haunt us.
RedDragon is one of those recommendations that has done exactly that. Made this blog a while back because we were so pissed with Razer and Corsair that we just told people who wanted a mechanical keyboard that was somewhat repairable to just get a Redragon because at least it's being honest with who they are and where they manufacture their product. It's a Chinese business. A testament that there are legitimate GOOD Chinese businesses out there. In fact, probably one of the best ones, as when you send an email to them, they actually answer! They don't discard your feedback like Razer or Corsair.
We did get a few e-mails about RedDragon. One of them is someone who bought 20 of the K556's said he had to return about 4 of them because they were missing the escape key. Nope, the box was not opened. Nope, the key wasn't floating around. The escape key was simply gone. Wow, kinda fucked up. But okay. So we found an email article selling not one but two broken RedDragon K556 keyboards (the very thing we recommended years back) and decided to buy them to see what was going on. So read on if you'd like disassembly and endless diatribes of ranting.
The Ebay:
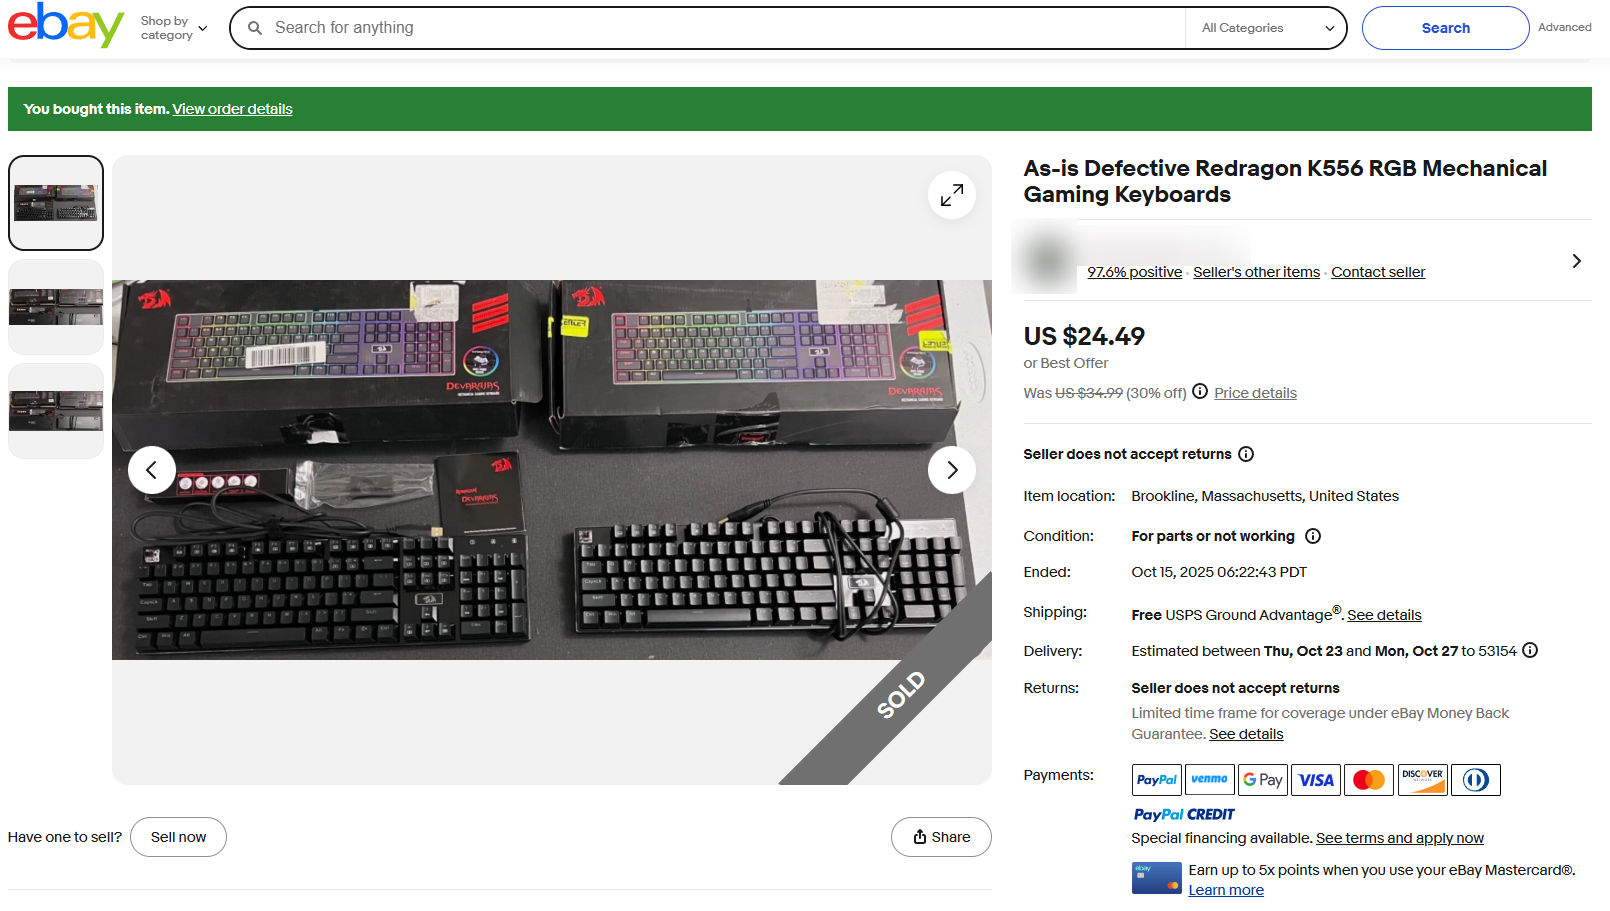 This is the listing on eBay that was just flat-out purchased. $25(USD) shipping included. We hid the name of the eBay seller for privacy reasons, even though the seller was fantastic about shipping these out to us, and the fact that we got them in about 4 days from the East Coast to the Midwest. The description for this auction was as follows:
The left keyboard was tested for power only. The one on the right did not power on at all. Sold as-is for parts/repair. - Anonymous Ebay seller.
Looking at a seller's profile tells you a lot about who you are buying from. Start looking through it all; Their listing quickly reveals this is one of those sellers that purchases bulk returned electronics by the pallet and pushes it individually out the door as fast as humanly possible. When we looked at the value. It's $12.50 USD per unit. Despite the fact that they're non-cherry switches, if we were to get the switches alone on Aliexpress, it would total very close to that number. So even if we couldn't fix jack shit. Well! We got a lot of parts at the end of the day!

And we guess we should do something about this CORSAI, er, Corsair K70 red keyboard that we've been rocking for a while. The "I" key likes to double-tap as we type, which is getting super annoying. But also demonstrates that even Cherry MX switches can fail. If we get one of them fixed, it'll be a worthwhile replacement. Now, we're not going to throw away the Corair. If someone needed a keyboard similar to the parts, we would gladly send it to them. Or we might spend the time desoldering all of the keys and placing them into a keyboard that is a little more open-source. It would be time-consuming as fuck. But eh.
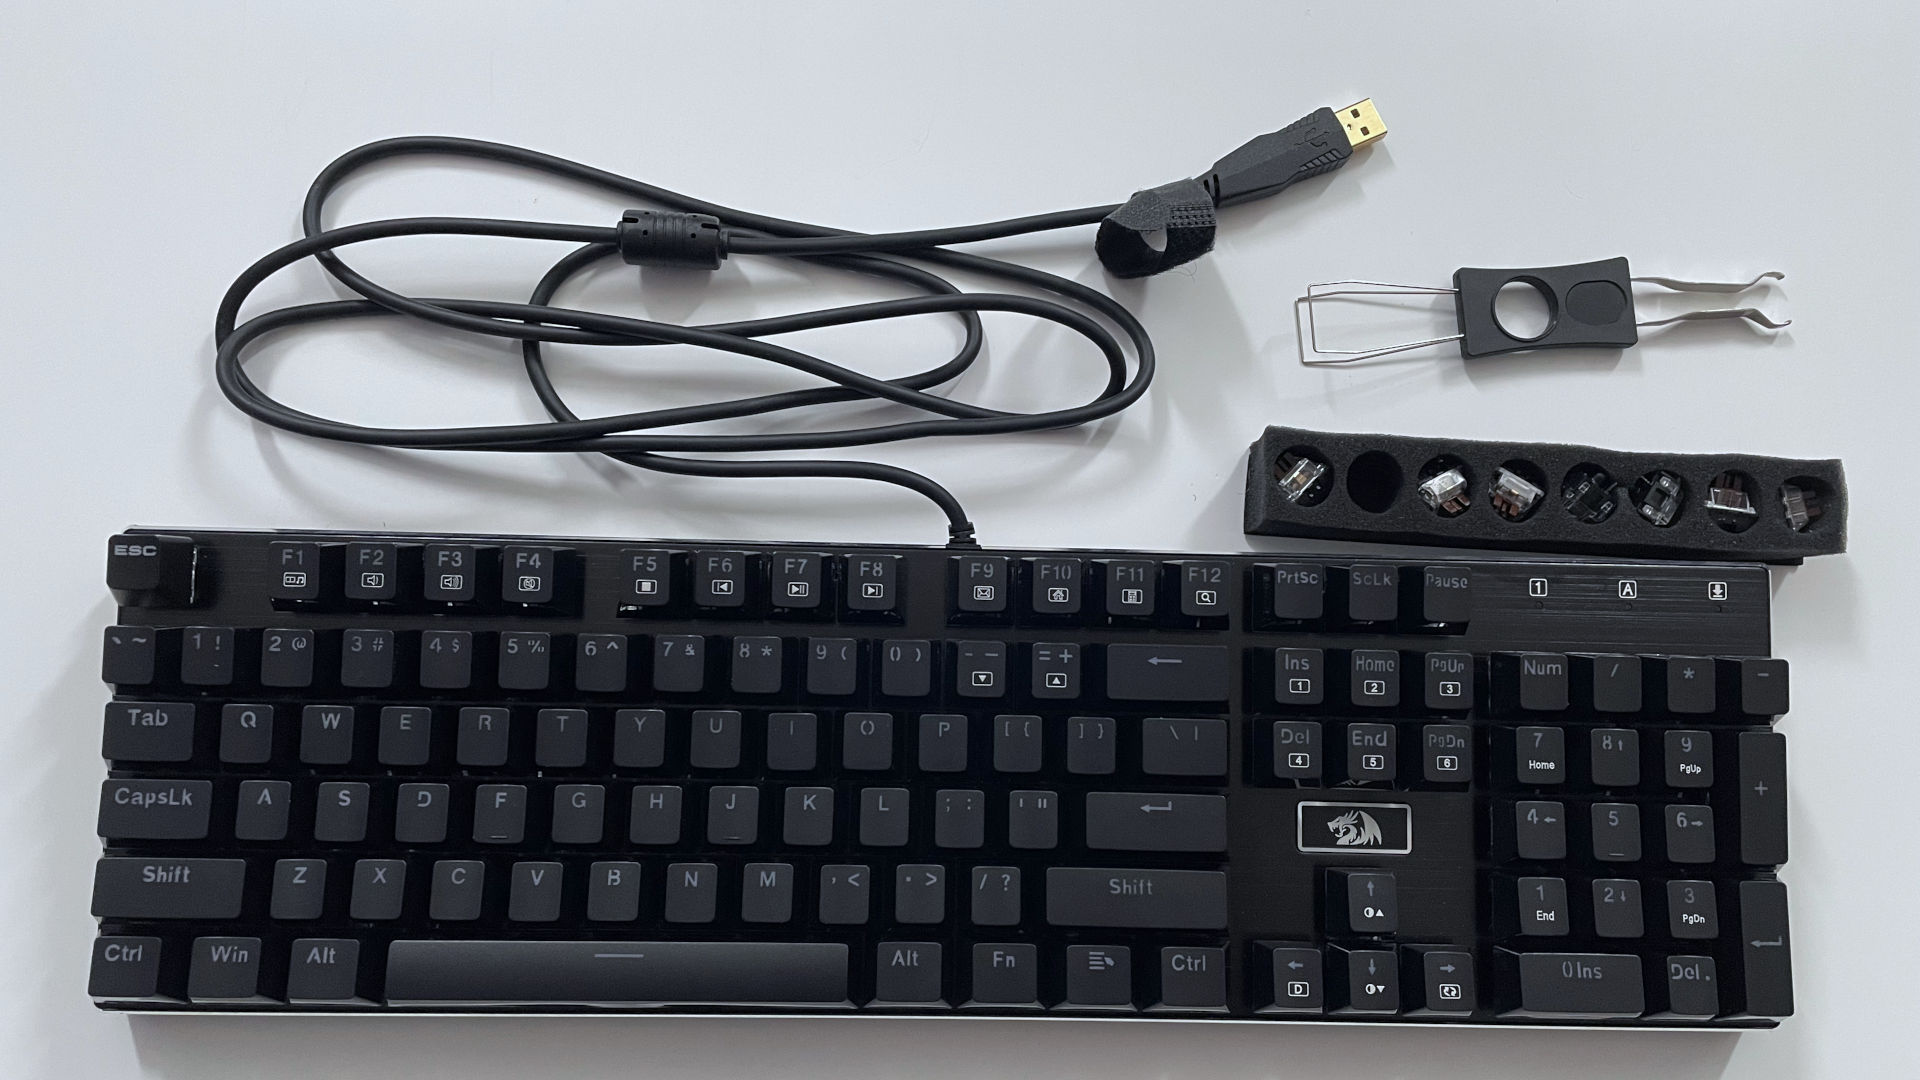
Purchased and then arrived!
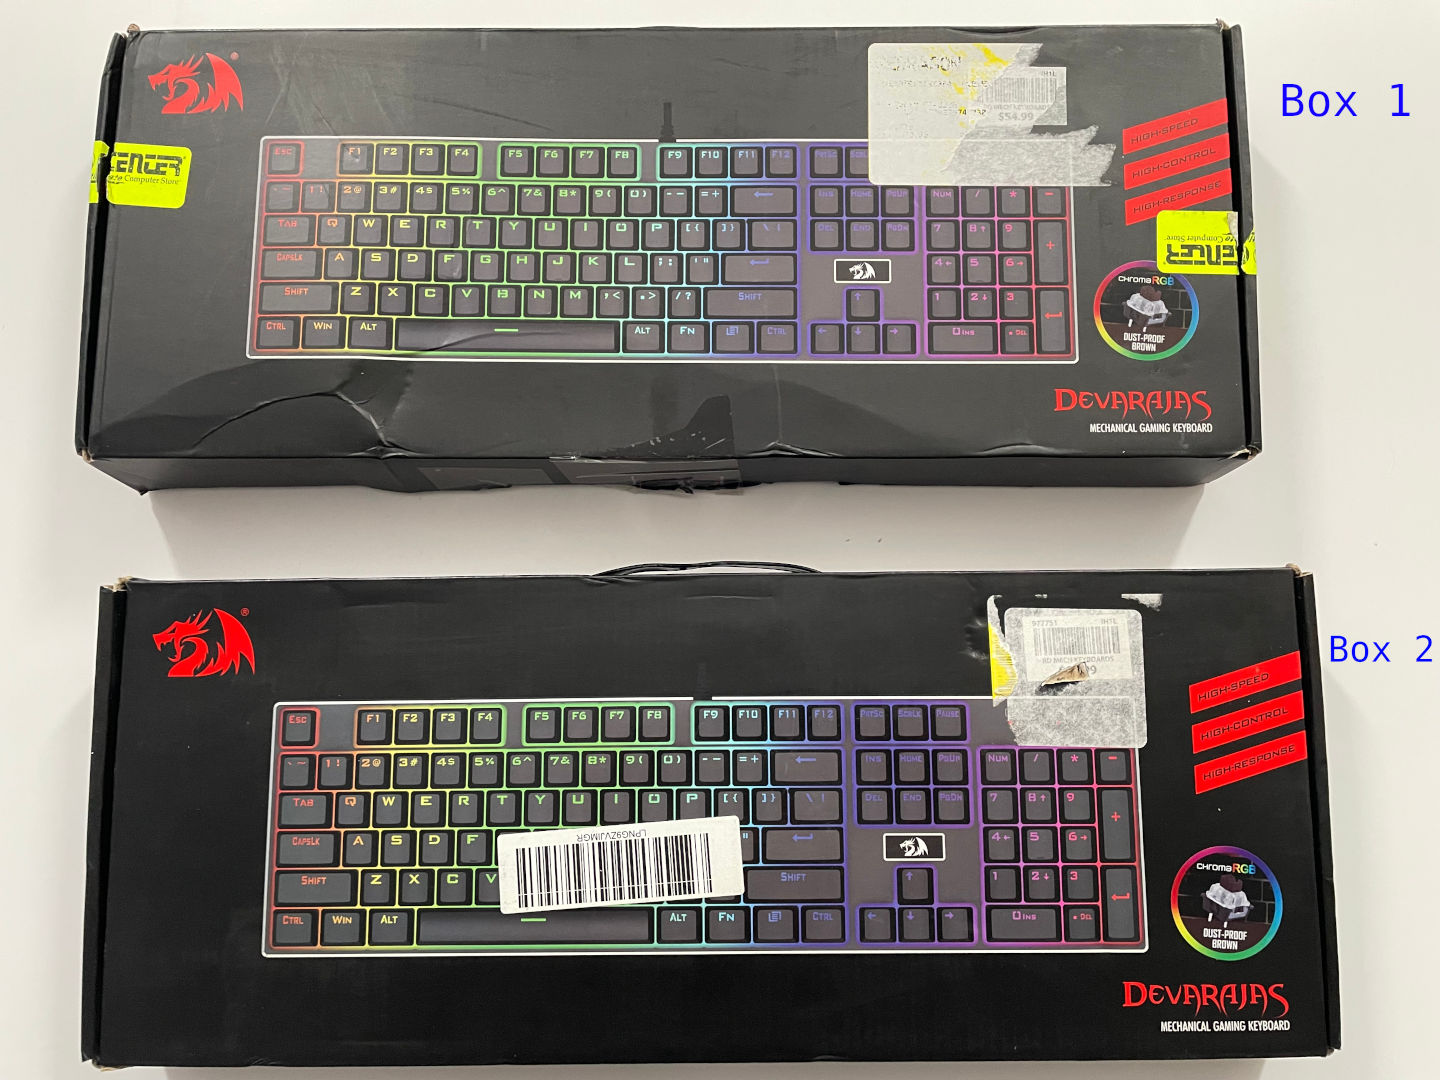
It's like an unboxing video. Except someone has already violated the boxes multiple times! But seriously. These were Microcenter returns. And it appears the original price these sold for was around $59.99. We did check Amazon as Redragon used to exclusively sell there back in the da,y and apparently the K556 "Davarajas" (Terrible name) is going for about $45 on sale now. H'okay! Let's get them Open. And we'll start with the easy one first, which is:
Box #2
Okay, the first box came with everything that you would get with a new Redragon K556 keyboard. This is kinda rare, as usually the manuals, the extra keys, or the extractor end up getting lost by the customer or Microcenter. Etc. Microcenter can't really send the keyboard back to Redragon, and since it's missing the escape key (*sarcasm* big surprise there! */sarcasm*), they can't really resell the keyboard. So it got into an e-waste palette, and that's pretty much it.
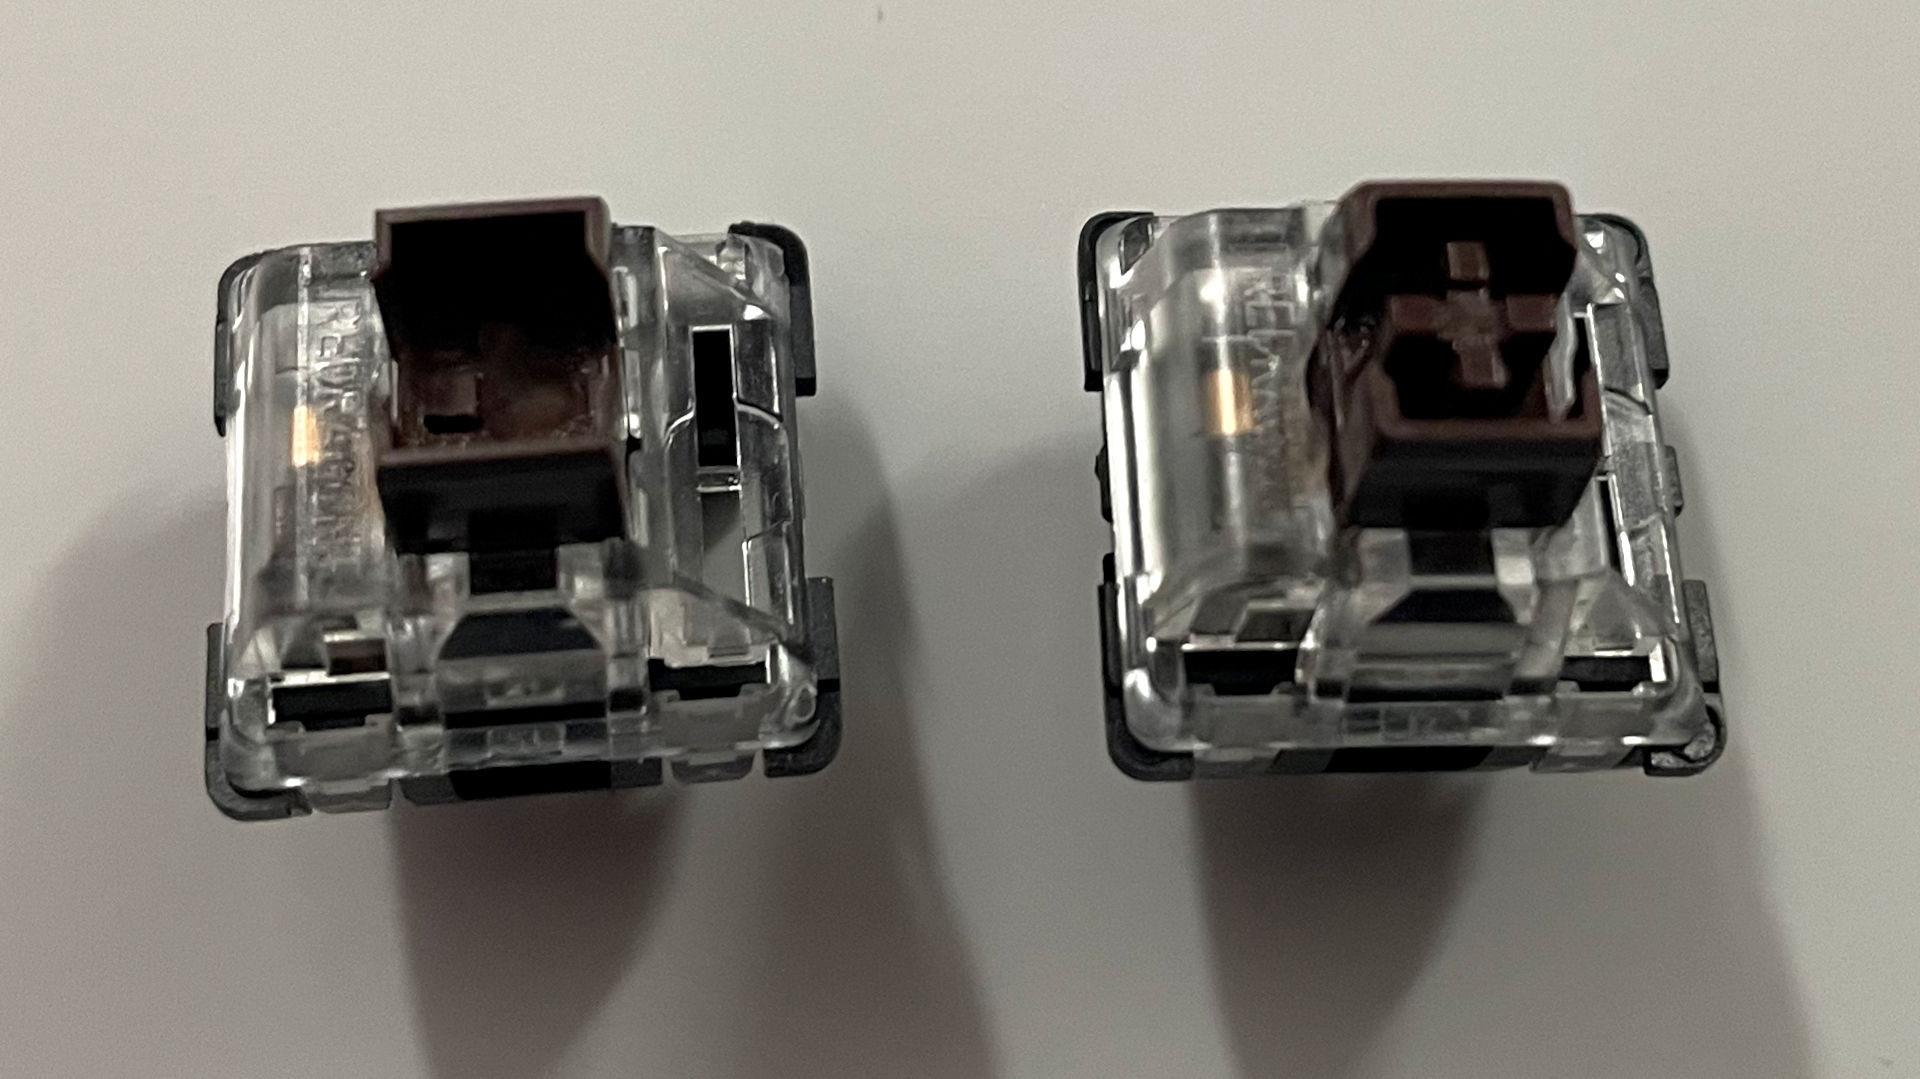
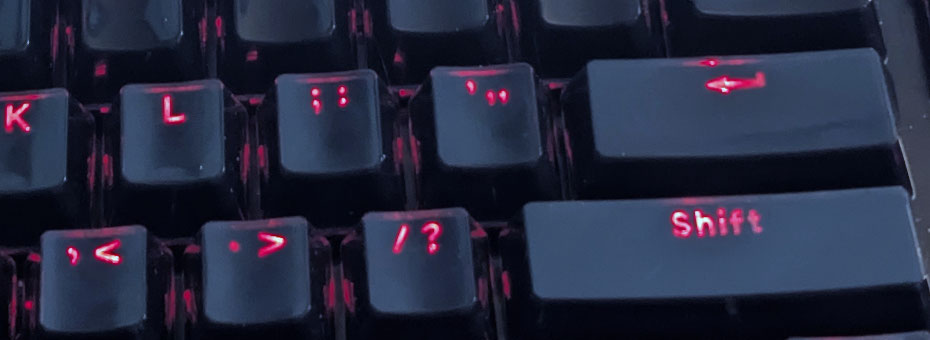
Well, there was something else wrong with the escape area of the keyboard. The TKL Brown switch center was broken off. So, it may have been bad shipping or customer abuse. Either way, it was a quick 2-minute swap with the supplied tool.
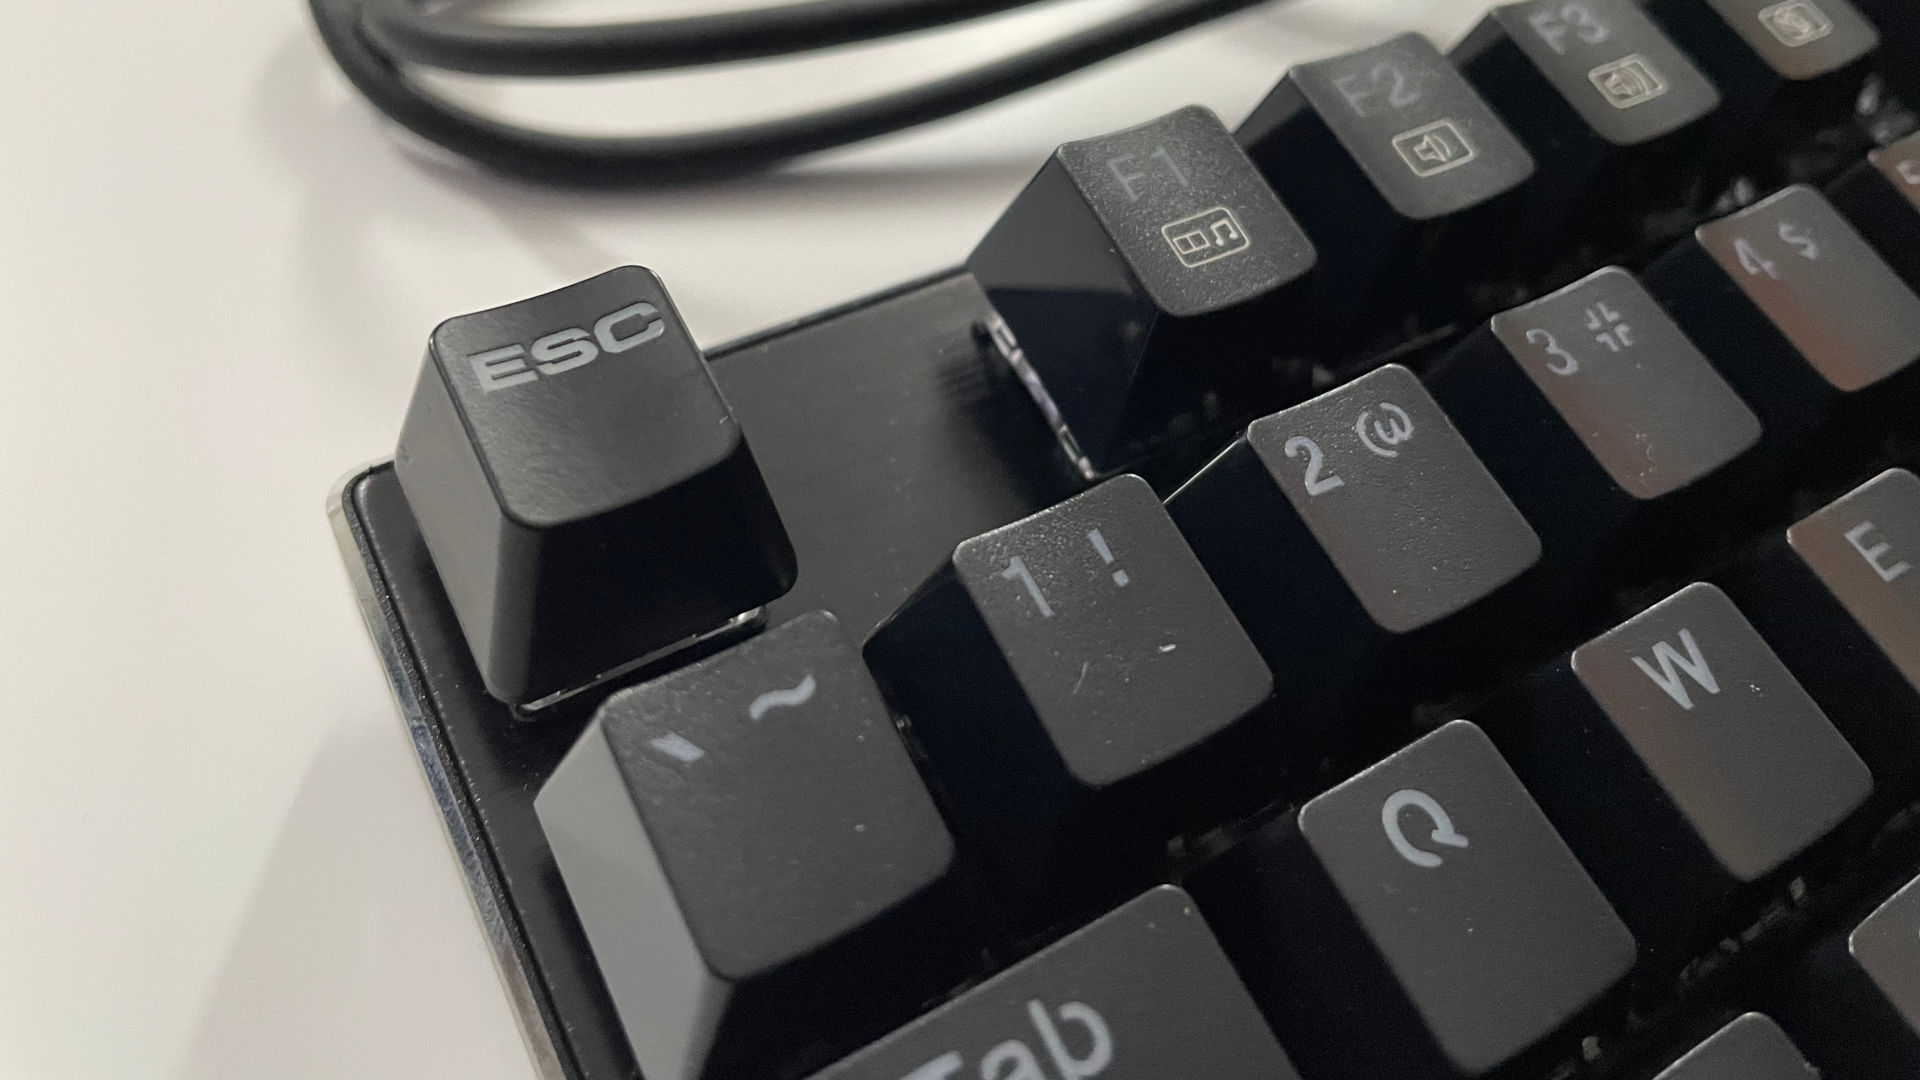
When you get super close to it, you can tell the Escape key that we extracted from our old Corsair certainly does not match the Redragon K556. But we're also not going to pay some jackass on eBay $12 for a single key either! So it'll have to do.
Three minutes, didn't even use my own tools. Just whatever that was in the box, plus a keycap off of my old keyboard.. Done. So right away we've easily made our money back on this venture. Wow.. That was fucking boring, wasn't it? Let's go over to Box #1
Box #1
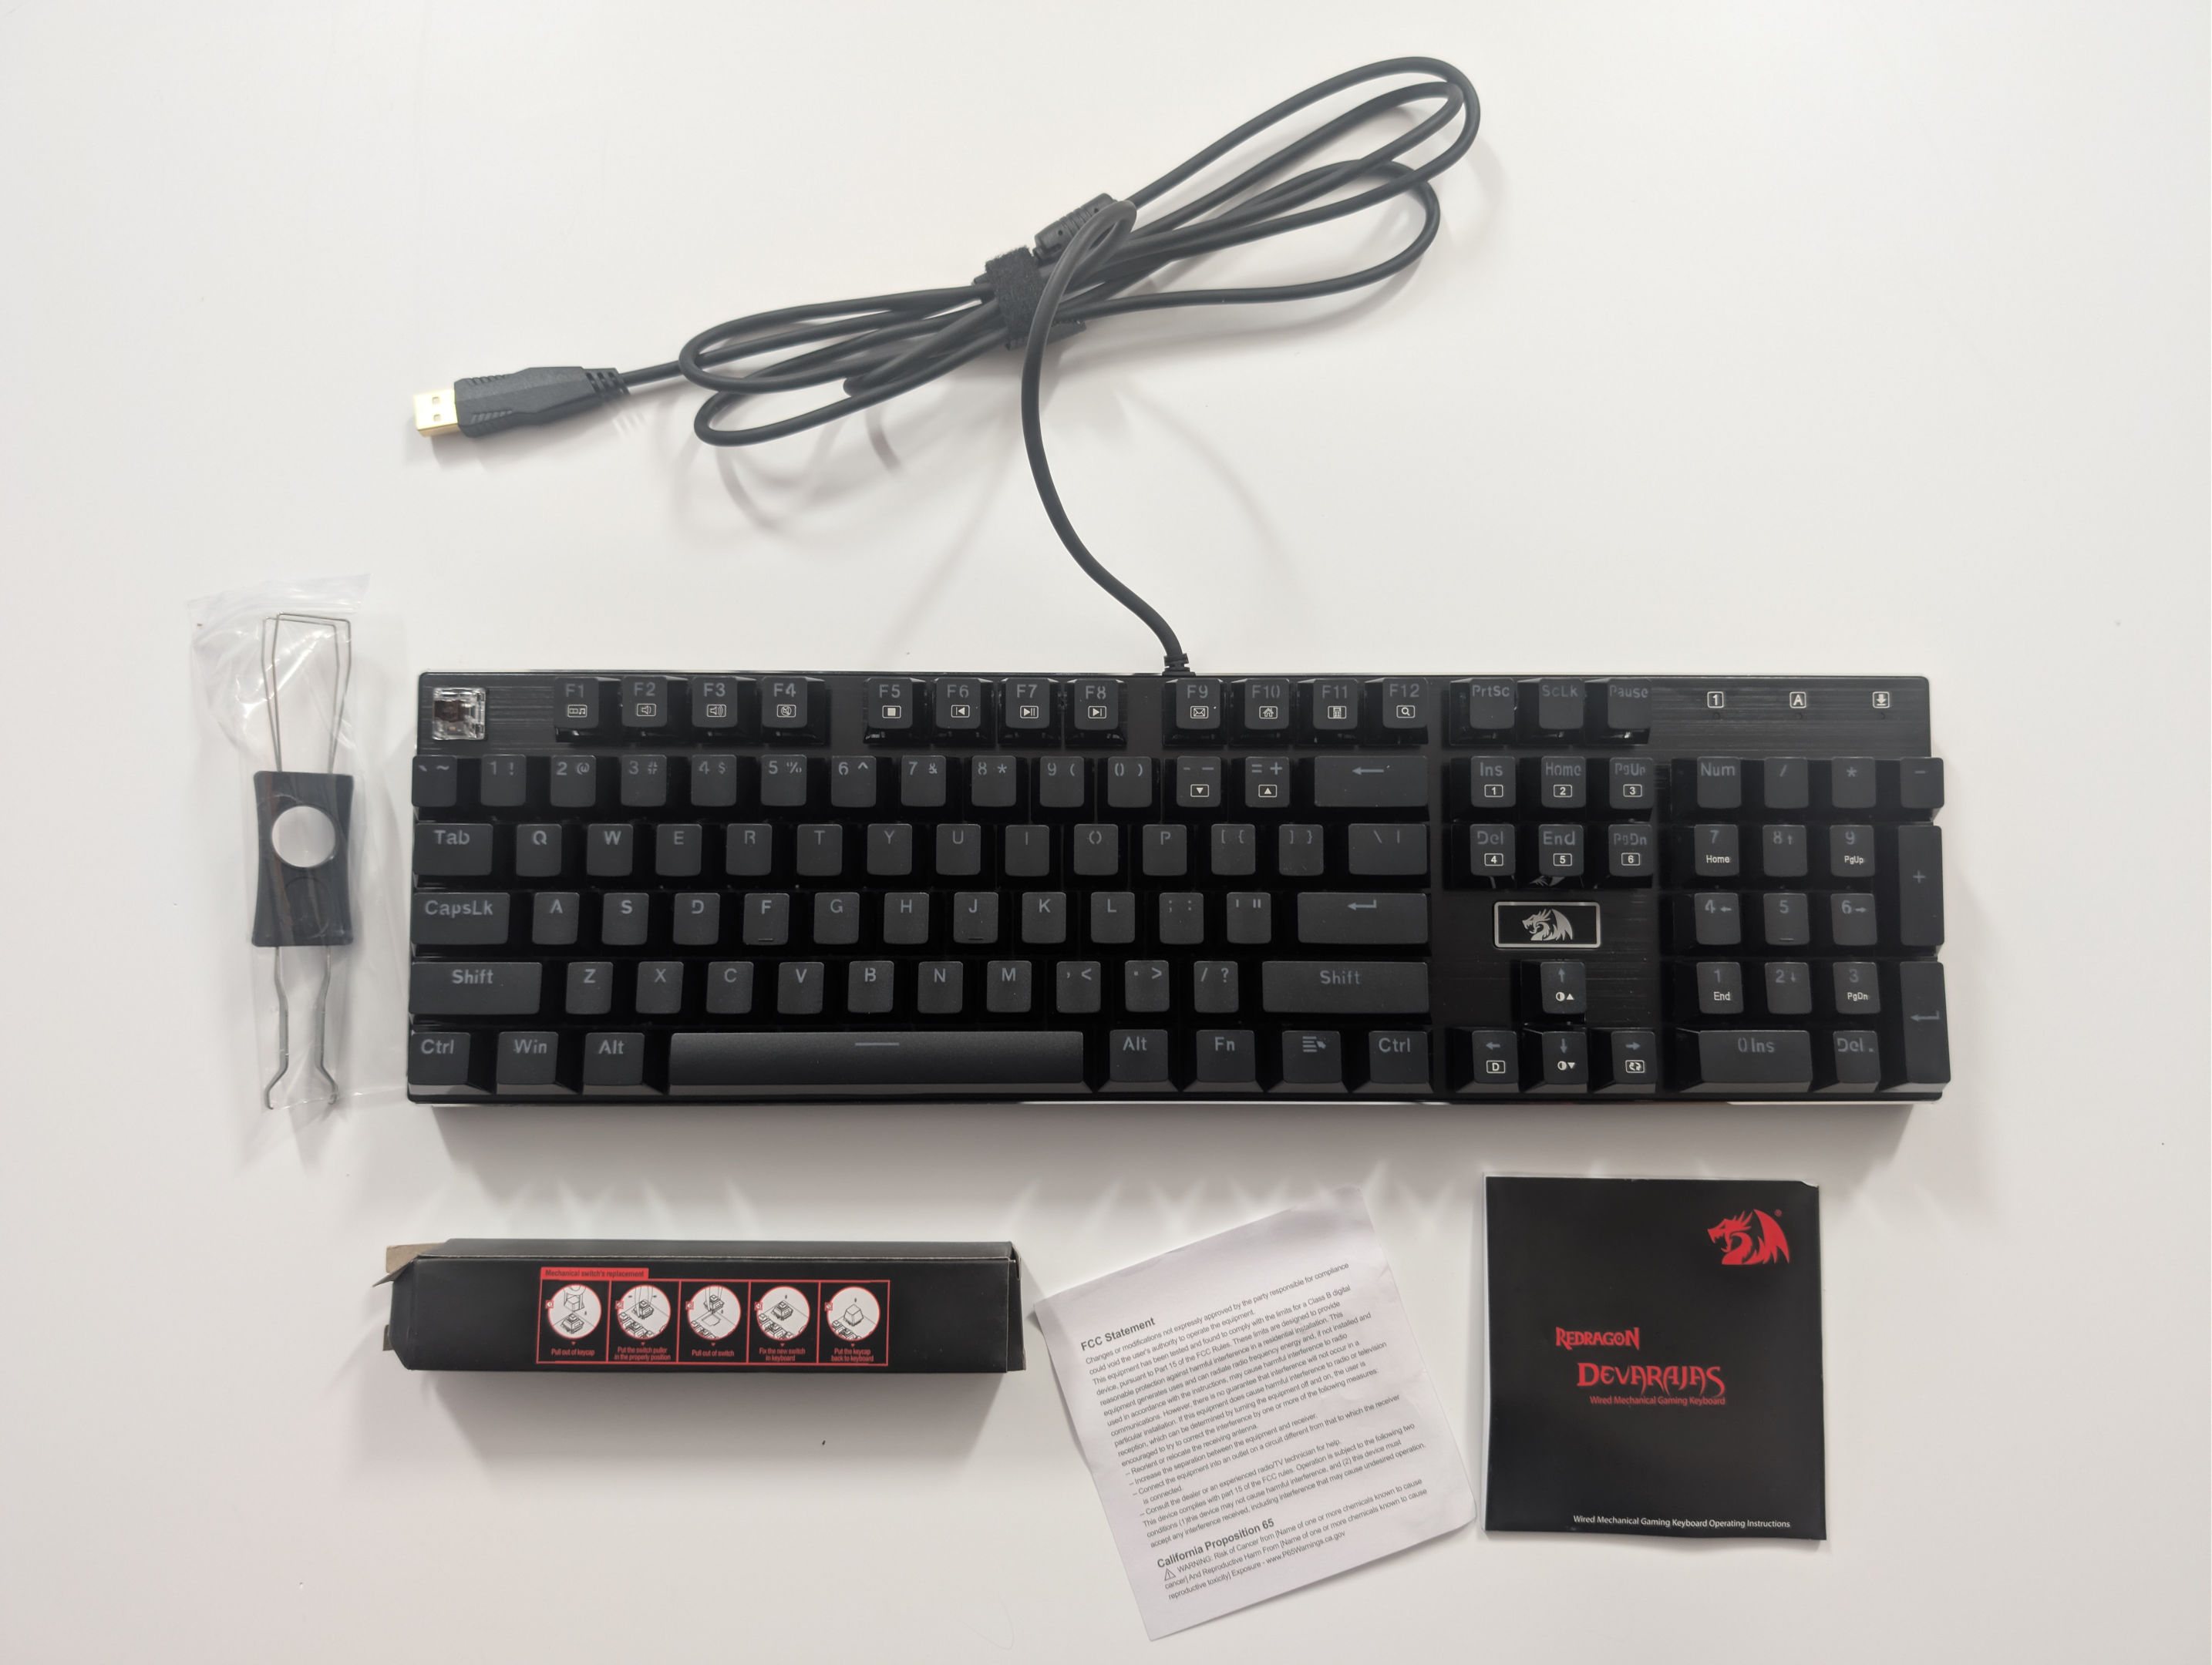
Box #1 was a little more interesting because this is the keyboard that does not power up at all. It comes with nothing except the keyboard, which is a lot more common for returned equipment. This is the one that does not power up at all, and sure enough, when we plugged it into our sacrificial device. NOTHING!!!! This is a little odd for Redragon because out of the many keyboards I've seen people buy, we have never encountered one that didn't power up. Our original thought process is that some gamer twisted the shit out of the USB cable until it broke, similar to fixing Razer or Corsair mice. But looking at the cable, there were really no signs of abuse at all. Alright, time to take it apart.
Throughout the entire process, you will need a Phillips #0 bit loaded into your screwdriver. We're just removing the side covers on the right and left. This might feel like you're doing much at first. But it will come in handy to remove these plates much later.
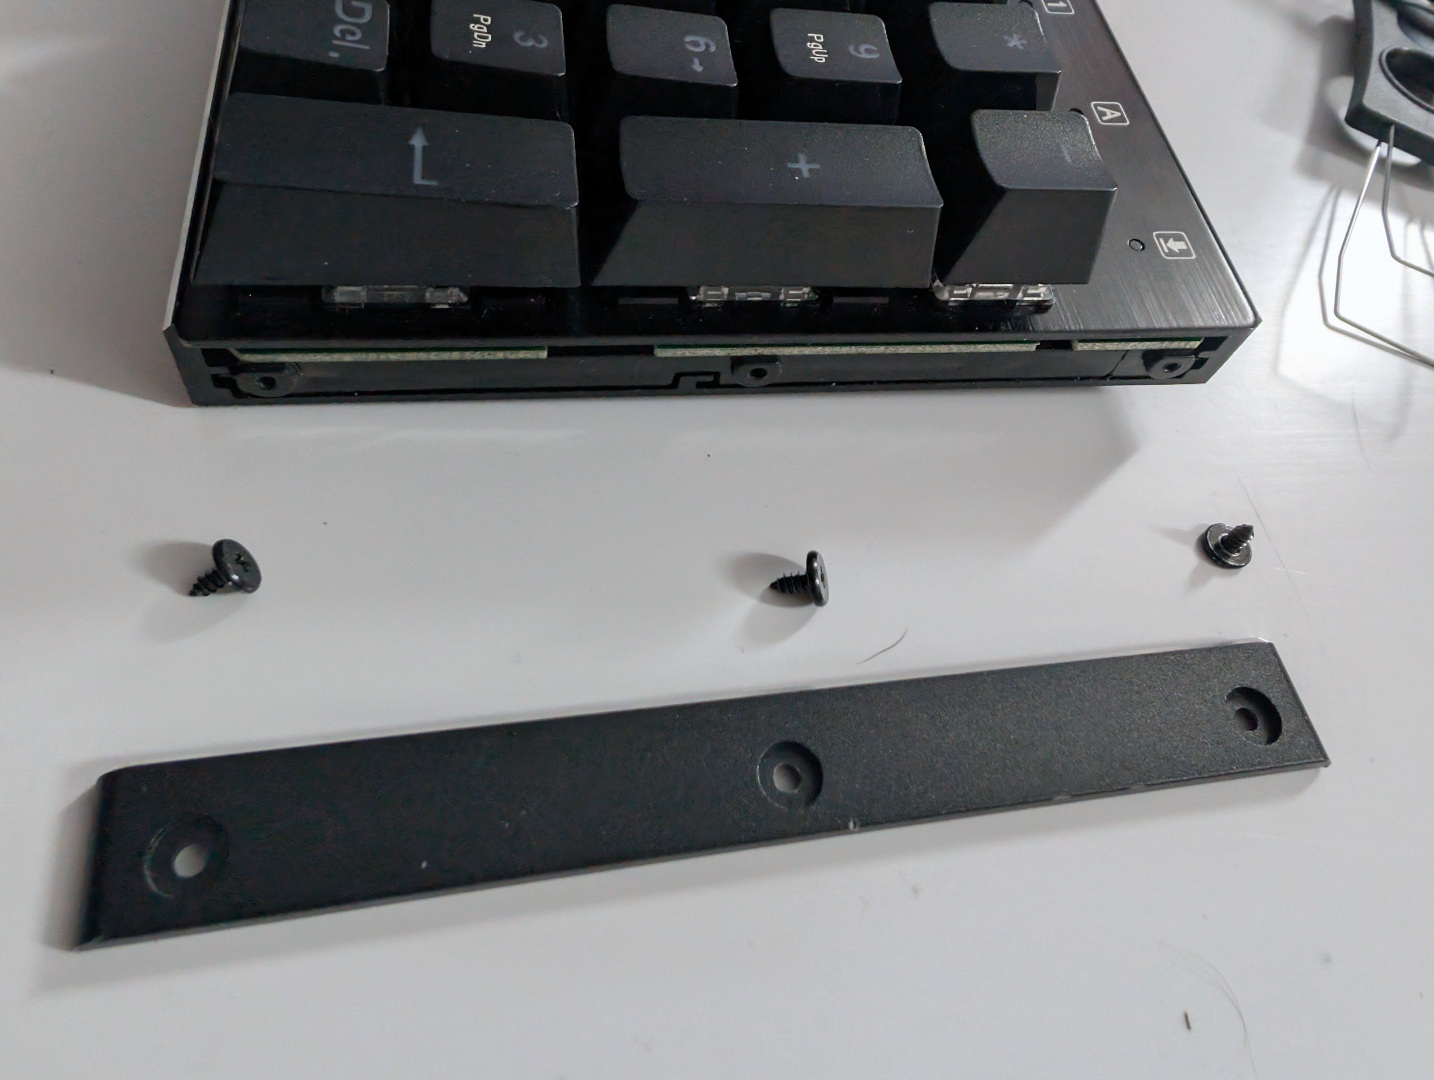
Also note these are very shallow screws that aren't used anywhere else but the side, so you might want to break out the dime-bags to keep your screws separate.
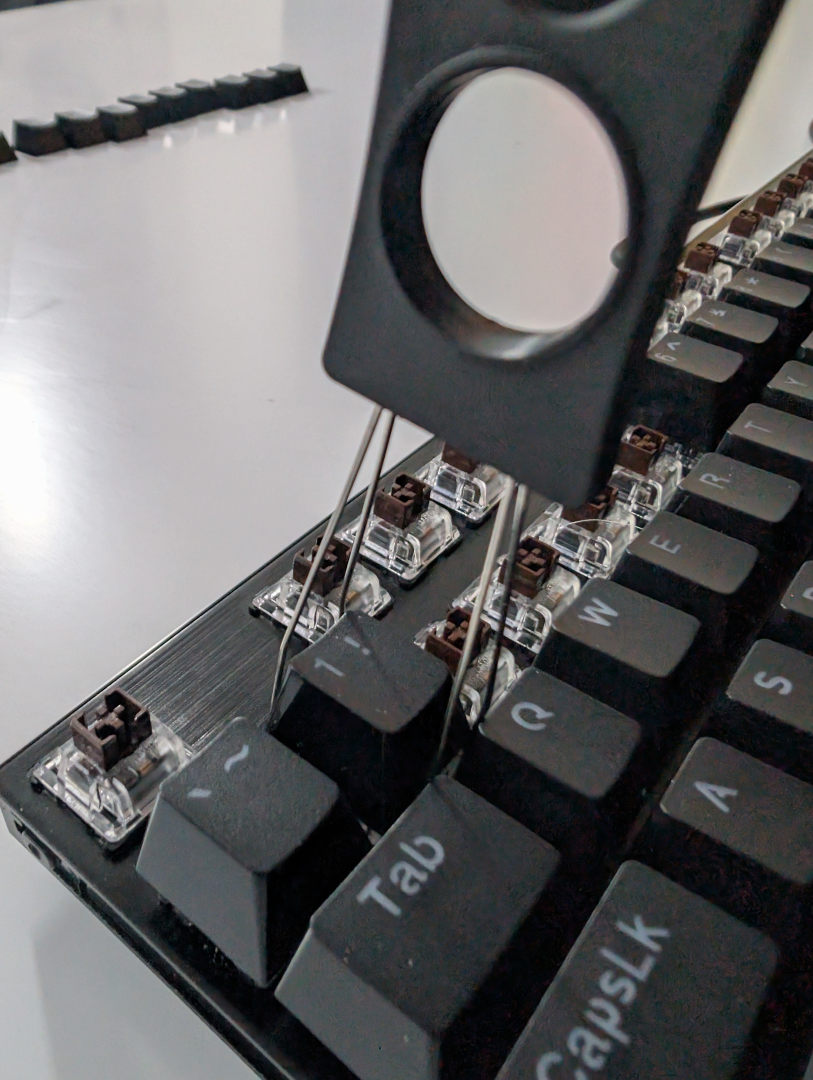
Next comes the super annoying part of removing all of the keycaps. Because to get access to the guts, we'll have to remove all of them. Good news! You don't have to remove the mechanical switches! Using the key extractor really saves a lot of time pulling them out safely. But if you don't have a key extractor. The same can be accomplished with a pair of small screwdrivers as you can get underneath and wedge them out. Apply a little pressure and they pop right out. Don't get all hulk about it, or you're else you're going to break some stems. This process takes us about 10 minutes to remove and another 10 minutes to reinstall.
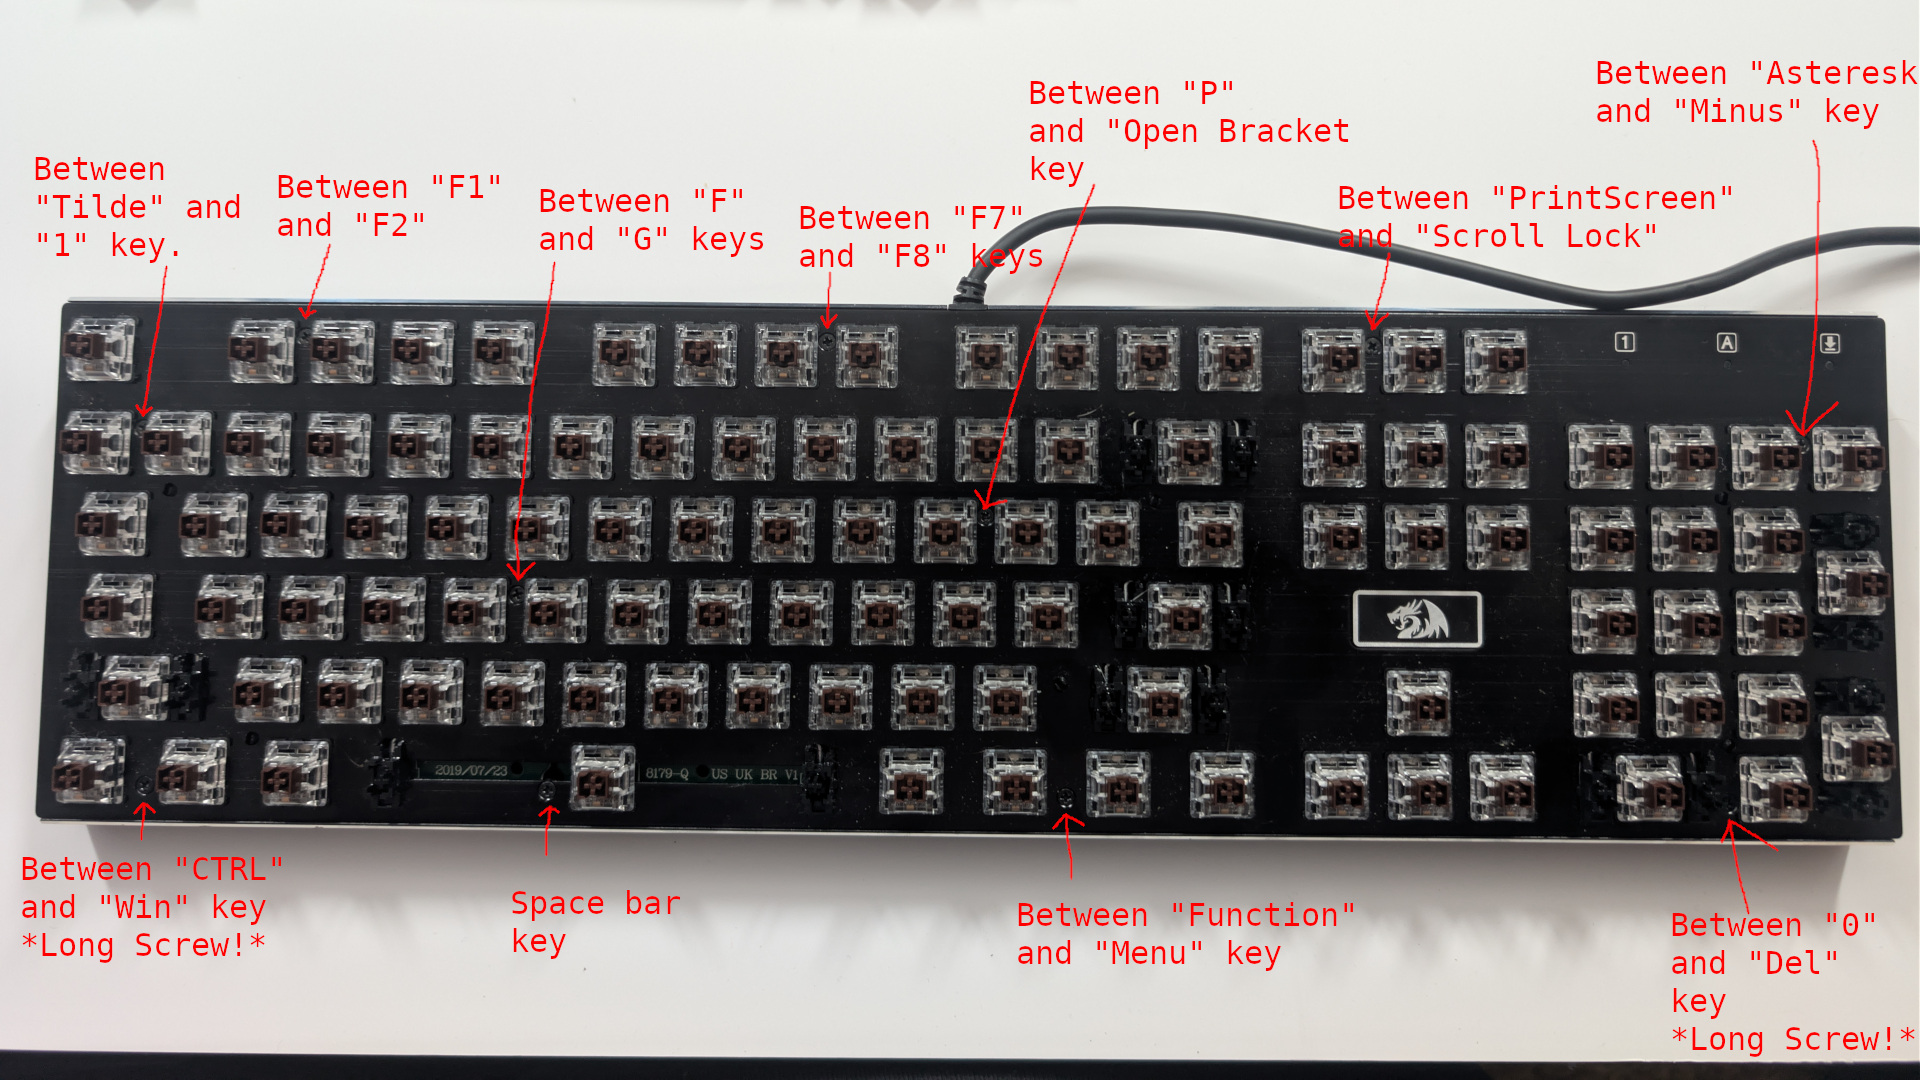
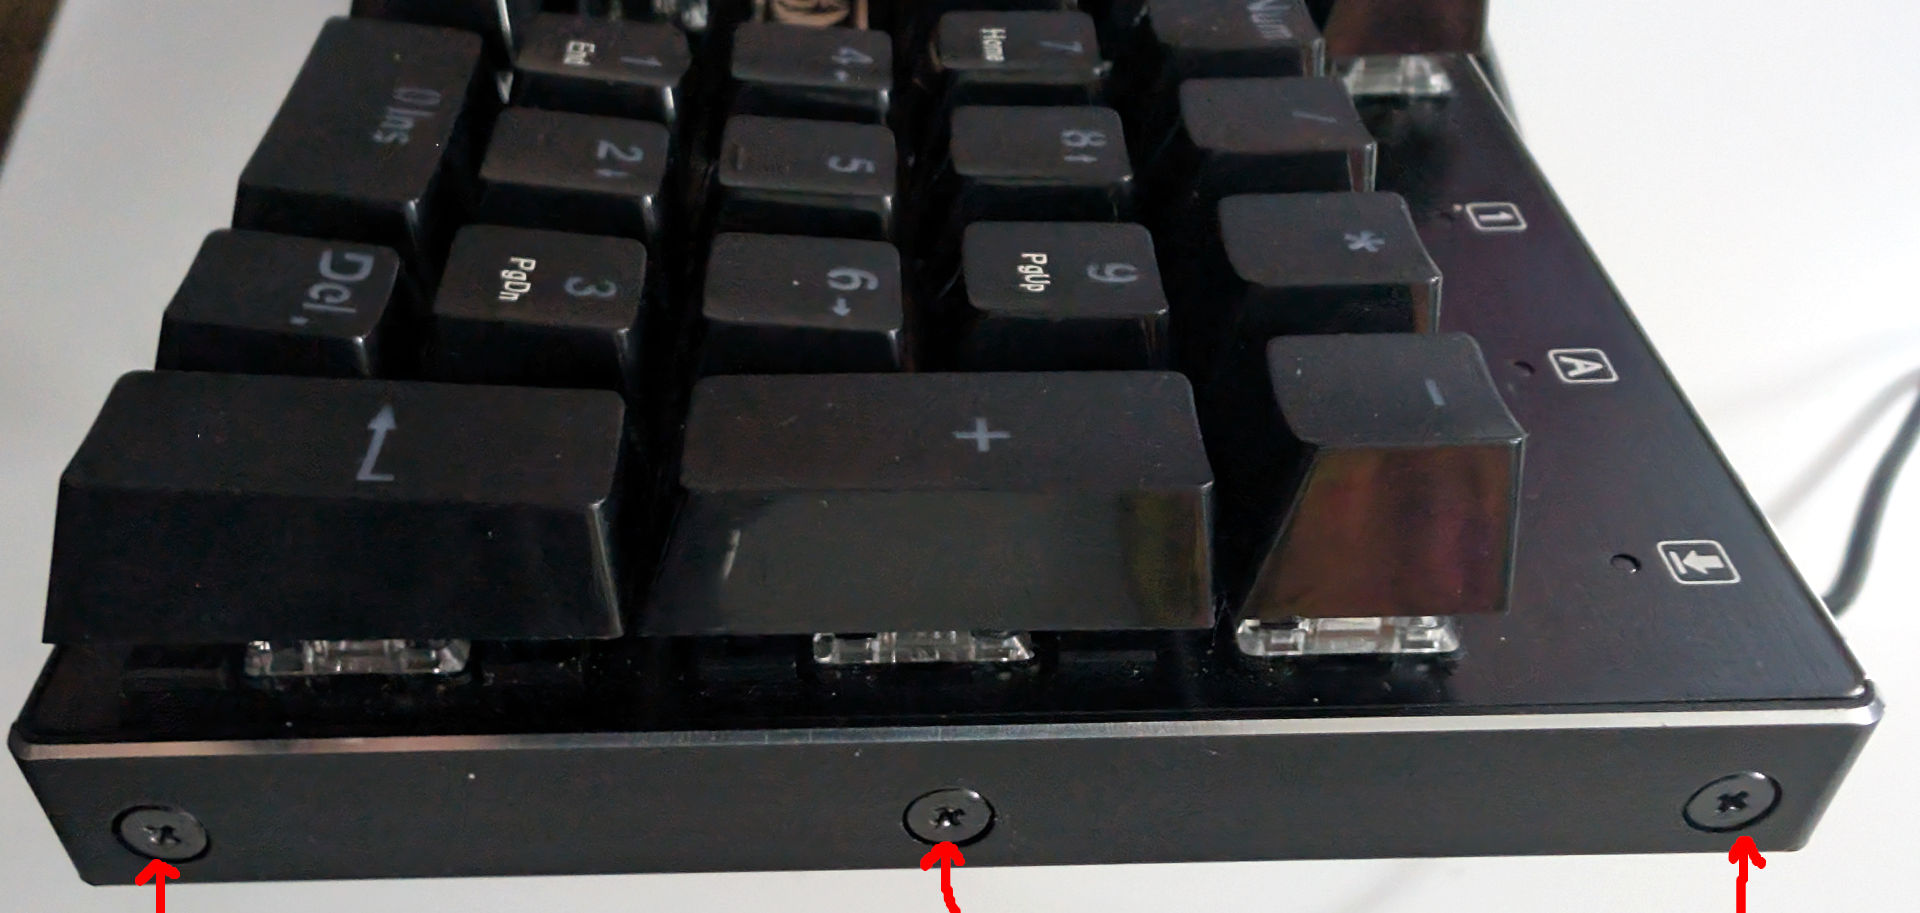
Alright, the next thing is we need to remove the base, which will give us access to the power cable and circuit board below.As you can see, we have a LOT of plastic tapping screws to remove. Starting from left to right:
- Between the "~" or tilde and the "1" key on the top.
- Between the "CTRL" and "WIN" keys, which is a long screw.
- Between the "F1" and "F2" keys.
- Between the "F" and "G" keys.
- Underneath the "Space bar" key.
- Between the "F7" and "F8" keys
- Between the "P" and the "[" open bracket keys.
- Between the "Function" and "Menu" keys.
- Between the "*" Asterisk and "-" Minus keys.
- Between the "0" and "Del" numberpad keys, which is also a long screw.
Remember removing the side plates? Well, once all of the plastic tapping screws are removed, you can slowly pry upward until it simply 'pops'out of its plastic tabs.

The nice thing about having a large desk is being able to lay out all of the screws next to the keys roughly.. You'll note that the bottom corner screws are especially larger than anything else. which is why it's important they get back exactly as you found them.
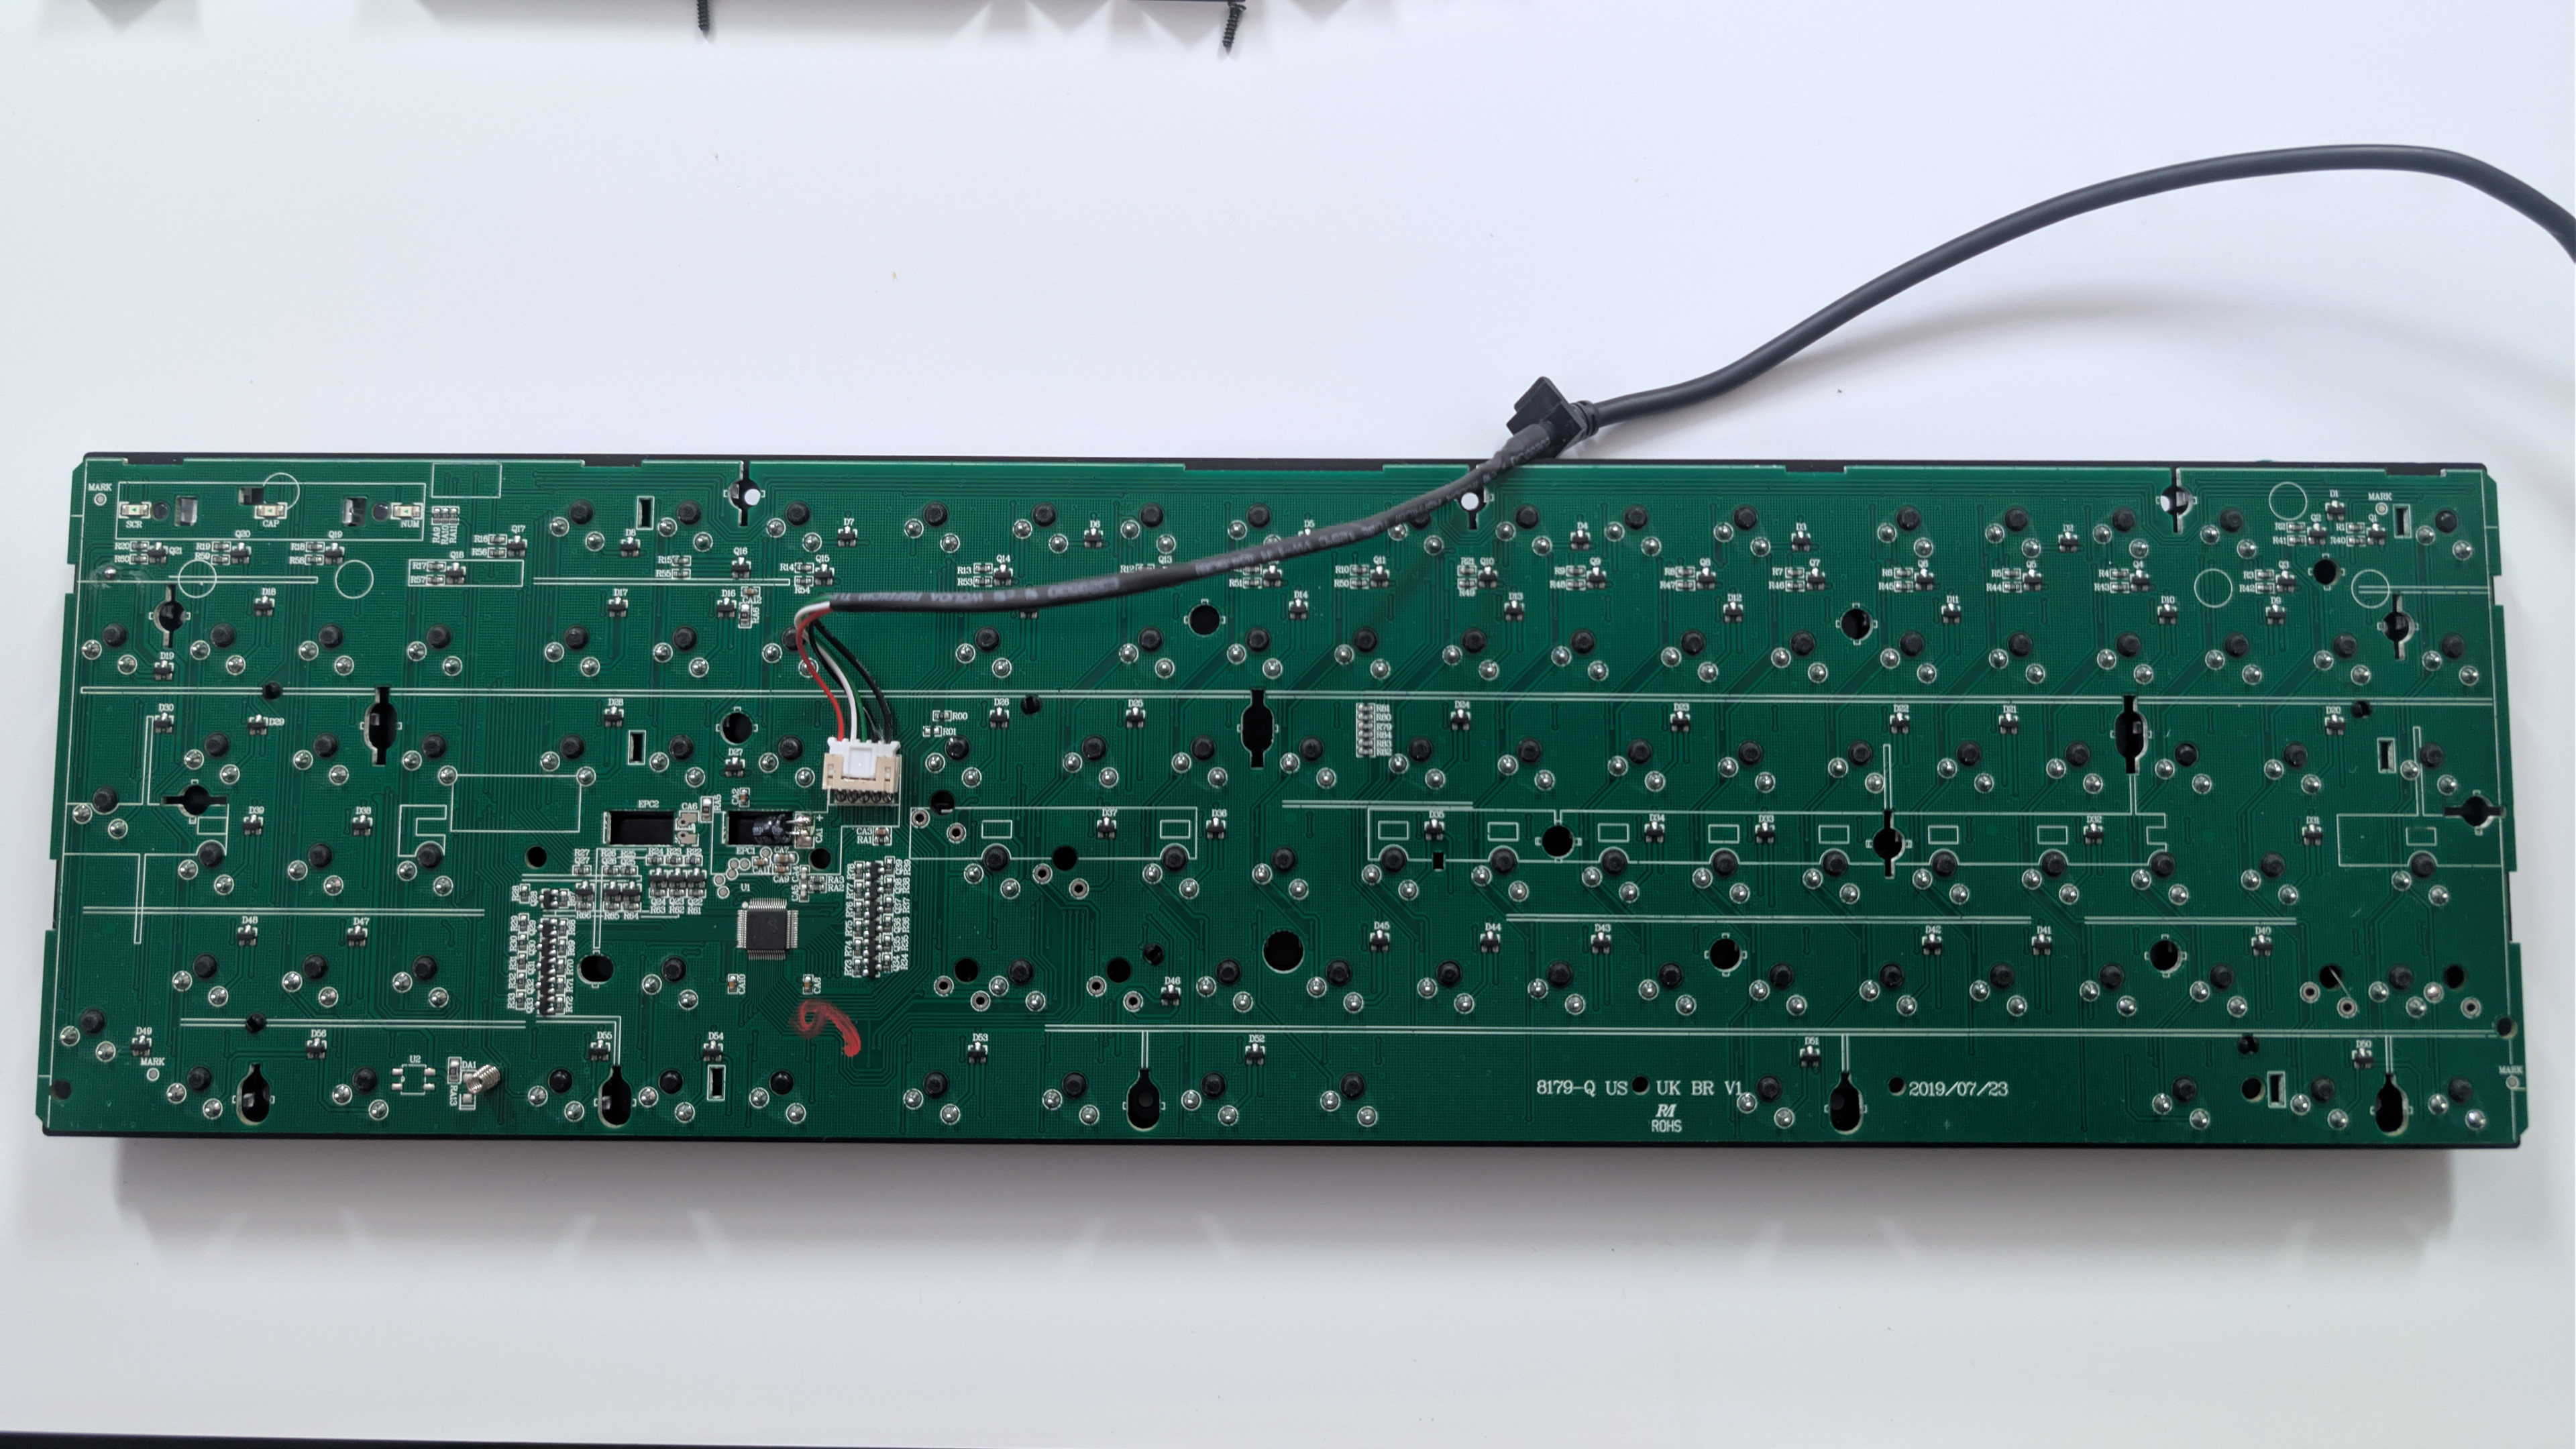
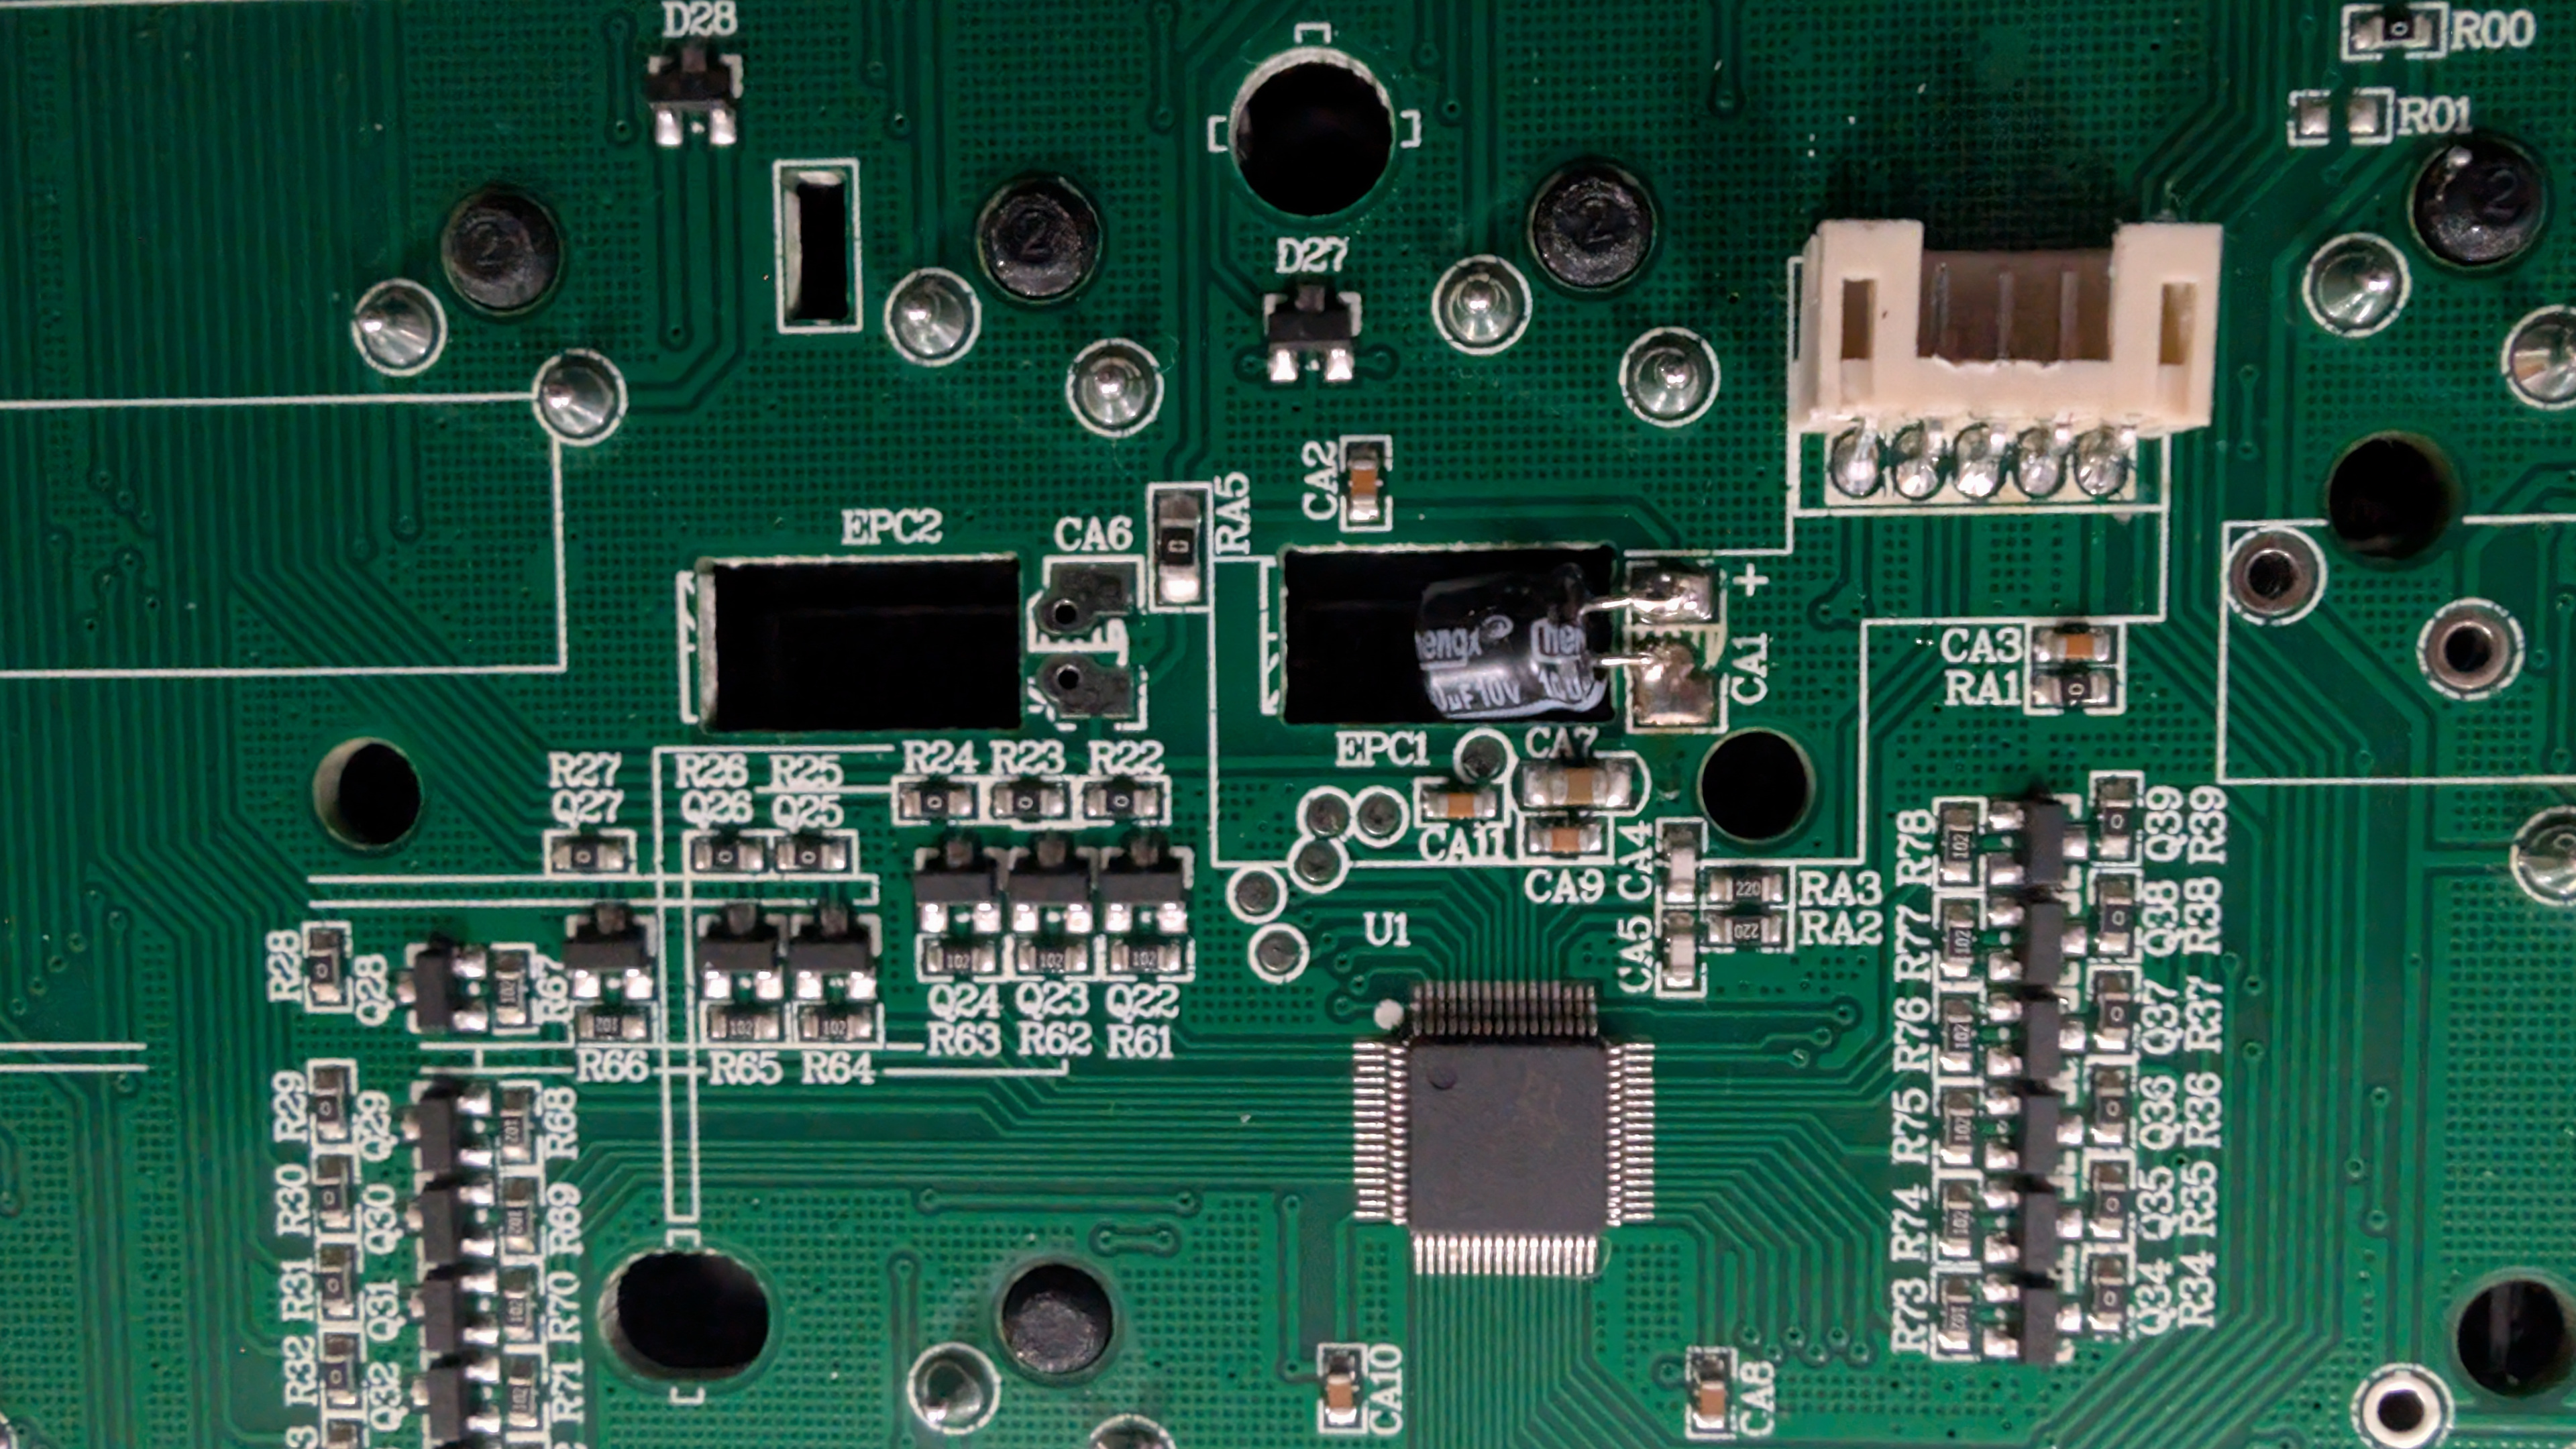
Alright, we flip it over, and we have a typical JP5 connector that goes off to our cable. With a small jeweler's flat-head screwdriver, we were able to pry that out without taking the entire plastic connector with us. Now, we ran a continuity test of the USB cable, and everything came back good. So, it's NOT the table. Looking at the circuit board, we noticed there's no fuse protection like we experienced with Microsoft OEM Xbox receivers. I decided to take a close-up picture of the IC chip, which, although we couldn't get a clear image of the CHIP, we discovered what was wrong.
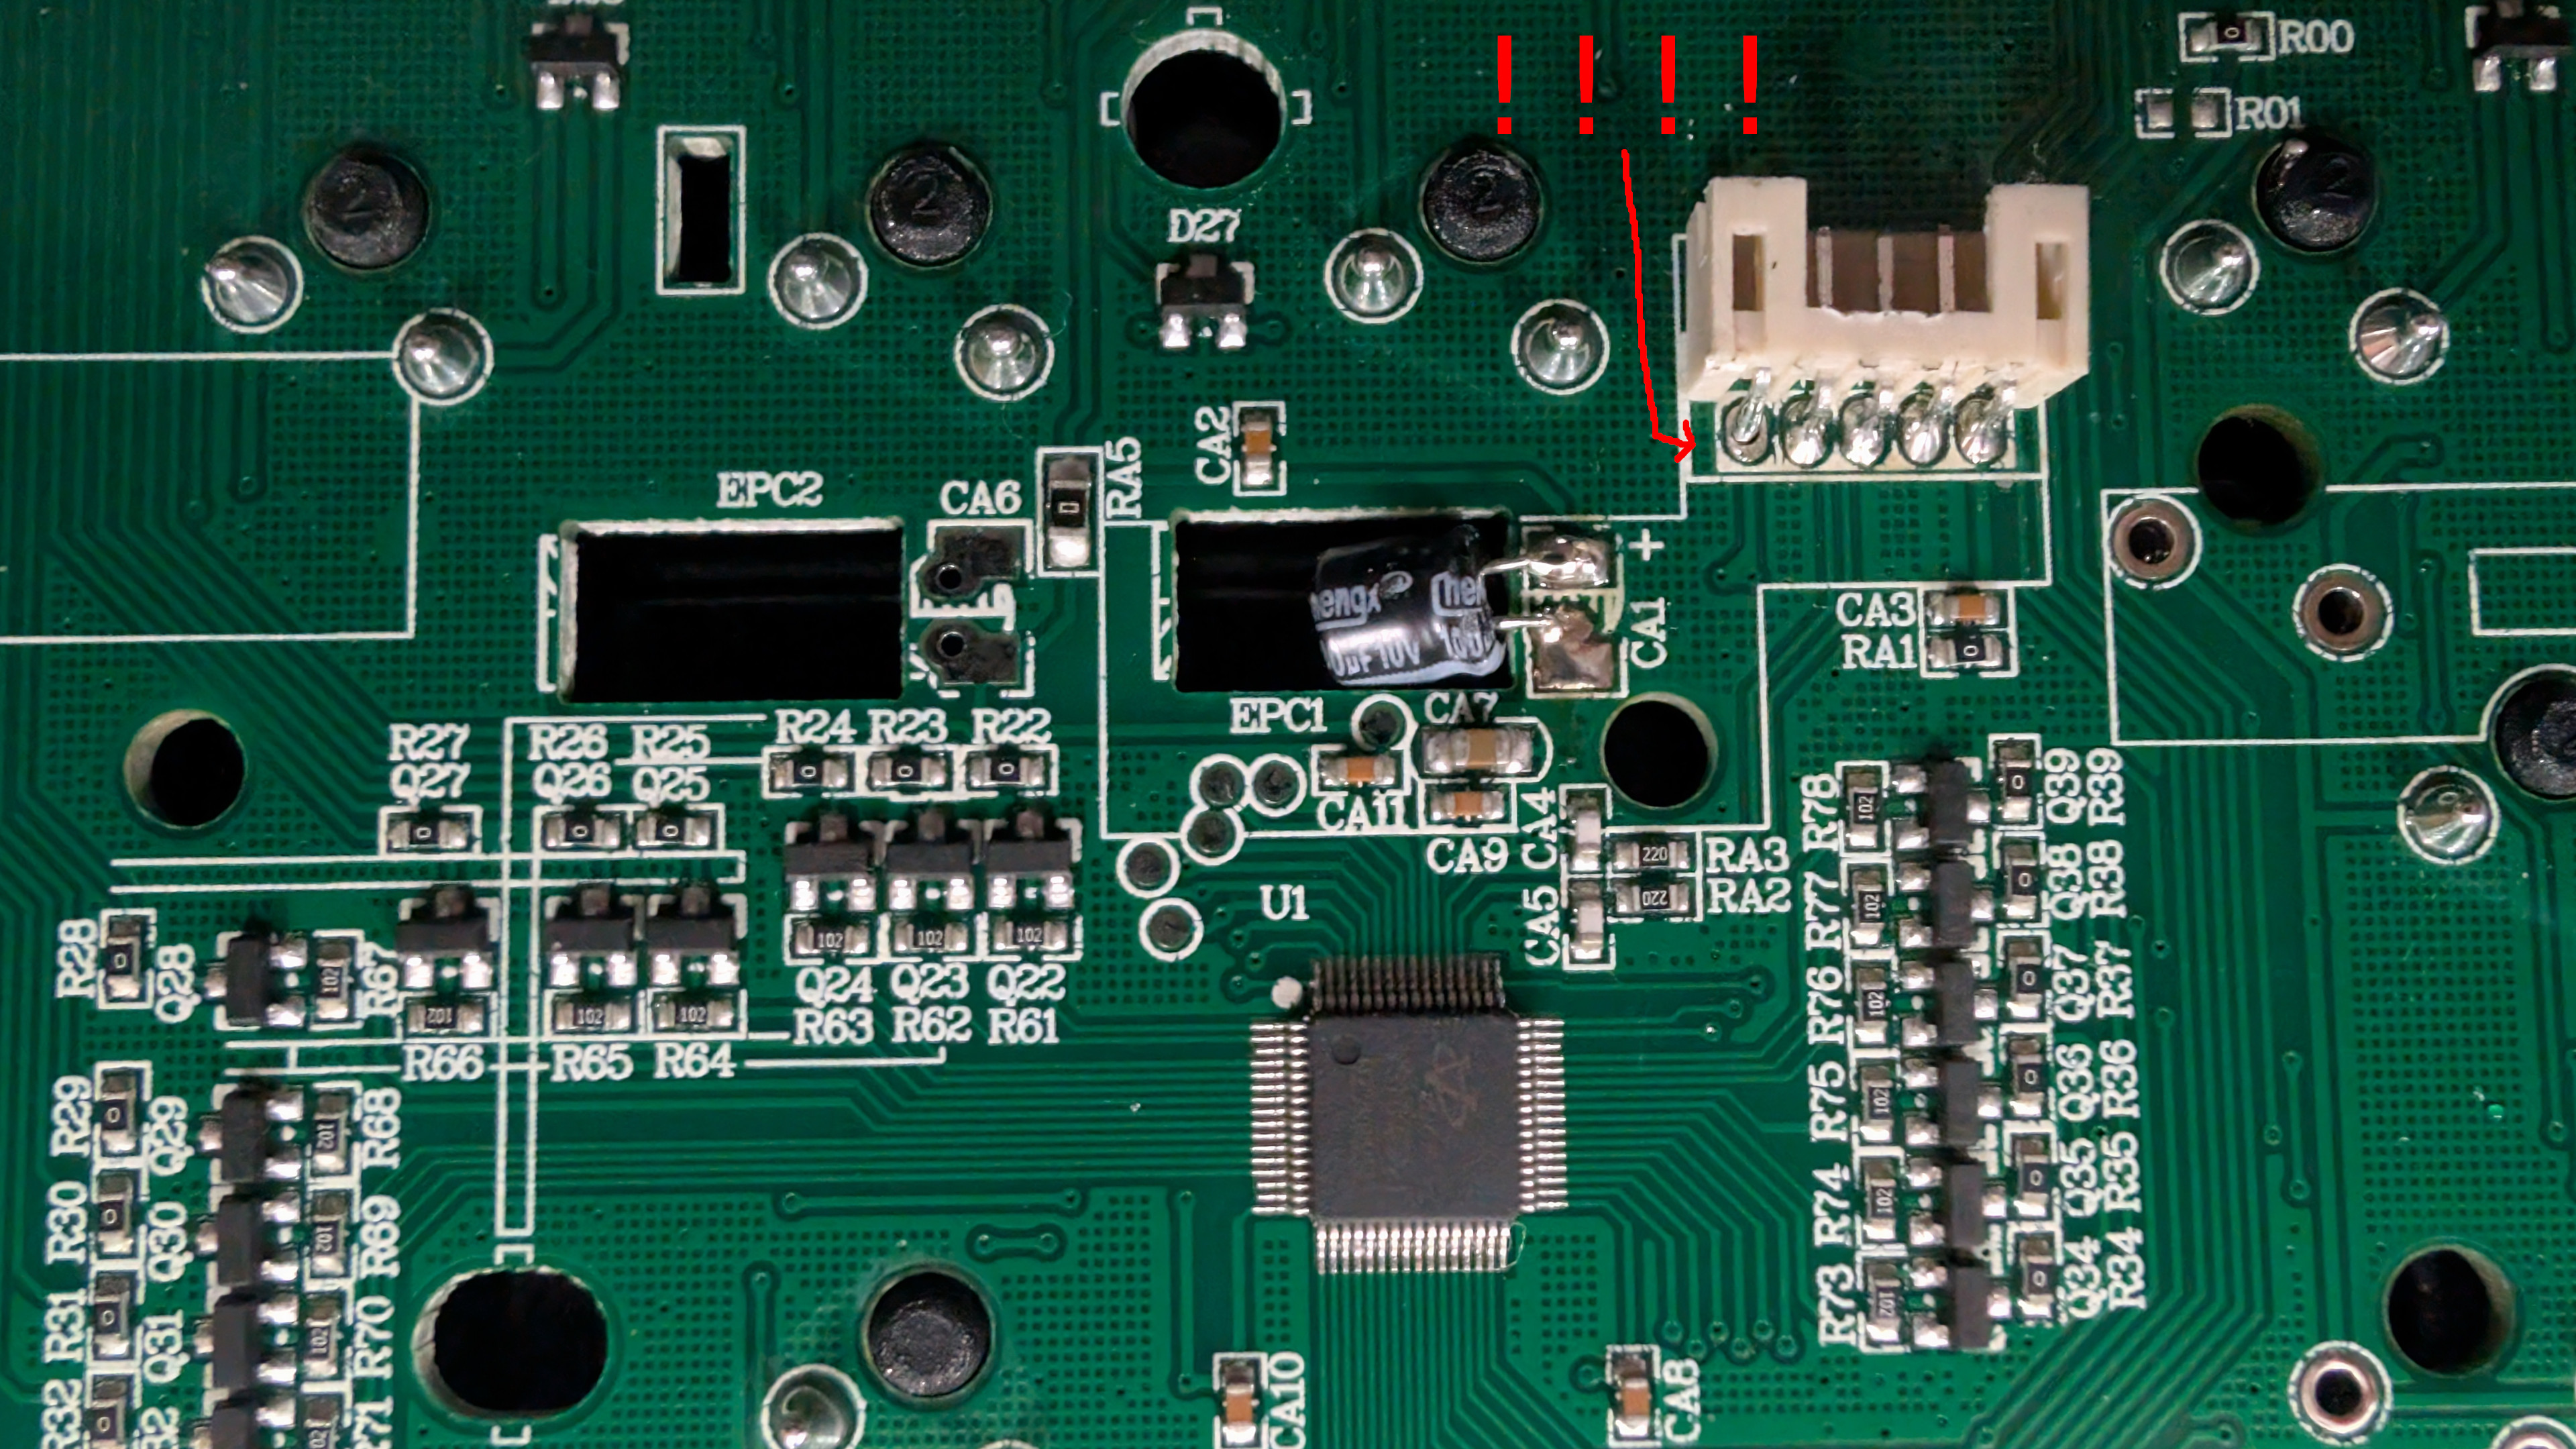
You can click on the image to get a more up-close 4 K resolution picture. But holy shit! solder starved connection on the exact pin that feeds 5vdc to power the keyboard! Now, it probably passed QA at the manufacturer because it was probably barely touching. But after shipping and bouncing around by the time the customer got this keyboard, it didn't power up at all! So this time around, it wasn't a bad cable. It was a missed solder job.
Alright, in 2 minutes with my Pinecil we fixed that starved solder connection, and it looks good as new. Now, we did plug it in, holding the motherboard in our hand just to see if it lights up before reversing all of these steps to assemble it back together. And guess what?
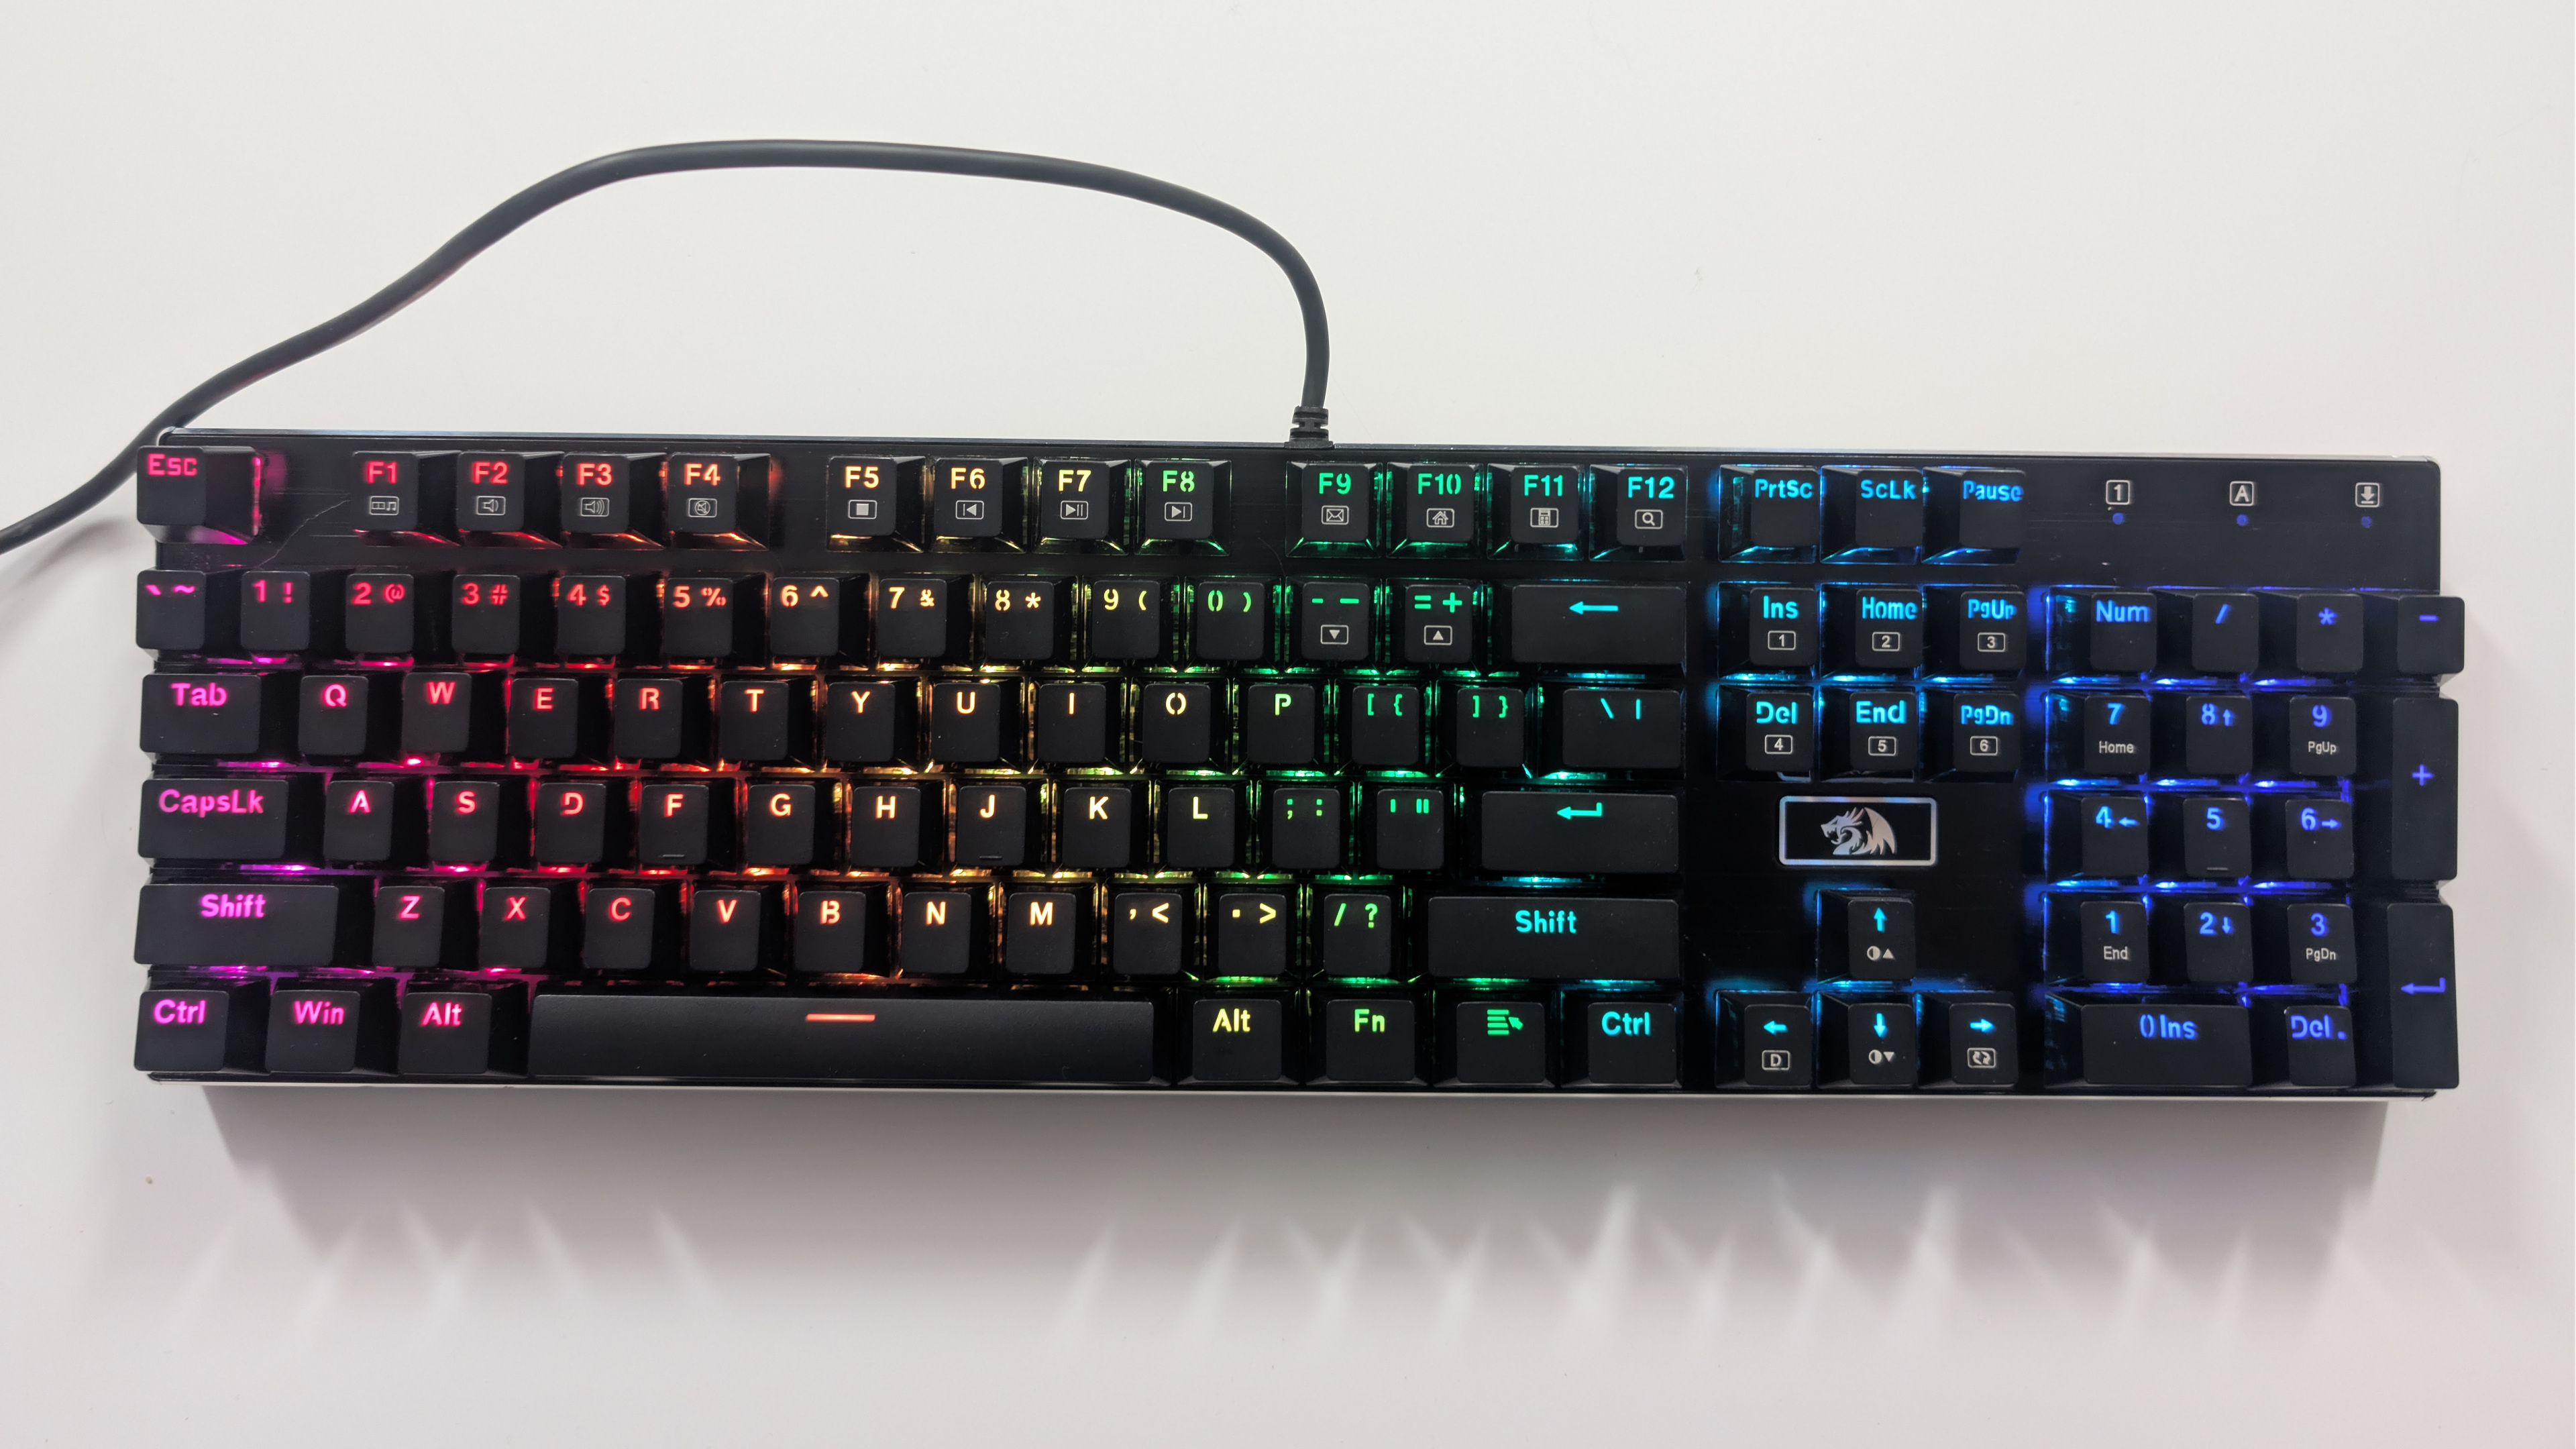
It's 100 percent again! possibly the first time the microcontroller is activated since it left the factory. Where did the other escape key come from for this keyboard? Well, when we purchased our first two Redragon K556's we upgraded the ABS keycaps with acrylics. Had to go through my storage to find the box of keycaps! But found it. placed it onto their keyboard and the Box #1 keyboard is perfect!
Final thoughts.
Has this soured my relationship with Redragon? Not really. But we also understand why Redragon gave up on the repairable keyboard. Because no one repairs shit in this world. Granted, we spent almost an hour on keyboard #1, but 5 minutes on keyboard #2. balance it out and round up. 35 minutes. Depending on how you value your time, this could be a loss. OR! It could be just saving gear that was hearing for the garbage.
To the average gamer, it's easier to get all "Karen" on some poor computer store worker, making retail an even shittier place by accepting returns that ultimately the store can't really do anything with. Unless they have a guy who spends time going through the pallets of rejects. Even then, what's the return value on a person doing that when your products are under $100? In one case, the return was justified with the starved solder joint. The other? I'm not sure. I'd view it as abuse since the stem of that brown keyboard switch was broken off.
We would also blame Redragon for not allowing companies in other countries to become authorized repair centers, like perhaps Microcenter. Where they would have a stock of parts ranging from the rubber feet of the keyboard to keycap sets, switches, and even a few aluminum outer shells and USB to JP5 connectors for recabling. Allowing these computer stores to have the capability of repairing a device to a new state. As the only way to really return a Redragon product is to send it halfway around the world, which, given shipping/tariffs well it's too costly to even try to do this from the States.
 Made an addendum article talking about the A105 keycaps and their longecity so far.
Now, the only thing that we are still a little bitter with Redragon on is how they stopped selling the A105 keycaps, but you can still get the A101 normal ABS plastic keycaps. Depending on how aggressive you are with your keyboard, you'll be burning through a new set of ABS plastic every 3-5 years, whereas the acrylics are going strong since we purchased them in 2022. We wouldn't give a shit if we had to pay double the cost for acrylic. It just worked. We've also searched around to see if anyone else is doing acrylic key-caps. no one! If you guys know a vendor that's doing acrylic key caps instead of just ABS, let us know in the comments before. For now, we'll probably be buying from Chinese vendors for old stock, as Reddragon is completely out.
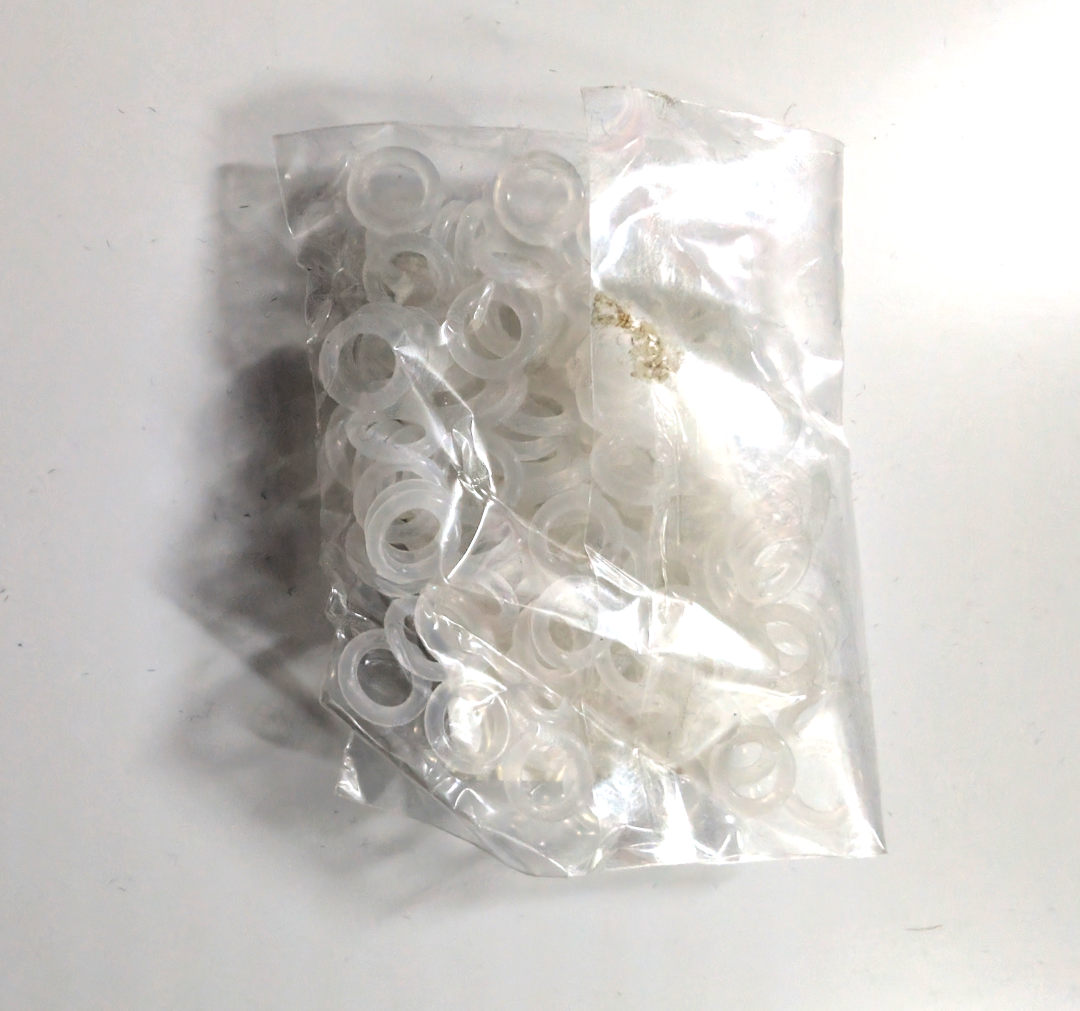
Some of you, during reassembly, may have asked why we didn't go with O-rings to reduce the plastic-on-metal 'klack' noise that is the complaint of some Redragon owners. The answer is:
It does not work on the TKL brown switches at all! - S
Because not only is the "+" part connecting, but the brackets of the switch are also connecting. There's just too much plastic making contact wth the keycap. I did load up these rings into my K70 as an experiment since it has Cherry MX reds, and it DID reduce the plastic clacking sound. So it wasn't the fact that we received defective rings from AliExpress. Unless we pulled every key off and shaved off the sides, sound dampening does shit on a Redragon.
As for the second Redragon, that's going off to FloatOverblow. Because what the hell are we going to do with two mechanical keyboards? We know the obvious answer is to put it back up on eBay to get your money back. But, eh, it's better when someone you know actually wants something like this.
For those who read this article and stayed with our ride to the end. Thanks. We really do appreciate it.
Until next time, that's what server said.
+++END OF LINE