
Keeping your Ouya alive with Android 5.0
I wished that the Android 5.0 scene on the Ouya matured a little more prior to making this tutorial. Upon originally doing the CyanogenMod tutorial. I came to the realization of being hit with walls of bugs, questions, and comments most of which we frankly couldn't answer. However, with the crushing progression of Kodi/XBMC moving onward toward v17 Krypton. People are asking for a tutorial on how to make their Ouya still relevant. We also want to say that we're not really programmers. We just document and modify scripts at our very best. The real heroes that require your thanks and support are on the XDA forums right here. The answer is:
It's possible. But it isn't pretty! -S
Disclaimers.
Even though at the date of this publication we are well past violating any warranties on your Ouya Console. Hell, the Ouya as a company is dead only remaining as a shadow organization underneath the Razor banner. We still feel it is necessary to go through all of the precautions and disclaimers.
NOTICE!
This tutorial will go through discussing the heavy modifications required to replace the operating system of the Ouya Console with an Android stock Operating system. In an effort to further the lifespan of the system for the usage of applications like Kodi. We cannot be held responsible for any damage be it physical, mental, or psychological that could occur while reading this document. The blogger responsible for putting this documentation together has zero background and credit within the Android development scene and thus should all be taken on an AS-IS basis. The version of Android used is highly unstable and may produce undesirable effects depending on what application is being launched. Please read out the FAQ for general questions about this site. As this site gives out direct links to binary-based software always scans every download with an adequate virus checker. Direct or hot-linking to the binaries will not be allowed due to the reckless nature of YouTube content creators and will only allow linking to this article. Thank you for your attention.
Reviews and thoughts.
Now before anyone gets overly excited about this. I just wanted to let everyone know that Kodi Krypton v17 does work underneath this OS. But there are some issues. One of them being mp4s are being software decoded despite making sure hardware-based encoding is enabled. This especially hurts 1080p videos. h265 videos are out of the question on this unit. So it's better to simply run CM11 with Kodi Jarvis v16. Unless someone finds a solution to this video decoding problem this is going to be a deal-breaker for many people out there. YouTube and Vimeo seem to work all right. Gaming is a little sluggish due to the fact that disk access time is reduced in this image. causing games to periodically lag spike for no real reason. All in all. the last image which is AOSP 5.0 works. But it's not great and it's only fair to warn people of this early on before everyone tries it themselves.
Introduction.
This tutorial will serve as a guide for both users who have followed our CyanogenMOD tutorial as well as the user who is running a stock Ouya Console. For those who followed my CyanogenMOD tutorial, I would like to thank every one of you for checking out my blog entry about it. But you are here because Kodi is now moving away from Android 4.4 and setting Android 5.0 as the minimum requirement for their latest media center. In order to do this, we will be using the AOSP 5.0 image from the XDA forum. The abbreviation stands for "Android Open Source Project" allowing developers to roll their own operating systems such as what the user "cwalker" did. Since he did leave everything open source there is no stopping someone from picking up the branch to continue the development of it.
Is this procedure even legal?
 The short answer is:
Yes
Unlike the original Xbox and its soft-modding and home-brew community where Microsoft would go after ANYONE making a .xbe file. Ouya founder Julie Uhrman stated in their kick-starter video on Invidious indexed at 2:21
"Their console is open for hackers who want to tweak the box and make it their own." - Julie Urman
The new company Razor they are only interested in the Ouya Dashboard with the "discover" store where all of the devs have signed up to have their games published. Razor has no direct interest in the legacy Ouya hardware.
Ouya Compatibility chart with Android AOSP 5.0:
All Ouya consoles can accept Android AOSP 5.0. However, there are some compatibility issues in terms of Wi-Fi and Bluetooth. 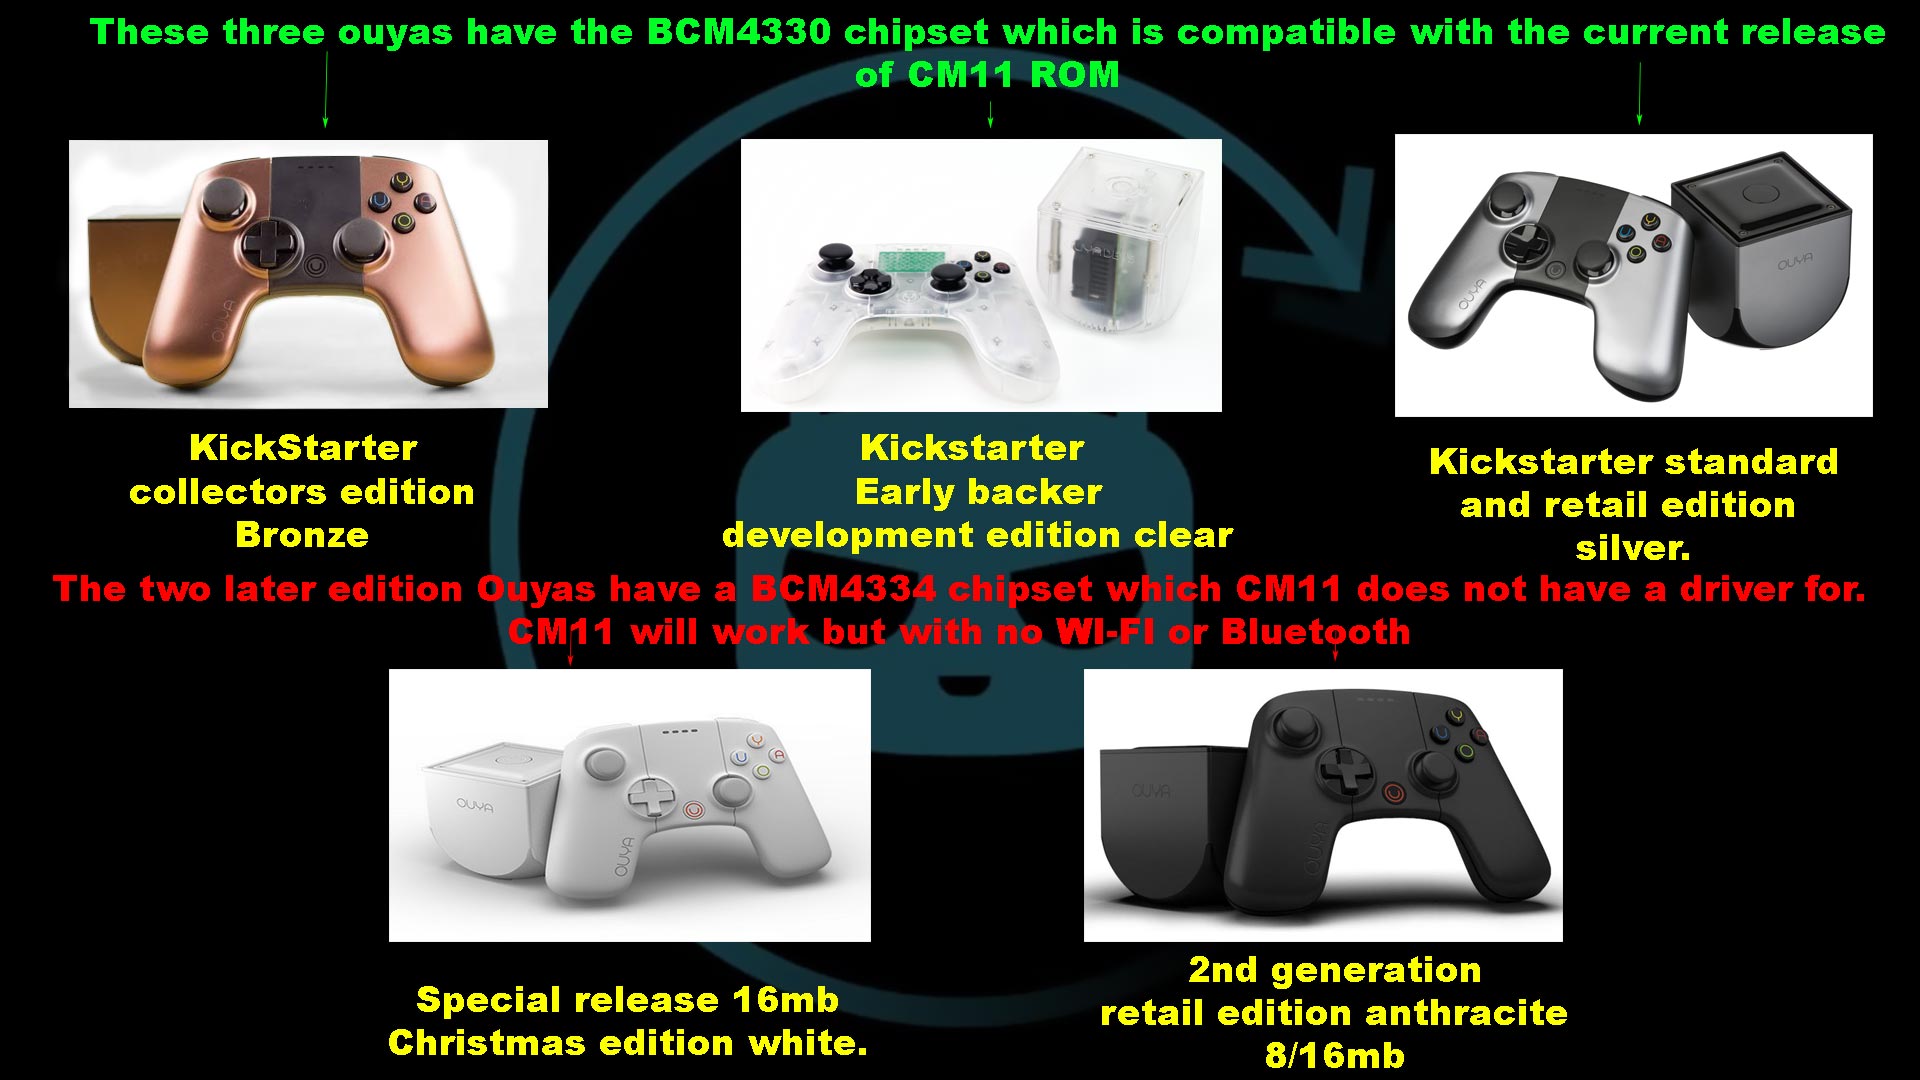 4/21/2017 - The compatibility chart for CyanogenMOD 11 is identical to the compatibility chart for AOSP 5.0.
- All Ouya systems with the BCM4330 chipset are compatible with AOSP 5.0 for Wi-Fi and Bluetooth. This includes the development edition clear, Kickstarter bronze, and retail silver.
- All Ouya systems with the BCM4334 chipset are not compatible with AOSP 5.0. Although the OS will load. Activating Wi-Fi and Bluetooth will not work. This affects the Anthracite, Ninja Black, and Christmas White edition Ouya consoles.
Why even install Android AOSP 5.0 to the Ouya?
Like any decision that you make with your device, there are always advantages and disadvantages to installing new firmware onto a device. Let's go through some of them.
The good of AOSP 5.0 mod:
- Kodi - At the time of this posting Kodi is moving away from Android 4.4 and onward to Android 5.0 for their latest release of Kodi v17 which makes it much easier to develop for what they need. Kodi v14 is a perfectly fine video player that works brilliantly side-loaded onto the Ouya! But anyone who has witnessed the Kodi/XBMC progression will tell you that the moment the latest version gets released suddenly plugin development sort of stops on the previous versions. So Kodi is now telling Ouya users to upgrade to experience v17 or to stay behind on v14.
- Google Play - I have published articles in the past on how to get google play working on your Ouya. But over time Google has gotten more and more obnoxious with the way it decides to update itself. Sometimes on the Ouya OS google doesn't really update properly. The end result is getting a lot of 921 errors when downloading APK's of your favorite utilities and games off of Google Play.
- Side Loading - There always will be compatibility issues with sideloading any game or application on any Android device as it's just going to a newer version of Android opens up the doors on games that otherwise would've crashed on the Ouya before. Once again, it gets back to how newer Android operating systems can handle older apk's as well as some of the newly compiled apk's.
The bad of Cyanogen Mod:
- Ouya Discover Store - If you like Ouyas Discover and do not want to screw around with getting your console working with weird controls or have to occasionally hook and keyboard or mouse to exit an application this can be awfully problematic. You can kind of get the Discover store back via Ouya Anywhere. But it doesn't come without its own host of problems.
- Don't want Google Play - You've never rooted your Ouya and have no intention to.
- ROM flashing risks - Like anything, there is a danger of hard-bricking your Ouya
- Kodi v14 sideloaded on your Ouya - It's perfectly fine for what you do and has no reason/intention of going to Kodi v15.x and above.
- Hardware-based compatibility issues - The Ouya trackpad does not work, and Bluetooth controllers like the PS3 and Wii-mote do not work. Certain memory cards are instantly rejected on this image of Android 5.0 for reasons unknown. RJ-45 network support has not been fully tested.
Then AOSP 5.0 upgrade will not be for you and you can stop reading right now.
Hardware prerequisites:
 Basic hardware prerequisites for Ouya Android 5.0 are as follows:
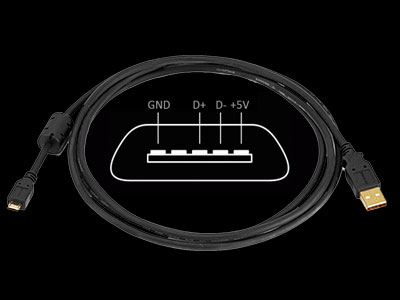
- A very good quality USB male "A" to female "micro A" cable. In this tutorial, we will not even be logging into our Ouya account which makes this cable a requirement.
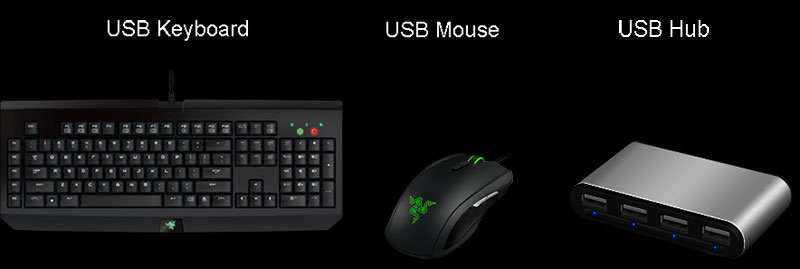
- USB Keyboard - This will be essential during the installation process as Bluetooth will not be active when we go through the boot-loader nor will it be active during the initial configuration of Android 5.0
- USB Mouse - Not nearly as essential during the bootloader process but very handy when doing your initial configuration. This is also necessary to get past the splash screen of Android 5.0
- USB Hub - It does not have to be self-powered unless you are hooking large external storage such as a portable hard drive to your Ouya. But you will still need one for as many devices as we are hooking up.
 USB thumb-stick for Cyanogen 11 users only! Cyanogen users have already done the heavy lifting and can just use a USB stick to upgrade to Android AOSP 5.0
- Some form of PC for new users to transfer the files to their Ouya. This tutorial focuses on Windows 10, but if you have Mac or Linux and you have already set up your ADB bridge then you should be fine as well.
Acquire the software:
 I have set up a link for all of the Android 5.0 mods to take place onto your Ouya known as "aospouya.zip". Click here or on the Download icon to the right to begin downloading the 7-zip file.
Extract files from the archive.
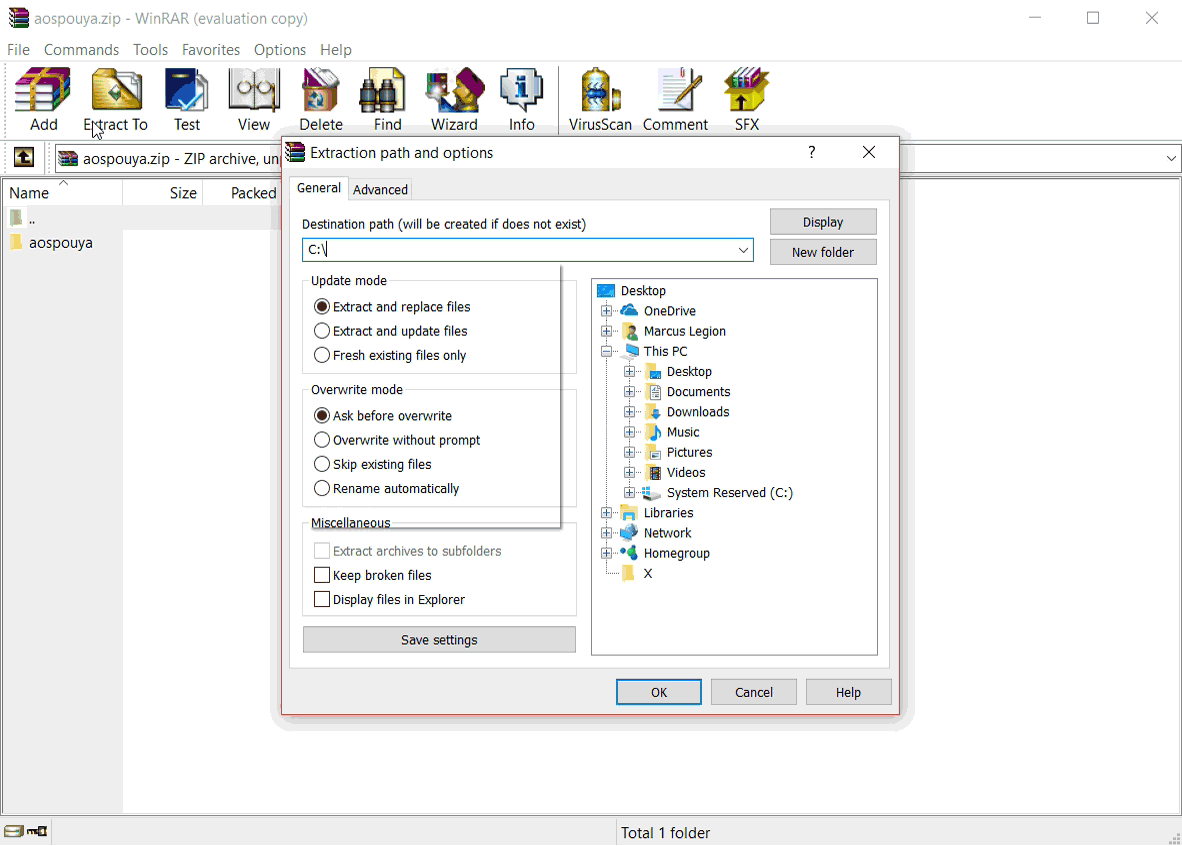 In this tutorial, we will simply extract all of the files provided in our download link to C:\ . You may extract these files anywhere you want however this tutorial will reference everything to C:\aospouya and you must make note of where you extract your files to.
The files that are in aospouya.7z are as follows:
- adb.exe as well as the two DLLs required to run ADB
- fastboot.exe which will be required to upload the recovery-clockwork-6.0.4.8-ouya.img via the micro-USB cable.
- A zip folder containing the following: aosp-lp-ouya-LRX22C-1.0.zip. (The build of the Android Open Source Project 5.0 OS.) pa_gapps-modular-pico-5.0.1-20150221-signed.zip (Google Play Apps Pico Edition.) ouyabootmenu-mlq-v2.0.4.zip (boot-loader for Ouya to change between regular boot and recovery mode via the power button.) ouya-keylayouts-1.05.zip (Modified android 5.0 kl controller files for the Ouya and other generic controllers) recovery-clockwork-6.0.4.8-ouya.zip (This version of clockworks gets installed onto your Ouya bootloader and does not get removed.) SR3-SuperSU-v2.79-SR3-20170114223742.zip (As AOSP 5.0 is not rooted by default this file will inject a new SU executable into our image to make it rooted for Android 5.0. )
- Driver folder containing files that allow you to access your Ouya in both "ADB" mode and "Fastboot" mode. The android_winusb.inf is already modified to find an Ouya on USB device USB\VID_2836&PID_0010 .
- A "win10" folder contains batch files "enable.bat" and "disable.bat." these files will assist us in installing unsigned Android drivers to a Windows 10 64-bit edition PC.
Installation of Android 5.0 AOSP edition onto your Ouya.
Before we talk about starting there are now two different Ouya users out there in the wild right now.
CyanogenMOD 11 Ouya users.
![]() The really good news for those who have followed our tutorial in the past is the simple fact that you already did all of the hard work!
The really good news for those who have followed our tutorial in the past is the simple fact that you already did all of the hard work! 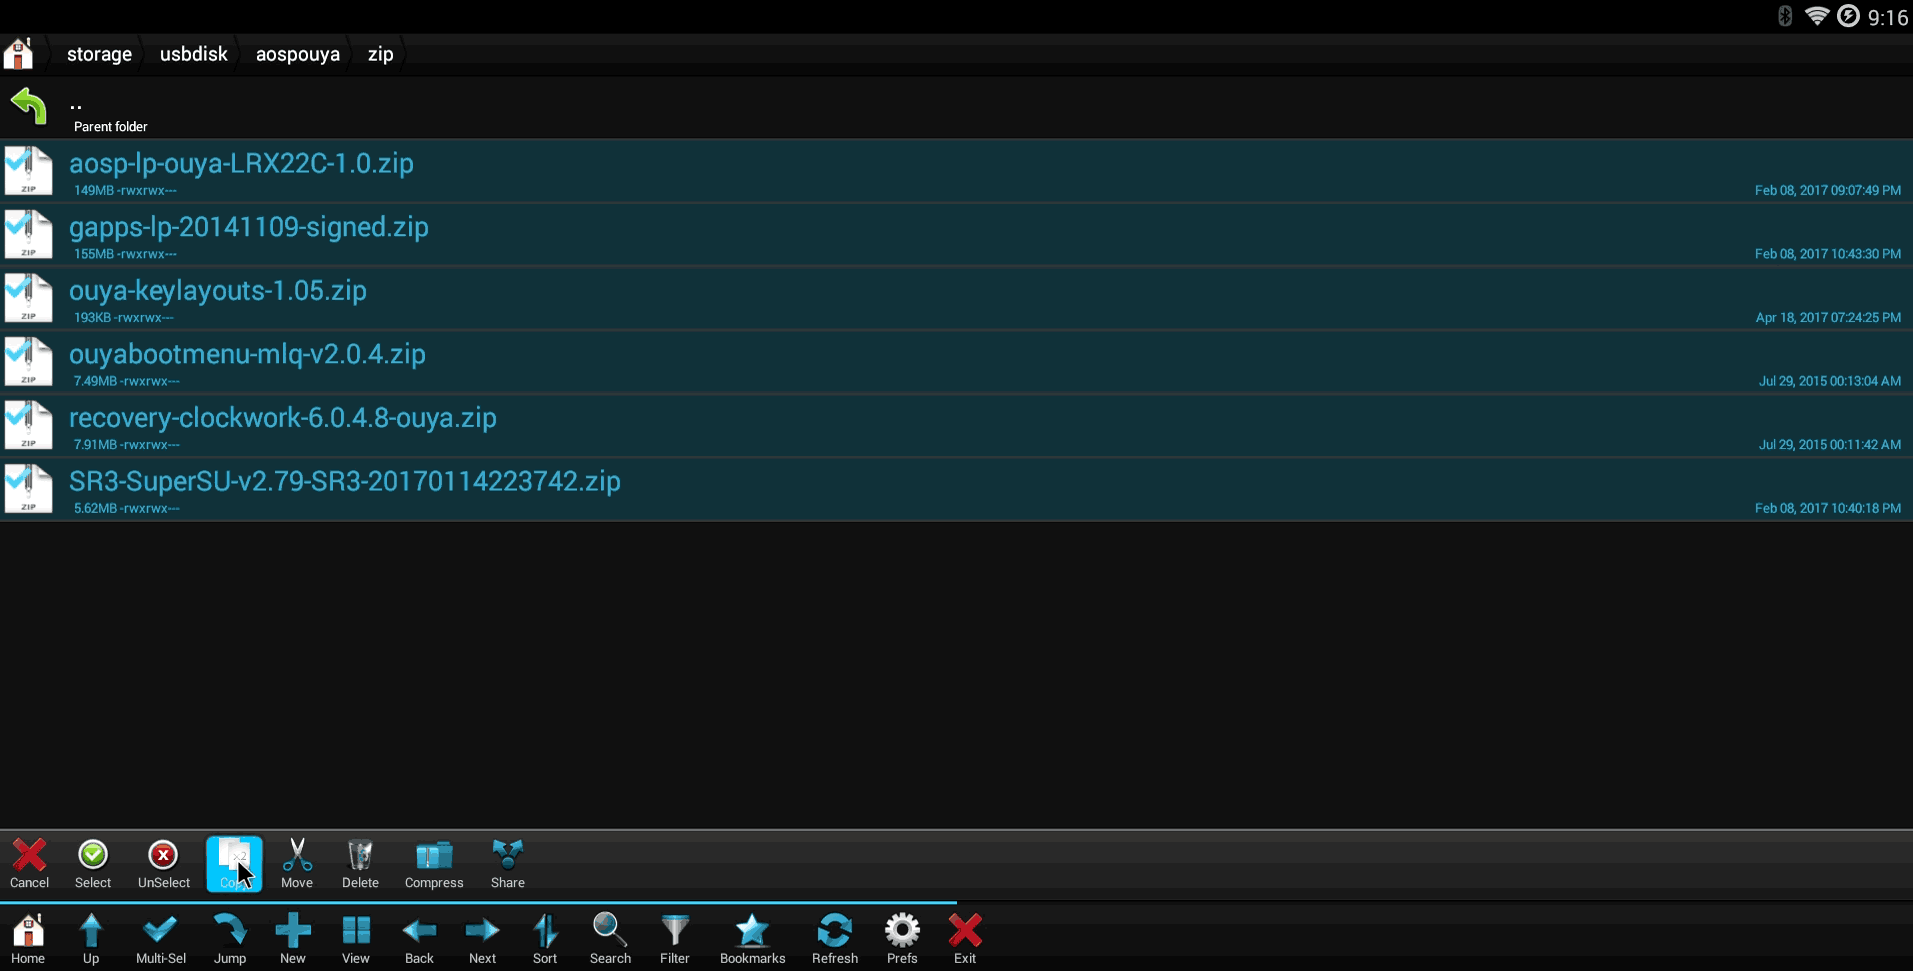 Simply put the /aospouya/zip folder onto a USB stick.
 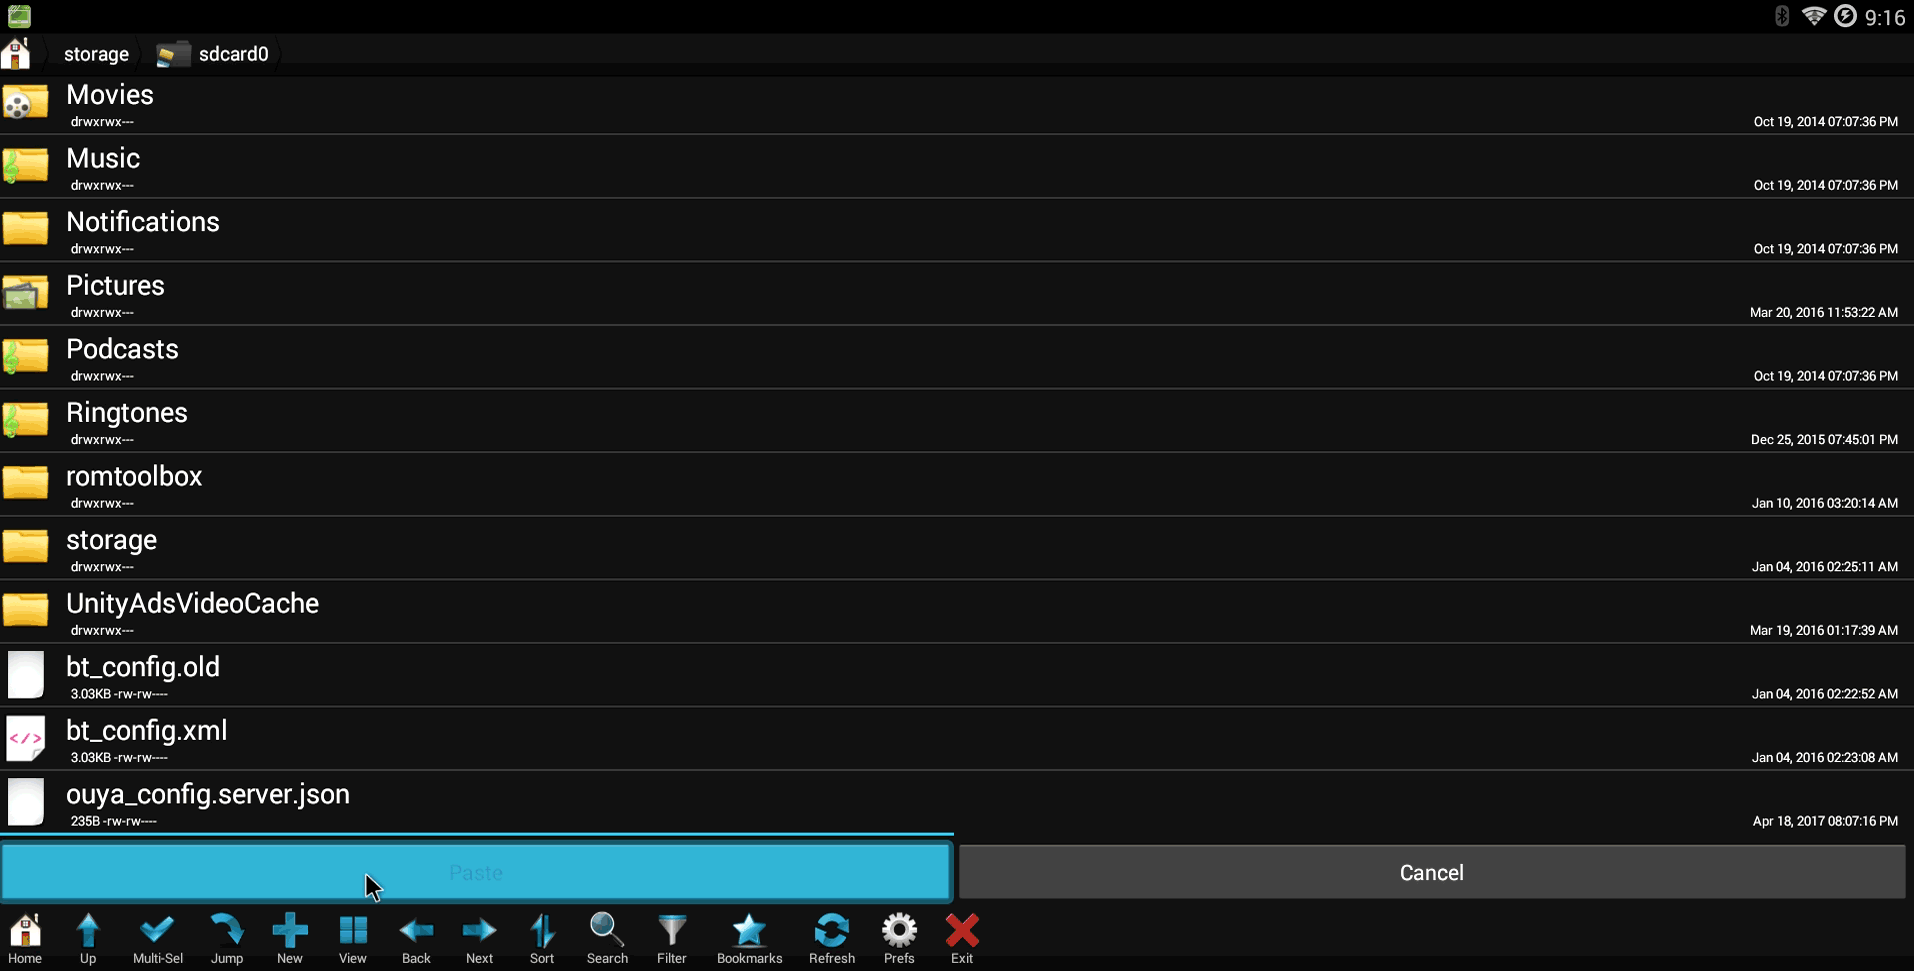 With your favorite file explorer paste all of the zip files right into your /sdcard/ folder. The next step will require a keyboard plugged into your USB port so make sure to have that ready.
 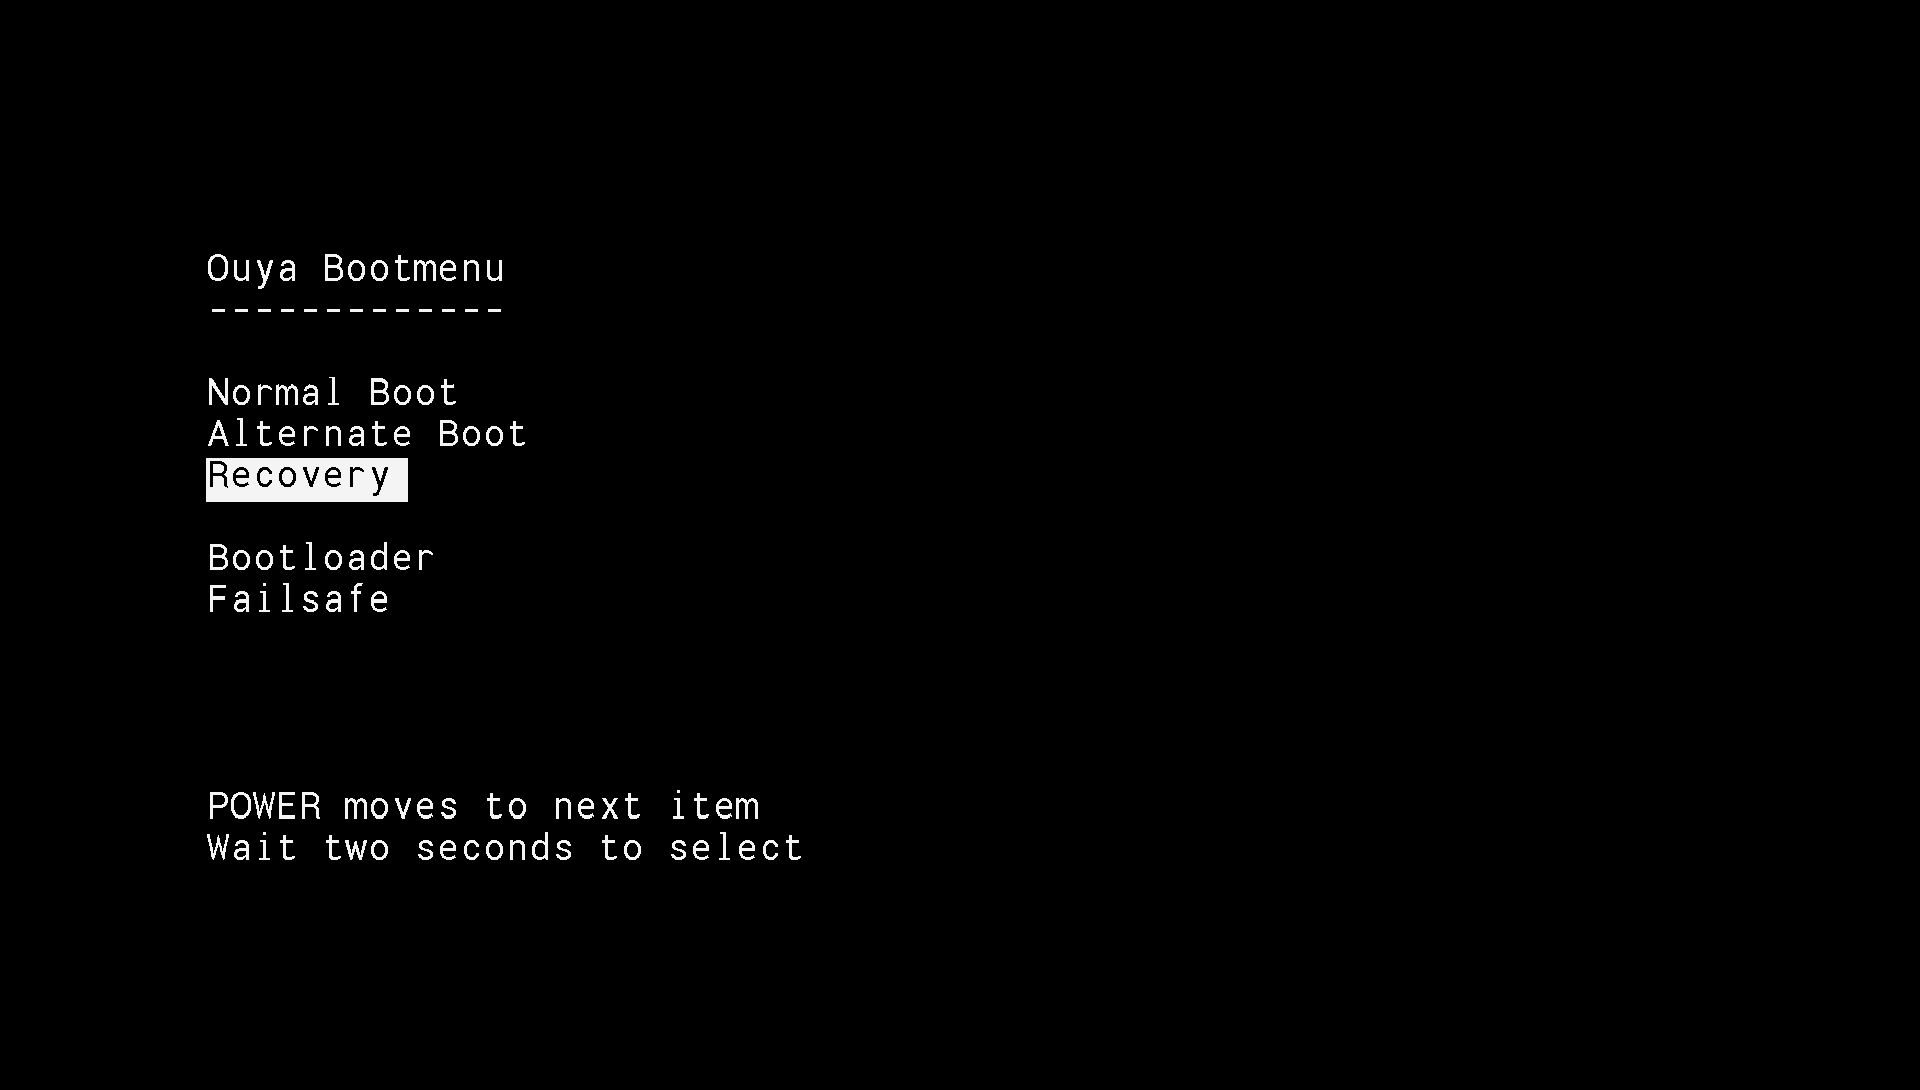 Either reboot your Ouya into recovery mode using your favorite reboot APK from Google Play. Or simply power down your Ouya and power it back up. The moment you see the Ouya Boot menu use the Ouya power button to make short-clicks down to Recovery mode. Your Ouya will then boot into ClockWorkMod Recovery. Click here to skip past all of the things you have already done!
Stock Ouya users.
The next group of Ouya users we will be talking to in the wild are still the majority which is the Stock Ouya firmware users. 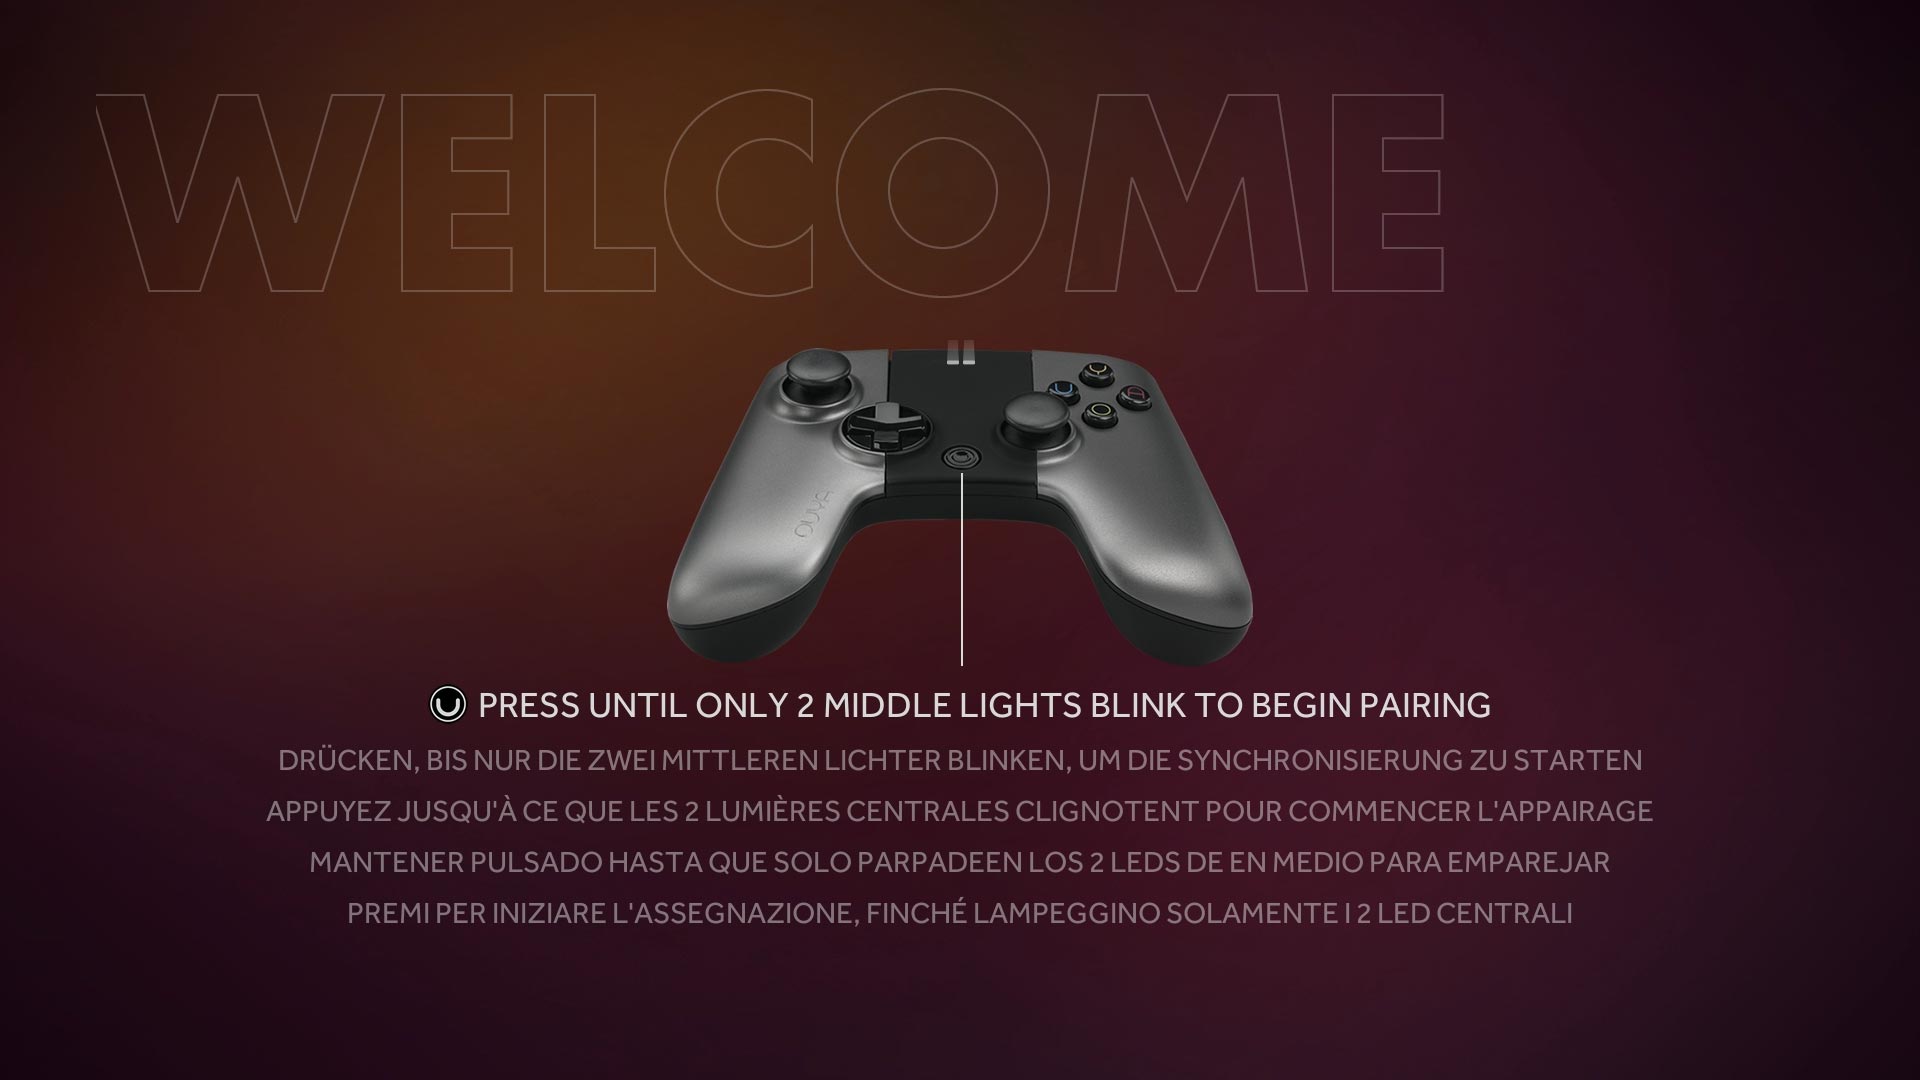 We're going to power up our ouya and leave it on the welcome screen. These instructions do not require your Ouya to be rooted or even logged into your Ouya account. If you had a mint Ouya still wrapped in plastic and opened it up and plugged and powered it up. Then that's all you need to do for now on your Ouya.
 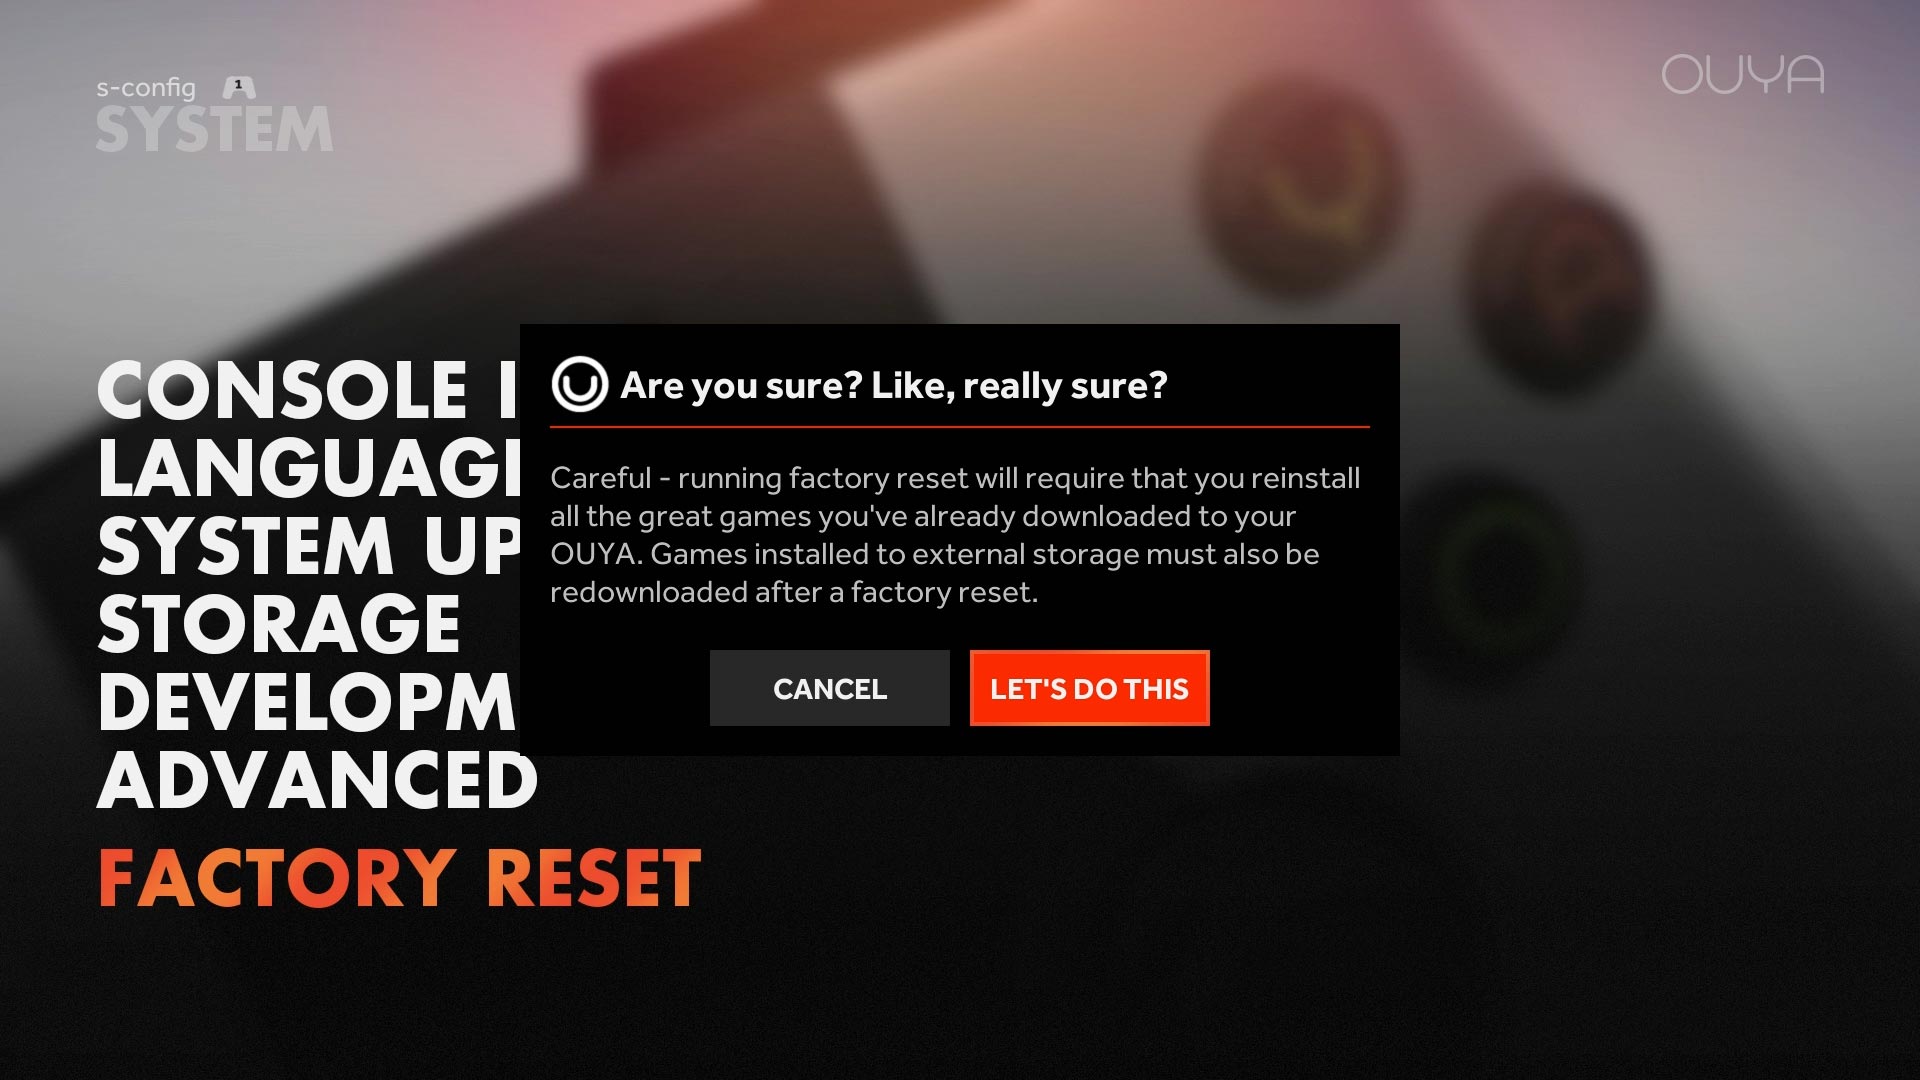 Now if you are already logged into your Ouya and you want to start fresh you can always do a factory reset to get the "welcome" screen. Just go under MANAGE > FACTORY RESET to continue. You don't have to do this step as when we install ClockWorkMod we will be doing a factory reset anyways.
PC operating system variance.
It should be noted that this tutorial will focus heavily on Windows 10 as that is the standard that the average PC user currently holds at the time of this blog. Whenever possible we will attempt to mention any variances between operating systems as this tutorial on installing ADB/Fastboot to transfer files can be easily done on Windows 8,7, and even XP. Unfortunately, we have not had the time to sit down with Linux to make an ADB tutorial for that yet.
Special notes for Windows 10 64-bit users.
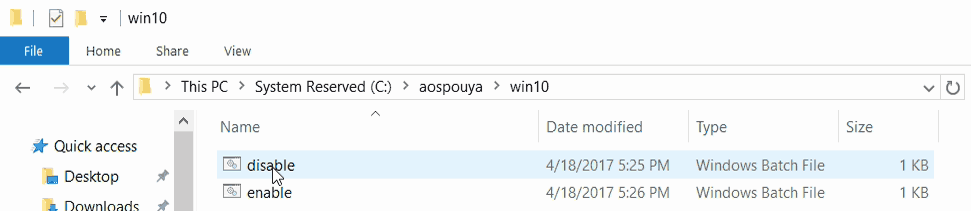 In order for your ADB driver to install successfully and not get flagged by the operating system as corrupted or invalid security certificates, we will need to disable a rather obnoxious security feature. You see every driver within Windows 10 64-bit must not be certified by an online domain. Of course, if you follow any of the android documentation you have to modify the ini files of your ADB to accept something foreign like the Ouya. This totally invalidates the driver! This is why we included some scripts for you to stop this from happening. Right-click on the disable.bat and "Run as Administrator" to turn off driver integrity checks..
I don't trust your scripts!
Here's what is in the script. You can type them in by hand if you really want.
echo "Disabling integrity checks and enable driver test signing. Reboot will follow!"
bcdedit -set loadoptions DISABLE_INTEGRITY_CHECKS
shutdown /r
 That's it. It simply tells your operating system to disable integrity checks on the driver. After the reboot, you can proceed normally as a Windows 10 32-bit user without the custom ADB driver getting blocked.
Device Manager.
If you right-click the windows icon you will be presented with a few options. One of them is "Device Manager" which is where we want to go to begin installing the ADB driver for our Ouya. 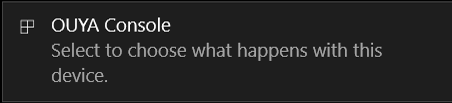 This will now be the time when you plug your Mini USB cable from your Ouya over to your desktop.
Windows 10
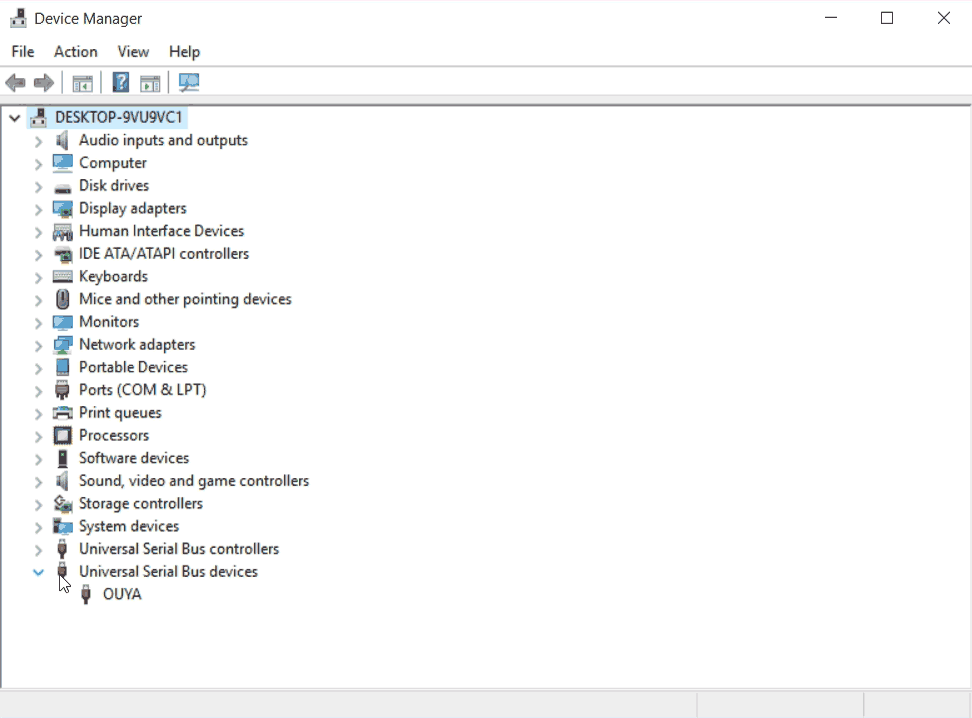 Upon plugging in your Ouya your unit will show up underneath two categories. Once under "Portable Devices" which allows you to transfer files via windows explorer. The other category is "Universal Serial Bus devices." Microsoft has installed a False ADB driver which practically does nothing. We will be replacing this driver with the official Google driver so that our ADB (android device bridge) shell will work.
Windows 7
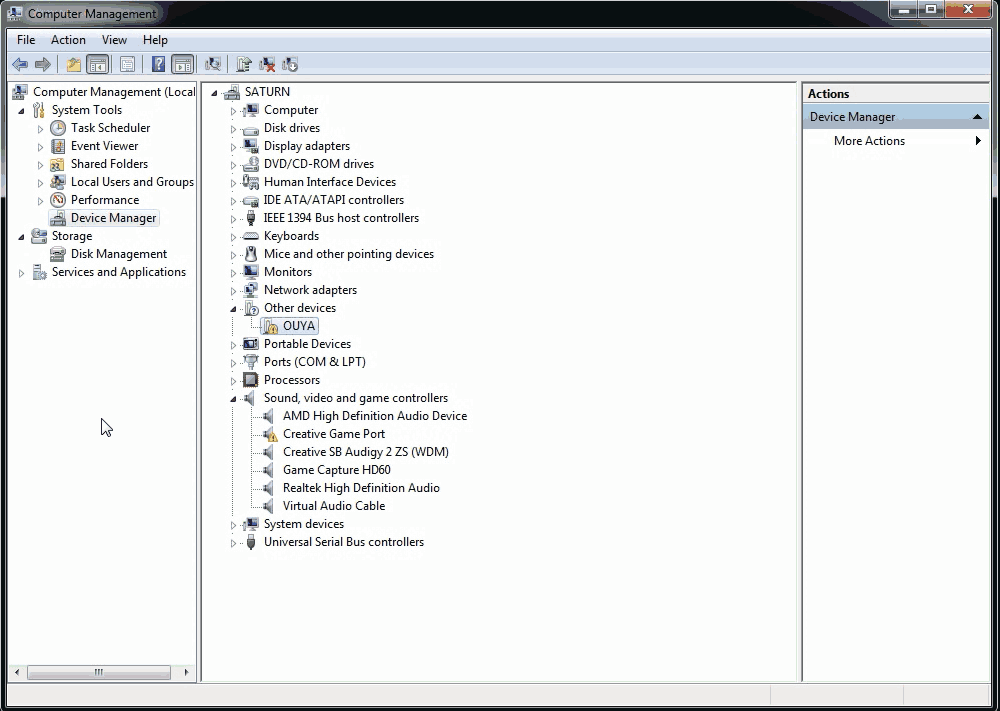 In earlier operating systems such as XP, 7, and 8. Your Ouya will show up with a yellow exclamation mark underneath the "Other devices" category.
Device verification.
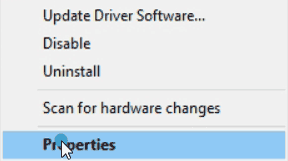 To verify that this is indeed the device that we want. We are going to right-click on our Ouya device and click on "Properties."
 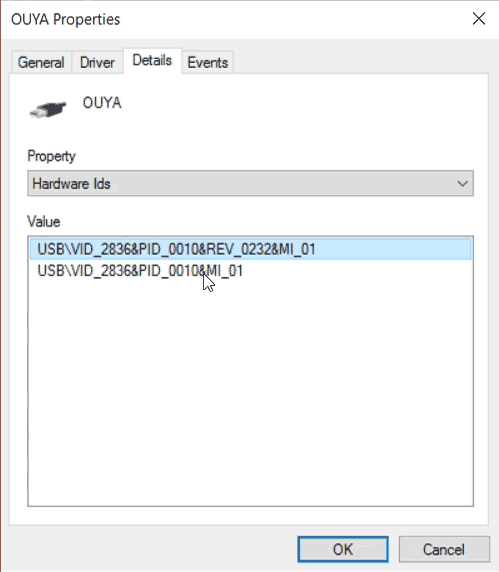 Click on the "Details" tab and underneath the property drop-down box select "Hardware Ids." It should report back to you USB\VID_2836&PID_0010&REV_0232&MI_01 . The VID_2836 is the most important part as that tells us that this is indeed our Ouya device. The Product ID or PID_0010 tells us that this is the Android Device Bridge (ADB) and not the Mobile Transport Protocol (MTP) that Windows use for file transfer to an Android device. You can click the cancel button to exit. We wish to get people in the habit of hardware verification because oftentimes people attempt to install the ADB driver onto the wrong device which is what caused many headaches in the past.
Troubleshooting.
If for some freak of nature, it is reporting your newly found USB device is listed as Unknown and has a Hardware ID of USB\VID_0000&PID_0000 or USB\VID_???&PID_??? this is really bad and you need to stop right now and diagnose what is going on. The basic symptom of this problem is a very poor USB cable. Bad USB connection. Or if the Ouya does not even get a display that the Ouya itself is corrupted.
Installing the Android device bridge (ADB) drivers.
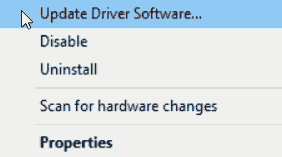 Now that we have located where our Ouya is in Device Manager. Right-click on the Ouya hardware icon and "Update Driver Software."
 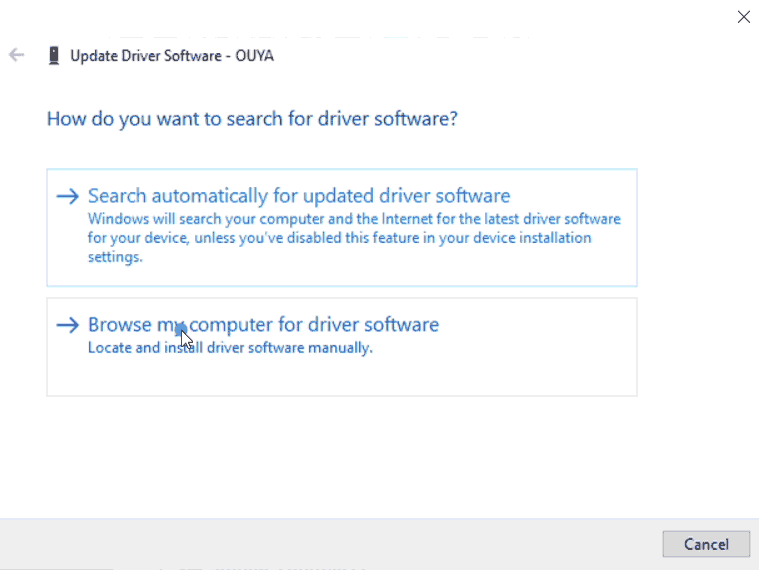 Select "Browse my computer for driver software."
 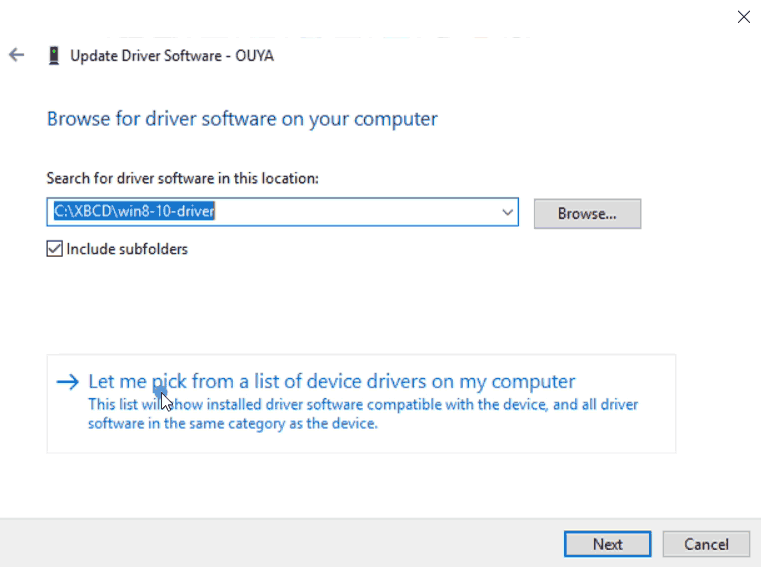 Obviously, we aren't installing Xbox drivers so instead click on "Let me pick from a list of device drivers on my computer."
 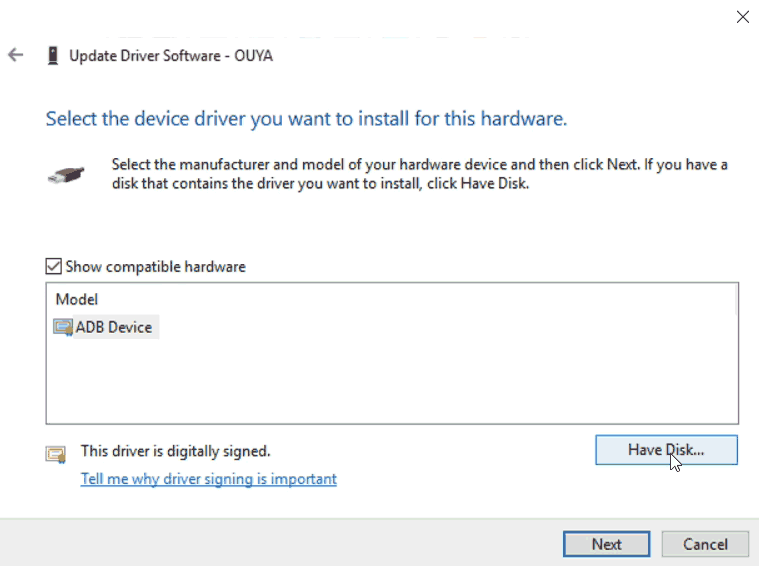 Click on the "Have Disk" button.
 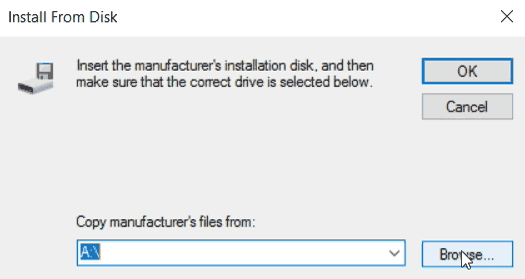 Click the "Browse" button.
 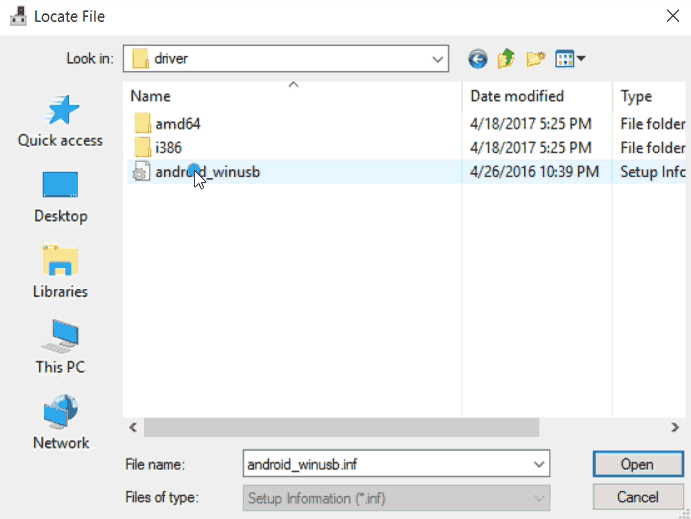 Provided that you downloaded and extracted the zip file to the default directory mentioned in this tutorial. The location of the driver will be found in C:\aospouya\driver\android_winusb.inf . Once selected click the "Open" button to continue.
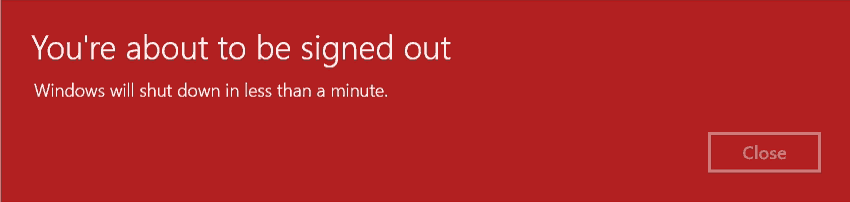
 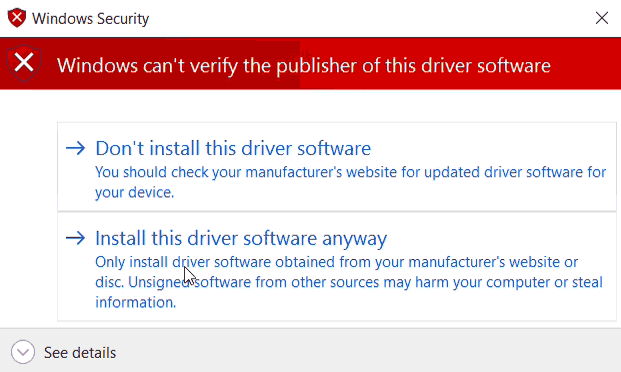 With integrity checking disabled windows 10 will now present this warning to you. This warning pops up due to the mortification done in the android_winusb.inf file to accept the Ouya as a detectable device. Click on "Install this driver anyway" to continue.
 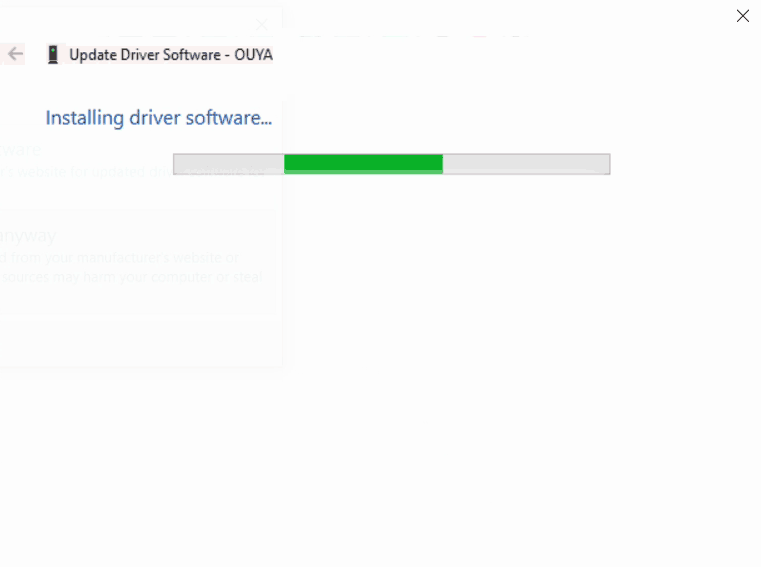 This driver will then install and complete.
 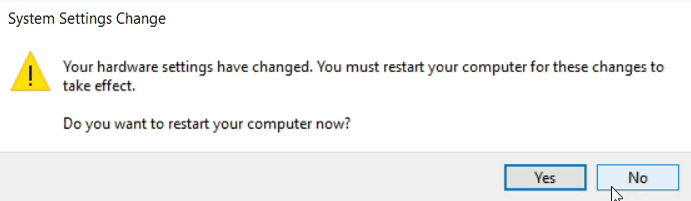 Another window will come up asking if you want to reboot your OS. Select "No" as it's not that important to do.
 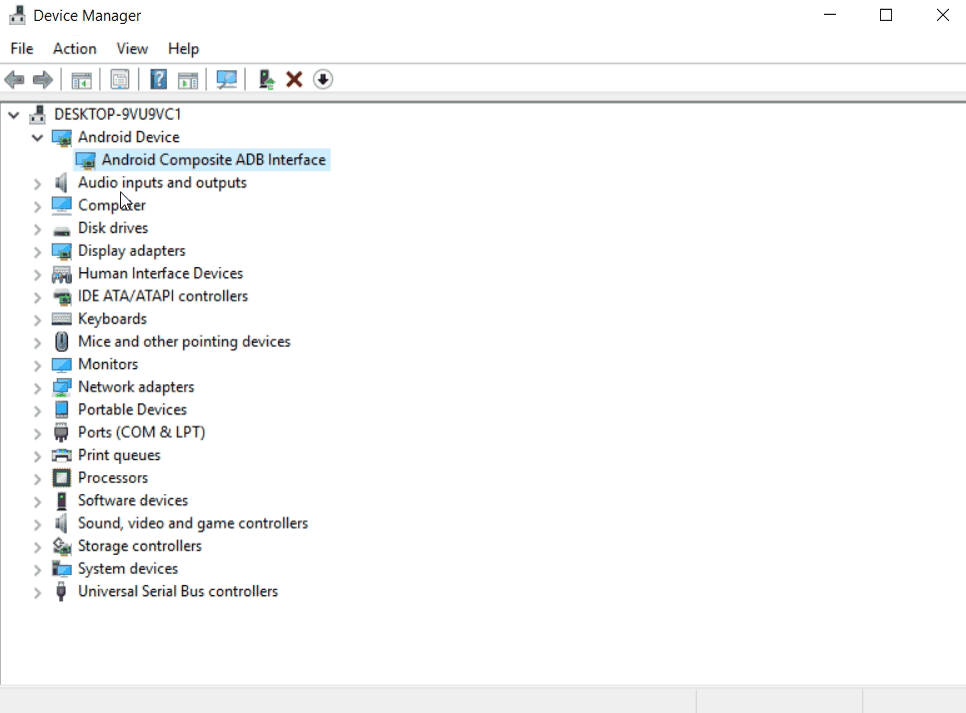 The final view in the device manager should look something like this. With a whole new category called "Android Device" and underneath "Android Composite ADB Interface". Installation of the ADB drivers is now complete.
Installing the adb_usb.ini file:
This file exists in your user profile folder underneath a section called .android and it has a very simple one-line comment which tells ADB where to look for your Ouya on your devices. For example, if your username in Windows is "skippy" then the logical path for this file will be C:\Users\skippy\.android\adb_usb.ini . What is in that ini file is as follows:
0x2836
Do you remember that number? That is your product ID for the Ouya. The very same ID we found in the device manager earlier. We can continue going to the command prompt by clicking "Start" and "Run" and typing in "cmd" to pull up a command prompt. Once you are there you will want to do the following:
mkdir %USERPROFILE%\.android\
echo 0x2836 >> "%USERPROFILE%\.android\adb_usb.ini"
Say that your username is "Skippy" for logging into Windows. This will make the folder C:\users\skippy\.android\ and inside of that folder, it will make a very small text file called adb_usb.ini . The reason why we must create this file in a very particular area is without it the adb.exe file has no idea what vendor to look for in the device manager and it will come up blank in the next few steps.
Working with ADB to transfer data to your Ouya for the Cyanogen mod upgrade.
With the command prompt still running we will want to now move into our aospouya folder.
cd C:\aospouya
adb start-server
It should respond with the following:
* daemon not running. starting it now on port 5037 *
* daemon started successfully *
Next let's see if ADB can actually see our Ouya.
adb devices
It should respond with:
List of devices attached
015d49062a501415 device
Troubleshooting
If it does not have anything underneath "List of devices attached" then ADB is not properly talking to the USB driver. Make sure your device is installed in device manager and the adb_usb.ini file exists underneath your %userprofile%\.android\ folder.
Back to ADB.
Unlike the ADB screen capture blog, I did a while back there is no need to pass the ADB connect command. You will be already connected via hardwire. The ADB connect command is only required if you are connecting to a remote source over the network. now we are ready to push all of the .zip files to the Ouya /sdcard/ folder at once. Unlike other documentation on the net where they wanted you to ADB sideload each zip file in the recovery bootloader. We're going to push them all at once and then let the ClockWorkMod bootloader handle it from there.
adb push zip /sdcard/
If you are in your C:\cyanouya folder then it should report something like this:
push: zip/recovery-clockwork-6.0.4.8-ouya.zip -> /sdcard/recovery-clockwork-6.0.4.8-ouya.zip
push: zip/ouyabootmenu-mlq-v2.0.4.zip -> /sdcard/ouyabootmenu-mlq-v2.0.4.zip
push: zip/ouya-keylayouts-1.05.zip -> /sdcard/ouya-keylayouts-1.05.zip
push: zip/pa_gapps-modular-pico-5.0.1-20150221-signed.zip -> /sdcard/pa_gapps-modular-pico-5.0.1-20150221-signed.zip
push: zip/aosp-lp-ouya-LRX22C-1.0.zip -> /sdcard/aosp-lp-ouya-LRX22C-1.0.zip
push: zip/SR3-SuperSU-v2.79-SR3-20170114223742.zip -> /sdcard/SR3-SuperSU-v2.79-SR3-20170114223742.zip
6 files pushed. 0 files skipped. 1291 KB/s (270418311 bytes in 231.945s)
Yes, it will take around 4 minutes to complete the transfer because of how much data we are sending. So far, everything we've done could've been easily done by an ADB network connection instead of going through the headache of USB connections. The next command is where the ADB network will fail you.
adb reboot bootloader
This will place the Ouya into the bootloader state otherwise known as "fastboot" as your device manager will start chiming in finding unknown devices once again. Note: At this time your Ouya will only have a power light and a pitch-black screen. This is normal as we have not given the Ouya any instruction as to what to load yet. If you reset your Ouya right now it will break out of the boot-loader and return you to the Ouya welcome screen. We have written nothing to the boot-loader of the Ouya as of yet. Make sure the keyboard is plugged into your Ouya at this time.
Working with Fastboot.
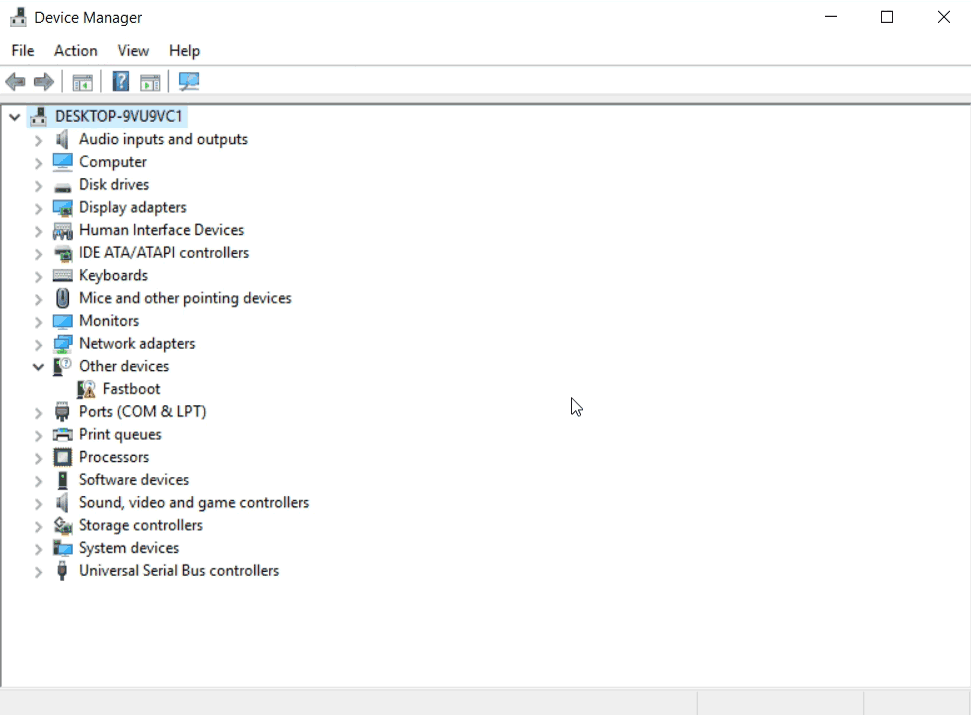 Once your Ouya switches to Fastboot mode your device manager will go crazy again and eventually not detect the next drive as it sits in the "Other Devices" catagory. In some cases it may automatically pull the driver from the C:\aospouya\driver\ folder and appear in its rightful place which if it does then great you can skip the steps about installing this driver. The hardware ID for fastboot will be USB\VID_0955&PID_7000&REV_0000 Let's begin the installation.
To verify that this is indeed the device that we want. We are going to right-click on our Ouya device and click on "Properties." Click on the "Details" tab and underneath the property drop-down box select "Hardware Ids." It should report back to you USB\VID_2836&PID_0010&REV_0232&MI_01 . The VID_2836 is the most important part as that tells us that this is indeed our Ouya device. The Product ID or PID_0010 tells us that this is the Android Device Bridge (ADB) and not the Mobile Transport Protocol (MTP) that Windows uses for file transfer to an Android device. You can click the cancel button to exit. We wish to get people in the habit of hardware verification because oftentimes people attempt to install the ADB driver onto the wrong device which is what caused many headaches in the past.
Troubleshooting.
If for some freak of nature, it is reporting your newly found USB device is listed as Unknown and has a Hardware ID of USB\VID_0000&PID_0000 or USB\VID_???&PID_??? this is really bad and you need to stop right now and diagnose what is going on. The basic symptom of this problem is a very poor USB cable. Bad USB connection. Or if the Ouya does not even get a display the Ouya itself is corrupted.
Installing the Android device bridge (ADB) drivers.
Now that we have located where our Ouya is in Device Manager. Right-click on the Ouya hardware icon and "Update Driver Software." Select "Browse my computer for driver software." Obviously we aren't installing Xbox drivers so instead click on "Let me pick from a list of device drivers on my computer." 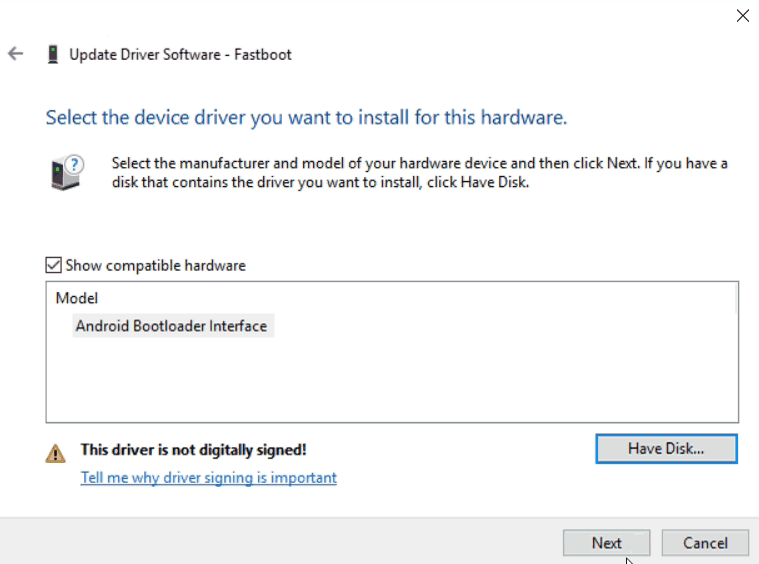 Click on the "Have Disk" button. Click the "Browse" button. Provided that you downloaded and extracted the zip file to the default directory mentioned in this tutorial. The location of the driver will be found in C:\aospouya\driver\android_winusb.inf . Once selected click the "Open" button to continue. With integrity checking disabled windows 10 will now present this warning to you. This warning pops up due to the mortification done in the android_winusb.inf file to accept the Ouya as a detectable device. Click on "Install this driver anyway" to continue.
 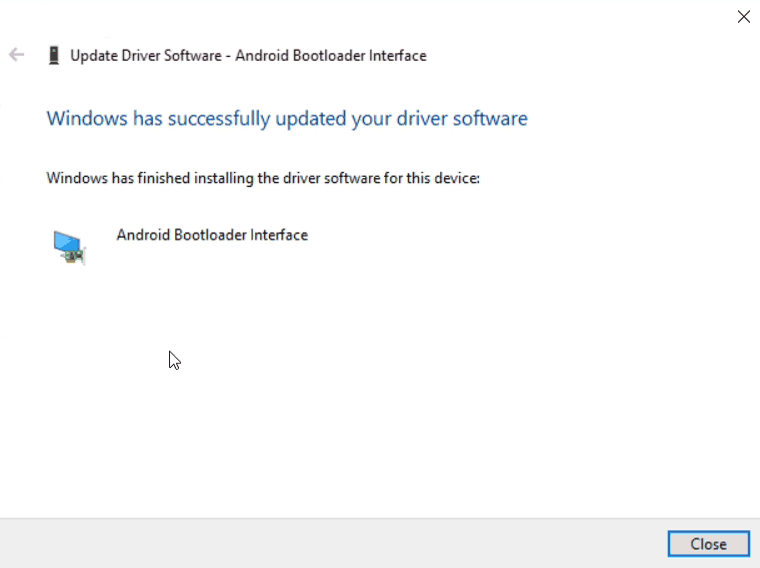 This driver will then install and complete it. Click "Close" to continue.
 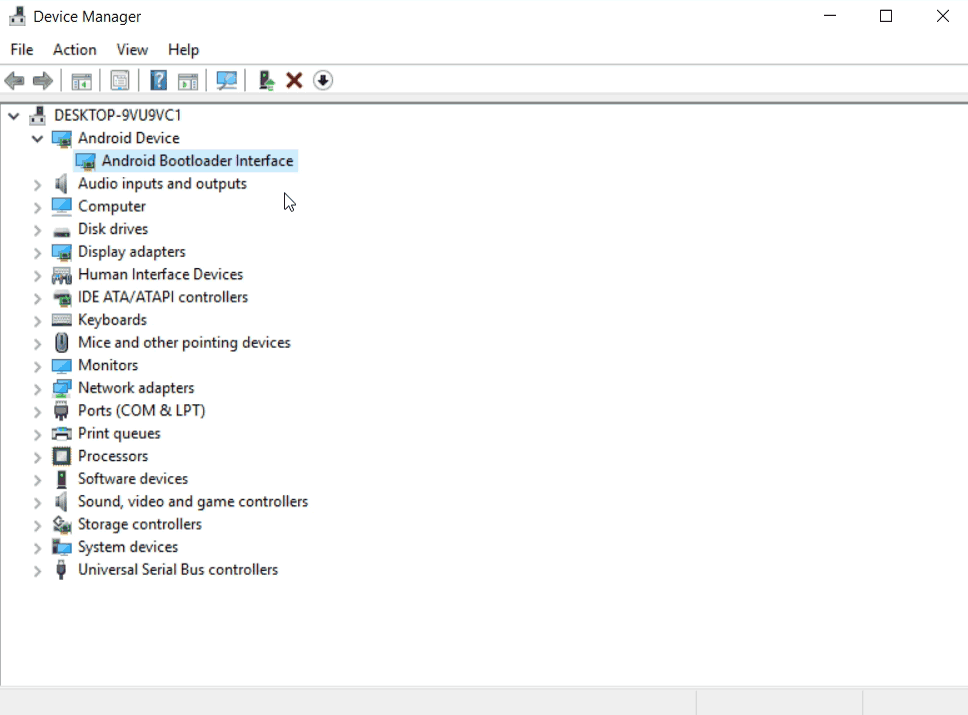 The final view in the device manager should look something like this. With a whole new category called "Android Device" underneath "Android Composite ADB Interface". Installation of the ADB drivers is now complete.
Pass the Fastboot commands to your Ouya.
To test to make sure fastboot can see your Ouya type in the following:
fastboot devices
Just like before it will report back if it can see your Ouya or not.
015d49062a501415 fastboot
If returns with a statement similar to the above then everything is good. The next command you will be typing in will be the following:
fastboot boot recovery-clockwork-6.0.4.8-ouya.img
It will report back the following at the same time you will notice your Ouya come back to life with a signal on your TV.
downloading 'boot.img'...
OKAY [ 1.594s]
booting...
OKAY [ 0.264s]
finished. total time: 1.861s
Troubleshooting.
The final fastboot command to boot into recovery is failing with the information below.
downloading 'boot.img'...
FAILED (write command failed (Unknown error))
finished. total time: 5.004s
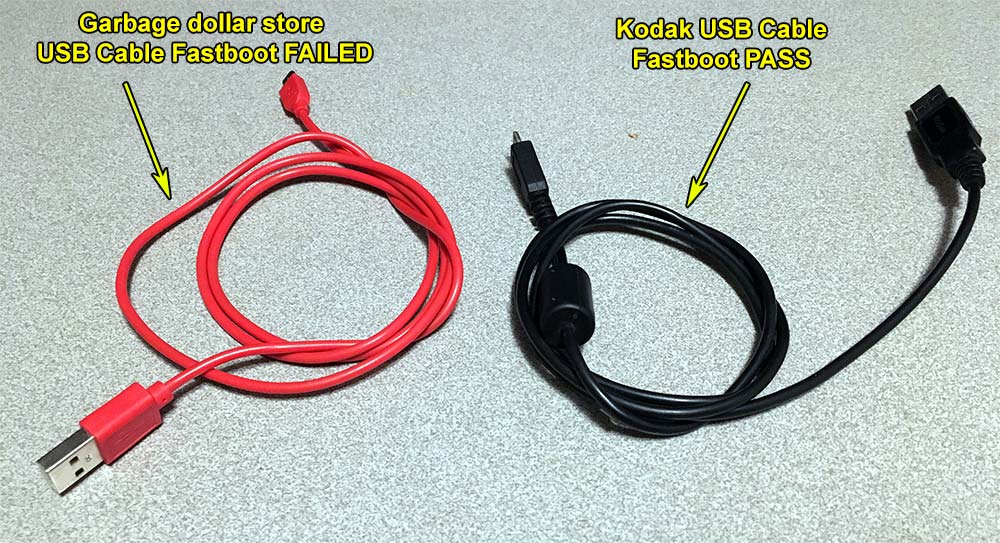
Low-quality cables are plagues in the cel-phone world.
I was able to reproduce this error by purchasing a USB cable from the dollar store. Dollar store USB cables are so cheap because there's hardly any copper in them to pass the signal down the line. This dollar store USB cable worked perfectly fine in ADB however the moment we got up to Fastboot it failed immediately. Why do you ask? The USB drivers for fastboot are crude at best and they may not be able to compensate for the signal loss that is going on in the dollar store cable. All I did was swap the dollar store cable out with a name-brand cable such as my USB charging cable that I got with my Kodak camera. And like magic, the fast boot command passed.
Welcome to ClockWorkMod.
 At this time you should see your Ouya come back to life but instead of the typical Ouya splash screen, you will be greeted with something new. You will be welcomed to the ClockWorkMod splash screen. This is also the point where we welcome back the CyanogenMod upgrade users who have been patiently waiting to get to the clockwork mod screen! Out of interest of saving bandwidth and readability. I shall focus on just the upper-left-hand corner of the screen which is where all of the action of ClockWorkMod is at. There will be information text with each step we do and if the screen changes too much I'll make a full-screen shot. But Let's begin.
Installing ClockWordMod onto the Ouya storage partition.
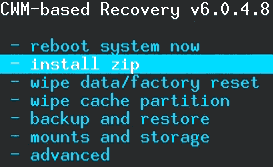 Using your keyboard, arrow down to "install zip" and hit enter.
 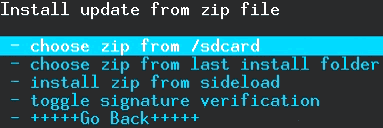 Arrow to "chose zip from /sdcard" and hit enter.
 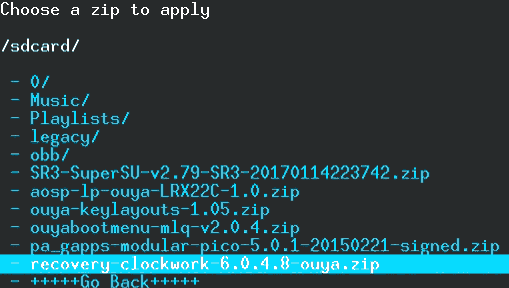 Arrow down to "recovery-clockwork-6.0.4.8-ouya.zip" and press enter to install. This will make ClockWorkMod your permanent bootloader recovery partition on your Ouya which is essential for AOSP 5.0 to work properly.
  Arrow down to Yes and hit enter. This should only take about 10 seconds to install.
Installing the Ouya Bootmenu.
The next section we are going to install is the Ouya Boot Menu which is a partial install that makes it a lot easier to return to ClockWorkMod in the event you wish to revert back to stock. Arrow to "chose zip from /sdcard" and press enter. 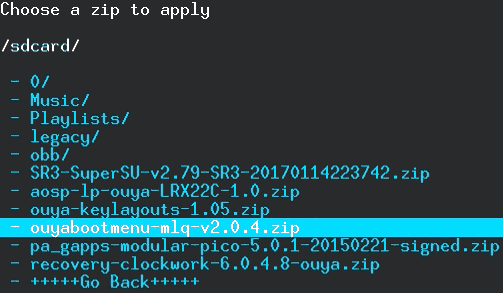 Arrow down to ouyabootmenu-mlq-v2.0.4.zip and press enter.
 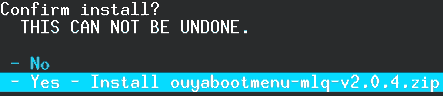 Arrow down to Yes and press enter.
Installing Ouya AOSP 5.0 (Android Open Source Project)
The next section we are going to install is AOSP 5.0 which is the core of our OS. Arrow to "chose zip from /sdcard" and press enter. 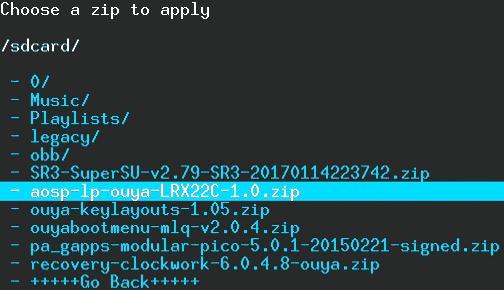 Arrow down to aosp-lp-ouya-LRX22C-1.0.zip and press enter
 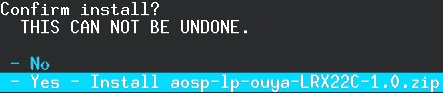 Arrow down to Yes and press enter.
 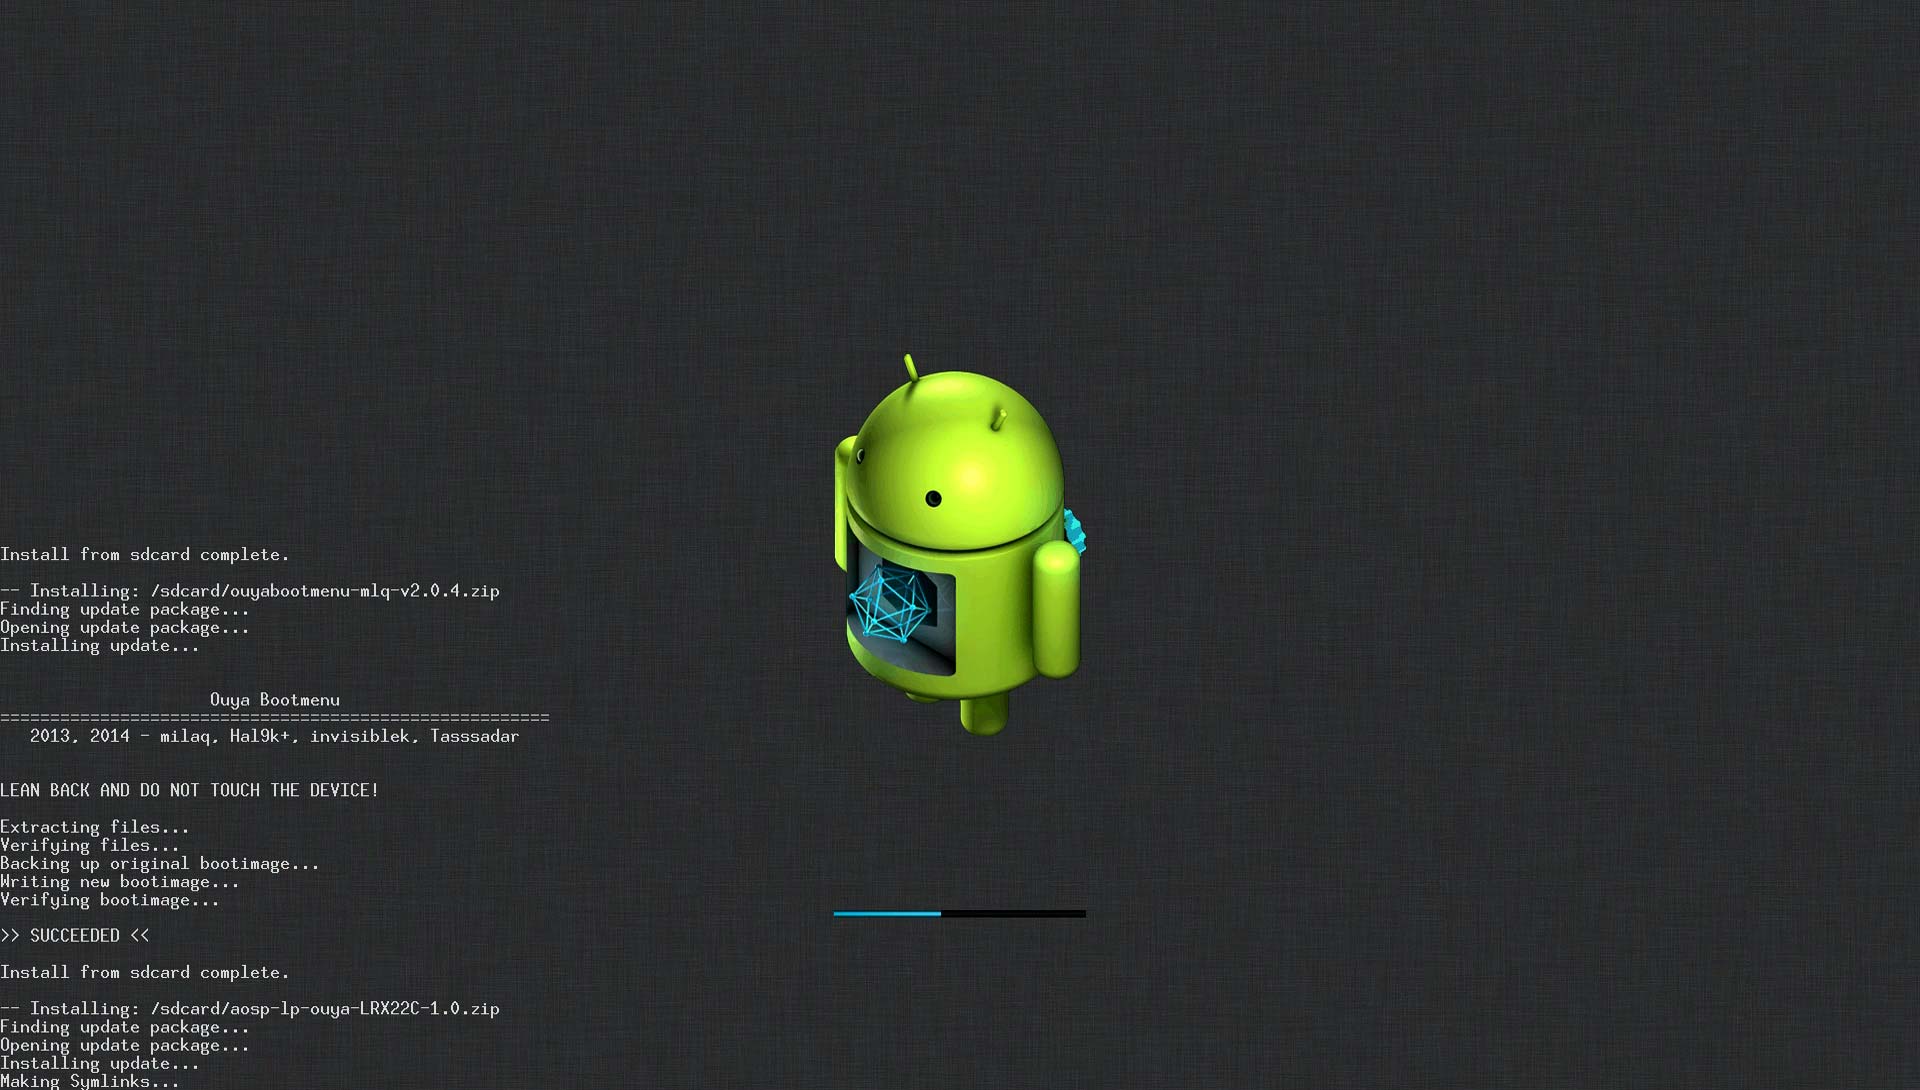 This process can take anywhere from 2-5 minutes to install as it has to unpack 300+ megs onto your Ouya.
Optional: Installing Google Apps.
In the next section, we are going to add Google Play functionality to our AOSP 5.0. This step is totally optional. If you are comfortable with downloading APKs from sites and have no need to play any games that are connected to the Google Play service then not installing this feature may make your Ouya run just a little bit faster as it does not have to concern itself with background services from the Google Network. It should also be noted that the original instruction called out for a standard Google install. This does not work as Google updates its services frequently to the point where the /system/ folder on your Ouya would run out of space from all of the services that Google has to offer now. This is why we are running a Pico version of Google. Allowing you the user to choose which Google services you want to have installed on your Ouya instead of having them all installed at once. Arrow to "chose zip from /sdcard" and press enter. 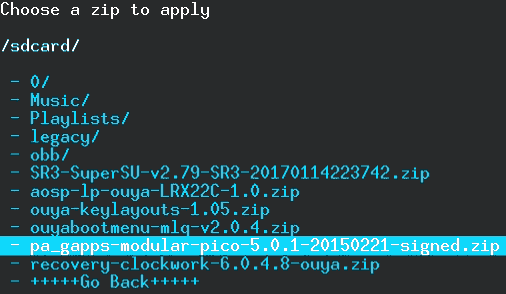 Arrow down to pa_gapps-modular-pico-5.0.1-20150221-signed.zip and press enter.
  Arrow down to Yes and press enter. Installation should take around 30 seconds.
Optional: Installing Super-User / Root access into ASOP 5.0.
By default, AOSP 5.0 is not rooted. This file will patch the OS Core to make sure that it remains rooted at all times. This is handy for those who want to play with services in Android or those who need to get into shell access to turn on and off services and network features. 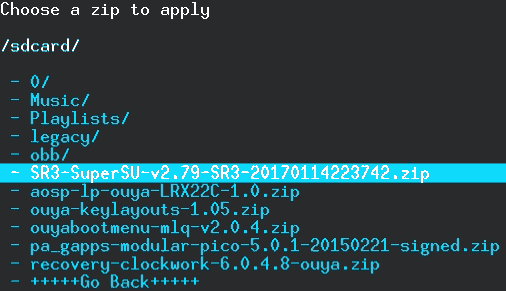 Select SR3-SuperSU-v2.79-SR3-20170114223742.zip and press enter.
  Arrow down to Yes and press enter to continue.
Installing .KL or key-layout files for joystick compatibility.
The final selection that we will install is the key layout files or .KL files that are required to attempt to make not only your Ouya Controller compatible with Cyanogen but other controllers such as the PS3 controller and the Xbox Controller. Arrow to "chose zip from /sdcard" and press enter. 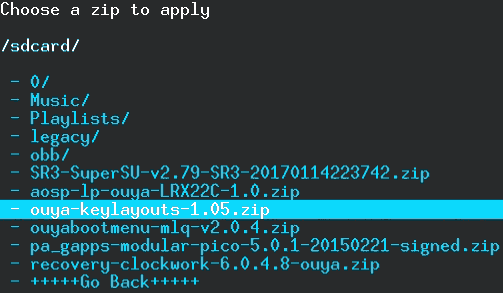 Arrow down to ouya-keylayouts.zip and press enter.
 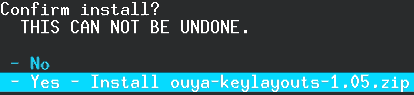 Arrow down to Yes and press enter. After all of these partial installs, you should have a complete Android 5.0 system now loaded onto your Ouya. Now before we reboot there is one last thing we need to do.
Clearing cache, Dalvik, and wiping user data in ClockWorkMod for Cyanogen Mod first-time boot.
Clearing all user data and cache from your Ouya is very important because if you do not. Android 5.0 may simply sit and do nothing on the first time you boot it because it's reading data from a previous launcher that it really should not read. DO NOT SKIP THIS STEP!!! Lets begin. 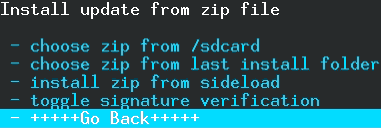 If you are still updating zip files. We need to back out of this menu. Simply arrow down to Go Back and press enter.
 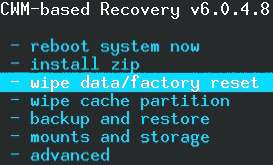 Arrow down to "wipe data/factory reset" and press enter.
 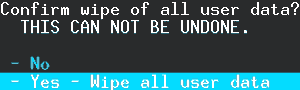 Arrow down to Yes and press enter.
 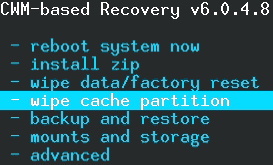 Next we will wipe the cache partition. Arrow down to "Wipe cache partition" and press enter.
 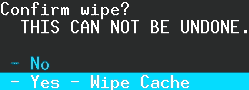 Arrow down to Yes and press enter.
 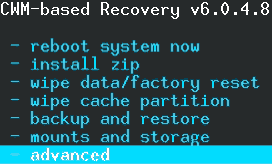 The last section requires us to go into advanced mode. Arrow down to advanced and press enter.
 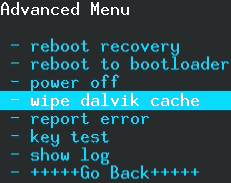 Arrow down to "Wipe Dalvik cache" which is what google play likes to use and press enter.
 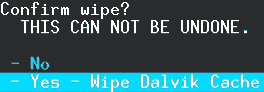 Arrow down to Yes and press enter.
 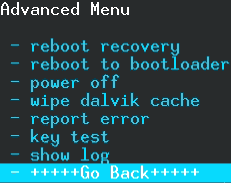 We are going to back out of the advanced menu now. Arrow down to "Go Back" and press enter.
 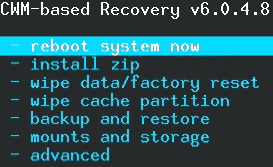 Select "Reboot system now" to continue.
 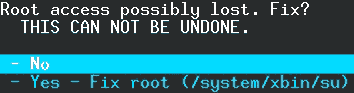 The last thing it will ask you before rebooting is CWM is questioning us about Root access. This is due to what our super-user script did to the Android 5.0 OS. This is acceptable. Select "No." And your Ouya will begin booting.
Welcome to AOSP Android 5.0 on your Ouya.
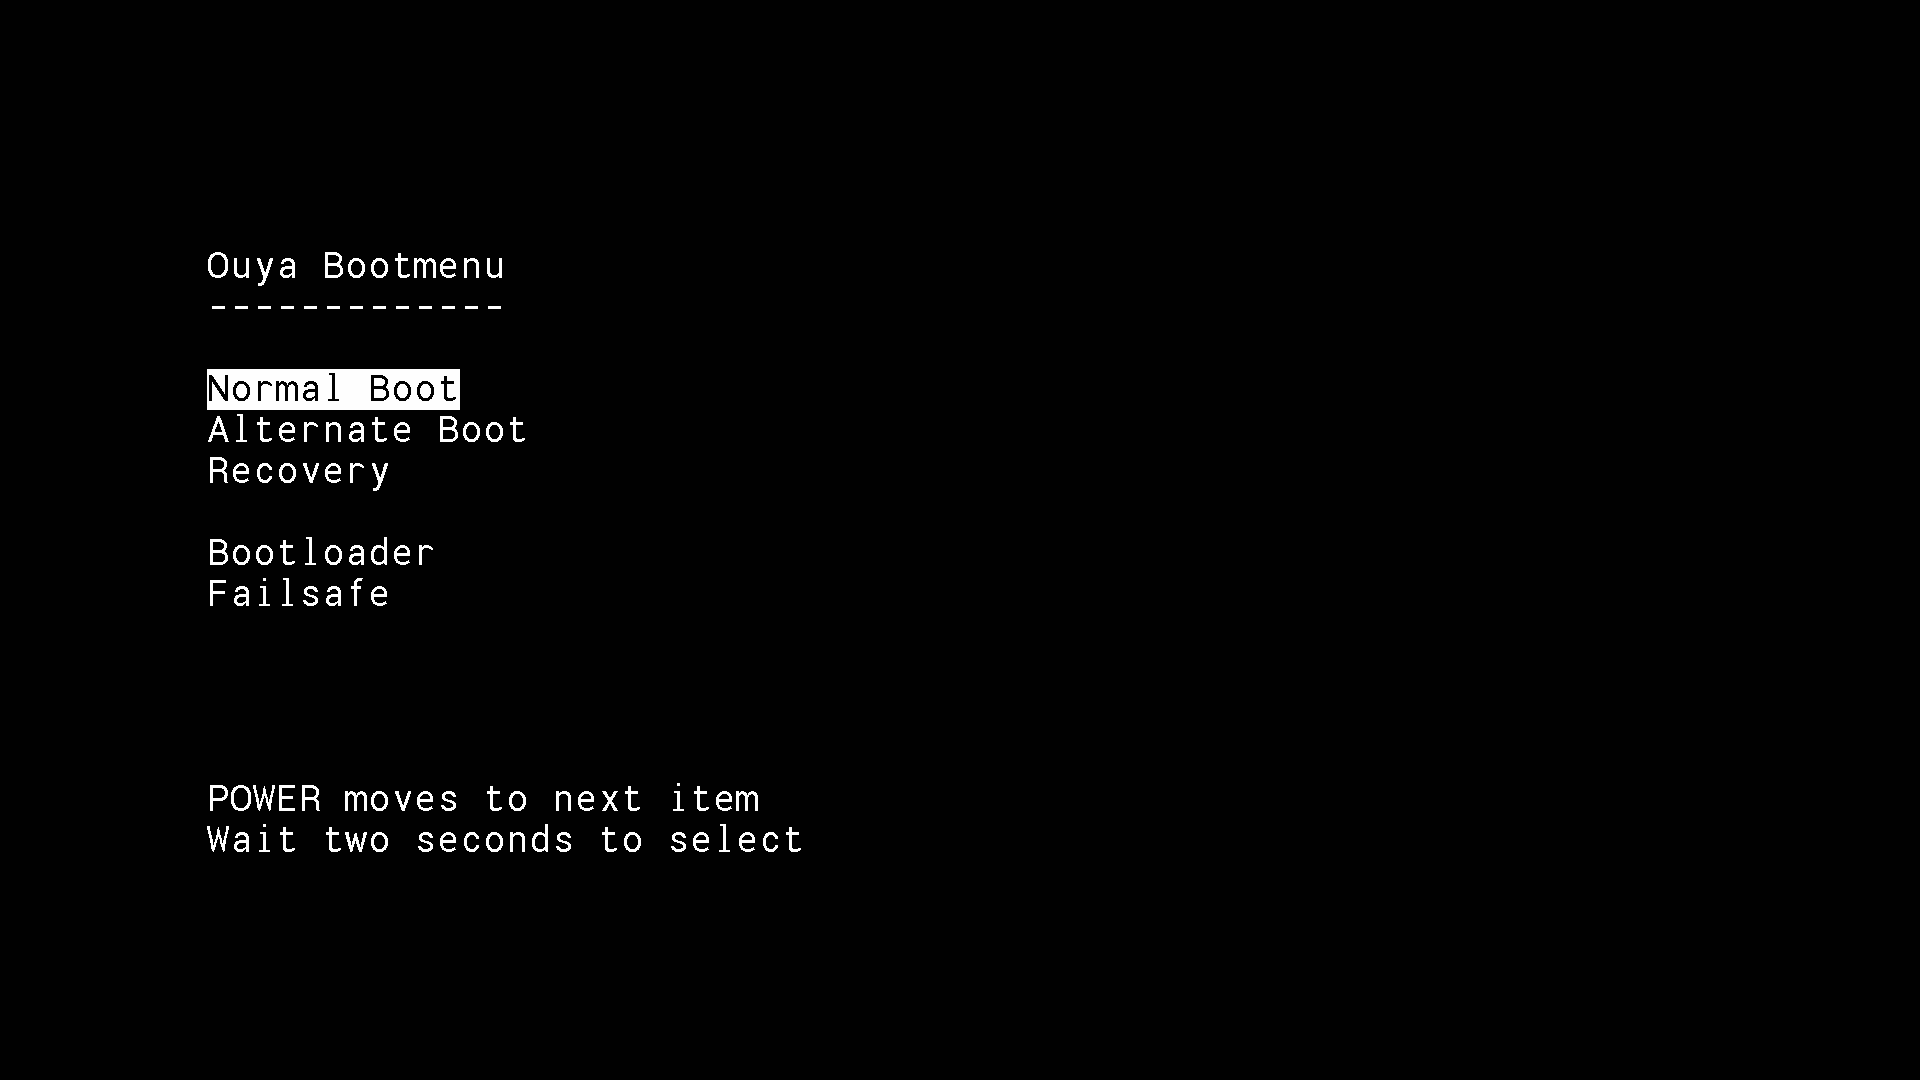 The very first thing you'll be greeted with is the Ouya Bootmenu. You do not have to touch anything and it will disappear in about 3 seconds. But if you want to go back to the recovery partition you can simply click your Ouya power button to cycle through the menus on this screen.
 ![]() If you loaded everything correctly in CWM this android boot screen should appear. Like the Ouya logo upon boot-up, it will begin cycling through colors from dark grey to light grey indicating that it has not locked up and it's currently processing data. This process of setting up a brand new account can take anywhere from 5 to 15 minutes to please be patient with this step!
If you loaded everything correctly in CWM this android boot screen should appear. Like the Ouya logo upon boot-up, it will begin cycling through colors from dark grey to light grey indicating that it has not locked up and it's currently processing data. This process of setting up a brand new account can take anywhere from 5 to 15 minutes to please be patient with this step! 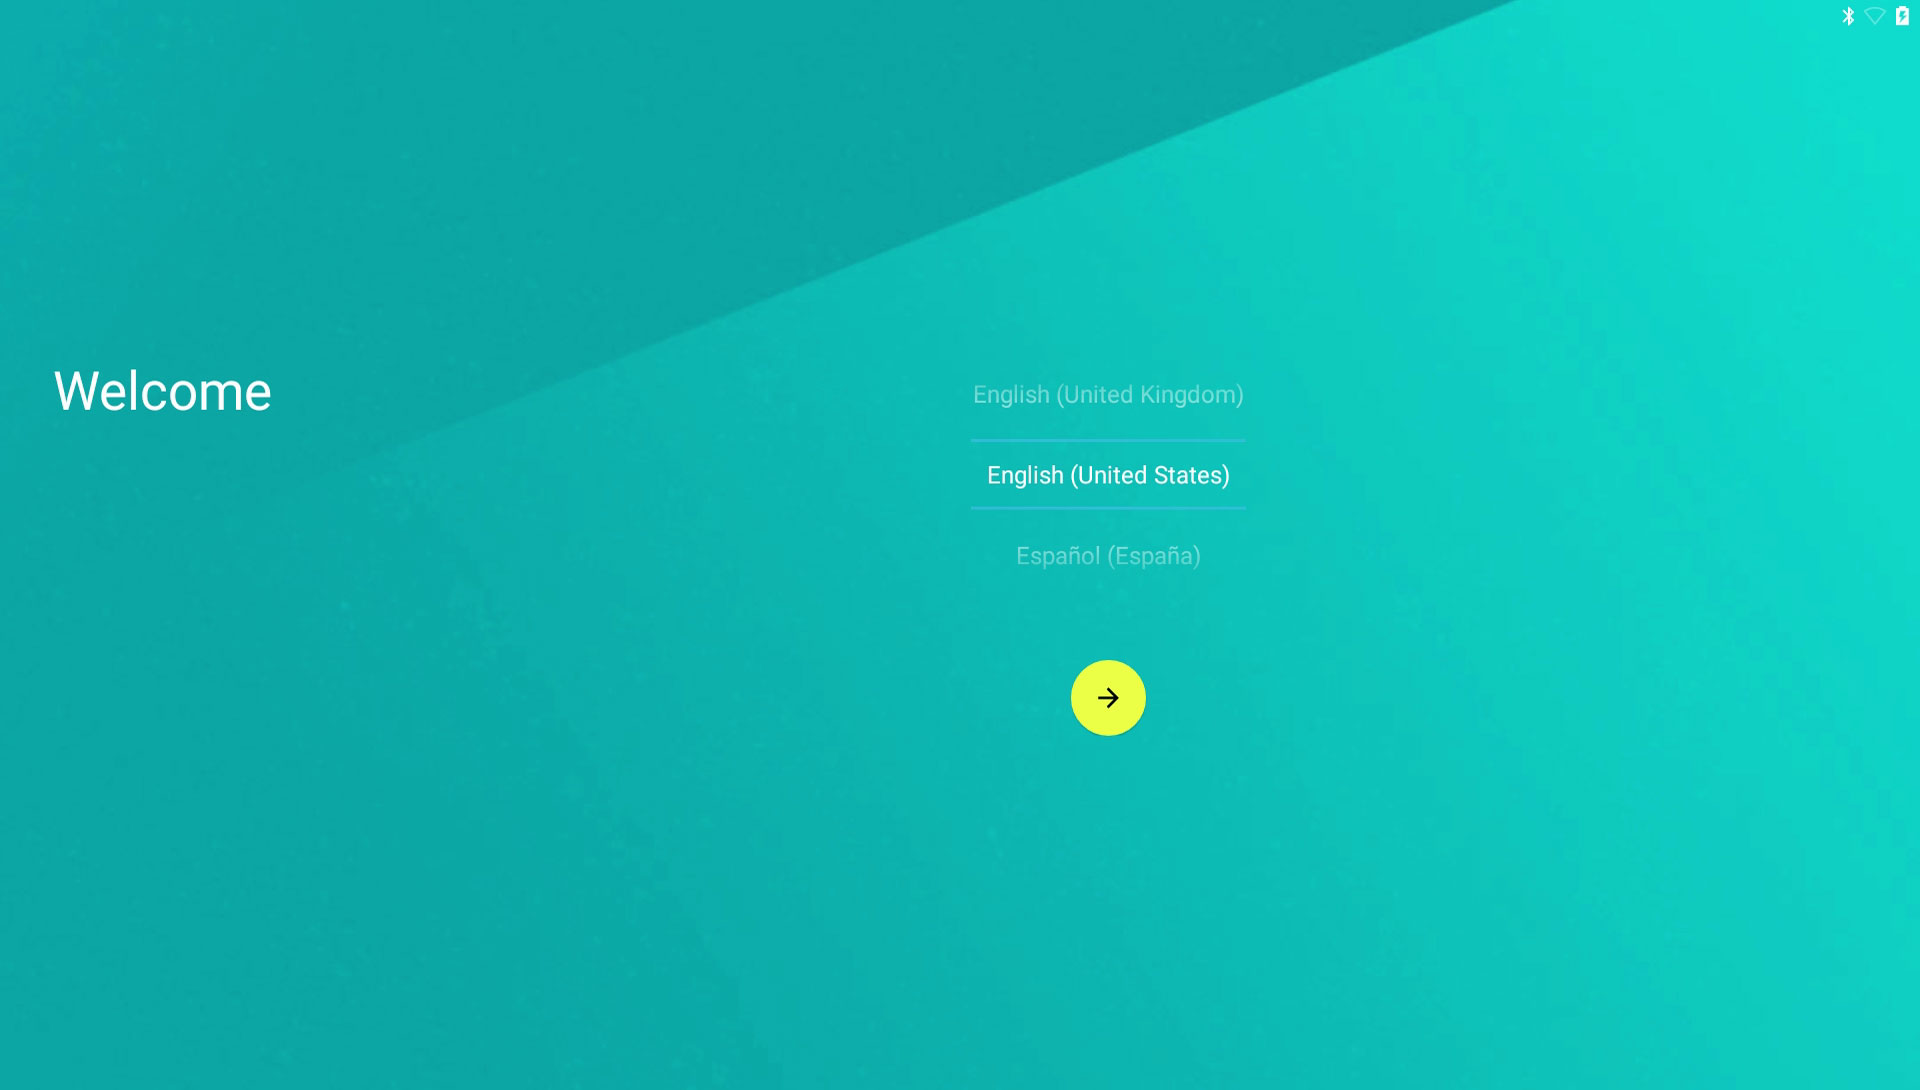 If you made it this far then congratulations! Your Ouya is fully loaded with Android 5.0 and ready to rock! You can navigate through the logins and credentials to setup Google Apps (Provided you installed that file) and finally be greeted with a desktop.
Special thanks and credits:
XDA Developers - These people deserve real credit. All I did was write up a user guide and packed all of the files together. Kodi - For giving reasons why Ouya is still alive in 2016 and beyond. Ouya Forums - For kicking me in the ass to actually write this documentation.
Server protect you.
END OF LINE+++
Installed the Ouya 5.0 image on my silver ouya box. After the install it is only showing the home screen in the top left hand corner of the tv. Is there a way to make it full screen. Thanks
I love you bro... Just a awesome job you have done since it was just a cream install on my Ouya TV. Thank you & keep up your great work.
Omar Shaikh
India.
Glad it helped out!
I loaded 5.0 and everything is working fine except everything is pushed to the top left corner of the screen. Is there a way to change the screen size? It does not take up the whole screen.