

Using the FFmpeg command line to convert MP4, OGV, and WebM video.
This quick guide goes through some of the details on how we convert some videos using FFmpeg. The video conversion is really important for those who are hosting their own files and not relying on a third-party site such as YouTube or Vimeo because you are looking for the most compatible video standards that offer the best quality at the lowest bandwidth so that not only your server is happy but the users that visit your site.
FFmpeg is awesome in respects that since it's open-source it's a binary that can be compiled on a remote server that you own and begin converting videos on the spot if necessary and if you have the CPU power to do it.
You could even run FFmpeg on a Raspberry Pi if you wanted to wait a few years for the results!
The real drawback is FFMpeg is a pure command line with no GUI which may scare some people away. But the fact that it's not GUI also means that it can run on just about any modern OS in the world. We have other blog articles talking about GUI video conversion later on for those who are interested.
Disclaimer time:
We at "s-config.com" are not affiliated with the development team of FFmpeg in any way and thus the information that we provide here can be placed out-of-date or worse yet could be deemed inherently false. The reason why our page even exists in the first place is to act as a note repository for the people that work on this blog. If you feel that some of the information is invalid then please leave it in the comments below. S-Config and its partners are not responsible for any physical, emotional, mental, or financial damage that could occur from the advice we provide. If you are all cool with that then please read on.
Quick and dirty recipes S-Config.com uses.
For those who just want to know what the hell we use to prepare our videos for hosting and don't want to go through 5,000+ words of text. We get you! This is the script we use within windows. You can append your NUL syntaxes for other OS's by seeing some of the other examples in this tutorial.
ffmpeg -i "Ukidig-HD.mp4" -r 30 -s 1280x720 -codec:v libtheora -qscale:v 5 -codec:a libvorbis -qscale:a 3 "Ukidig.ogv"

ffmpeg -i "Ukidig-HD.mp4" -r 30 -s 1280x720 -c:v libx264 -profile:v high -preset veryslow -b:v 1000k -minrate 500k -maxrate 2000k -bufsize 4000k -an -pass 1 -threads 0 -y -movflags +faststart -f mp4 NUL
ffmpeg -i "Ukidig-HD.mp4" -r 30 -s 1280x720 -c:v libx264 -profile:v high -preset veryslow -b:v 1000k -minrate 500k -maxrate 2000k -bufsize 4000k -c:a aac -b:a 96k -pass 2 -y -movflags +faststart -f mp4 "Ukidig.mp4"
del ffmpeg2pass-0.log
del ffmpeg2pass-0.log.mbtree

ffmpeg -y -i "Ukidig-HD.mp4" -c:v libvpx-vp9 -b:v 1500K -minrate 1000K -maxrate 3000K -bufsize 6000k -threads 8 -cpu-used 8 -g 120 -keyint_min 60 -tile-columns 4 -auto-alt-ref 1 -lag-in-frames 25 -frame-parallel 1 -row-mt 1 -pass 1 -an -movflags +faststart -f webm NUL
ffmpeg -y -i "Ukidig-HD.mp4" -c:v libvpx-vp9 -b:v 1500K -minrate 1000K -maxrate 3000K -bufsize 6000k -threads 8 -cpu-used 0 -g 120 -keyint_min 60 -tile-columns 4 -auto-alt-ref 1 -lag-in-frames 25 -frame-parallel 1 -row-mt 1 -pass 2 -codec:a libopus -b:a 96k -vbr on -ac 2 -compression_level 10 -frame_duration 60 -movflags +faststart -f webm "Ukidig.webm"
del ffmpeg2pass-0.log
del ffmpeg2pass-0.log.mbtree

ffmpeg -i "Ukidig-HD.mp4" -c:v libsvtav1 -preset 8 -b:v 1500k -minrate 1000k -maxrate 3000k -bufsize 6000k -an -threads 0 -pass 1 -movflags +faststart -y -f mp4 NUL
ffmpeg -i "Ukidig-HD.mp4" -c:v libsvtav1 -preset 0 -b:v 1500k -minrate 1000k -maxrate 3000k -bufsize 6000k -c:a libopus -b:a 96k -threads 0 -pass 2 -movflags +faststart -y -f mp4 "Ukidig.AV1.mp4"
del ffmpeg2pass-0.log
del ffmpeg2pass-0.log.mbtree
We demoted .h264 MP4s to 720p. We also increased the bitrate of WebM and AV1 to 1500 to accommodate game plays. -minrate = 0.5x or better . -maxrate = 2x . -bufsize = 3x . 96Kbs audio in libvorbis is generally good for almost anything video-wise, If you're making a music video with it, increase it!
We have another script that checks VMAF and PNSR quality. If a video has a mean average of the upper 70s to 80s VMAF and it only dips below this for a handful of frames it's acceptable.
ffmpeg -i "Ukidig.webm" -i "Ukidig-HD.mp4" -lavfi libvmaf=log_path=output.xml:feature=name=psnr:log_fmt=xml:log_path=VMAF-PNSR-WEBM.txt -f null -
ffmpeg -i "UkidigAV1.mp4" -i "Ukidig-HD.mp4" -lavfi libvmaf=log_path=output.xml:feature=name=psnr:log_fmt=xml:log_path=VMAF-PNSR-AV1.txt -f null -
Making videos via command line / FFmpeg.
All of the examples given below are strictly ones that worked out well for me and were discovered through going through the FFmpegs documentation on their website.
Prepping FFmpeg onto your Linux box.
sudo apt-get install ffmpeg libav-tools
This is the command that we passed to get it working on our Raspberry Pi. It should also work with many Linux environments that use the apt command such as Debian. Windows users can simply go to the FFmpeg site and download the stock binaries. We will be avoiding any self-compiling here out of simplicity. Since we do not own a mac we are unable to provide instructions as to what to do on OSX.
Test video download.
 For our test video, we shall be using something from our own site which is the Ukidig-HD.mp4 file which was recorded in a dual-pass 25-35MB stream giving the maximum quality. This file is rather large at 290+ megs in size. You are welcome to download and follow along with this guide if you wish.
Usage of quotations within filenames.
Throughout this blog, you will see us using double quotes on filenames and single quotes on filenames. Double-quotation is used in a windows environment and single quotation is used within a MAC/Linux environment. The reason why quotations may be helpful to you is in case your file has any spaces like "Test Movie.avi" for windows and 'Test Movie.avi" for Mac/Linux. This is one of the things that a lot of forums tend to skip and simply assume that you know how to specify filenames. But it messed up some of our batch scripts a few times.
Making an MP4 file for web streaming.
ffmpeg -i Ukidig-HD.mp4 -c:v libx264 -profile:v high -preset slow -b:v 1500k -maxrate 3000k -bufsize 6000k -threads 0 -codec:a aac -b:a 128k Ukidig.mp4
Single-pass MP4 encoding example. Let's break down what is happening here.
- Flag "-i" specifies the input file which in this example I used my high-quality MP4 files of Ukidig.
- The "-c:v libx264" specifies that we want to make a .h264-compliant video file.
- "-profile:v high" and "-preset slow" ensure to get the best quality image which means it may take some time depending on the processor core that you are using.
- "-b:v 1500k" sets our variable bit-rate of our video to 1500kbs or 1.5M for general streaming on the web. This can vary depending on the resolution and type of film you are working on. for 1080p video tutorials, it works for us."
- -maxrate 3000k - acts as a throttle in case there is a lot of action on the screen. The general rule of thumb on this one is always go double your variable bitrate.
- -bufsize 6000k" - typically used for streaming media such as gaming. But in WordPress, this is helpful too as it gives us a minimum three-second buffer in the event of latency or lag. It's the general rule to give your buffer three times that of your variable bitrate.
- "-threads 0" is to use all of the processor cores in a system, you can set this however you want.
- "-codec:a aac" is our audio codec. Many people will demand libfdk_aac but due to licensing problems, the only way you can get that is by compiling FFmpeg yourself. The default AAC codec is really good and works well with the h264 codec.
- "-b:a 128k" The bit-rate of the audio. For voice and narration, you can set it down to 64k or 96k to save space. But since this has music we keep it higher at 128k.
Phew! That was a lot of crap going on! But that is unfortunately the nature of MP4 and compressing it down to something smaller for web broadcast!
2-pass encoding of MP4.
2-pass encoding tends to give better-quality renders of your video but may also increase the size of your file by approximately 10-20 percent. Here's how that is done.
In Windows:
ffmpeg -i "Ukidig-HD.mp4" -c:v libx264 -profile:v high -preset slow -b:v 1500k -maxrate 3000k -bufsize 6000k -threads 0 -pass 1 -an -y -f mp4 NUL
ffmpeg -i "Ukidig-HD.mp4" -c:v libx264 -profile:v high -preset slow -b:v 1500k -maxrate 3000k -bufsize 6000k -threads 0 -pass 2 -codec:a aac -b:a 128k -f mp4 "Ukidig.mp4"
del ffmpeg2pass-0.log
The -y flag is to force overwrite of "NUL" so it doesn't ask us if we're sure about this. You don't have to delete the log file that it generates as it overwrites every time you perform a -pass 1. But we just like our script to clean up a little once done.
In Linux/MAC:
ffmpeg -i 'Ukidig-HD.mp4' -c:v libx264 -profile:v high -preset slow -b:v 1500k -maxrate 3000k -bufsize 6000k -threads 0 -pass 1 -an -f mp4 /dev/null && \
ffmpeg -i 'Ukidig-HD.mp4' -c:v libx264 -profile:v high -preset slow -b:v 1500k -maxrate 3000k -bufsize 6000k -threads 0 -pass 2 -codec:a aac -b:a 128k -f mp4 'Ukidig.mp4'
Yes, you are passing the command twice. The first pass generates a ffmpeg2pass-0.log file that FFmpeg then uses during its second pass to determine how to best optimize the mp4 file.
S, does it really matter? I mean, an encoder is an encoder right?
 Initially, we thought that way. Until we decided to re-encode one of our old videos. The XBCD V2 tutorial to be exact. Upon stopping both videos with VLC at 00:15 and taking a snapshot of my web page at 1,500kbs or 1.5M. The contrast was startling. Even with doing a single-pass render versus a 2-pass render in Adobe Premiere, it was still clearer. To add insult to injury. the Premiere file was 75.4Megs in size. the FFmpeg was 67.9Megs in size. This changes the way I encode things for my website and will be going through all of my master files to re-encode them for better-faster quality.
Even better 2-pass MP4 encoding!
As of 02/13/2023, we've changed the way we encode videos.
In Windows:
ffmpeg -i "Ukidig-HD.mp4" -r 30 -s 1280x720 -c:v libx264 -profile:v high -preset veryslow -b:v 1000k -minrate 500k -maxrate 2000k -bufsize 4000k -an -pass 1 -threads 0 -y -movflags +faststart -f mp4 NUL
ffmpeg -i "Ukidig-HD.mp4" -r 30 -s 1280x720 -c:v libx264 -profile:v high -preset veryslow -b:v 1000k -minrate 500k -maxrate 2000k -bufsize 4000k -c:a aac -b:a 96k -pass 2 -y -movflags +faststart -f mp4 "Ukidig.mp4"
In Linux/MAC:
ffmpeg -i 'Ukidig-HD.mp4' -r 30 -s 1280x720 -c:v libx264 -profile:v high -preset veryslow -b:v 1000k -minrate 500k -maxrate 2000k -bufsize 4000k -an -pass 1 -threads 0 -y -movflags +faststart -f mp4 /dev/null && \
ffmpeg -i 'Ukidig-HD.mp4' -r 30 -s 1280x720 -c:v libx264 -profile:v high -preset veryslow -b:v 1000k -minrate 500k -maxrate 2000k -bufsize 4000k -c:a aac -b:a 96k -pass 2 -y -movflags +faststart -f mp4 'Ukidig.mp4'
We've lowered our bitrate even more because, for the most part, these are tutorial/presentation videos, and not a lot of high-speed action happens. MP4s on our site are considered a 'fallback' video standard in case WEBM is not working and thus we don't give it as much space/priority as WEBM. This is why we lowered the base bit rate. Unlike our revision from 05/03/2020, we also added '-r 30' to reduce the framerate to 30 and '-s 1280x720' to lower the resolution to 720p. Similar to OGV encoding h264 is only stored on this server for limited operating systems like Raspberry Pi's and 1080p tends to stress out those low-end systems too much.
We also added a -minrate so that if we are stuck on a still picture for any length of time FFmpeg has the capability of saving some space on our hard drive and also space on your bandwidth. We also brought the -preset down to "veryslow" because when making videos we have all of the time in the world to compress VP9s and AV1 so why not? This preset has yielded better space savings as well. Finally, it was found that -movflags +faststart is actually a really beneficial thing for streaming on a website because it moves all of the information to the front of the video stream. Allowing the user to index and move around without having to reload large chunks of the video. This also has the side benefit it making it feel like a YouTube video.
Making Webm files with FFMpeg.
ffmpeg -i Ukidig-HD.mp4 -c:v libvpx-vp9 -b:v 1000k -c:a libvorbis -b:a 96k -threads 0 Ukidig.webm
- The flag "-i" specifies the input file which in this example we used my high-quality MP4 files of Ukidig.
- The "-c:v libvpx-vp9" represents the video codec we will be using. Understand that you will need a very new version of FFmpeg to use the VP9 Library. Older FFmpeg that is in Debian distros will only have VP8 which is "-c:v libvpx."
- We then specify a variable bit rate of 1000k or 1M with "-b:v 1000K" which works very well when doing desktop-based tutorials. For gaming or high action at 1080p, you may want to increase this value to 2000k or more.
- Finally, the audio is compressed in Vorbis which is traditional for WebM files with "-c:a libvorbis." Bit-rate for the audio is set for 96k "-b:a 96k" as vorbis/ogg audio.
2-pass WebM encoding.
These commands are similar to MP4 but with 2-pass encoding.
In Windows:
ffmpeg -i "Ukidig-HD.mp4" -c:v libvpx-vp9 -b:v 1000k -c:a libvorbis -b:a 96k -pass 1 -threads 0 -y -f webm NUL
ffmpeg -i "Ukidig-HD.mp4" -c:v libvpx-vp9 -b:v 1000k -c:a libvorbis -b:a 96k -pass 2 -threads 0 "Ukidig.webm"
del ffmpeg2pass-0.log
In linux/MAC:
ffmpeg -i 'Ukidig-HD.mp4' -c:v libvpx-vp9 -b:v 1000k -c:a libvorbis -b:a 96k -pass 1 -threads 0 -f webm /dev/null && \
ffmpeg -i 'Ukidig-HD.mp4' -c:v libvpx-vp9 -b:v 1000k -c:a libvorbis -b:a 96k -pass 2 -threads 0 'Ukidig.webm'
2-pass encoding is important with WebM as only using single-pass gives inconsistent sizes and quality issues when using a variable bit rate. By using a 2-pass system we can ensure that the video will have consistent quality throughout the entire encoding process. For more information check out the VP8 and VP9 documentation. There's also better documentation on the WebM project Wiki on how to use FFmpeg and WebM.
Even better 2-pass WebM encoding!
Later on, we found an article from Google Developers that gave people a roadmap on how Google likes to use FFmpeg within their environments such as YouTube/etc. We thought it was super handy so we'll provide a link to that one too.
We were mostly interested in encoding 1080p @ 60fps since that's the rate we capture right now.
ffmpeg -i tearsofsteel_4k.mov -vf scale=1920x1080 -b:v 3000k \
-minrate 1500k -maxrate 4350k -tile-columns 2 -g 240 -threads 8 \
-quality good -crf 31 -c:v libvpx-vp9 -c:a libopus \
-pass 1 -speed 4 tos-1920x1080-50-60fps.webm && \
ffmpeg -i tearsofsteel_4k.mov -vf scale=1920x1080 -b:v 3000k \
-minrate 1500k -maxrate 4350k -tile-columns 3 -g 240 -threads 8 \
-quality good -crf 31 -c:v libvpx-vp9 -c:a libopus \
-pass 2 -speed 4 -y tos-1920x1080-50-60fps.webm
Okay, we don't need to really scale our videos unless it's an old-dying protocol. But a lot of this information is great! So here's our version!
Windows:
ffmpeg -y -i "Ukidig-MASTER.mp4" -c:v libvpx-vp9 -b:v 1000K -minrate 500K -maxrate 3000K -bufsize 6000k -an -threads 8 -cpu-used 8 -g 120 -keyint_min 60 -tile-columns 4 -auto-alt-ref 1 -lag-in-frames 25 -frame-parallel 1 -row-mt 1 -pass 1 -movflags +faststart -f webm NUL
ffmpeg -y -i "Ukidig-MASTER.mp4" -c:v libvpx-vp9 -b:v 1000K -minrate 500K -maxrate 3000K -bufsize 6000k -threads 8 -cpu-used 0 -g 120 -keyint_min 60 -tile-columns 4 -auto-alt-ref 1 -lag-in-frames 25 -frame-parallel 1 -row-mt 1 -pass 2 -codec:a libopus -b:a 96k -vbr on -ac 2 -compression_level 10 -frame_duration 60 -movflags +faststart -f webm "Ukidig.webm"
Linux/MAC:
ffmpeg -y -i 'Ukidig-MASTER.mp4' -c:v libvpx-vp9 -b:v 1000K -minrate 500K -maxrate 3000K -bufsize 6000k -an -threads 8 -cpu-used 8 -g 120 -keyint_min 60 -tile-columns 4 -auto-alt-ref 1 -lag-in-frames 25 -frame-parallel 1 -row-mt 1 -pass 1 -movflags +faststart -f webm /dev/null && \
ffmpeg -y -i 'Ukidig-MASTER.mp4' -c:v libvpx-vp9 -b:v 1000K -minrate 500K -maxrate 3000K -bufsize 6000k -threads 8 -cpu-used 0 -g 120 -keyint_min 60 -tile-columns 4 -auto-alt-ref 1 -lag-in-frames 25 -frame-parallel 1 -row-mt 1 -pass 2 -codec:a libopus -b:a 96k -vbr on -ac 2 -compression_level 10 -frame_duration 60 -movflags +faststart -f webm 'Ukidig.webm'
For starters, we've removed the -quality flag in favor of the -speed flag. Also, we adjusted the speed on the first pass because the first pass legitimately is there just to determine the requirement of the bitrate we are about to encode. There's no sense in spending additional processor power on the first pass. So, -speed 4 on the first pass and -speed 0 which is the slowest on the second pass. Now, Google recommends that you go in the middle and set your -speed 2. But as we're blogging if it takes extra time for a video to come out we simply do not care. This command is an alias of -cpu-used just like AV1 encoding.
Now we're psychos with access to a 64-core threadripper. This is the reason why we used -cpu-used 0
One thing that helped us out big time for us especially for archiving streaming videos is the flag -row-mt which depending on how many processors you are working with offsets the side effects of -speed 0. Without -row-mt processor usage on my system was at around twenty to thirty percent. Adding the -row-mt 1 flag increases the speed of encoding by about %30 in my case AND improves the video quality slightly too.
Another thing we adjusted is the -g or (Group of Picture) flag to 120. Since we're working with 60fps video you set your GOP to 2 seconds. So, -g 120 ultimately helps with encoding filesize. Please read the notes of this command when encoding AV1 video down in this article!
The -tile-columns 4 one was interesting in the respect that it used to be tiled based on resolution. A 1080p in VP9 would be broken into 4 columns for the processor to render in, 2160p was 8.. etc. but with -row-mt flag now its default is anywhere from 1 to 4. So, I keep mine at 4.
-frame-parallel 1 just enables the ability for the processor to decode the frames in parallel. Again it seems like -row-mt already does this but will leave it on just in case.
-auto-alt-ref 1 enabled reference framing so that when a client seeks around it will load that reference frame first before loading the rest. This also links to -lag-in-frames 25 which tells the reference frame where to go within the timeline. For some reason, you can't go past 25 frames with it.
-buffsize is still important! It helps with quality during the lowest bitrate of encoding versus a high.
For audio, we switched from -codec:a libvorbis to -codec:a libopus for better quality and a better revision of the OGG family. Also, Opus is capable of handling multi-channel or surround sound, unlike vorbis.
Making OGV files with FFmpeg.
ffmpeg -i Ukidig-HD.mp4 -c:v libtheora -b:v 4000k -c:a libvorbis -b:a 96k -threads 0 Ukidig.ogv
This is not the usual way you're supposed to pass the command to make an OGV file:
- We're specifying bit-rate with "-b:v 4000k" for 4000kbs transfer giving us a predictable file size for our blog. Ogg-Theora by design uses scale levels of compression versus bit rate. If you are not careful and specify a bit-rate too low such as avconv's default 200k. You will receive an unwatchable ogv file with frame skipping especially at 1080p.
- Audio is also limited to a 96k stream "-b:a 96k" because in our humble opinion, ogg/vorbis audio tends to handle a lot nicer than mp3. A more civilized way of making an ogv file is as follows:
ffmpeg -i Ukidig-HD.mp4 -codec:v libtheora -qscale:v 5 -codec:a libvorbis -qscale:a 3 Ukidig.ogv
- By using "-qscale:v 5" and "-qscale:a 3" of OGV ensures that the video will be compressed on a more exacting measure of quality over compression. However, doing it this way may lead to some unpredictable file sizes, especially when working with large-resolution files like 1080p.
- Using a video qscale of 5 is even a little low for 1080p@60fps but it keeps the bandwidth in check on my site when showing something high action. Also, the percentage of users falling all the way back to OGV is incredibly low which is why we aren't overly concerned about the quality. If you specify a qscale level. FFmpeg will then ignore variable bit-rate commands "-b:v" you pass to it in favor of scale settings.
Desktop tutorial settings.
ffmpeg -i Ukidig-HD.mp4 -r 30 -s 1280x720 -codec:v libtheora -qscale:v 5 -codec:a libvorbis -qscale:a 3 Ukidig.ogv
When encoding desktop videos such as the many tutorials on my site. We found it to be a lot better to simply reduce the resolution with "-s 1280x720" to bring it down to 720p. Also, drop the frame rate down to 30fps with "-r 30" in order to half the frame rate to keep the size low. Although a lot of the videos were shot at 1080p the desktop becomes a lot more readable and the size of the OGV becomes something that is easier to handle on this site versus fighting with a blocky 1080p OGV file. Also, dropping it to 720p helps a lot with people that are browsing this site with a Raspberry Pi as the low decode overhead and the size makes it easily playable on low-powered boxes.
If you insist on making 1080p ogv files. Then it's recommended that you crank up the -qscale:v to 7 or greater so it doesn't look too terrible!
2-pass OGV encoding?!?
Yes, it's possible. But there wasn't much of a perceivable difference when we tried it out. In fact, the quality was lower and the size was larger defeating the very purpose of what 2-pass encoding is supposed to do. But if you want to try it here are the commands. go nuts.
For Windows:
ffmpeg -i Ukidig-HD.mp4 -c:v libtheora -b:v 2000k -c:a libvorbis -b:a 96k -pass 1 -threads 0 -y -f ogv NUL
ffmpeg -i Ukidig-HD.mp4 -c:v libtheora -b:v 2000k -c:a libvorbis -b:a 96k -pass 2 -threads 0 Ukidig.ogv
del ffmpeg2pass-0.log
For Linux/MAC:
ffmpeg -i Ukidig-HD.mp4 -c:v libtheora -b:v 2000k -c:a libvorbis -b:a 96k -pass 1 -threads 0 -y -f ogv /dev/null && \
ffmpeg -i Ukidig-HD.mp4 -c:v libtheora -b:v 2000k -c:a libvorbis -b:a 96k -pass 2 -threads 0 Ukidig.ogv
2-pass mode really does not like the -qscale command. 2-pass however compatible with -r 30 -s 1280x720 for those interested in slowing frame rate and resizing in order to save disk space. The only observed difference is it tends to smooth out the key-frames a little. But that's about it. For more information check out the OGV documentation.
NGINX and OGV
It was found out rather late on my site that for some reason .ogv files were being downloaded instead of just playing in a player within a browser. This is because, unlike Apache, NGINX does not recognize the ancient streaming video format despite supporting other formats that are even more exotic. Your web server needs to understand what the MIME type is so that when it encounters this file it can then query the browser and check to see if it will accept such a format.
to correct this, you'll have to go into your /etc/nginx/mime.types and/or /opt/nginx/mime.types depending on your flavor of Linux and add the following line under the video section which is near the bottom of this document.
video/ogg ogv;
And then restart your Nginx server.
Addressing AV1

AV1 is actually not a container like WebM, mp4, or OGV but instead, it's a codec made by Google to compete against HVEC/H265. In our mp4 examples, we're using H264 instead of H265. Why? Because H265 is not adapted to all of the major platforms out there. AV1 suffers from the same problem because of how new this codec is as of 05/30/2020 the support for this codec is incredibly limited to only the newest of android phones and PC Windows users.
It is however very promising as since it is a successor of WebM/VP9 which we showed you it yields better quality at low bit rates.
Here are the commands for encoding AV1 that we found the most beneficial.
LibAOM Mode:
We'll first describe the very first way people were encoding which was LibAOM. Highly accurate but incredibly slow!
For Windows:
ffmpeg -y -i "Ukidig-MASTER.mp4" -c:v libaom-av1 -b:v 1000k -minrate 500k -maxrate 2000k -bufsize 4000k -crf 31 -cpu-used 8 -threads 16 -g 60 -keyint_min 60 -tile-columns 4 -auto-alt-ref 1 -lag-in-frames 25 -frame-parallel 1 -row-mt 1 -pass 1 -an -strict experimental -y -movflags +faststart -f webm NUL
ffmpeg -y -i "Ukidig-MASTER.mp4" -c:v libaom-av1 -b:v 1000k -minrate 500k -maxrate 2000k -bufsize 4000k -crf 31 -cpu-used 0 -threads 16 -g 60 -keyint_min 60 -tile-columns 4 -auto-alt-ref 1 -lag-in-frames 25 -frame-parallel 1 -row-mt 1 -pass 2 -c:a libopus -b:a 96k -vbr on -ac 2 -compression_level 10 -frame_duration 60 -strict experimental -y -movflags +faststart -f webm "Ukidig.AV1.webm"
For Linux/MAC:
ffmpeg -y -i 'Ukidig-MASTER.mp4' -c:v libaom-av1 -b:v 1000k -minrate 500k -maxrate 2000k -bufsize 4000k -crf 31 -cpu-used 8 -threads 16 -g 60 -keyint_min 60 -tile-columns 4 -auto-alt-ref 1 -lag-in-frames 25 -frame-parallel 1 -row-mt 1 -pass 1 -an -strict experimental -y -movflags +faststart -f webm /dev/null && \
ffmpeg -y -i 'Ukidig-MASTER.mp4' -c:v libaom-av1 -b:v 1000k -minrate 500k -maxrate 2000k -bufsize 4000k -crf 31 -cpu-used 0 -threads 16 -g 60 -keyint_min 60 -tile-columns 4 -auto-alt-ref 1 -lag-in-frames 25 -frame-parallel 1 -row-mt 1 -pass 2 -c:a libopus -b:a 96k -vbr on -ac 2 -compression_level 10 -frame_duration 60 -strict experimental -y -movflags +faststart -f webm 'Ukidig.AV1.webm'
You can also do AV1 inside an MP4 container as well.
For Windows:
ffmpeg -i "Ukidig-HD.mp4" -b:v 1000k -minrate 250k -maxrate 2000k -bufsize 4000k -crf 31 -cpu-used 8 -threads 8 -g 60 -keyint_min 60 -tile-columns 4 -auto-alt-ref 1 -lag-in-frames 25 -frame-parallel 1 -row-mt 1 -pass 1 -an -strict experimental -y -movflags +faststart -f mp4 NUL
ffmpeg -i "Ukidig-HD.mp4" -b:v 1000k -minrate 250k -maxrate 2000k -bufsize 4000k -crf 31 -cpu-used 0 -threads 8 -g 60 -keyint_min 60 -tile-columns 4 -auto-alt-ref 1 -lag-in-frames 25 -frame-parallel 1 -row-mt 1 -pass 2 -an -strict experimental -y -movflags +faststart -f mp4 "Ukidig.AV1.mp4"
For Linux/MAC:
ffmpeg -i 'Ukidig-HD.mp4' -b:v 1000k -minrate 500k -maxrate 2000k -bufsize 4000k -crf 31 -cpu-used 8 -threads 8 -g 60 -keyint_min 60 -tile-columns 4 -auto-alt-ref 1 -lag-in-frames 25 -frame-parallel 1 -row-mt 1 -pass 1 -an -strict experimental -y -movflags +faststart -f mp4 /dev/null && \
ffmpeg -i 'Ukidig-HD.mp4' -b:v 1000k -minrate 500k -maxrate 2000k -bufsize 4000k -crf 31 -cpu-used 0 -threads 8 -g 60 -keyint_min 60 -tile-columns 4 -auto-alt-ref 1 -lag-in-frames 25 -frame-parallel 1 -row-mt 1 -pass 2 -an -strict experimental -y -movflags +faststart -f mp4 'Ukidig.AV1.mp4'
Notes on the -cpu-used function: The higher the number the less time it takes for each frame to encode. we set the number high on the first pass and then we set it to '1' on the second pass for quality. Encoding with AV1 is painfully slow and there is no hardware support for it.
11/01/2022 - It has been reported that certain versions of FFMPEG end the AV1 stream prematurely if -tile-columns and -row-mt has been used. So if you find your 9-minute videos exiting at like 45 seconds. you know why.
You will also notice the -g or (Group of Picture) has been reduced to 60 frames. This is because after extensive testing we found that video encoding was ending with no error resulting in videos that were 40 to 60 percent complete. Or videos that claim the full movie length until you index to the 60 percent mark to find nothing. Now, we can't get rid of this feature together because -g works with -movflags +faststart, and without those commands then seeking video would be painful on a powerful PC (Spiking up to 100 percent), and seeking on a phone would be next to impossible with AV1.
Compare and contrast.

When you compare the different encoding methods and the size savings in contrast to the original MASTER file. It's really amazing. AV1 shows the best encoding at just under 30MB/sec. The original Web-VP9 codec commands we passed still did a bang-up job in size values. However, Web VP9 is very close with a 5 percent margin between each other at the best quality mode used. Considering VP9 is widely accepted on mobile platforms as well as desktops. It's going to be our go-to codec until support for AV1 gets better.
Addressing Twitter in the room.

Posting pictures to Twitter tends to be super problematic in the respect that the website is only expecting one type of mpeg4 format and that is it! If you are doing short videos (approximately 10-30 seconds) for Twitter and you need to make sure twitter understands what you are doing then you'll probably want to pass a command like this over your mp4 file:
ffmpeg -i INPUT_FILENAME -c:v libx264 -strict -2 OUTPUT_FILENAME.mp4
Strict mode helps out a lot and when we first uploaded the video Twitter even kept the original resolution. However, after uploading it again it re-encoded my video making it terribly looking. Still have to work on that more.
Final thoughts.
There are blogs out there that will scoff at the way we are encoding and believe they have a better way of encoding. Incidentally, those blogs don't have public video-blog entries as we do.
Sooooo, it's a little hard to take their word when they don't use the technology. We're not saying we're the brightest bulbs on the internet either!. This is why we placed a disclaimer at the start of this article. If someone presents us with a better methodology of encoding we'll be happy to try it. We are also aware AV2 is around the corner however no browser supports it and it's highly experimental. So for now we're not going to discuss that.
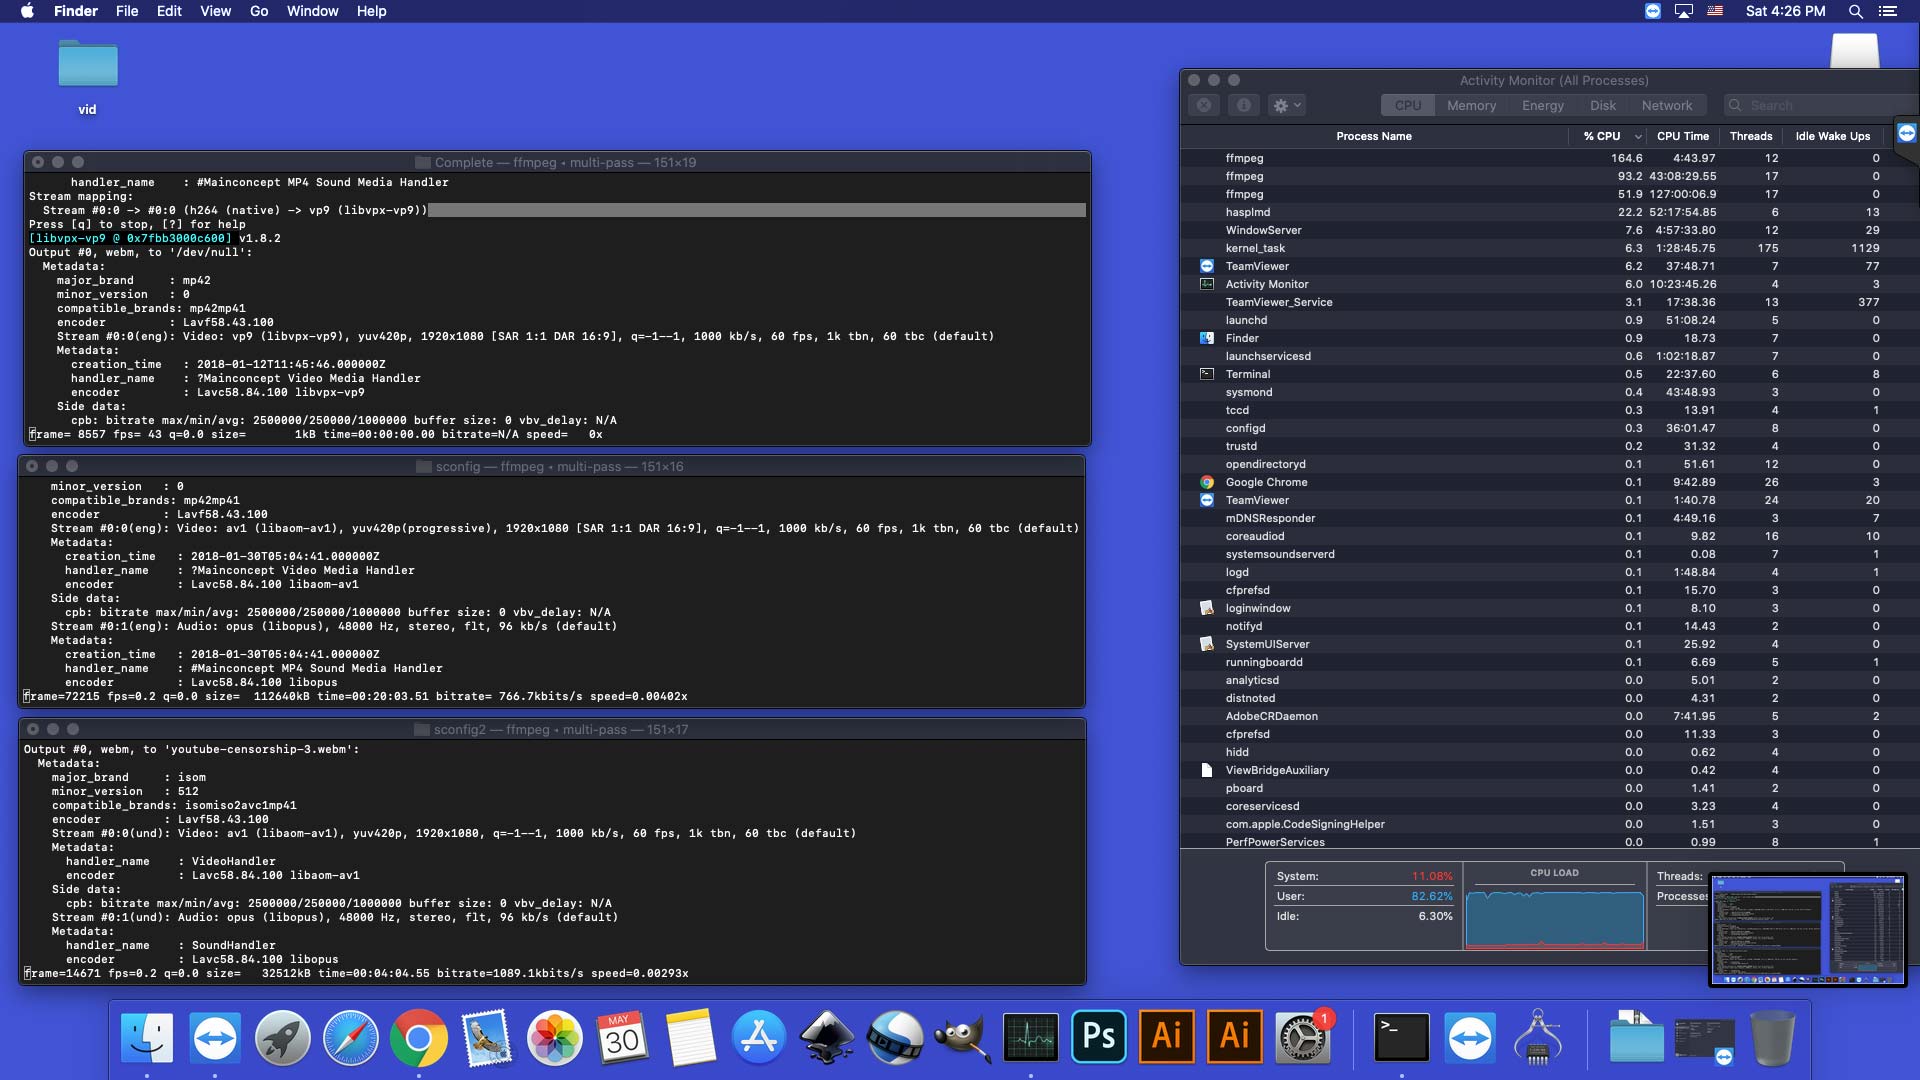
FFMPEG is one of the best multi-platform tools that we use on almost everything. From MAC to Linux to Windows. It works even without the need for a GUI which means you could rent a server on some VPS and encode videos while you edit away on your next big project. In the screen, above we have our Hackintosh re-processing every video this website is currently holding which will take probably a week considering I'm also even making a special AV1 codec version as well in support of open source and royalty-free. As much as we'd like to support new codecs we also have to be mindful of the people visiting our site. So to that end. FFMpeg simply rocks.
Server protect you.
END OF LINE+++