
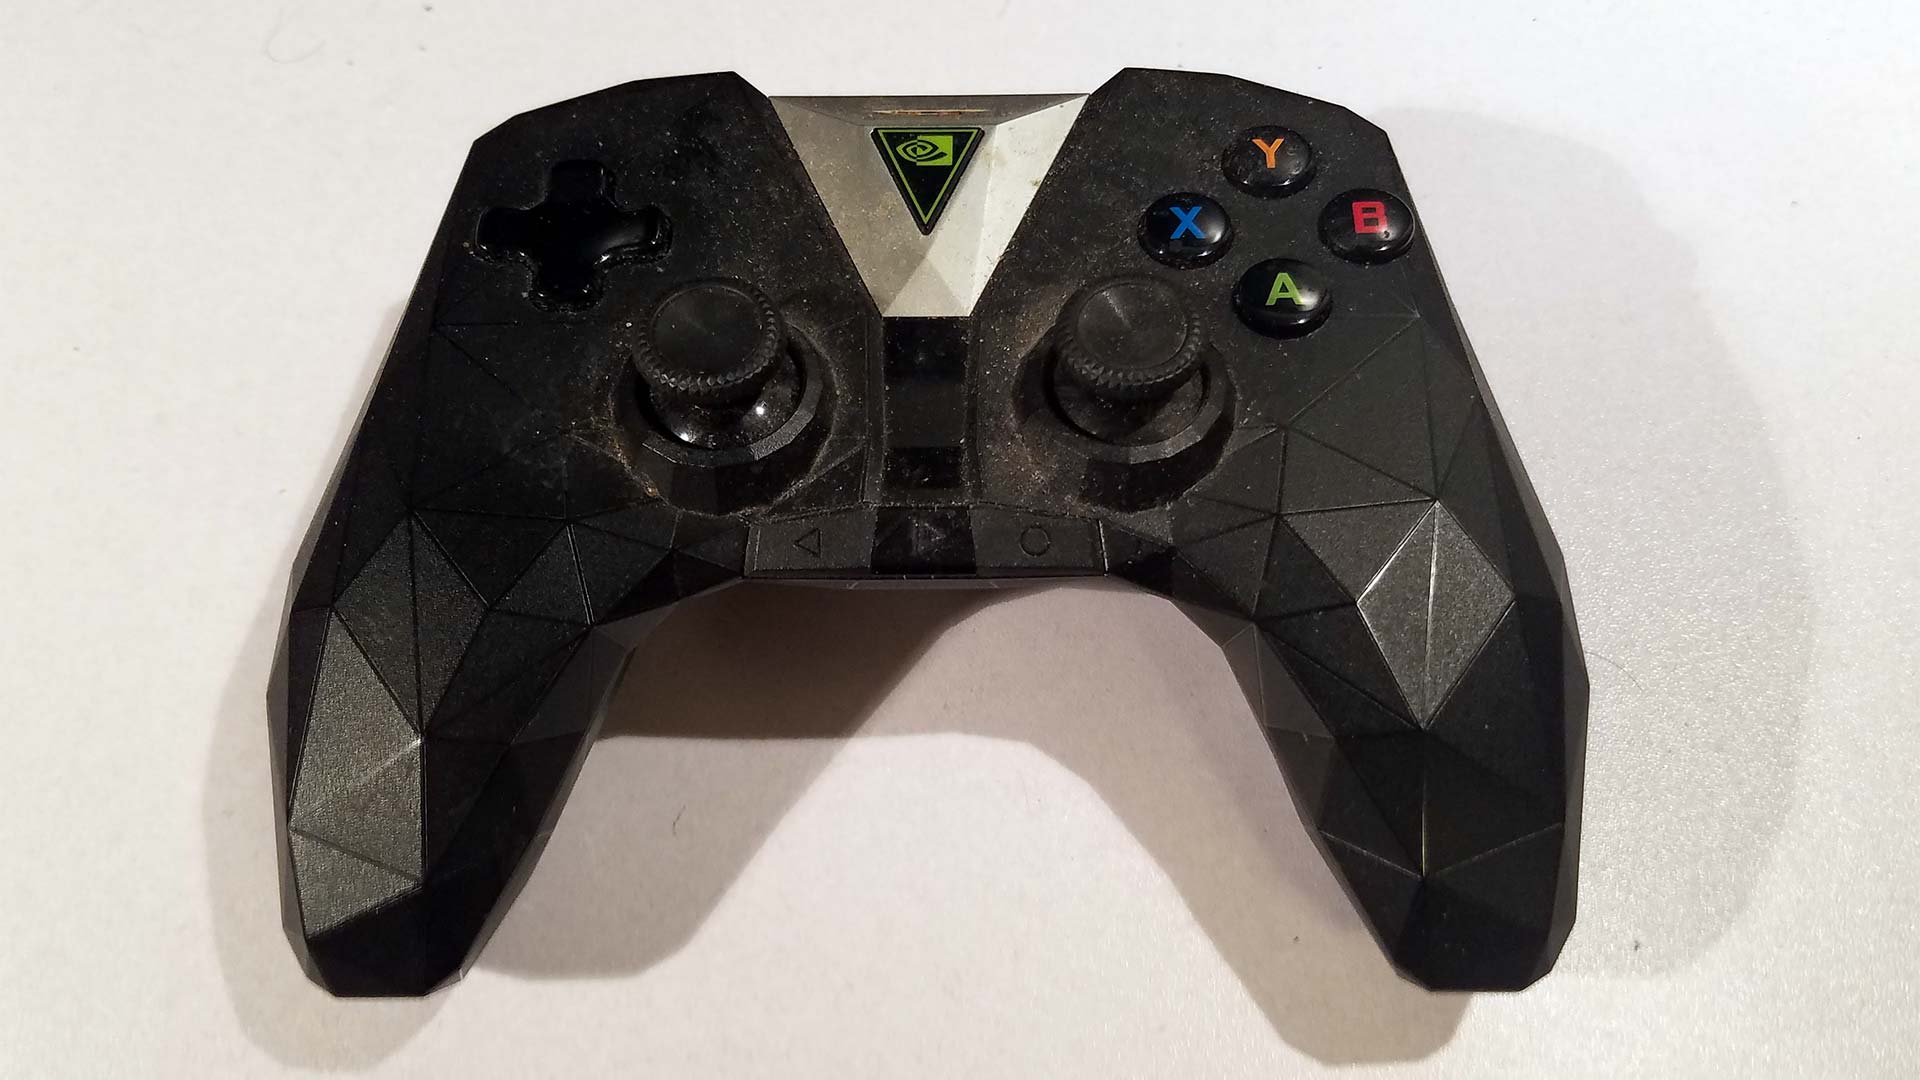
One of these controllers is now on my bench.
It was bound to happen!
Considering that we have three of these Nvidia Shield TV systems that were given friends it's a no-brainer that a few of these controllers were to end up on my repair bench. This time around dealing with a very common issue. Sticky buttons. Maybe it's just coffee?!?? Maybe too much PornHub! You never know as a repair tech! We should probably wear gloves for this one!
As always everything on s-config.com is on an AS-IS basis and is designed for educational purposes. Read our FAQ for more details.. We are not responsible for any damages that occur if you carry out such a repair on your hardware.
Would you like to know more? Continue to read onward!
"Note: If you get a black screen but the audio is playing. Or you got a potato PC and it's studdering. We have fallback Links below."
Video tutorial fallback mirrors:
In case you have no-script enabled or for some reason cannot see the title video on this website. We have provided direct links for these videos. For more information about the standards we use on this site click here if you would like to know more.
AV1       - Link
MP4/.h264 - Link
OGV       - Link
The problem with the controller.
Sticky buttons. This generally happens when someone spills liquid onto the controller. Of course, if you ask your friends or the customer themselves if they spilled anything on the controller they will deny it! But just on the surface of the controller, there's a spray of brown crystallized liquid that was all over the upper plastics of the Nvidia Sheild controller. Now, there are some YouTube content creators which would tell their audience this:
Just spray WD-40 into it.. Good as new. - Rando Content Creator.
These guys are assholes! Because it may break up some of the garbage between the plastics of your controller it leaves behind this oily residue that attracts dirt and debris. Ultimately you're going to have to take apart your controller to truly take care of the problem!
Tools of the trade.
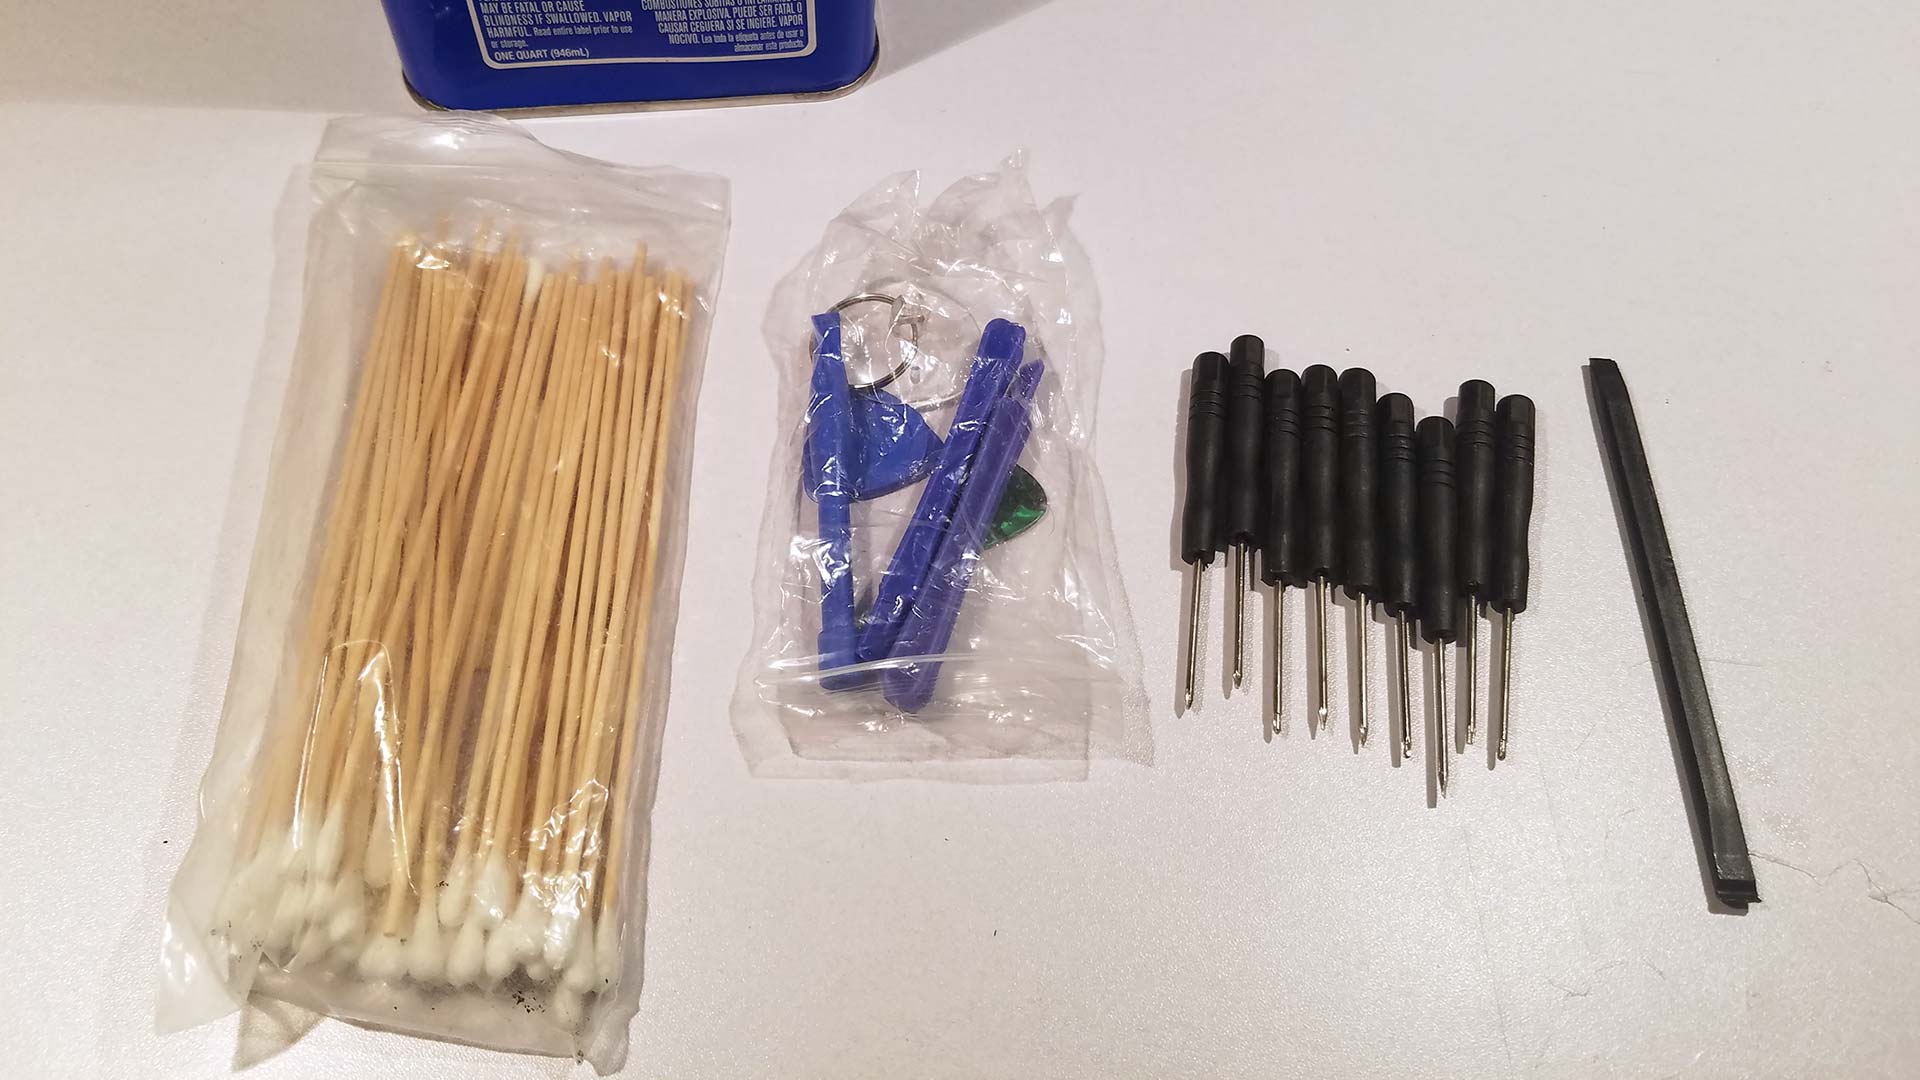
Nvidia has never been a company known to make its products user repairable. if they just stuck with Phillips head screws on their products they could've made the whole procedure a hell of a lot easier. But at least they weren't total dicks by requiring you to purchase a T8-security bit like the Xbox 360 controllers.
On top of that, the shell of the case is clipped as you'll see in a moment. So the ultimate repair kit is actually the same kind of kit that you purchase for an I-phone repair.
- T6 and T5 handled Torx screws will be your major ones.
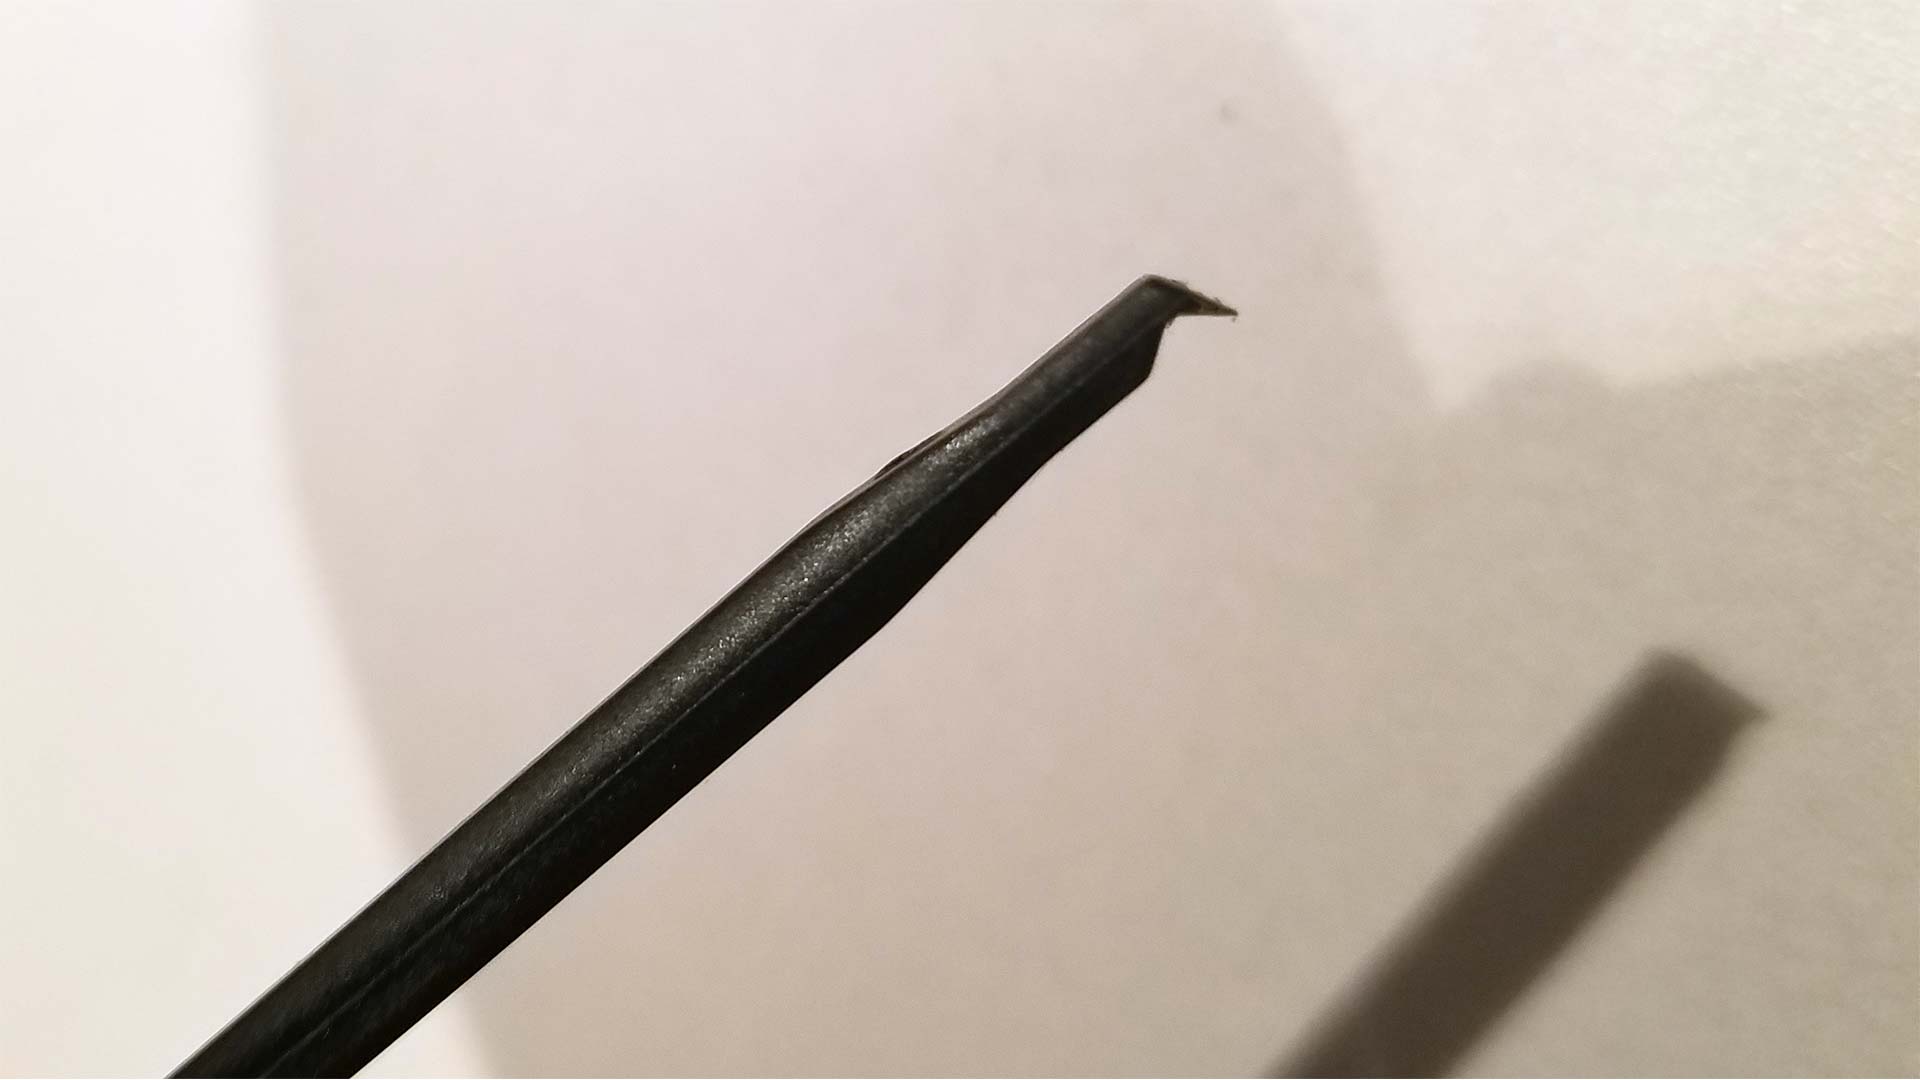
- a plastic pry bar to take care of the plastic clipping around the controller.
- Q-Tips for cleaning
- denatured alcohol for cleaning the plastics.
Let's begin!
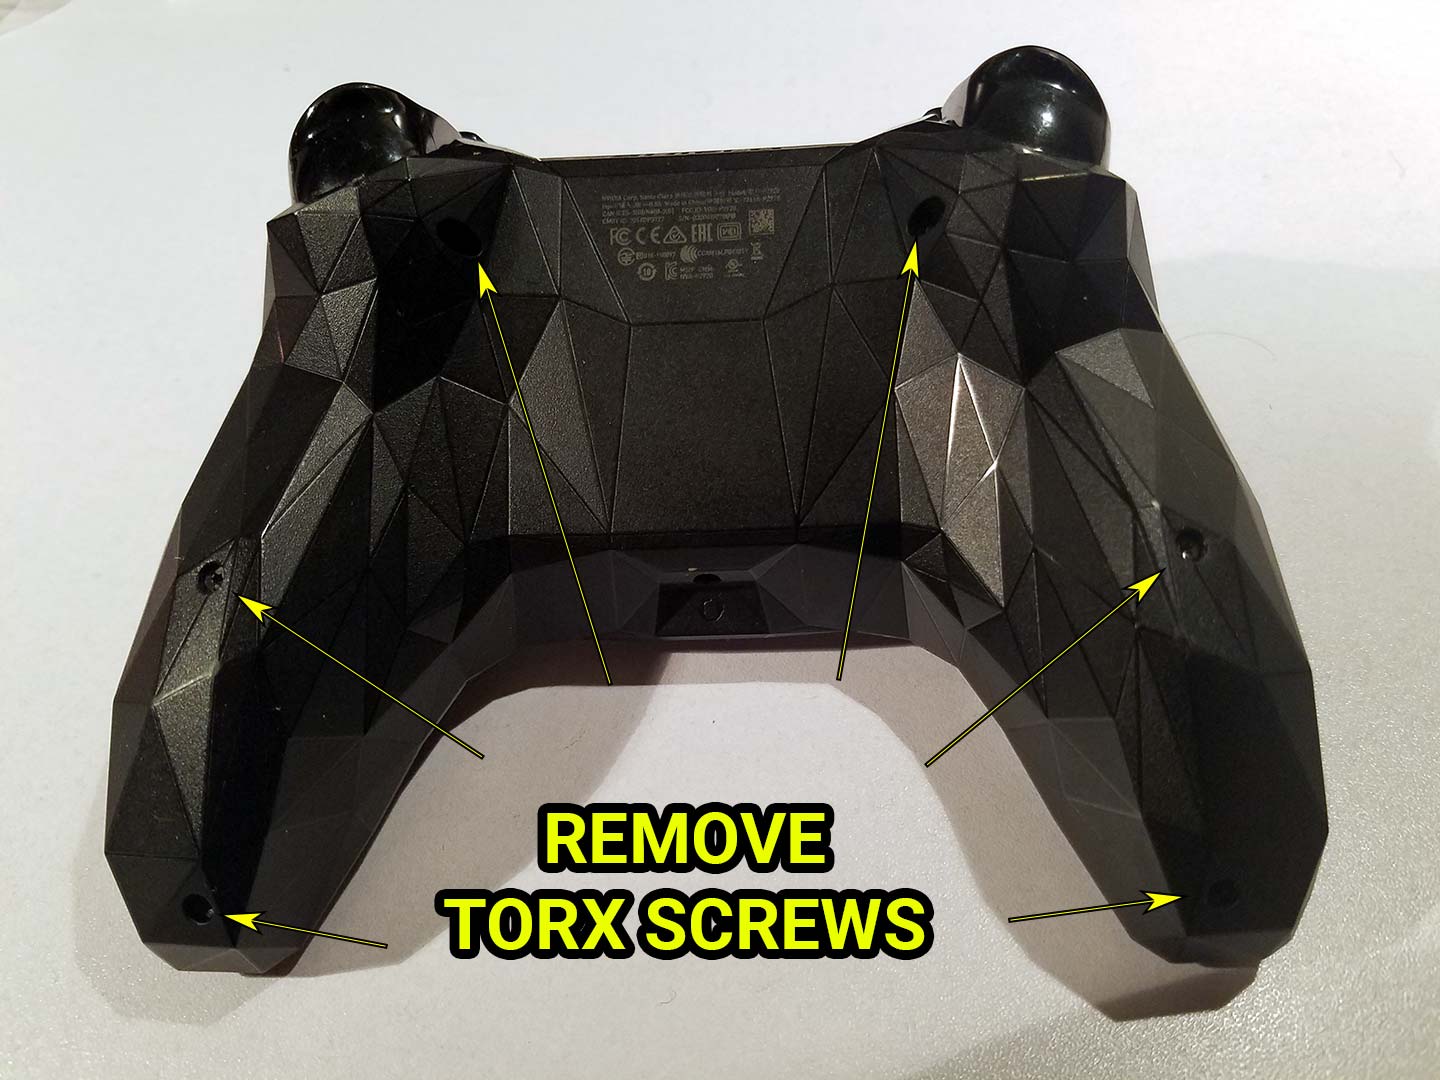
Let's bust out that iPhone repair kit with the (I believe) T6 screw and remove all of the screws in the back.
You've probably noticed that after you remove those 6 screws you cannot pry open your trusty Nvidia Shield TV controller. That is because Nvidia felt the need and/or desire to plastic clip the inner shell so that even if all of the screws fall out that the shell itself will stay together. You're going to need to work around your controller with this plastic pic that most iPhone repair kits come with.
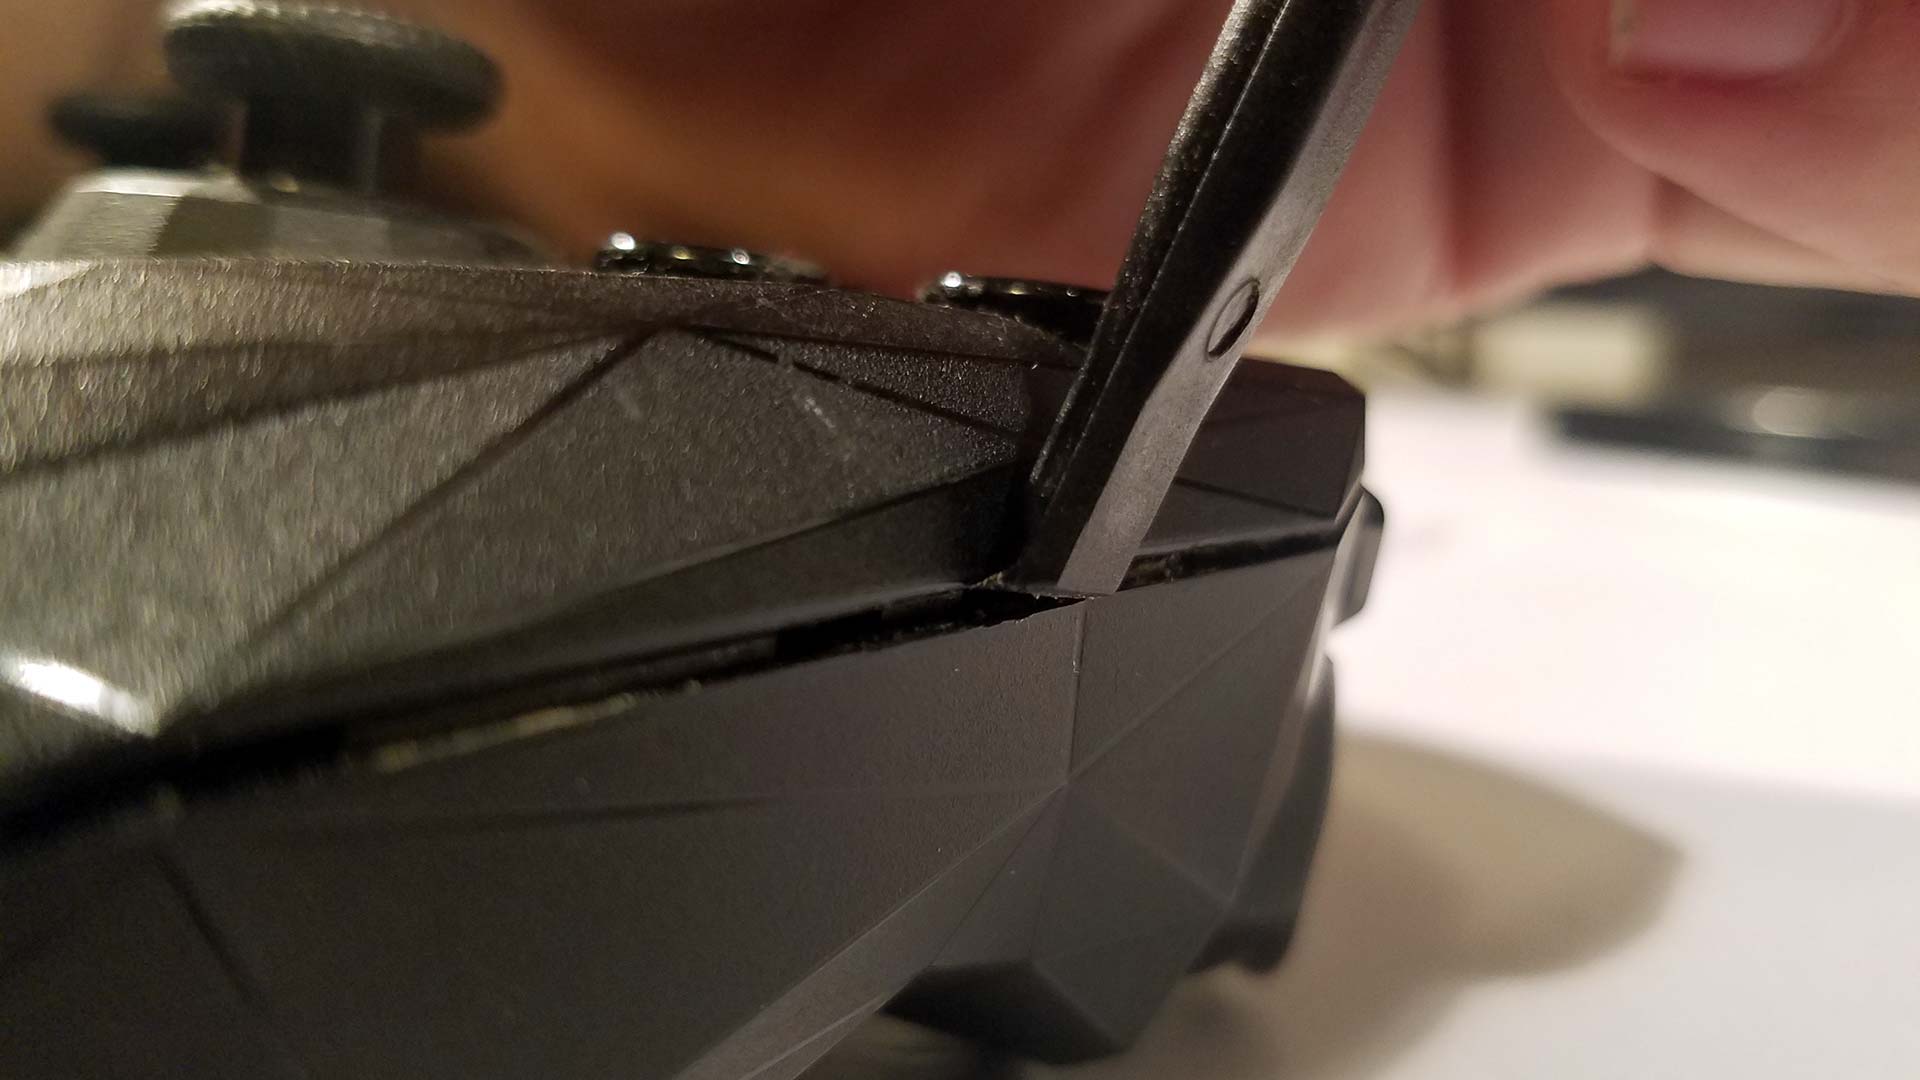
Learning from our own mistakes, you should start from the bottom of the controller and slowly work your way up unlocking all of the plastic tabs. This part you want to be patient with. You're not only fighting the plastic clips.
You are also righting the front analog trigger similar to that of the Xbox 360 controllers. Try to be a little careful of the front of the controllers as the upper rail buttons also tend to stick to the bottom as you are separating. Between assembly and disassembly, this will be no doubt the hardest step of the process.
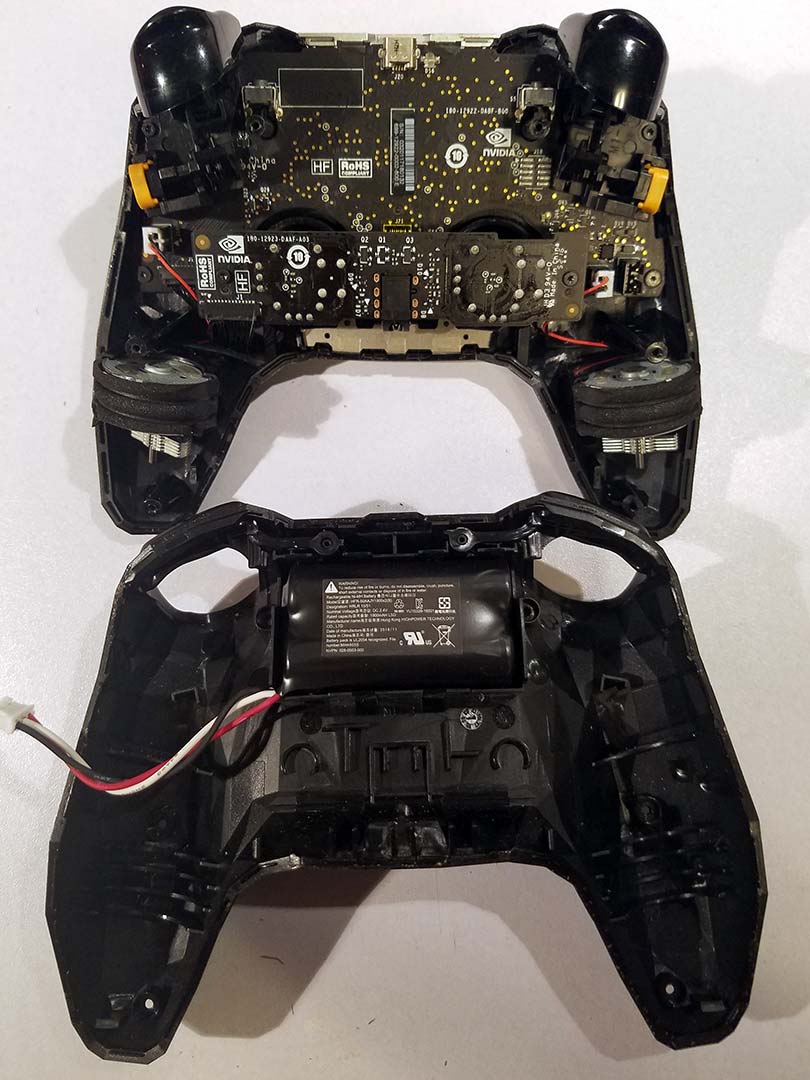
Alright! We got the controller apart! Interestingly, Nvidia has chosen a 2.4v NiMH battery pack part number HFR-50AAJY1900x2 instead of saying what modern controllers have which is lithium Ion packs. The good news on this subject is your Nvidia shield and the controller will be completely safe to travel with you through the airport in a bag check-in. You will just need to carry on your remote control which regardless of generation will always be lithium-ion. The bad news is NiMHs aren't known for having a good shelf life. So a replacement may be necessary after a few years.
Be aware didn't walk away from this process flawlessly here!
DAMAGE REPORT!!
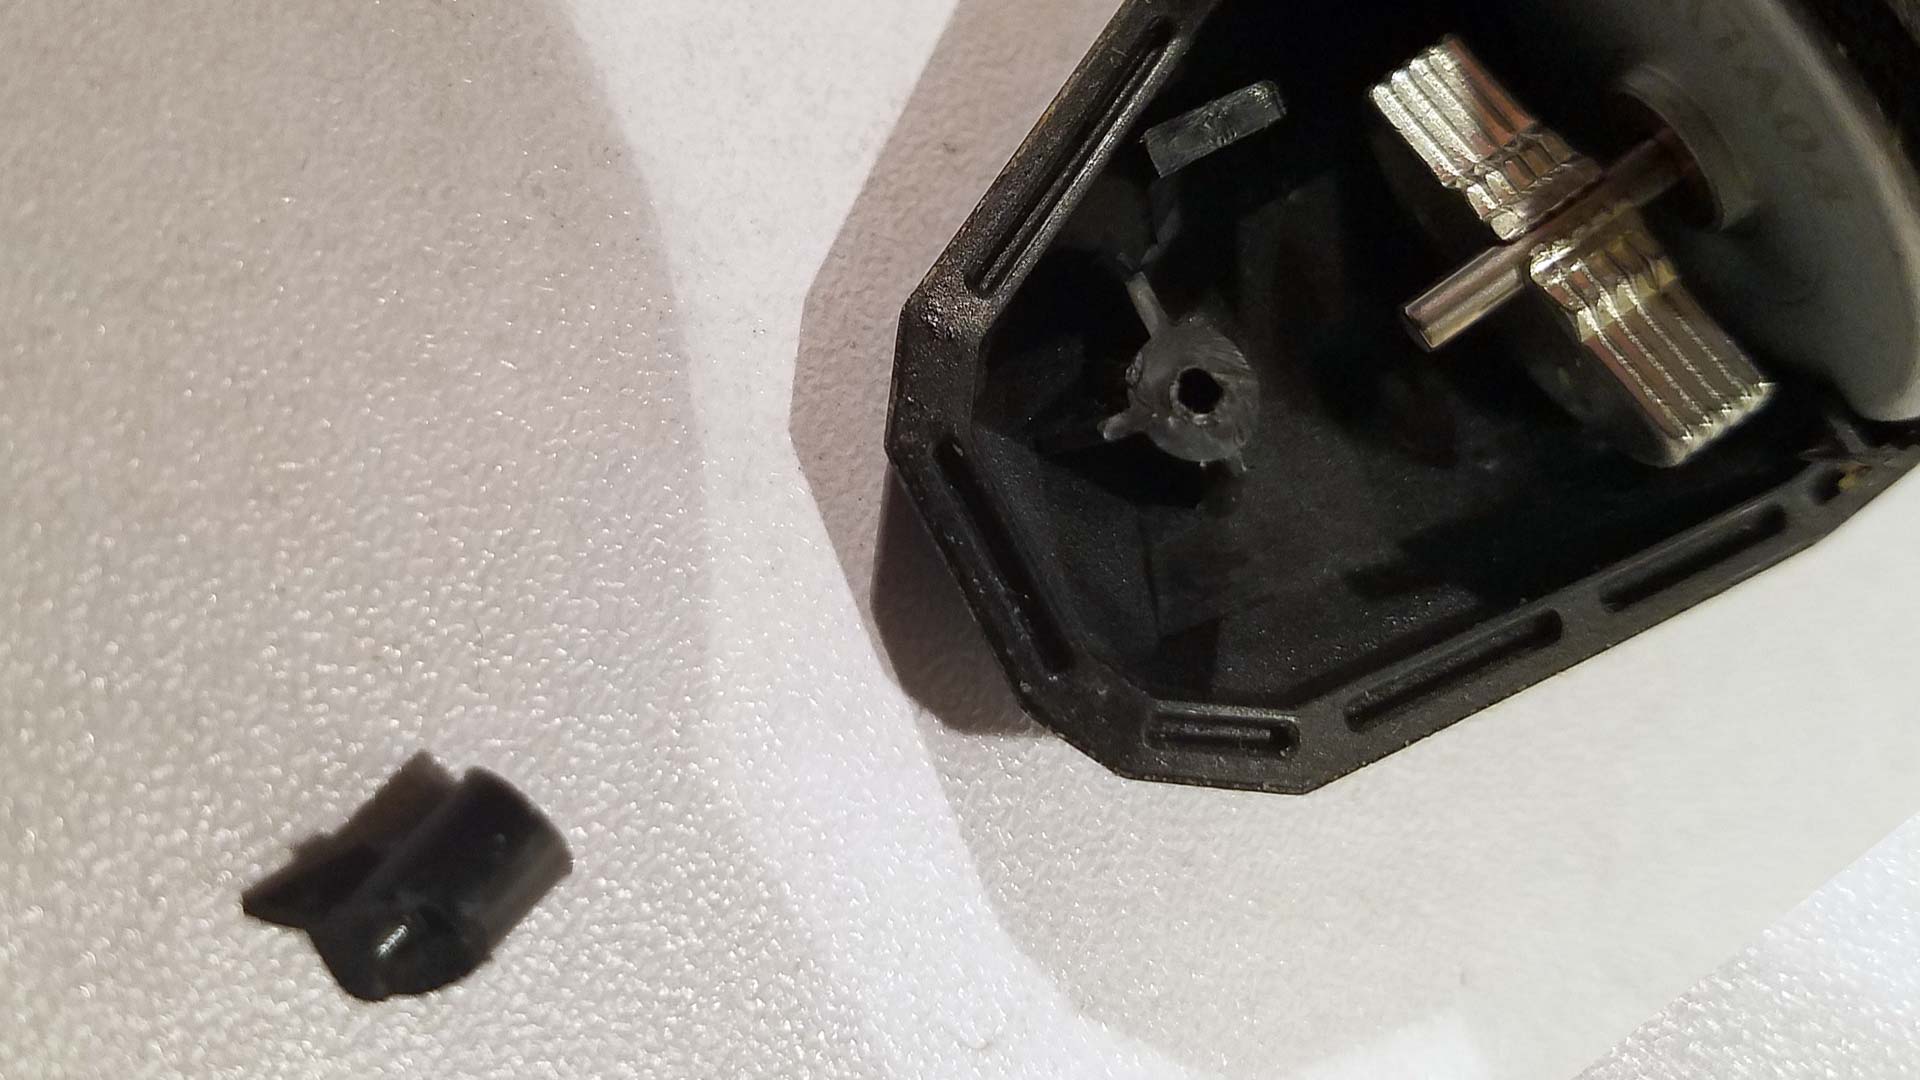
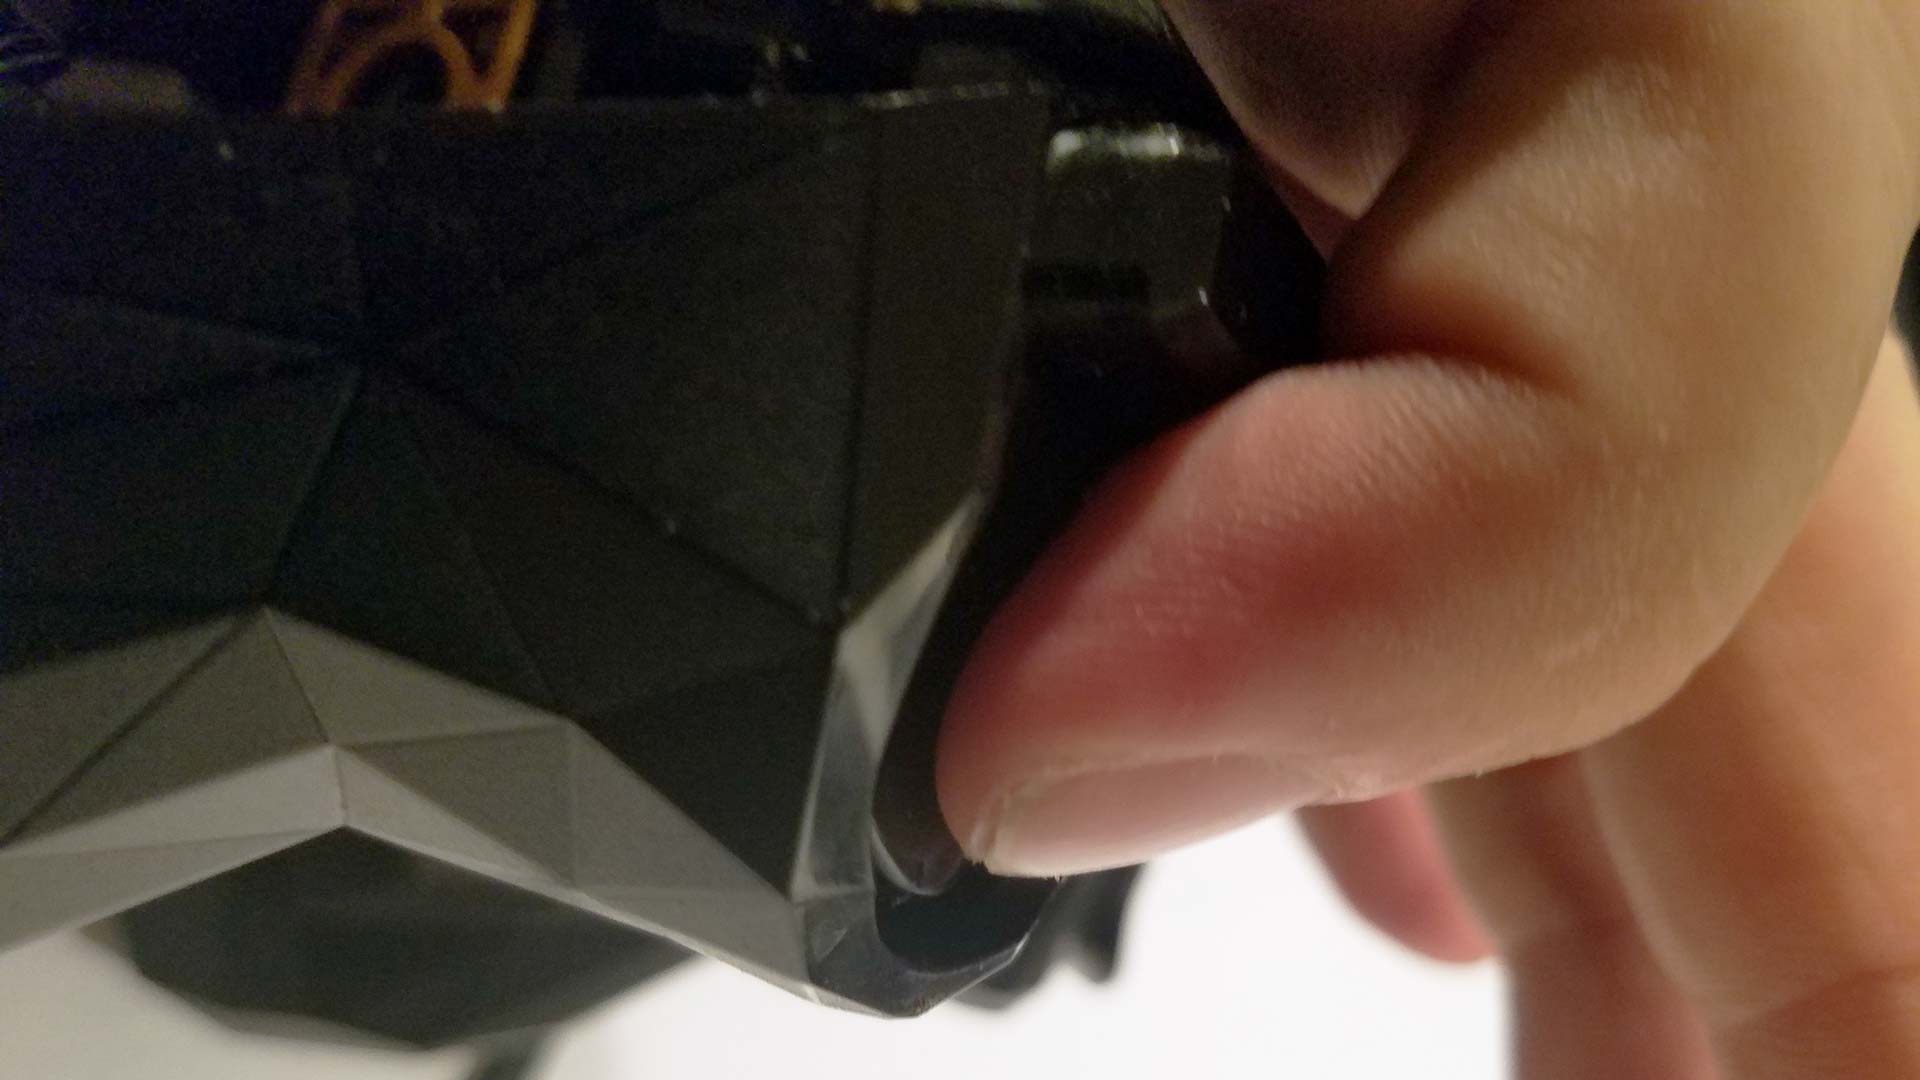
Is it a blessing or a curse that we had to fight those plastic clips? We're not entirely sure because as we popped the final clip in the front we had this piece of plastic fall out which was one of the screw holes. Now, it could've been the fact that we started in the wrong area on the controller and produced unwanted stress. It could've been cracked from us torquing on the screw. Perhaps we were impatient with fighting with the plastic casing and pushed it too hard! It could've just been shitty plastic reinforcement on Nvidia's part. Either way, you slice this there's no real good way of repairing plastics like this except for perhaps JB-weld epoxy.
Nothing can be done at this stage so we're just going to move forward with the repair.
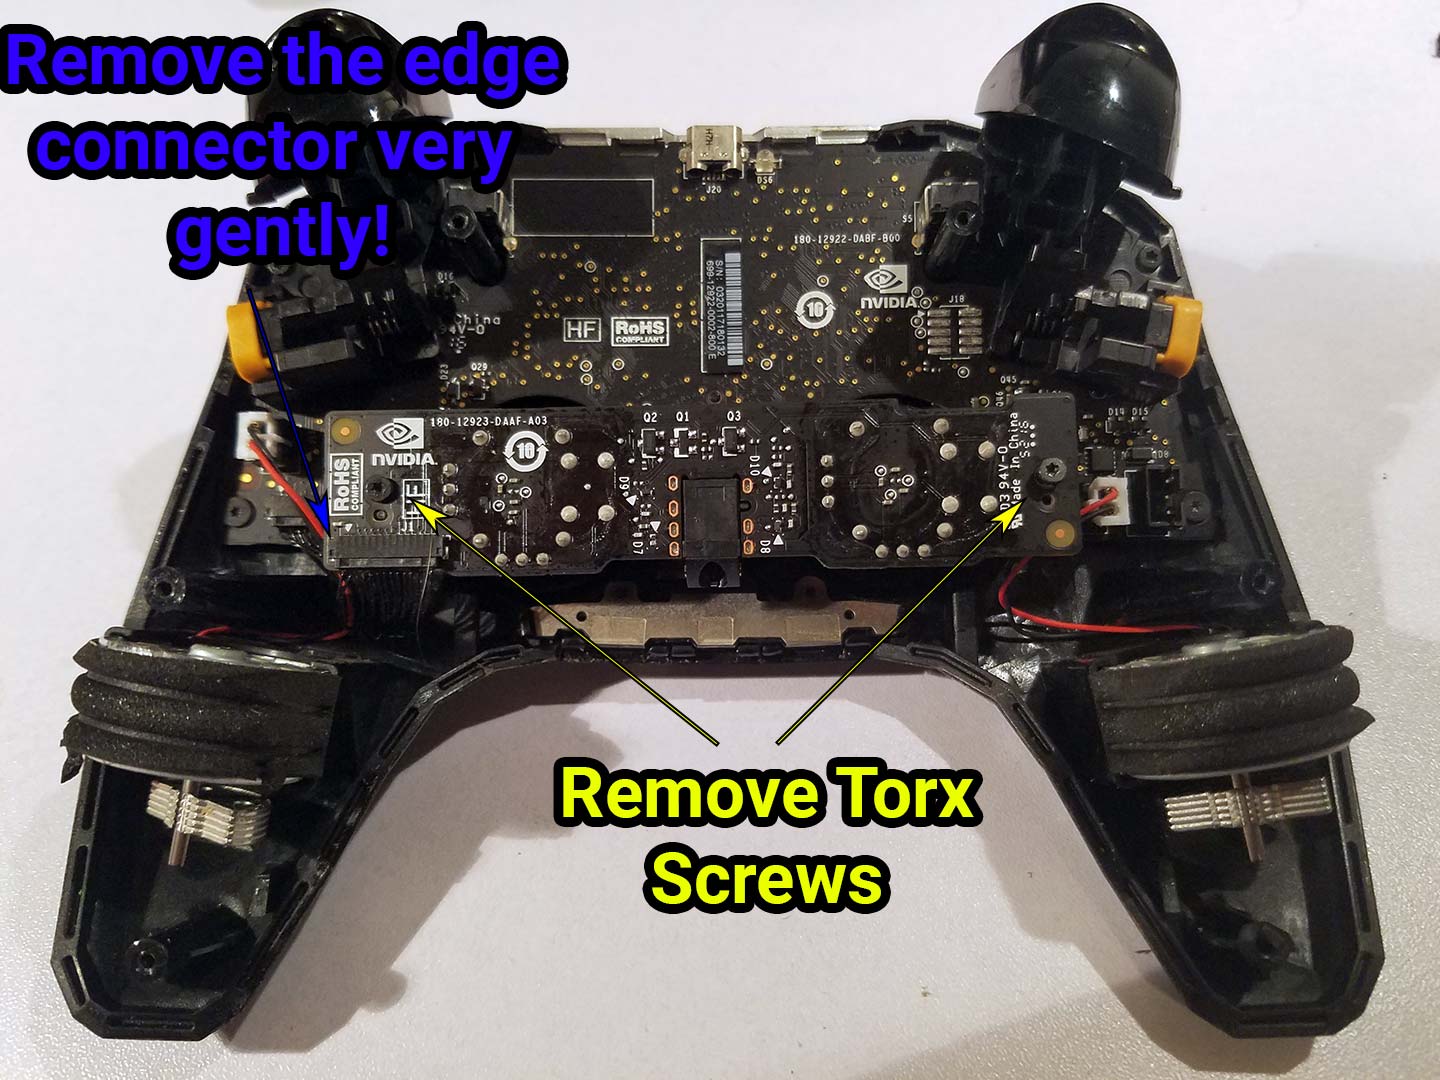
We have to remove two more T6 screws and then finally the edge connector on the side. We particularly hate these styles of connectors as the cables can tear so easily. Using your plastic pry-pick or an incredibly small flat-head work the sides of the plastic out. DO NOT tug on the cabling!
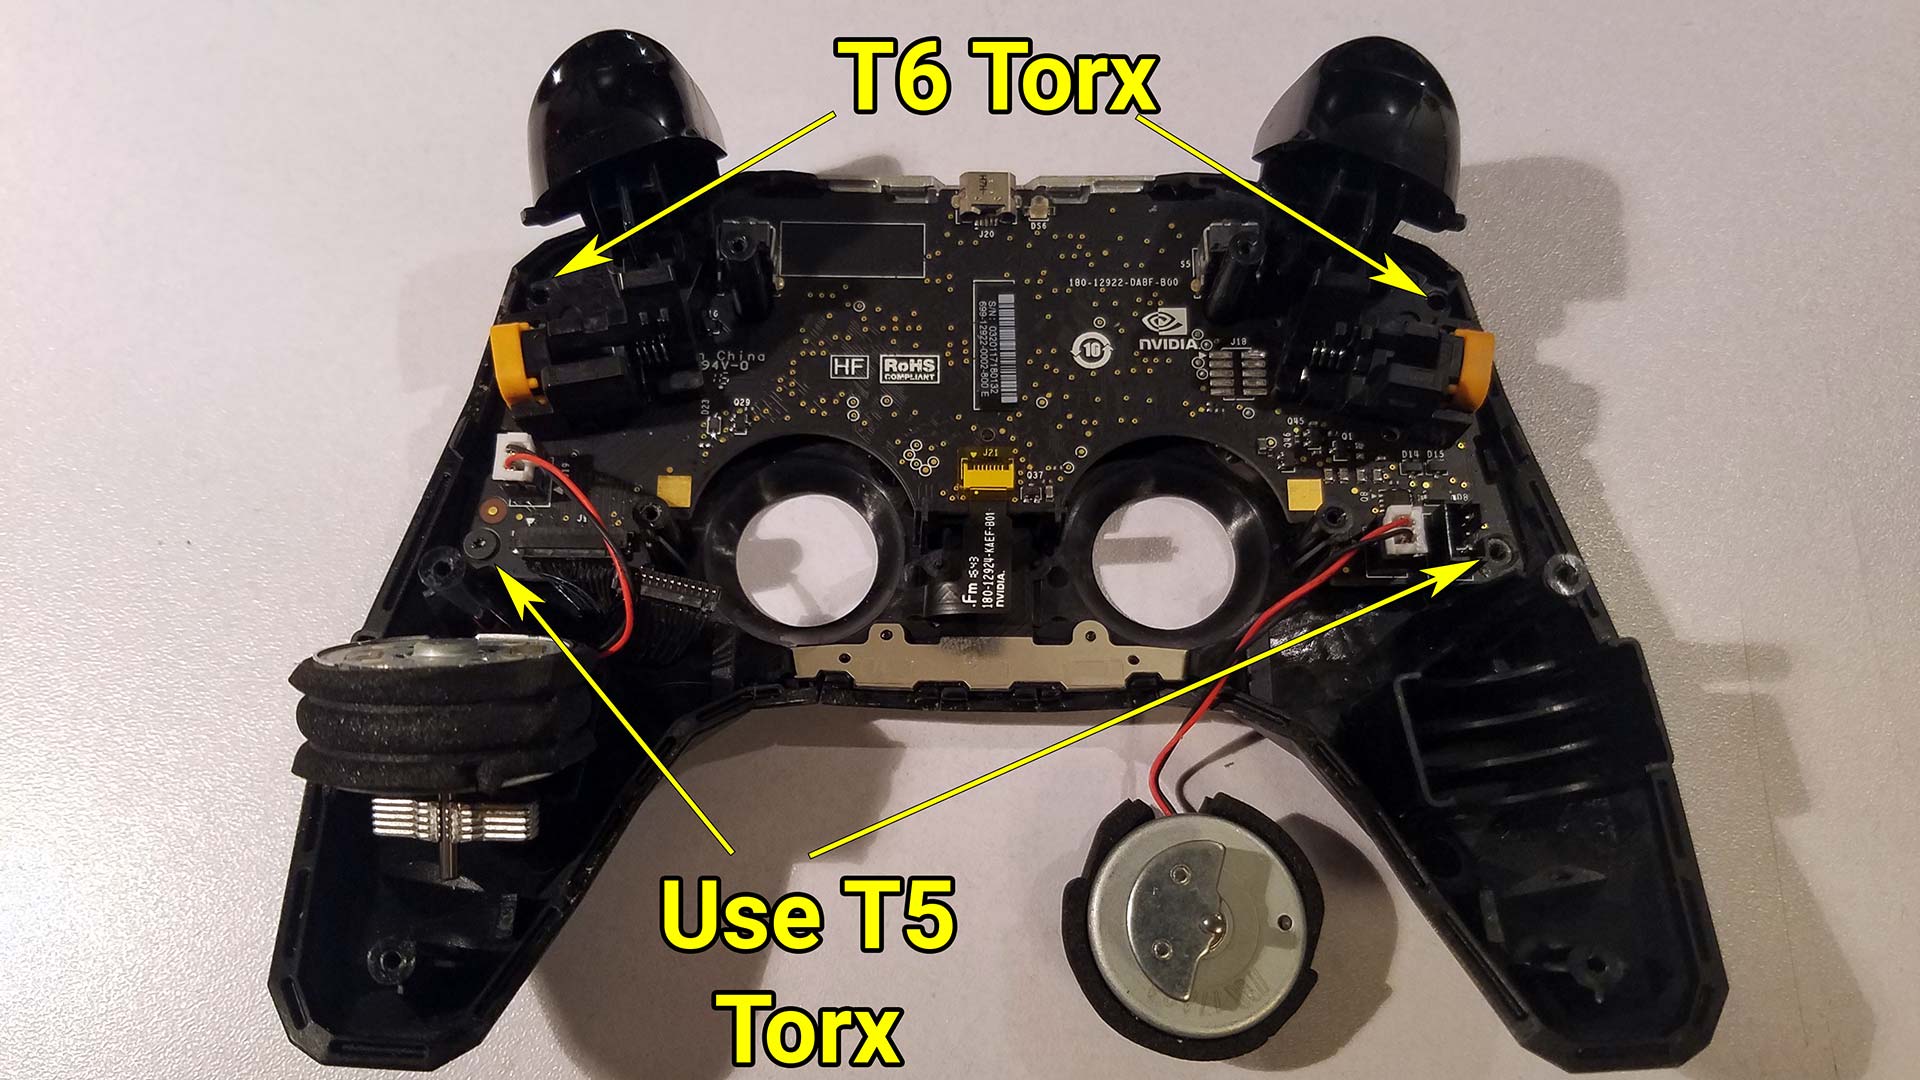
In a super-dick move, Nvidia decided they were going to use a different-sized Torx to finally remove the motherboard. So remove the T6 screws on the top and finally remove the T5 screws near the bottom. It is almost ready to be removed straight out except for the edge connector right in the middle which gives us the touchpad support.
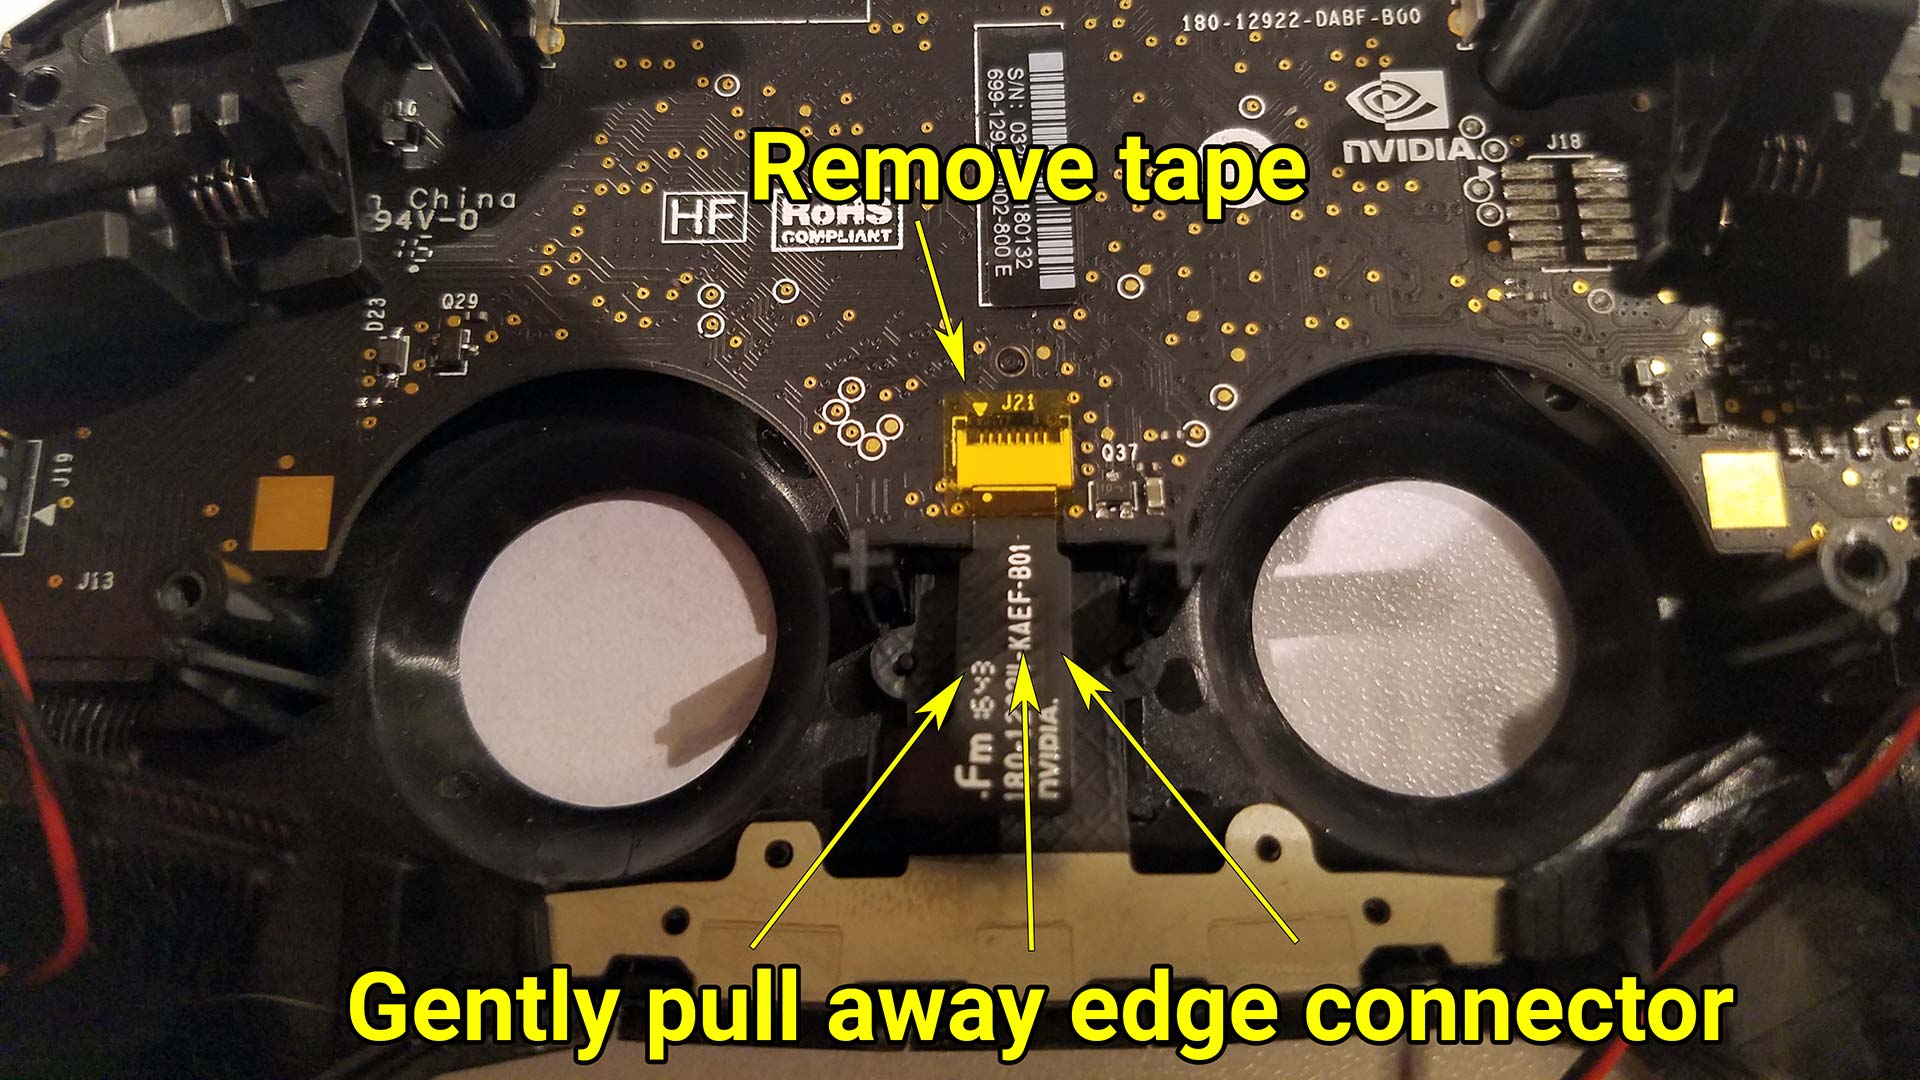 Using cel-phone level screws isn't the only thing Nvidia incorporated into their controllers. They also were a special group of dicks by having incredibly fragile edge connectors instead of JIT connectors. Remote the yellow tape that is holding the connector and cable together. Finally, very gently tug the cable out. you can wiggle it back and forth and you should visually see the white line pull out further and further until it pops out with ease.
At this stage, you can tuck away the edge connector so that it does not get damaged when inserting or removing the mainboard of this controller.
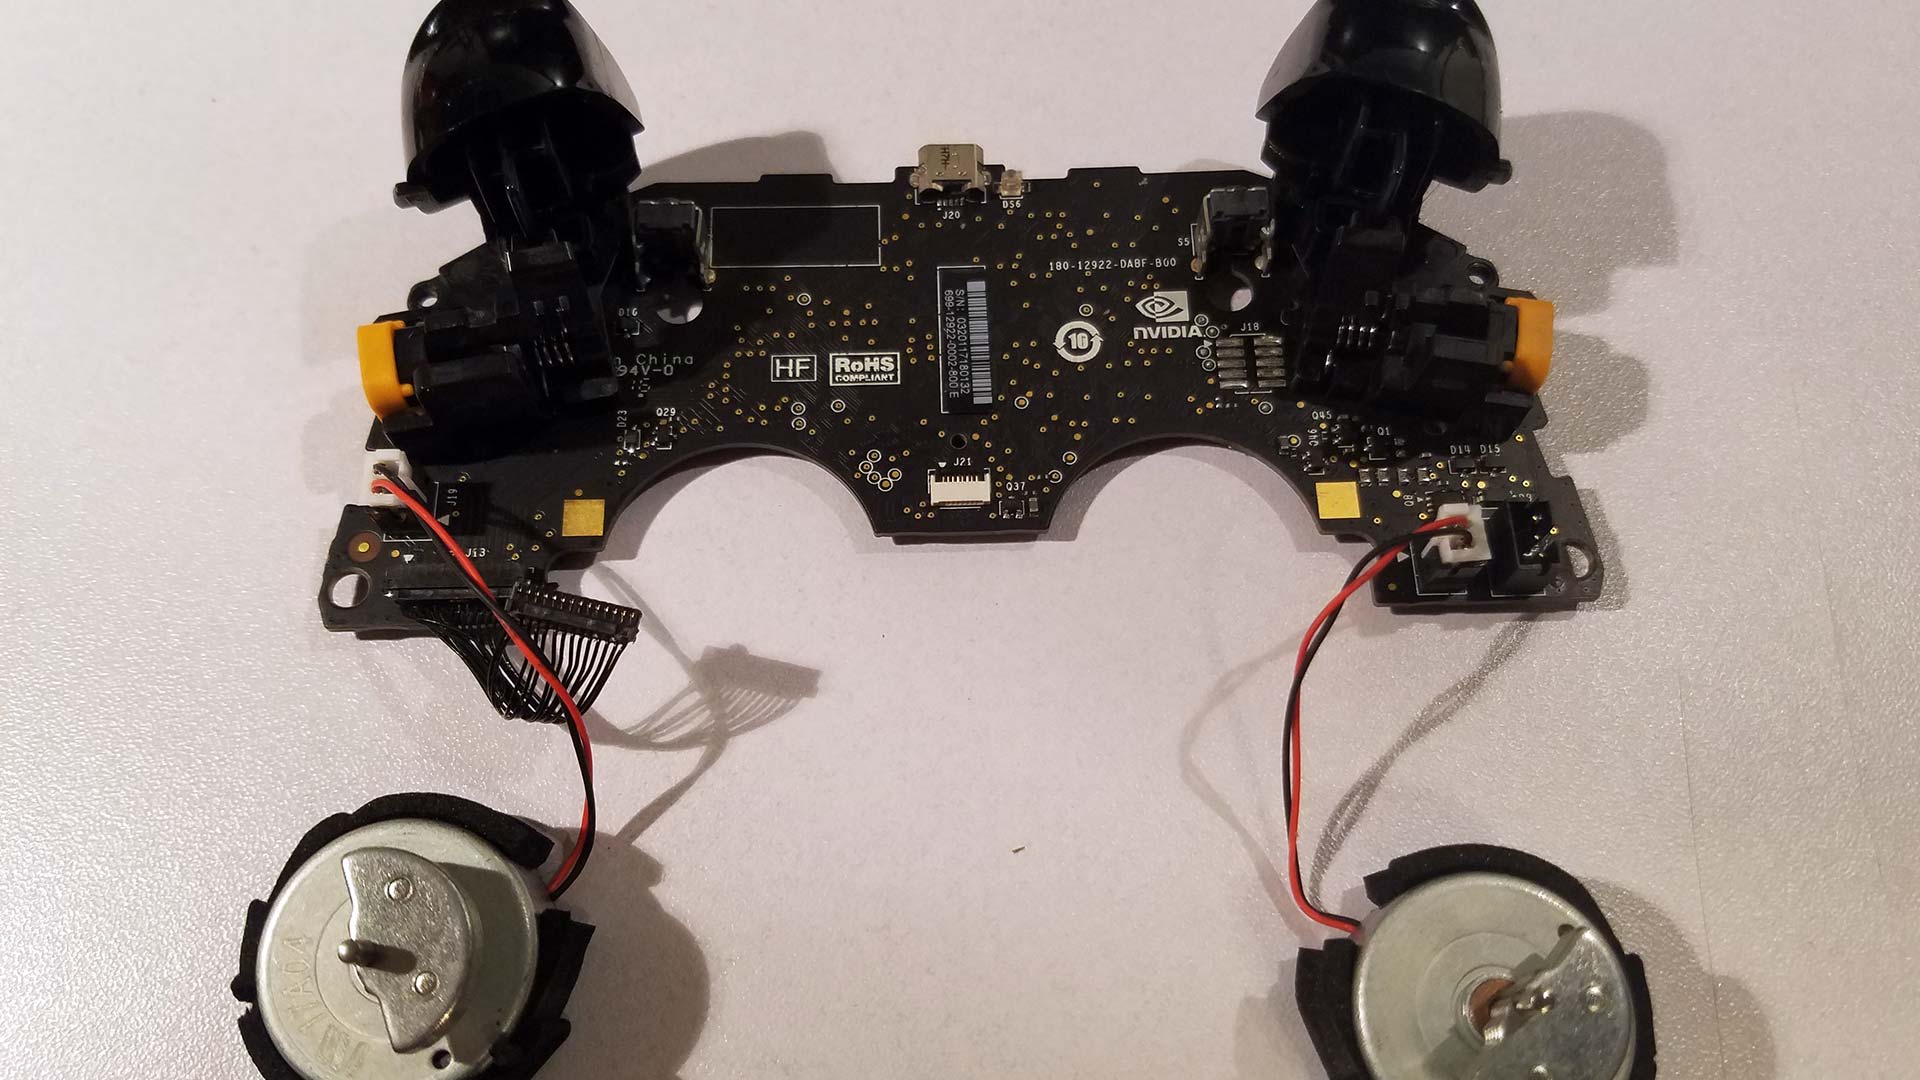
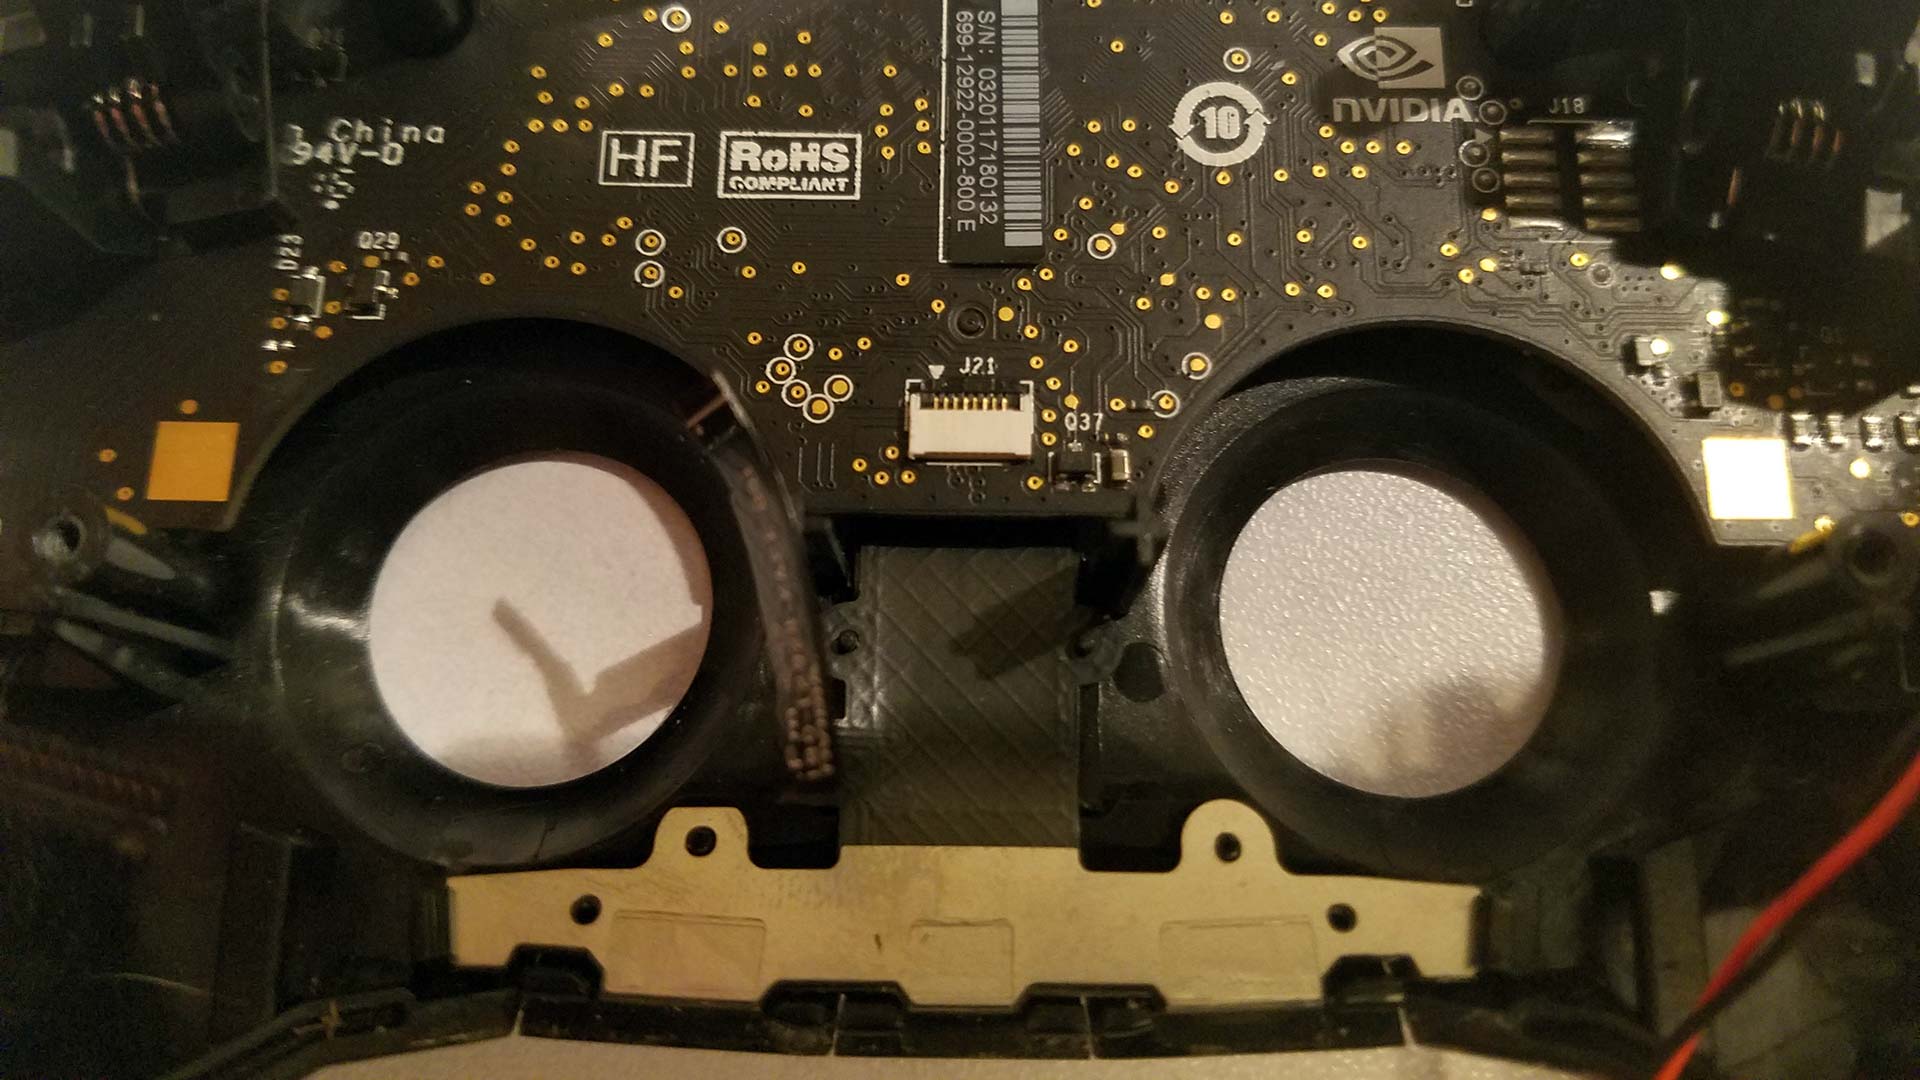
Alright, we pulled both the rumble motors and the board out at the same time. we tried to disconnect the motors but they were super connected to the board. We opted to just not deal with it and leave them plugged in.
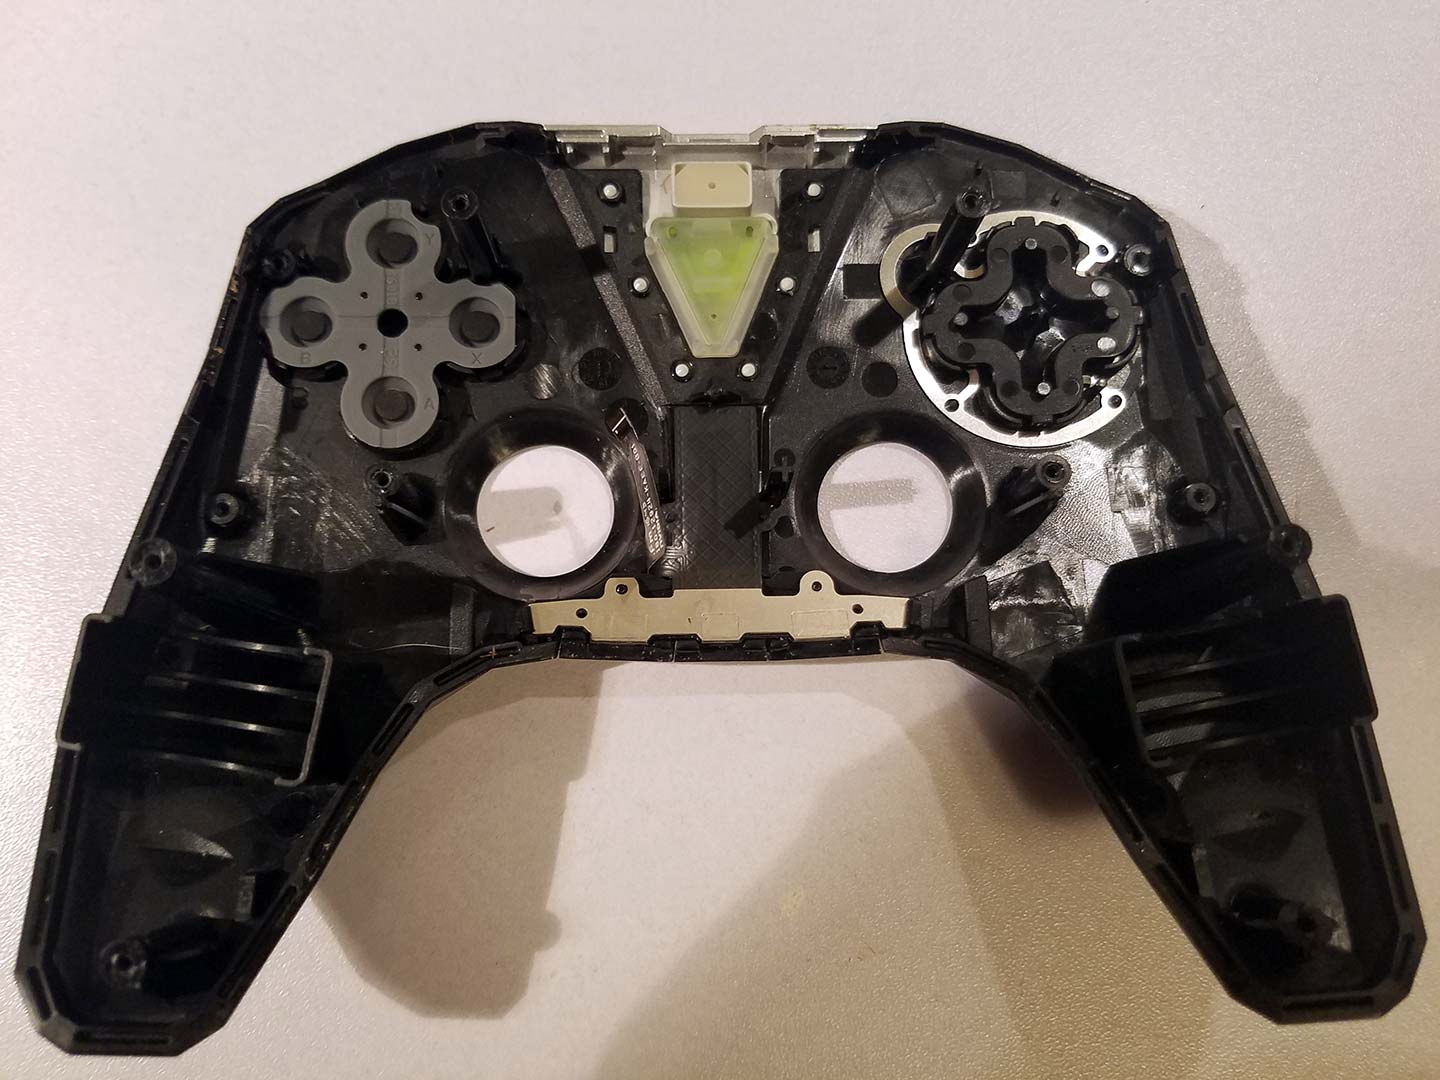
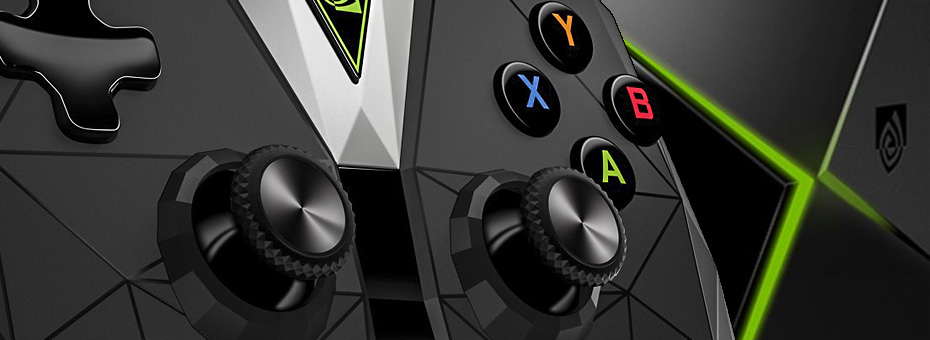
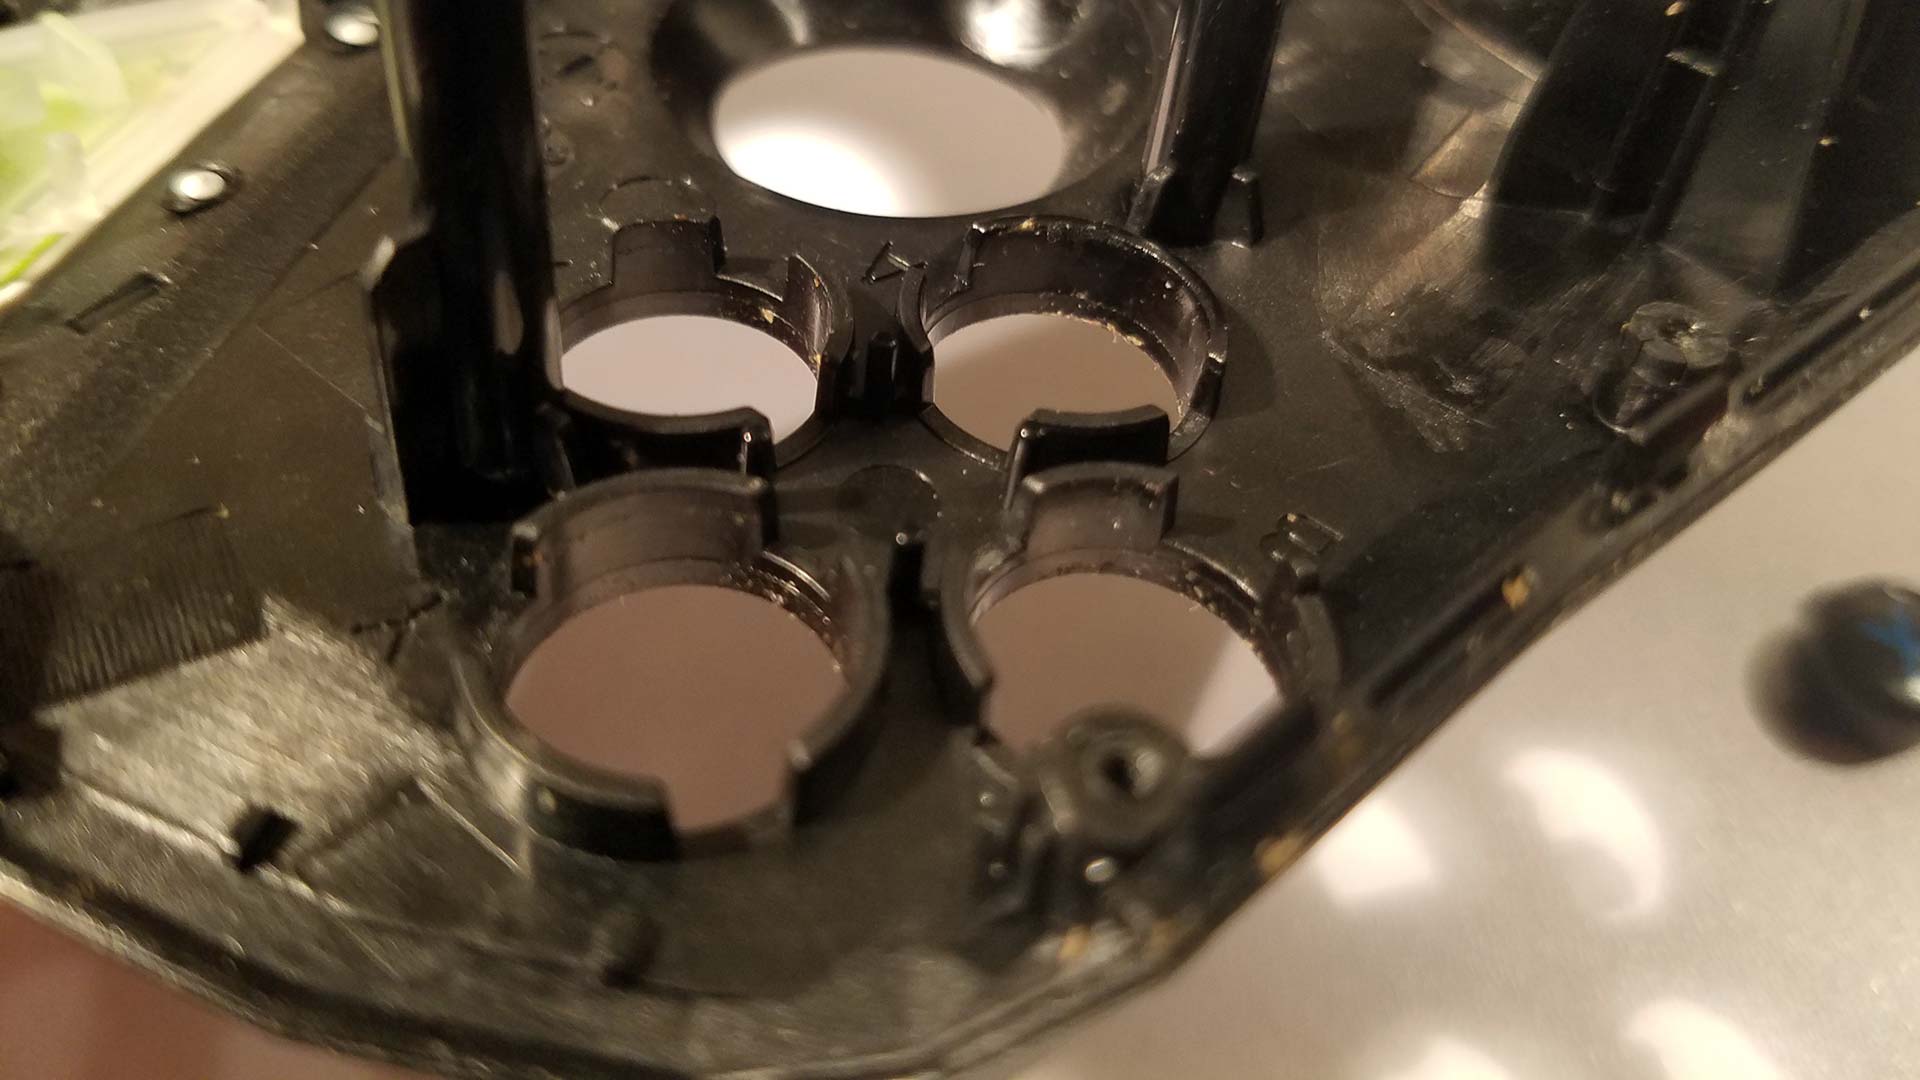
With the top of the shell finally exposed we can clean everything! not just the BAXY buttons that we had problems within our video. But the direction buttons as well as the home button for the controller.
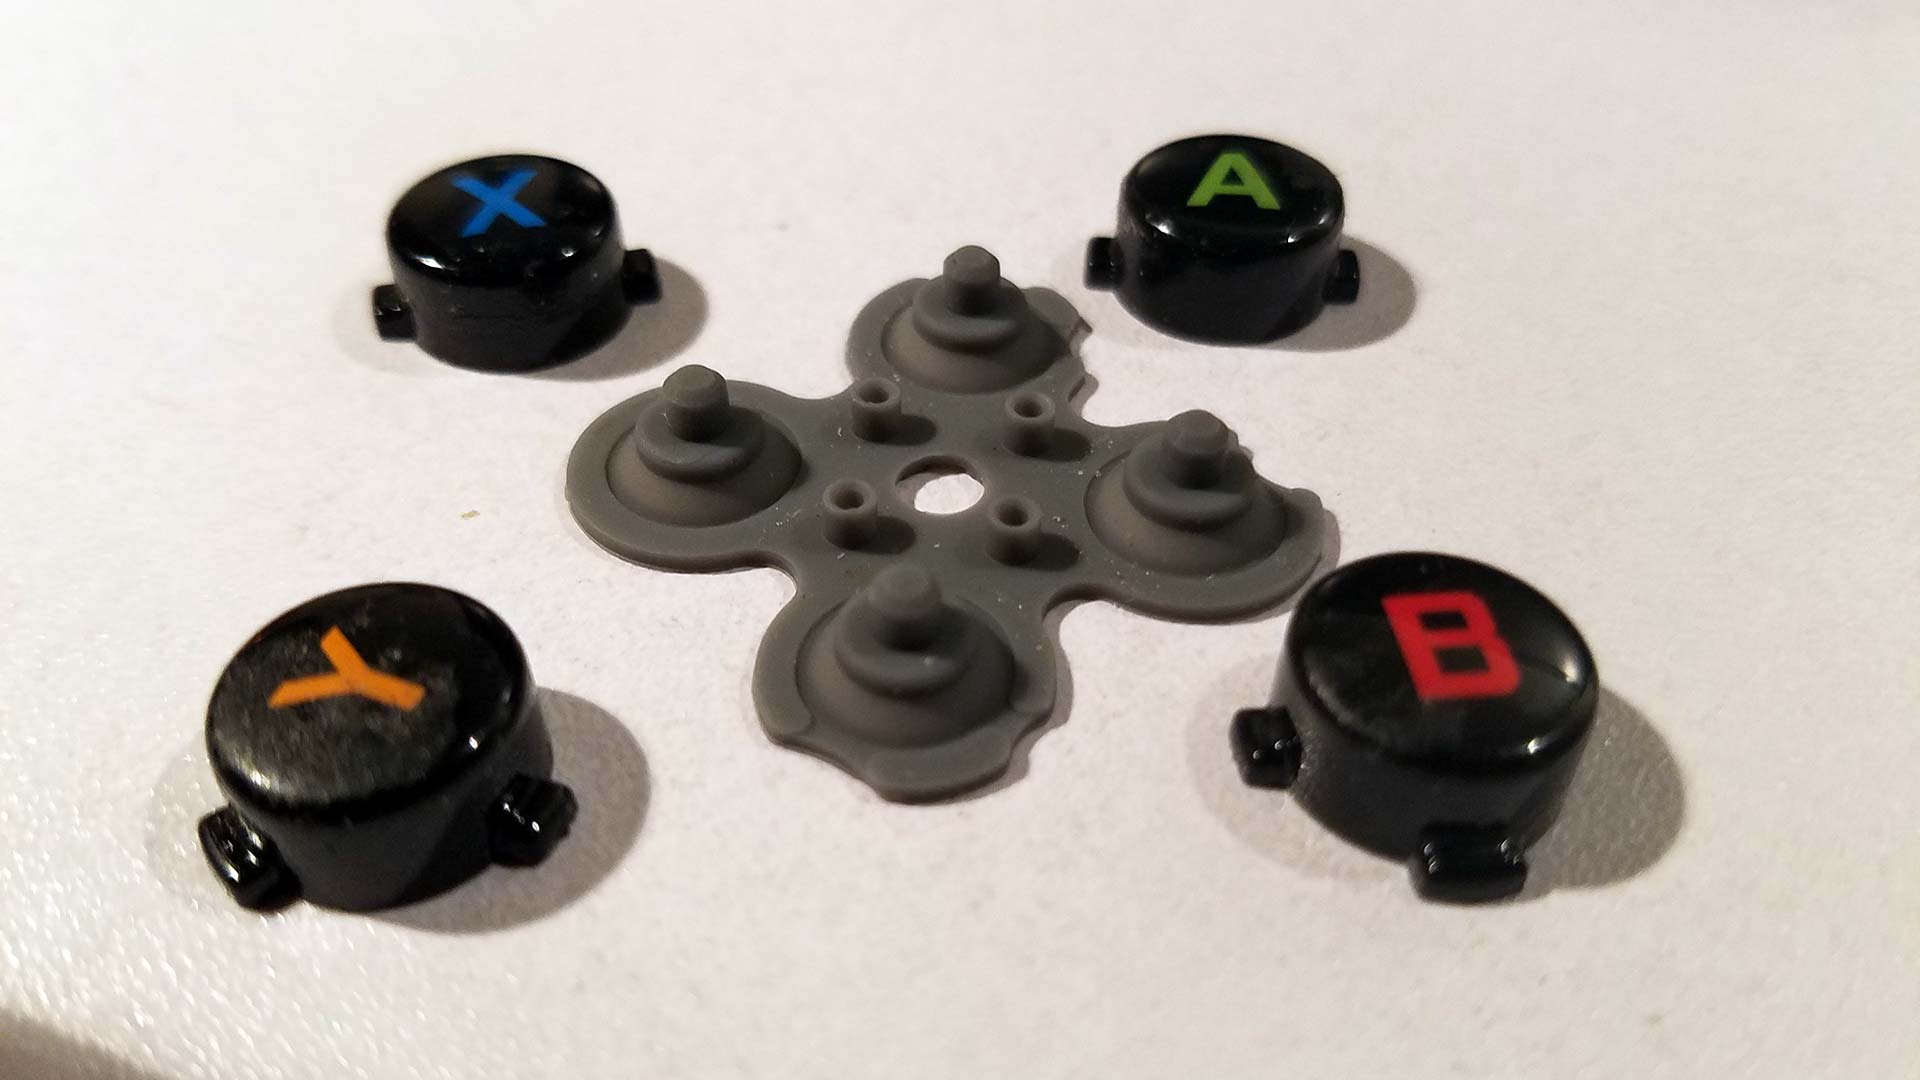
With a close-up picture of the buttons, you see the damage that took place here. Ironically these feel like similar buttons that would go into an Xbox 360 black controller. It's time to clean these bad boys up with alcohol until they shine. We think that what was spilled on the controller was coffee because we had to scrape off the crystallized debris from some of the buttons.
Not just inspecting the buttons we also have to inspect the plastics where the buttons would be installed. As you can see there's liquid there too! time to clean that section up! In fact, we're going to go through everything and scrub the front plastics with alcohol to get it as shiny as possible!
After you are all done follow the steps in reverse minding any cabling issues or clamping issues in the front of the controller and you should be back online ready to rock and roll!
Calibration Woes!
When we re-assembled the controller and paired it back up again. We found my analog stick drifting to the right all of a sudden! This is probably because we unplugged the battery and thus calibration of the controller was lost.
After reading some forums we found that we weren't the only ones with this problem. What you must do is use your remote or hook a keyboard to your Nvidia shield. unpair your controller completely.
Then, hold the Nvidia home button like you're going to pair your controller again and keep holding until it turns off completely.
Then, re-pair the controller.
We would have to take a look at that daughterboard and repair the potentiometers. Luckily it didn't come to that!
Update 05/30/2020:
 Click here for another blog on how to repair analog drift.
The calibration on this controller did not hold. Within a few days, it was back to drifting towards the left and wreaking total havoc on the Nvidia console. This means another blog to fix that problem has been generated. click the link above to follow that if you are having problems with your analog hats drifting as we did.
Final thoughts.
Yes, it would've been nice to show you the disassembly video instead of just the before and after. You would've probably heard a lot of cursing and bitching about Nvidia if that were true. Because we worked on all kinds of controllers the controller for the Nvidia Shield TV has to be one of the most annoying to take apart and clean. Anyhow, if you found this blog article useful awesome! If not, we hope you find your answers for controller repair elsewhere.
Until next time, server protect you.
END OF LINE+++
Love this - just saved me £60 buying a new gamepad!
I'm glad it helped out! Thank you for checking out this blog!
the video of the controller "before" made me feel sick! How did you let your controller get to that state ?!
Glad you didnt have to repaid the pots.
Now we're just the repair techs. It was actually a christmas present that we gave to one of our friends and six months in the remote control was totally gone and next was that controller. Hence why the controller landed on my bench! The only thing OUR Nvidia shield suffers from is the layer of dust on it due to it only being used once maybe twice a week We work too much!;D
But there may be a part 2 coming. Where we will be repairing those pots (they are reporting it's drifting to the right all of the time). Looking at the insides it's not the worst repair job to replace those things.