
Banana Pi the Case Mod edition:
In the spirit of my previous blog post dealing with I-Pac mod It's time the Banana Pi gets a face-lift with a new case mod. The reason why I'm doing this comes down to a lot of things that all boil down to the fact that my needs from this unit changed a lot over the years. This blog is just a minor update of what we have been doing in between jobs.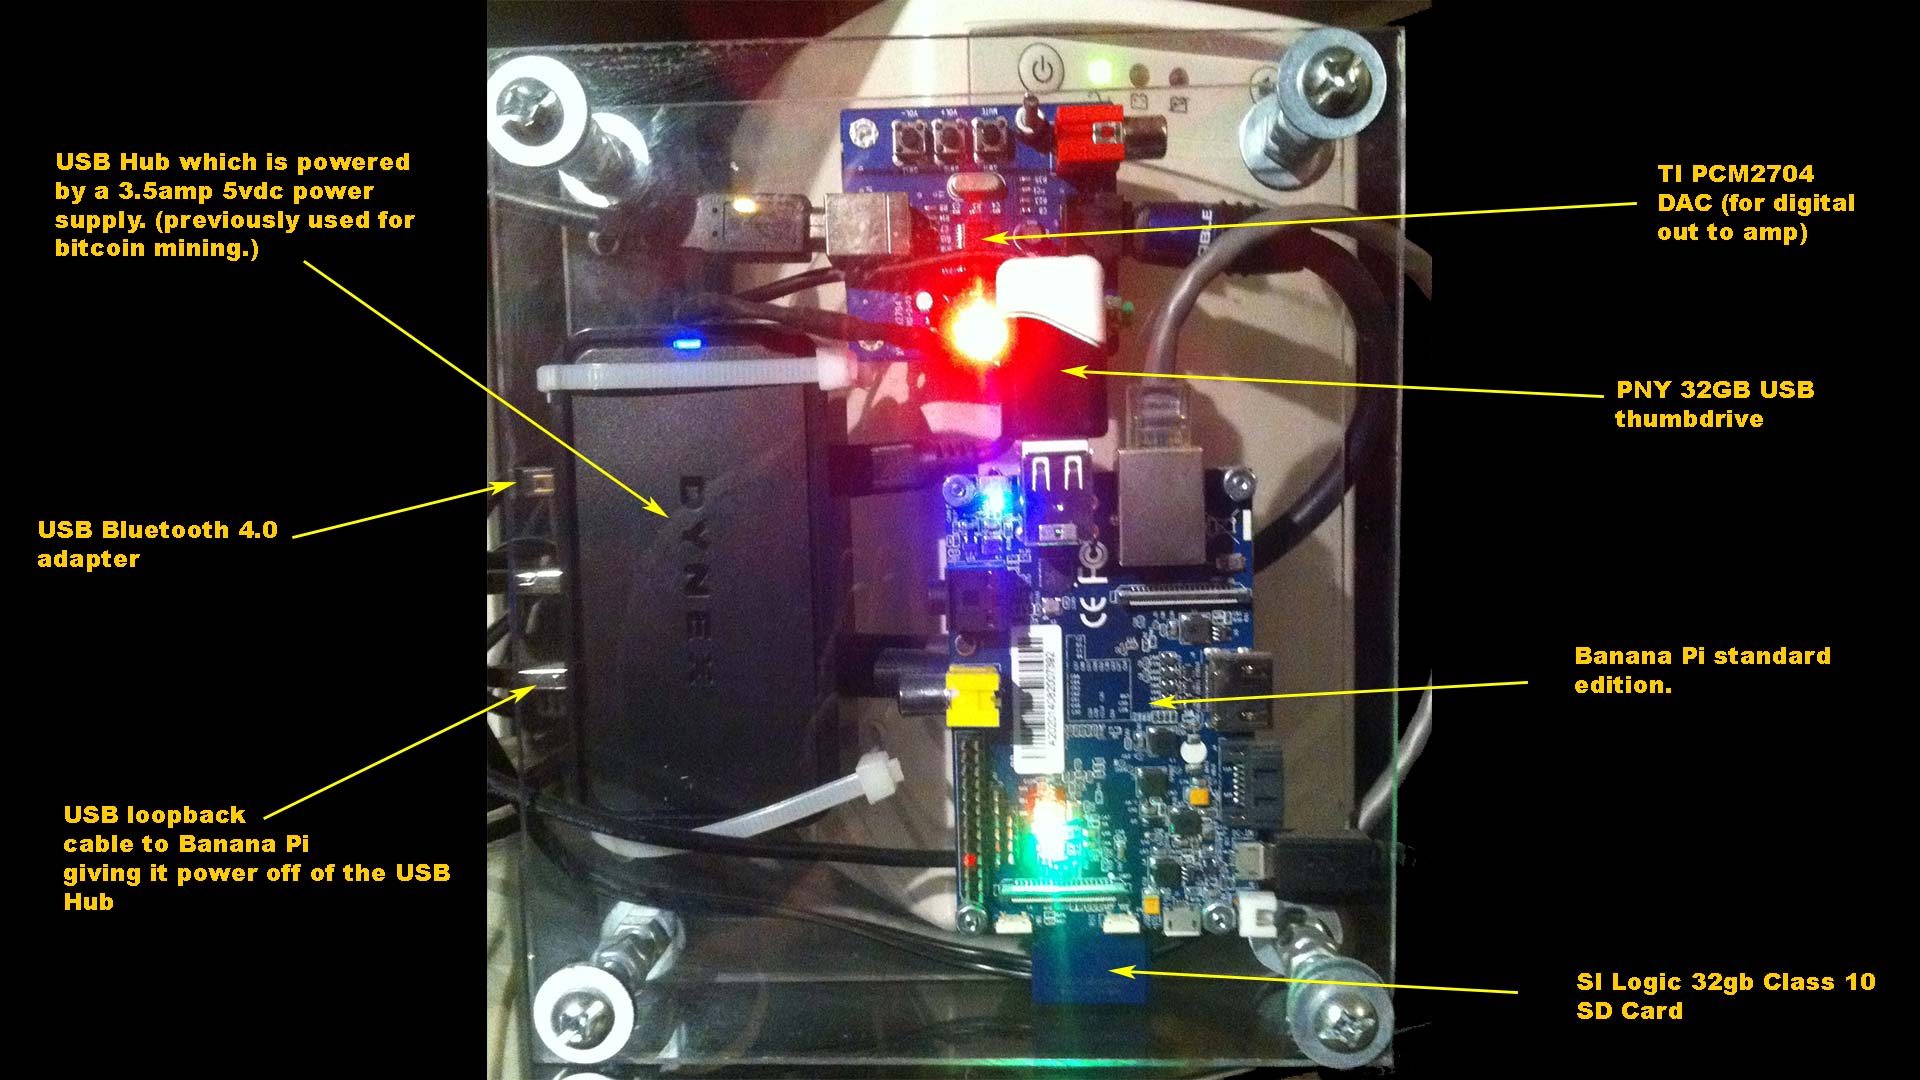
The version 1.0 case mod.
This case mod enclosure was build-out of 2 pieces of acrylic Plexiglas with whole holes drilled into it with a rotary tool to fit a series of 8 bolts around the frame and a locking nut in the center to hold the two sheets together. This was actually very easy to service Because if we wanted to change out the USB stick or the USB ports on the Banana Pi itself we simply loosen the screws holding the two bolts together and it splits apart very easily. We used a few M40 1 inch machine screws to secure the PI in place as well as securing the DAC as well using nylon washers to keep ground-fault to a minimum. We also bought the USB hub later because at the time we joined the bitcoin bandwagon by having four ASIC erruptors on the back of my Pi configuration (for those wondering, we didn't make mad money. but it paid for itself and the hub we purchased, so we couldn't complain!). The USB Hub is held it in two cable ties as we didn't want to break apart the outer casing. We did have to strip the insulation away from the other two USB cables we had connected to it (One going off to the DAC, the other to power the Banana Pi ) because the ASIC erruptors were getting hot enough to melt the insulation plastic around each of the cables. The SD Card we took for my old Raspberry Pi and loaded the new OS onto it which had 32GB of storage. On top of that, we also used a PNY 32GB USB stick to act as a temporary storage folder for my transmission-bittorent client when I wanted to download the latest fedora ISO's for my PC. 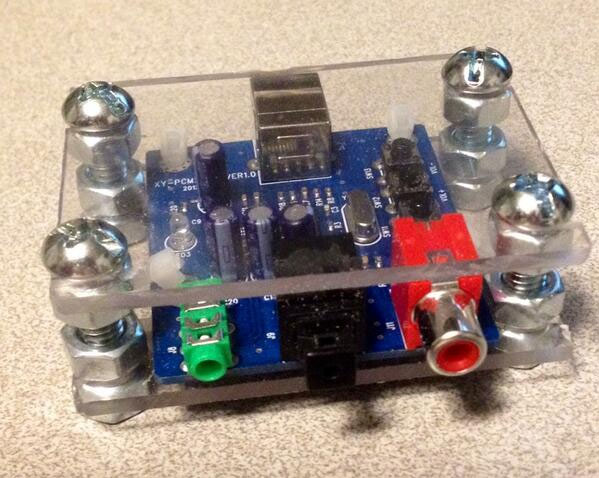 Finally, the TI PCM2704 was originally used in my Raspberry Pi because the audio quality was so God awful off of the Raspberry Pi chip that we had to buy a DAC just to get around most of the clicking and hissing issues.
But overtime our needs changed:
- Got rid of my block erruptors as we did the math and they weren't even profitable enough to supply power to them!
- PNY 32gb USB stick actually died from all of the torrent'ing we were doing to this thing. USB sticks are not designed for constantly read-write access over a long duration like that.
- Although it never overheated due to how breathable to the case was. it also collected lots of dust inside, which was annoying.
- Due to all of the status lights it literally lit up my living room like having a Christmas tree! It was cool at first but eventually it got distracting.
- Since the Banana Pi has a different sound chip then the Raspberry Pi. There's no popping and clicking and although having a digital throughput was nice coming off of the DAC it wasn't necessary.
So, it's time for a new redesign. 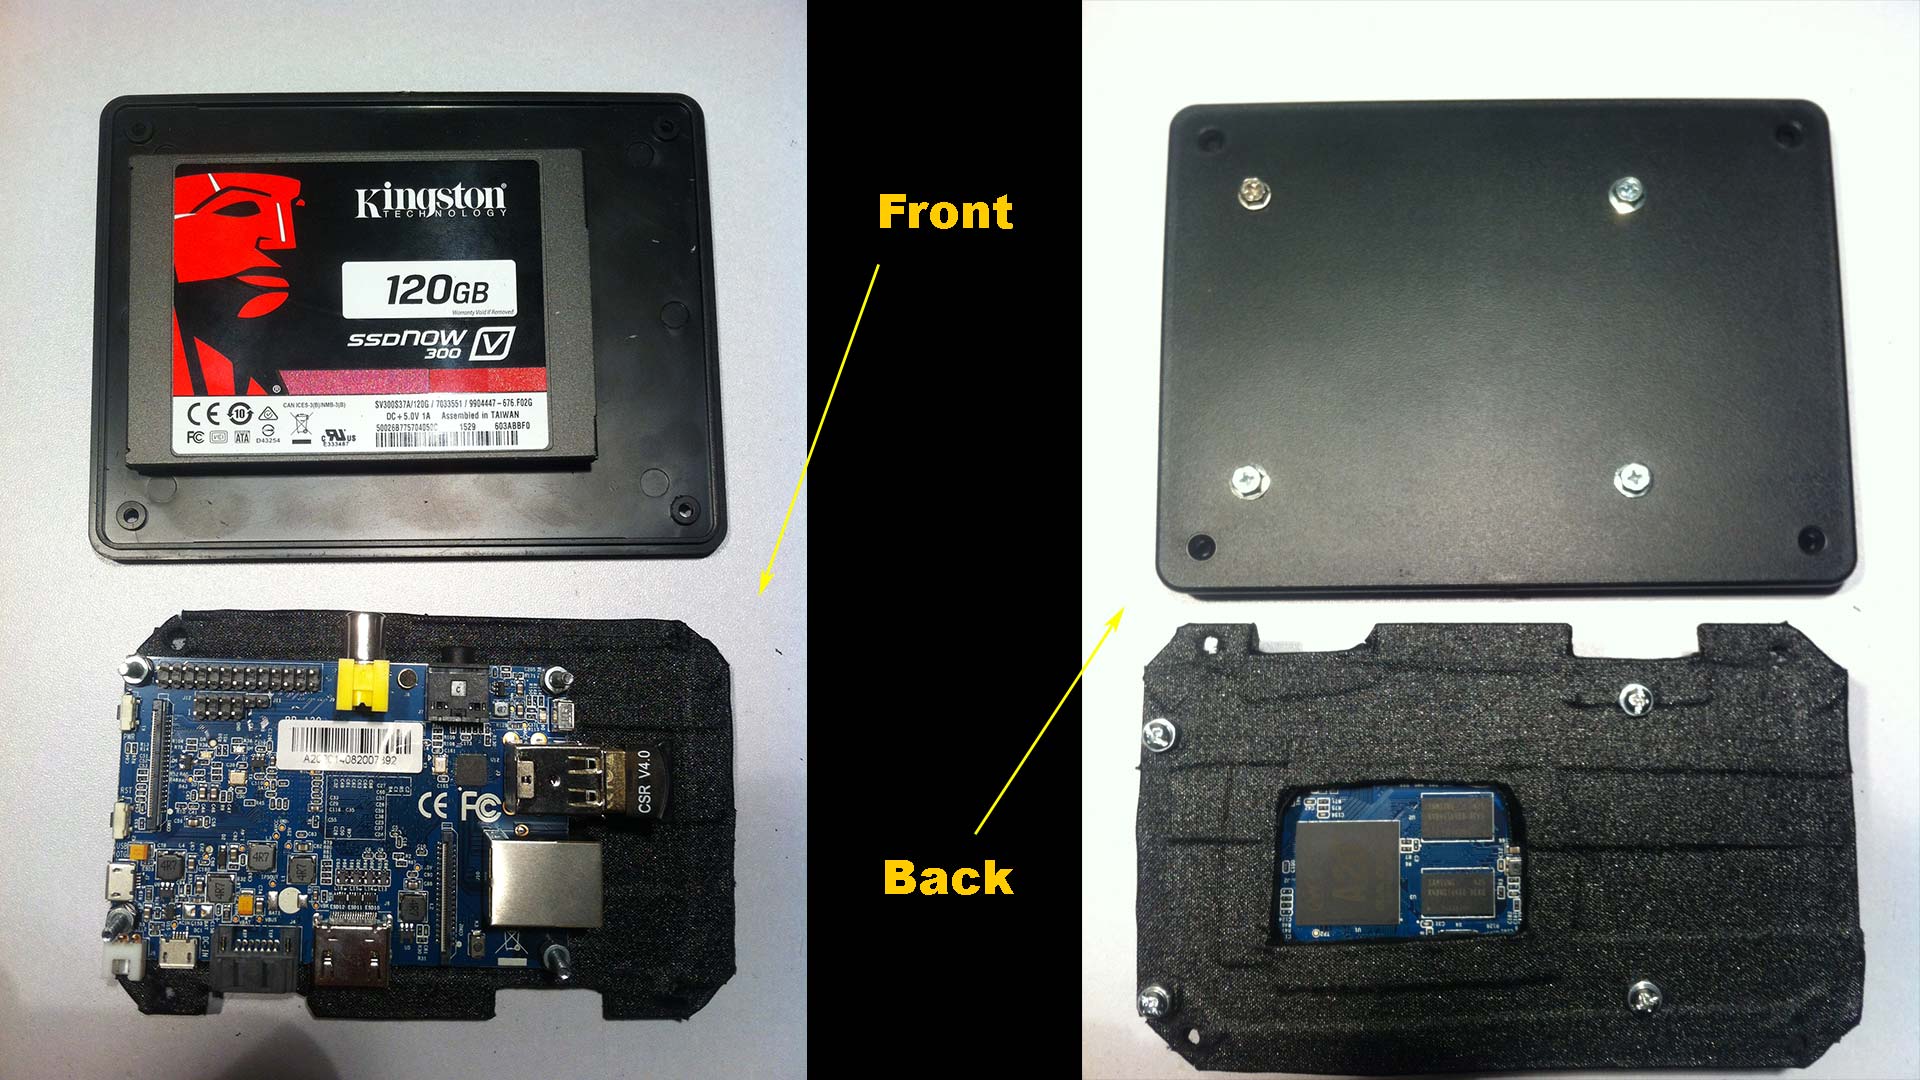 This case is similar to my I-Pac blog because we picked up a lot of these cases from a surplus vendor for 90 cents a pop. Instead of another USB stick, we're going to take advantage of banana Pi's SATA port by using a 120GB SSD drive. This will maintain the 0db sound of the old case but give us much faster speeds. Apart from the acrylic will be recycled to fit inside of its new casing. drilling holes to act as the support clamp while other cutting a square hole in the back of the acrylic so the processor can breathe (and if we desire down the road we could add heat sinks). Finally to cut down on electrostatic charge of Plexi and to give it a nicer finish than the terrible cutting job we were doing with my rotary tool we wrapped it in gaffers tape. Reused the M40 screw for mounting the Banana Pi and This part of the mod is complete.
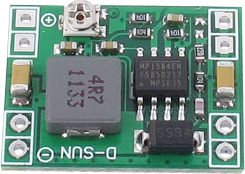 Because we know a lot of people were having problems getting the banana Pi to provide enough power to their SATA hard-drive. We decided ours was going to use two independent dc-dc step-down circuits based on the LM2596 IC and set the voltage to around 5.10vdc which is the identical voltage coming off of an I-pad charger that worked with the Banana Pi flawlessly. 5.10vdc is also healthy for the laptop hard drives and just to be sure we tested it with a crappy laptop drive to make sure it didn't explode or click on fire-up. After 2 days of constant current, we determined it was safe enough to use on my SSD drive. As for why 12vdc power supply instead of a 5vdc. It seems that 5vdc power supplies higher then 2amps tend to get exponentially expensive over the 12v counterpart. On top of this, you have a variety of power supplies ranging from 5.0vdc, 5.1vdc, and 5.2vdc all of them set with their power output. We wanted more control over the 5vdc then that. Finally, with a powerful enough 12vdc power supply, it is possible to power a router at the same time as my Banana Pi without having multiple AC-DC power bricks which are very wasteful. Since the DC-DC chip has an efficiency ratio of %96 it just makes sense to go this way than fighting with the power distribution of the Banana Pi. In the world of USB charging, you can have up to a 5% variance in voltage before problems can occur. The Banana Pi could go up to 5.20vdc which is what people on forums recommend. It is my personal preference to keep it low because we cannot be certain how clean or regulated the 12vdc power supply that will be used. It was very sensitive to dial-in as when you get them they are maxed out providing 11.53vdc from a 12.03vdc power supply. Once perfected you should tack some glue to the side of the pots do not move as you are working with the rest of the harness. (do not go crazy with the glue! You may have to move those pots someday.) We have approximately 5vdc 6amps of power between the two DC-DC step-down chips. Another reason why we split up the power is the DC-DC step-down chips produce almost no heat if the power they are regulating is under 1amp. You need a heat-sink for these DC-DC circuits if you exceed more then 2amps on one of them. I added vent holes because I knew putting the Pi into an enclosed case will cause some heat concerns and the SSD drive will generate its own heat which is why I mounted the drive on the top of the case so the warm air can escape through the side vents. Finally, with a few hours soldering, we were able to re-route all of the connectors to the back of the case to try and give it a cleaner look when it's sitting on my stereo rack.
 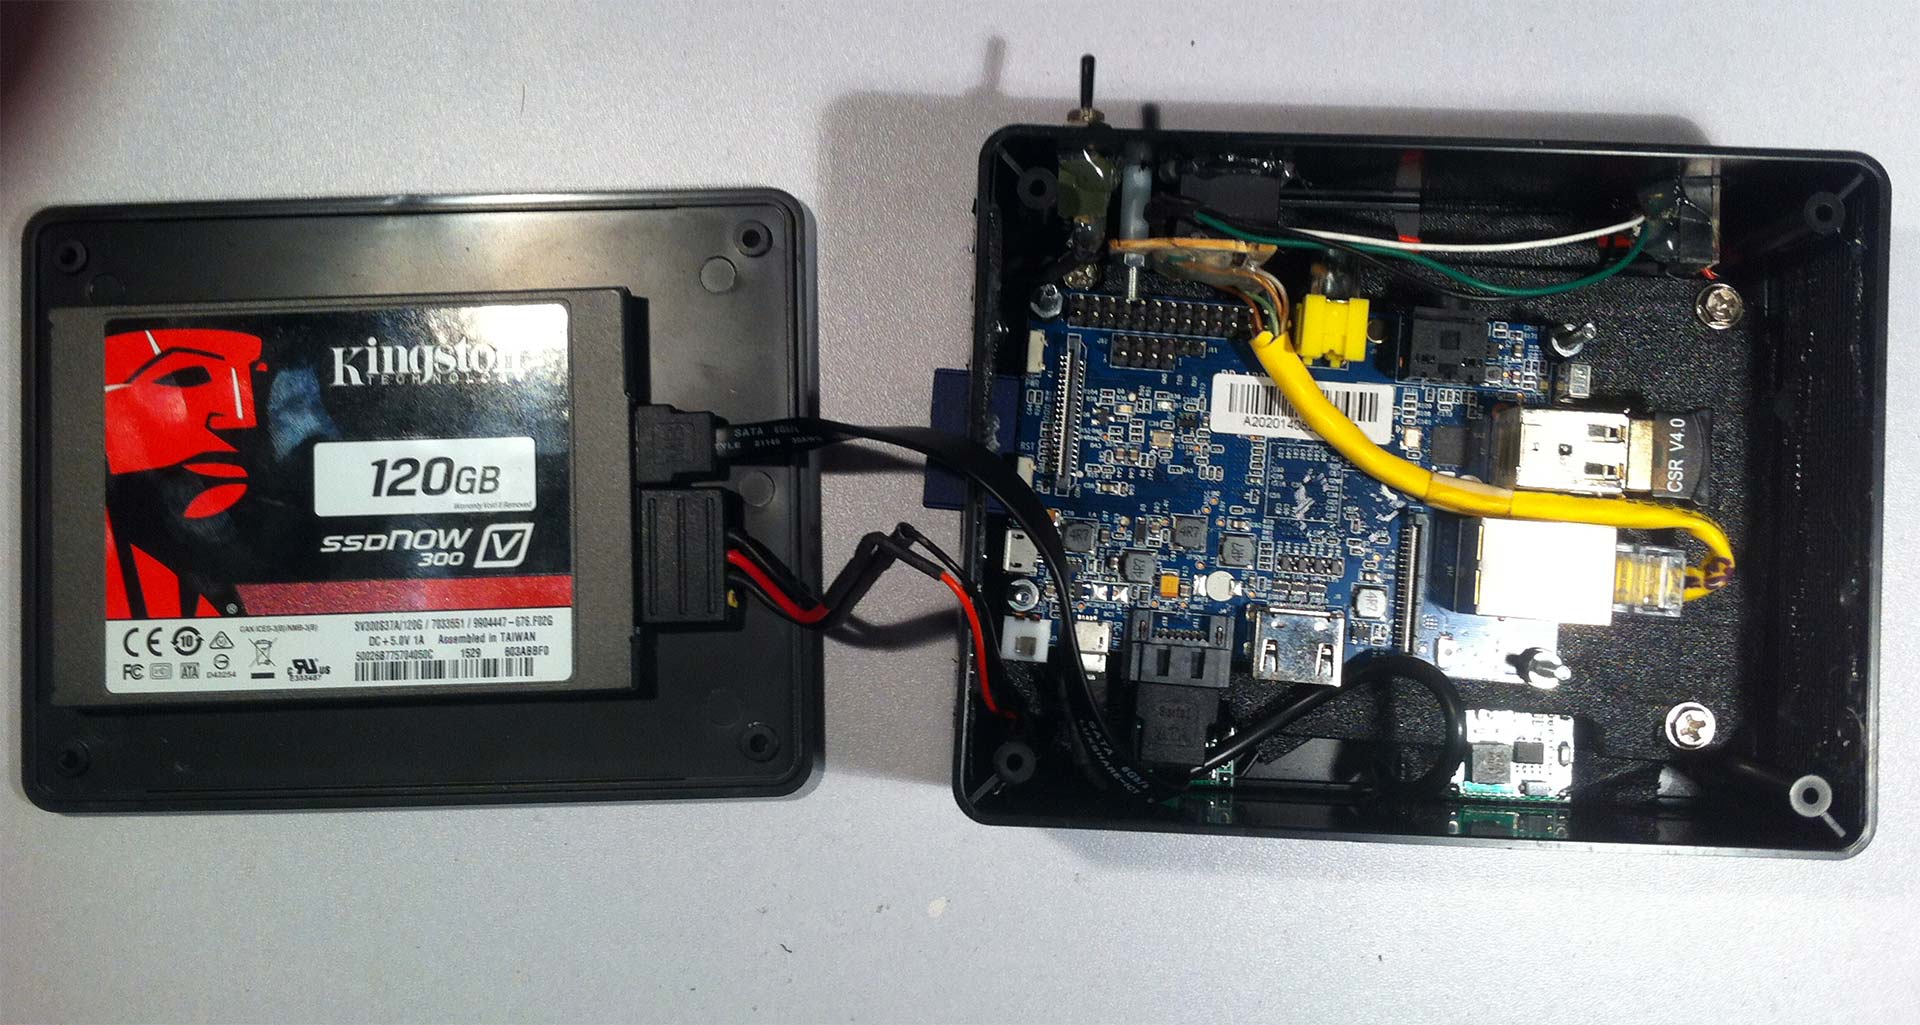 The fit-test for the case mod went rather well considering. We still have to rotary tool the screws a little better as the pi-board is in there a little crooked. But overall it's very secure and does not move at all when all of the screws were installed. Even though we purchased an official Banana Pi SATA kit that we were going to use for this project it was ultimately decided against it and instead stole some wires from a Dell PC. The power harness as well as we could flex those cables around a lot easier than the Banana Pi SATA case. Finally, a slot was carved out so the SSD card can be easily removed even if the case itself is all sealed up. We were not going to drill holes on this case mod for the HDMI port as this is a headless unit.
Final results of the case mod.
 The cuts around the RJ-11 jack were a little on the rough side. But overall the case feels like a more solid design! No longer is it a Christmas tree as is now looks like the black-box of some vehicle for logging for a case mod. The case mod is very subdued over the Plexiglas case that I have. Because of how insanely bright the LEDs are on the Banana Pi could -Still see the green heartbeat going if you place a hand up to the vents on this unit. As for heat, the SSD drive does generate a little bit of heat as predicted. But the banana Pi is still fine being only a few degrees higher than ambient room temperature. With the time and money poured into this box, we could've just picked up some mass-produced box from china and be done with it. But where's the fun in that?
12 volt power supply
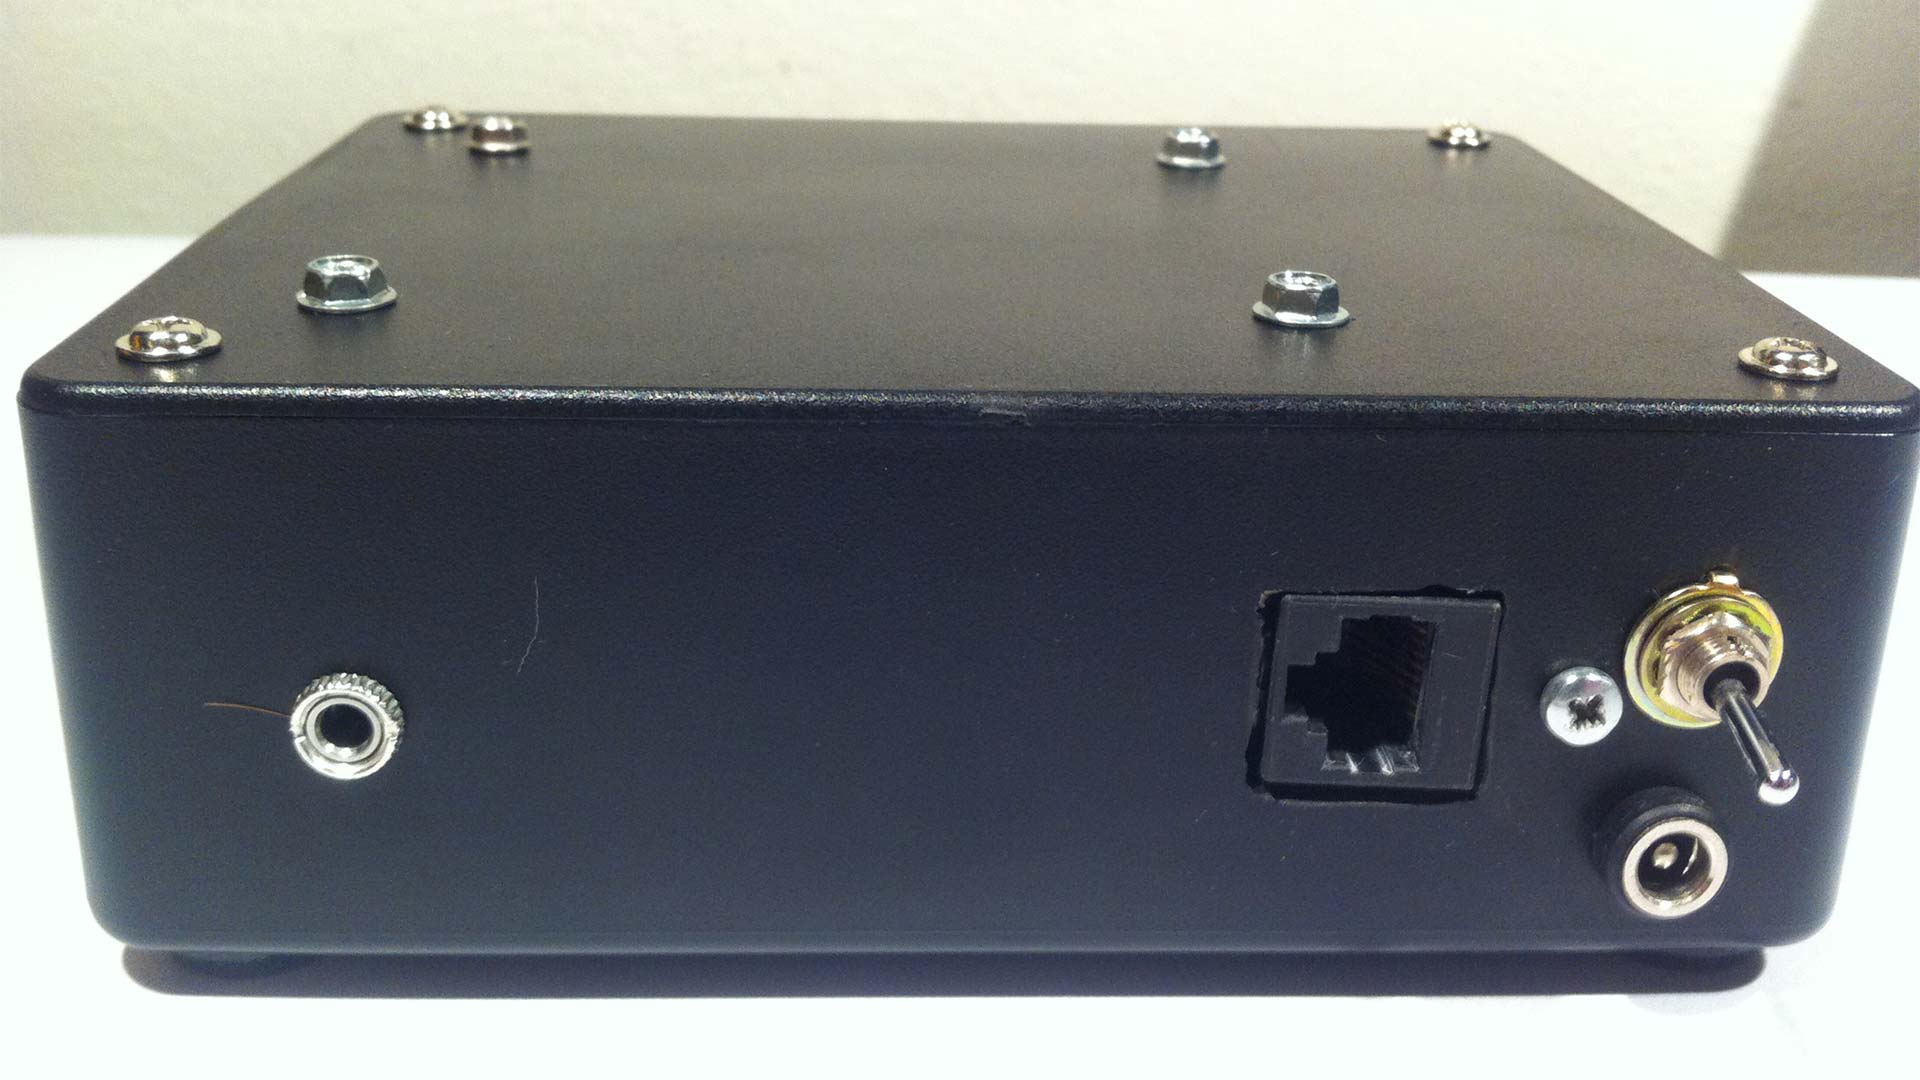
 For those wondering why so much effort was put in converting 12v to 5.1v with the two DC-DC circuits of this project, This is why. This unit replaces the power supply on my NetGear Router as well as my Motorola Surfboard cable modem. And now it serves power to my Banana Pi as well. Some would say that is putting all of your eggs in one basket. But if the cable modem failed or the router failed the rest of the devices on the network would be rather useless now. Besides that all of the old PSUs are kept in case something catastrophic happens. And considering there were cel-phone companies throwing out these units recycling this isn't a problem. This completes the showcase of my BananaPi Case.
Server Protect you.
END OF LINE+++