
DIY fun with LED RGB Lighting.
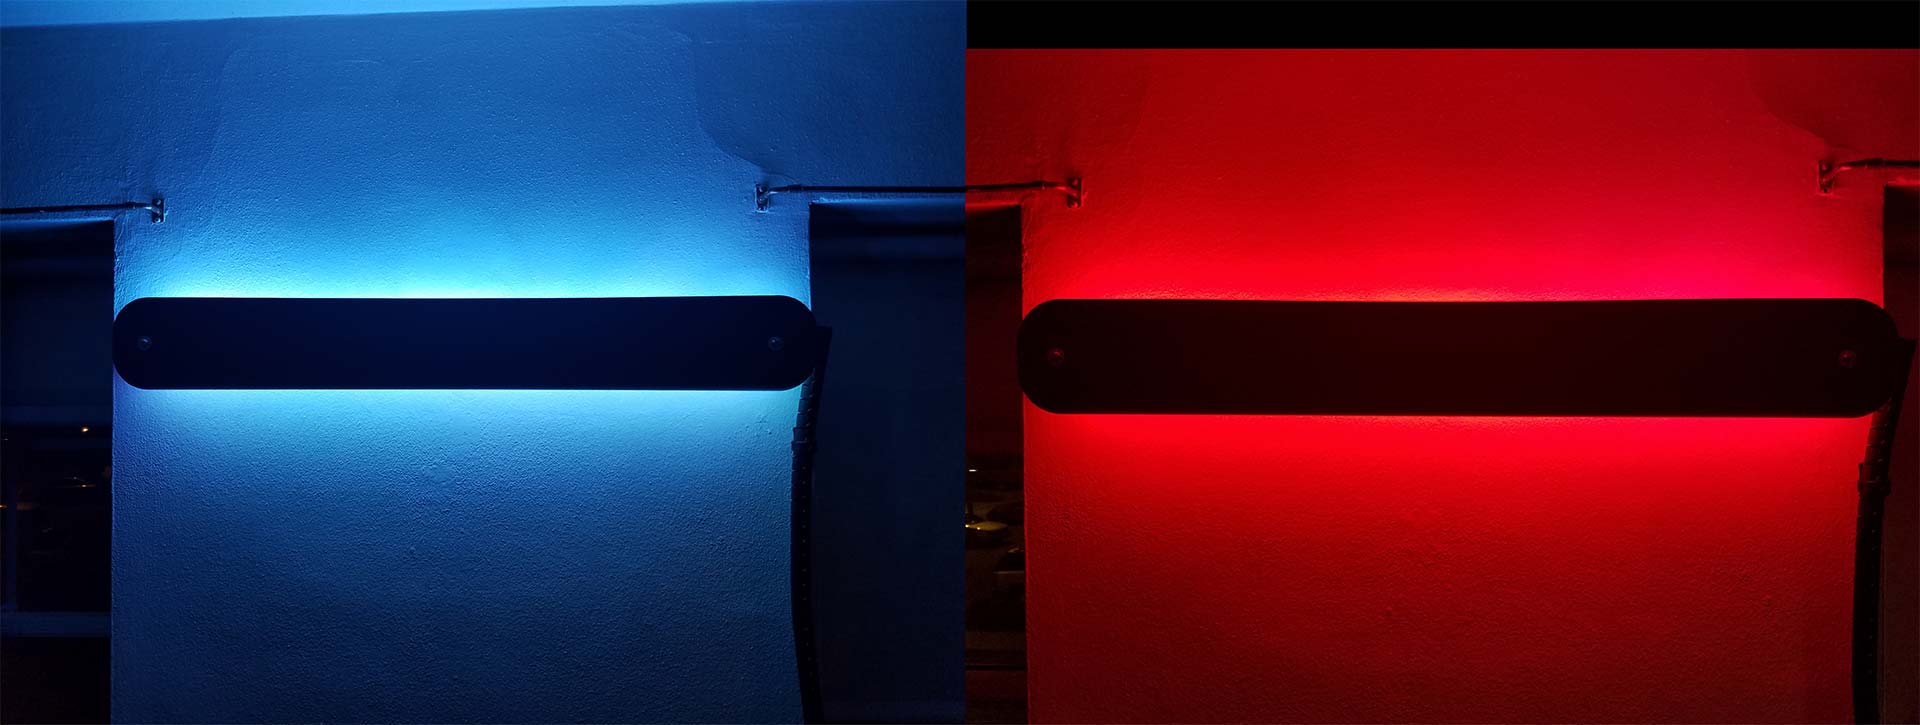
LED RGB Lighting is almost like some project you put on Pinterest. But it's going here because we make it! Screw image aggregate services that seek to control the internet. We wanted something in the living room for those nights where we want to relive music videos of girls putting up lipstick while a guy in a gimp suit dances in front of us. We're both the ones with the makeup AND inside of the suit at the same time! More accurately in those music videos, they use 3-point lighting. Blue, Red, and a Natural white.
This latest blog entry deals with me getting all "basic-boi" and the simple fact that we didn't want to go out and buy a 100+ US dollar Phillips RGB LED mood-light bulb for my living room. Probably also because we would have to be anywhere from two to four of them to which we're sorry. Not paying $300+ for lights that just "set the mood." Especially when I have a lot of the materials to make the lighting, to begin with. So let's see if we can show you to the best of our abilities how to do this. Read on if you want to know more.
Tools and equipment of the trade.
Okay, so let's start with the very base of this project which is the lights themselves as well as a means to power it all up.
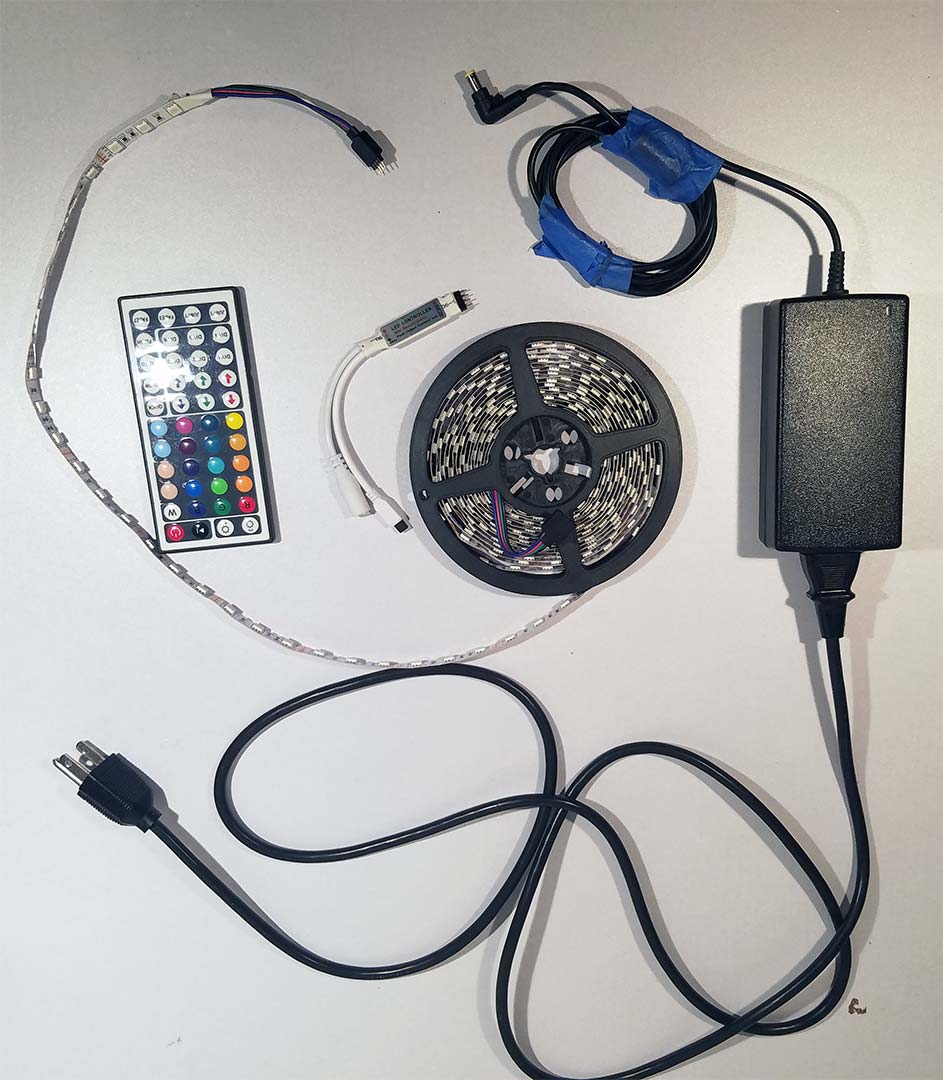
- 12-volt power supply - This was a salvage power supply off of an old LCD monitor. 12vdc with a 3.33 amp output. Please note that if you recycle an old power supply to make sure that the positive power is inside of the barrel connector and the negative is on the outside or ground. Otherwise, it may not power up or it may even damage the adapter. We've also chosen this adapter not because it was free but because it was in the middle of the road for the requirements to power up. You need anywhere from 5vdc to 24vdc. Of course the higher of a voltage you go the fewer amps you need to drive it. But we like to keep everything working within a 12vdc rail in case we were to switch anything to battery power.
- 5 Meters of 5050 RGB lighting. We choose this because after running the calculation of power consumption we calculated that the entire 5-meter run would be something like 3.14 amps which was a little high for the power supply we've chosen at 12 volts. We will be using about 4 meters for this project.
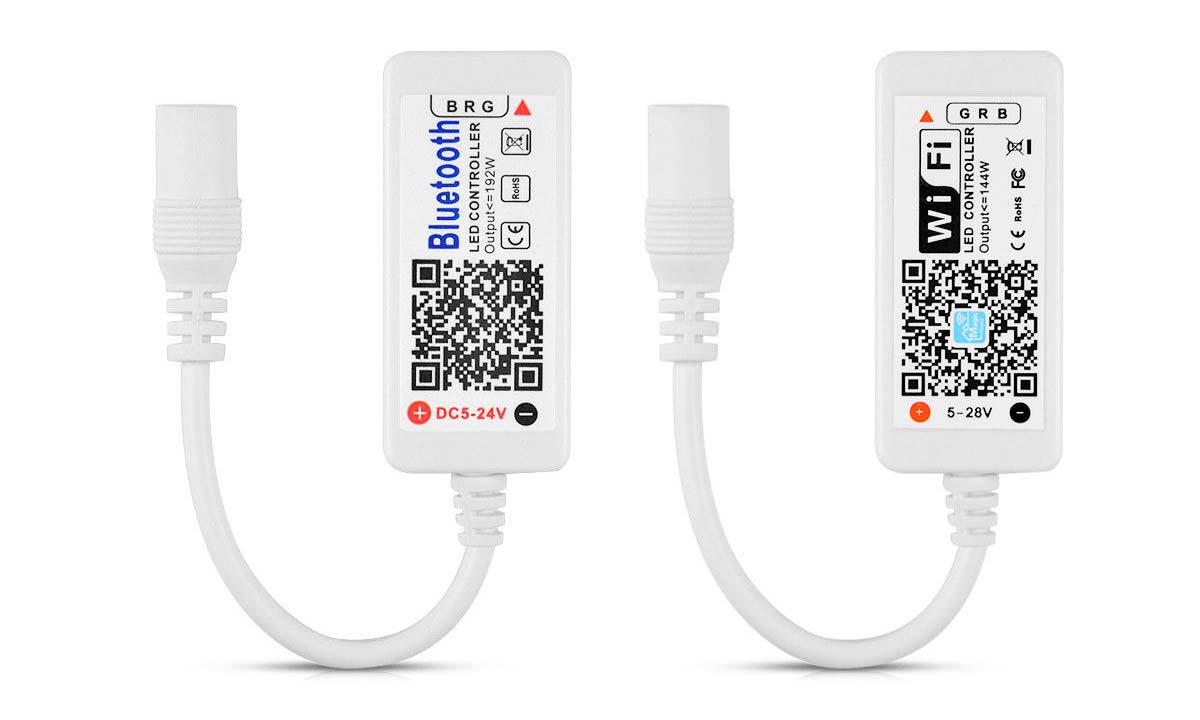
- A lighting controller - The ones from eBay typically come with a controller that you can use an IR remote to control. But you are not limited to just that as you could also get wireless Bluetooth and wireless Wi-Fi versions of controllers to govern over your LED setup. Just be careful when ordering a replacement controller as all of the Chinese vendors will simply use the word "Wireless" in the attempt to make you the customer pay premium for a Wi-Fi version only to end up with a blue-tooth only version. It should be noted that it took 3 vendors which were using pictures of the Wi-Fi version but shipped me the Bluetooth version before we finally found one vendor which got it right. The cost between the two is about five dollars U.S. For the Bluetooth version and ten dollars U.S. for the WiFi version. What's best for you is totally up to you. The Wi-Fi version is great if you want to control the entire house with your phone. Bluetooth version is great if you don't want to fight with your home network and just want your cel-phone to quick access the LED Lighting.
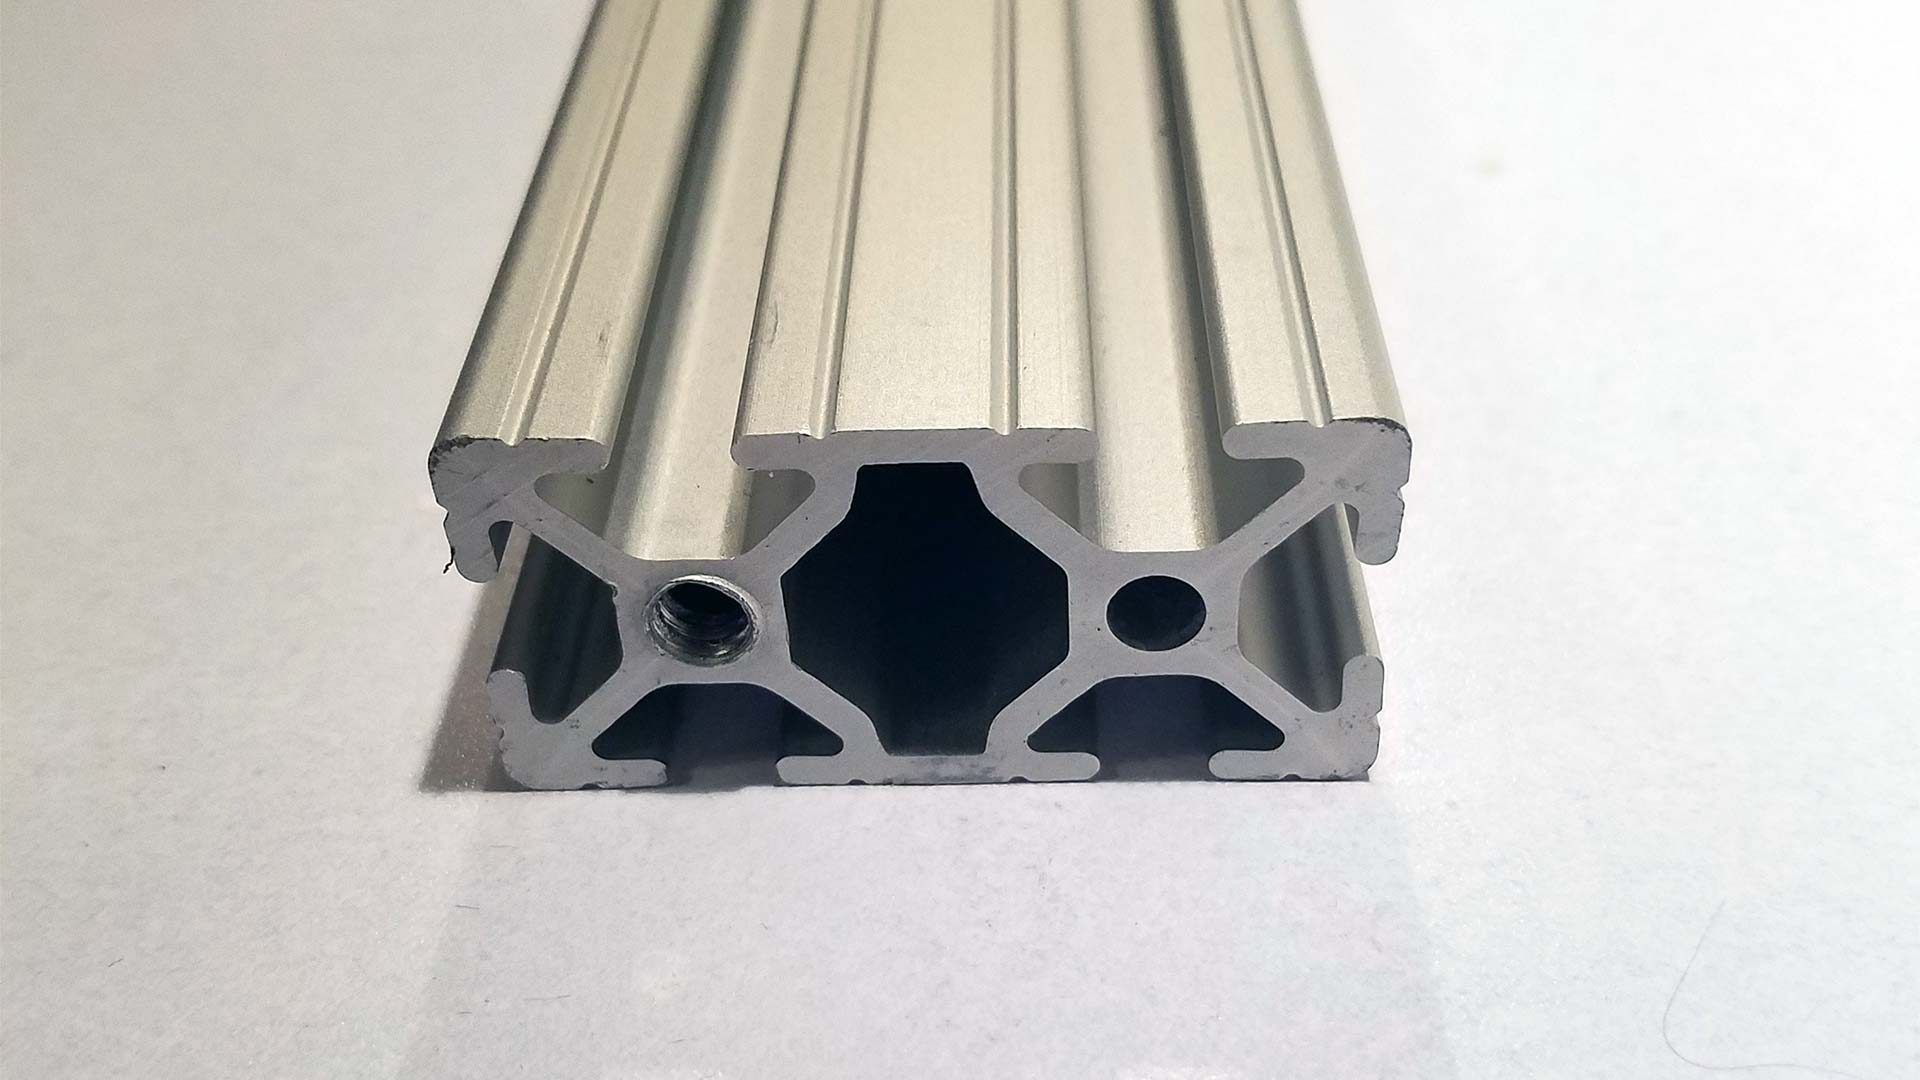
- Extruded Aluminum tubing - We're using Fasteks 20x40mm aluminum tubing at a length of about 32 inches. But any aluminum is fine. Why do you ask? The most common mistake we see when people use LED strips is they don't have any means of cooling them down. You're going to be pushing 2-3 amps into this lighting grid. It's going to make heat! Usually, when you see people using these types of lights in grocery stores they just tac it onto a wall and walk away. the heat is never drawn away from the LED's and as a result, it ends up looking like shit after a few months with lots of burned-out LED's. Extruded aluminum is probably the most expensive piece of the project but also is the most crucial in getting this done.
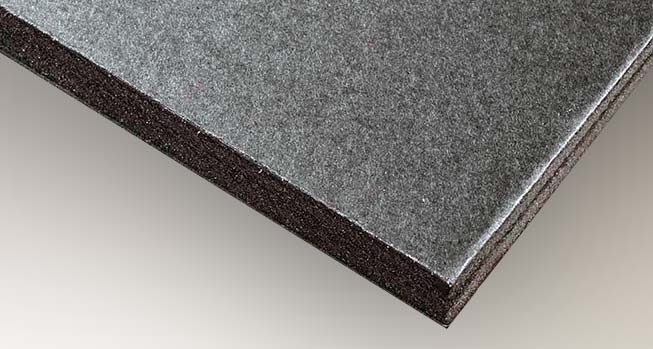
- Black Foamboard - Now you could use wood, or hell even steel if you can cut it. But for me, the black foam board was the most readily available and it was the easiest thing in the world to route with as well. It's also light as we already have enough weight from hanging aluminum off of the wall! The reason why we need this is to diffuse the lighting. Staring at LED's directly is very harsh! So this combined with some other tricks described later will give us the ambient effect that we want for our lighting.
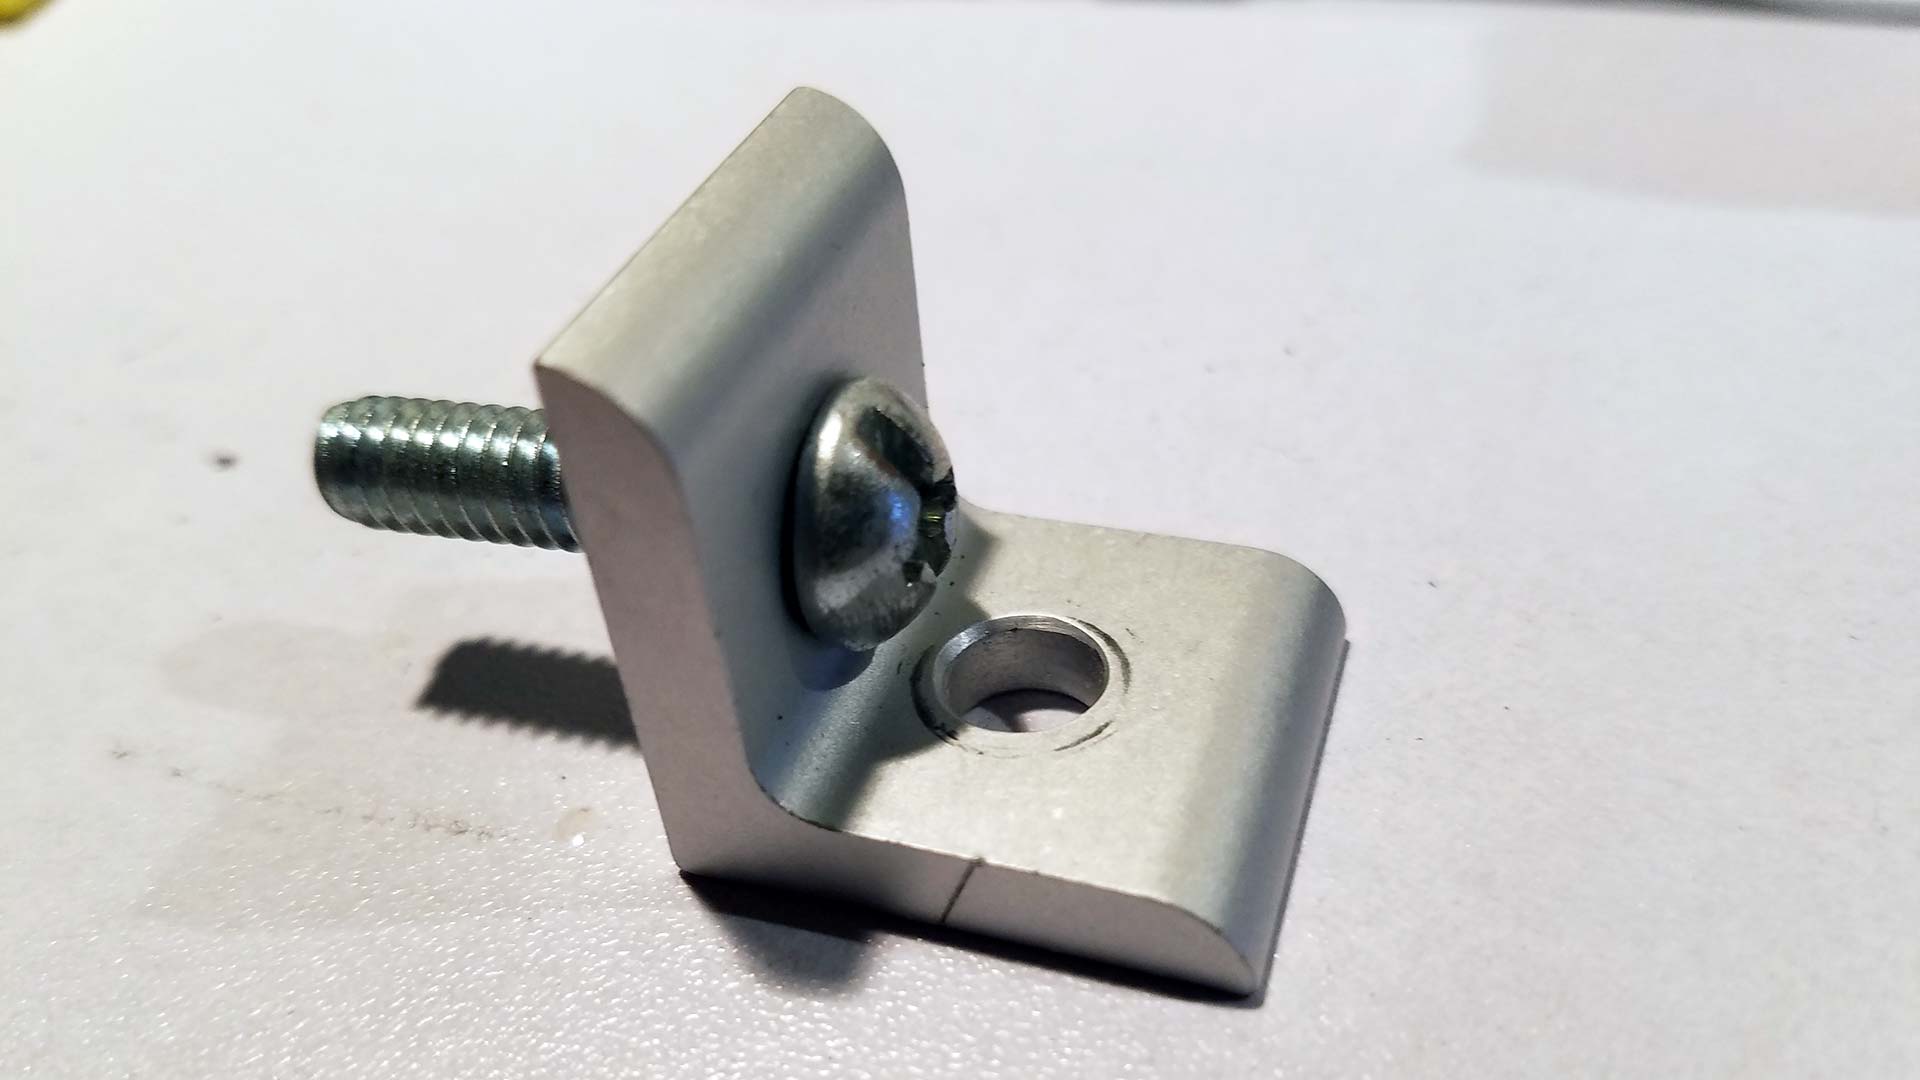
- Angle mounts with bolts are also going to be a requirement as we will be bolting this to our wall. We used a machine bolt to go to the Extruded aluminum and eventually we had to use a drill to make the hole wider. But it fit and it was super-tight. We advise you doing the drilling before you start on any of the electrical work. As for the wall screws themselves, you can get some plastic studs and dry-wall tapping screws from any hardware store to hang it up.
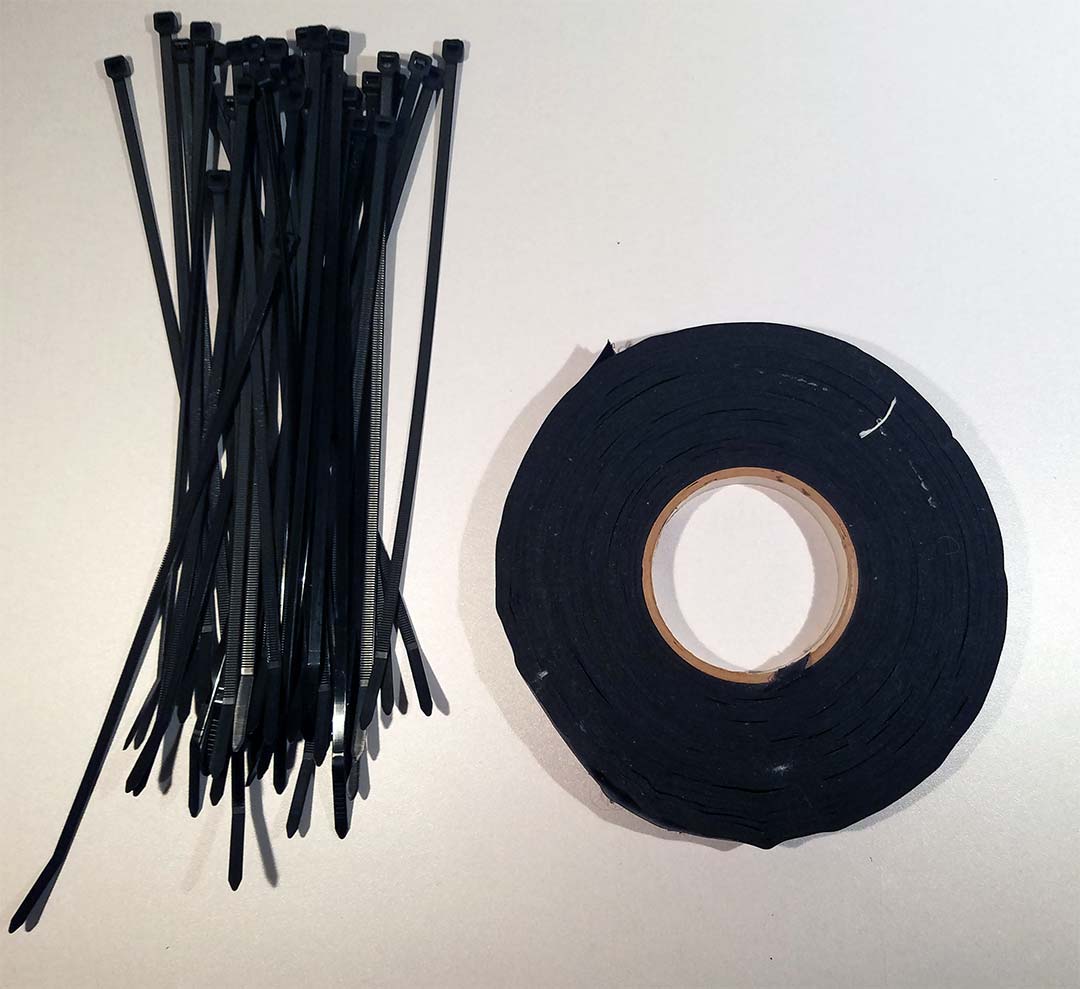
- This project will also require cable ties and tape. We use gaffers tape but electrical will work fine as well. The reason for this is the adhesive from the LEDs is not going to stick all that well to our aluminum especially when this starts to heat up. Also, we use the tape to act as insulation from the aluminum in case there is a ground fault.
Other tools of the trade.
You will also need the following equipment for general tools:
- Wire clippers to clean up the cable-ties. Clip the LED strips to size and clip the tape nice and clean.
- Phillips screwdriver for screwing the machine bones and dry-wall screws.
- Soldering iron for wiring power between each side of this light-bar.
- Some extra wire for power running.
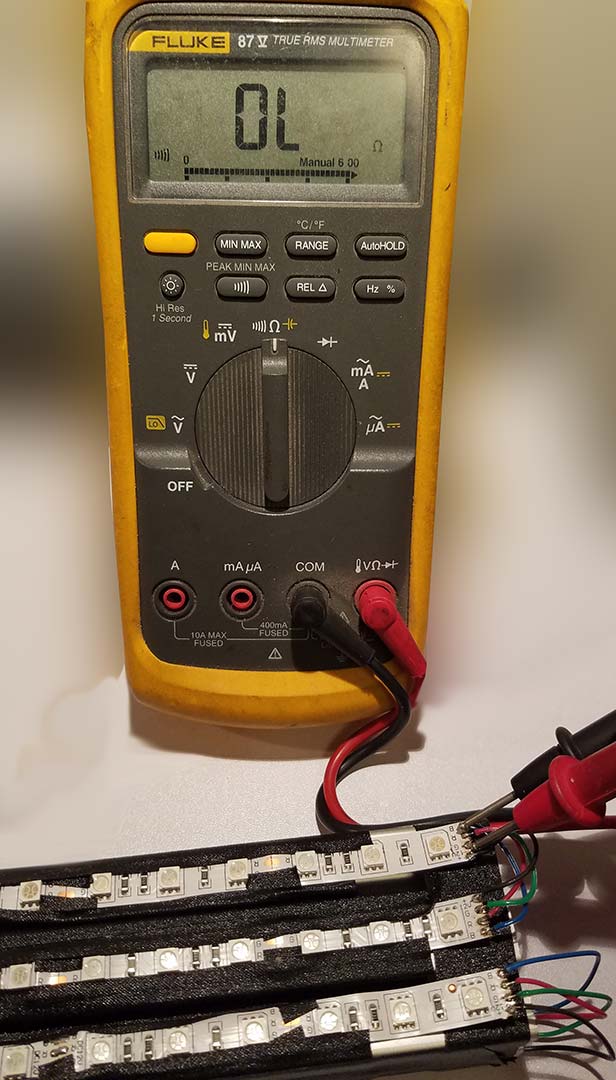
- Voltmeter for checking continuity and to ensure no ground faults are going to the Aluminum.
- pliers which are always handy for securing bolts along the frame of this lighting.
- Perhaps a drill if you are intending of dropping anchor screws in the wall as I have done.
- Aluminum tape is optional but highly recommended as you shall see later on in this article.
Assembly of the LED lighting system.
Probably the first thing you want to do is drill the holes in the side of aluminum big enough to fit your machine bolts in there. If your screws fit in perfectly then great you don't need to use the drill on another. Once you've made it to where your screws fit and your aluminum bar can be easily mounted on the side of your wall. This is where the fun of assembly comes into play.
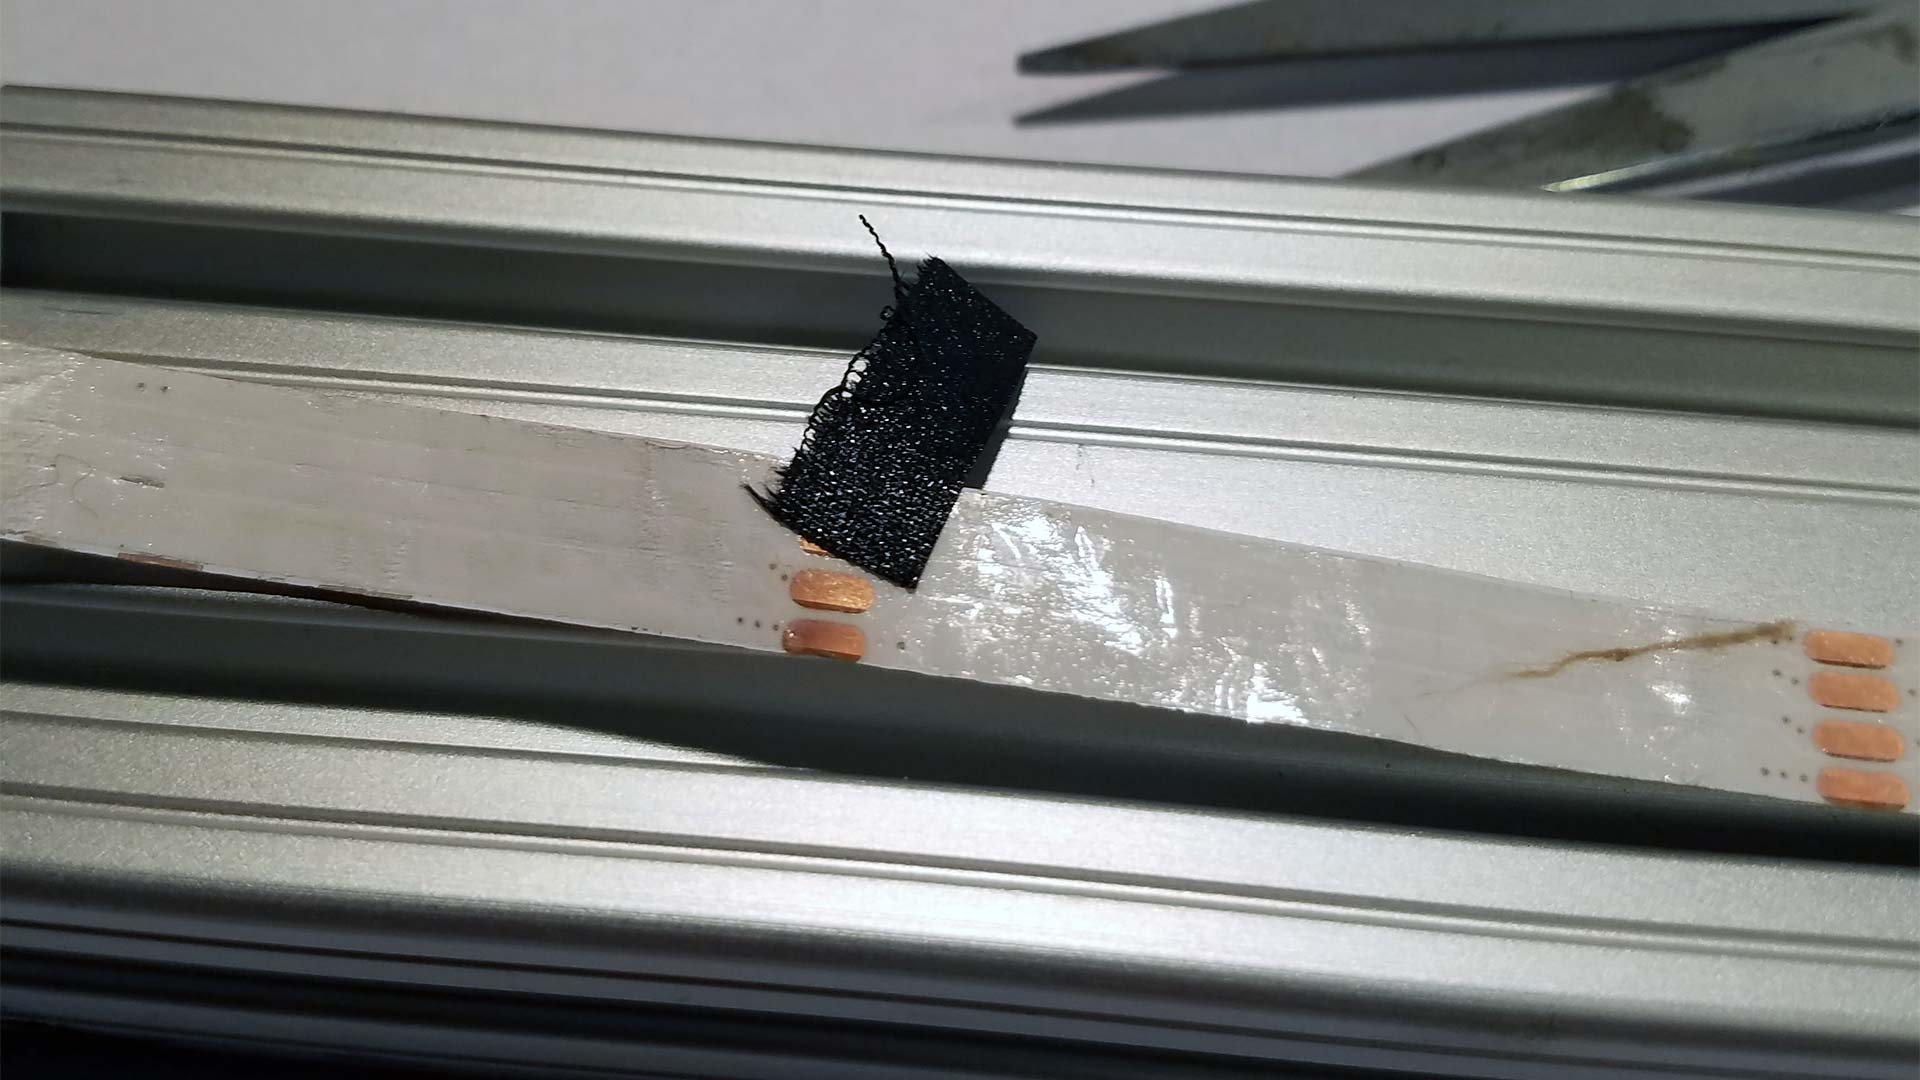
The very first thing we're going to do is undo the spool of LED lighting and remove the wax coating that protects the piss poor adhesive backing on these lights. When we cut these LED strips we're going to want to cut them right on the copper LED contacts as three of them complete a circuit. Because these are not the waterproof version of the LED strips we're going to also add a little piece of tape to cover all of the copper pins to prevent any level of ground fault from occurring.
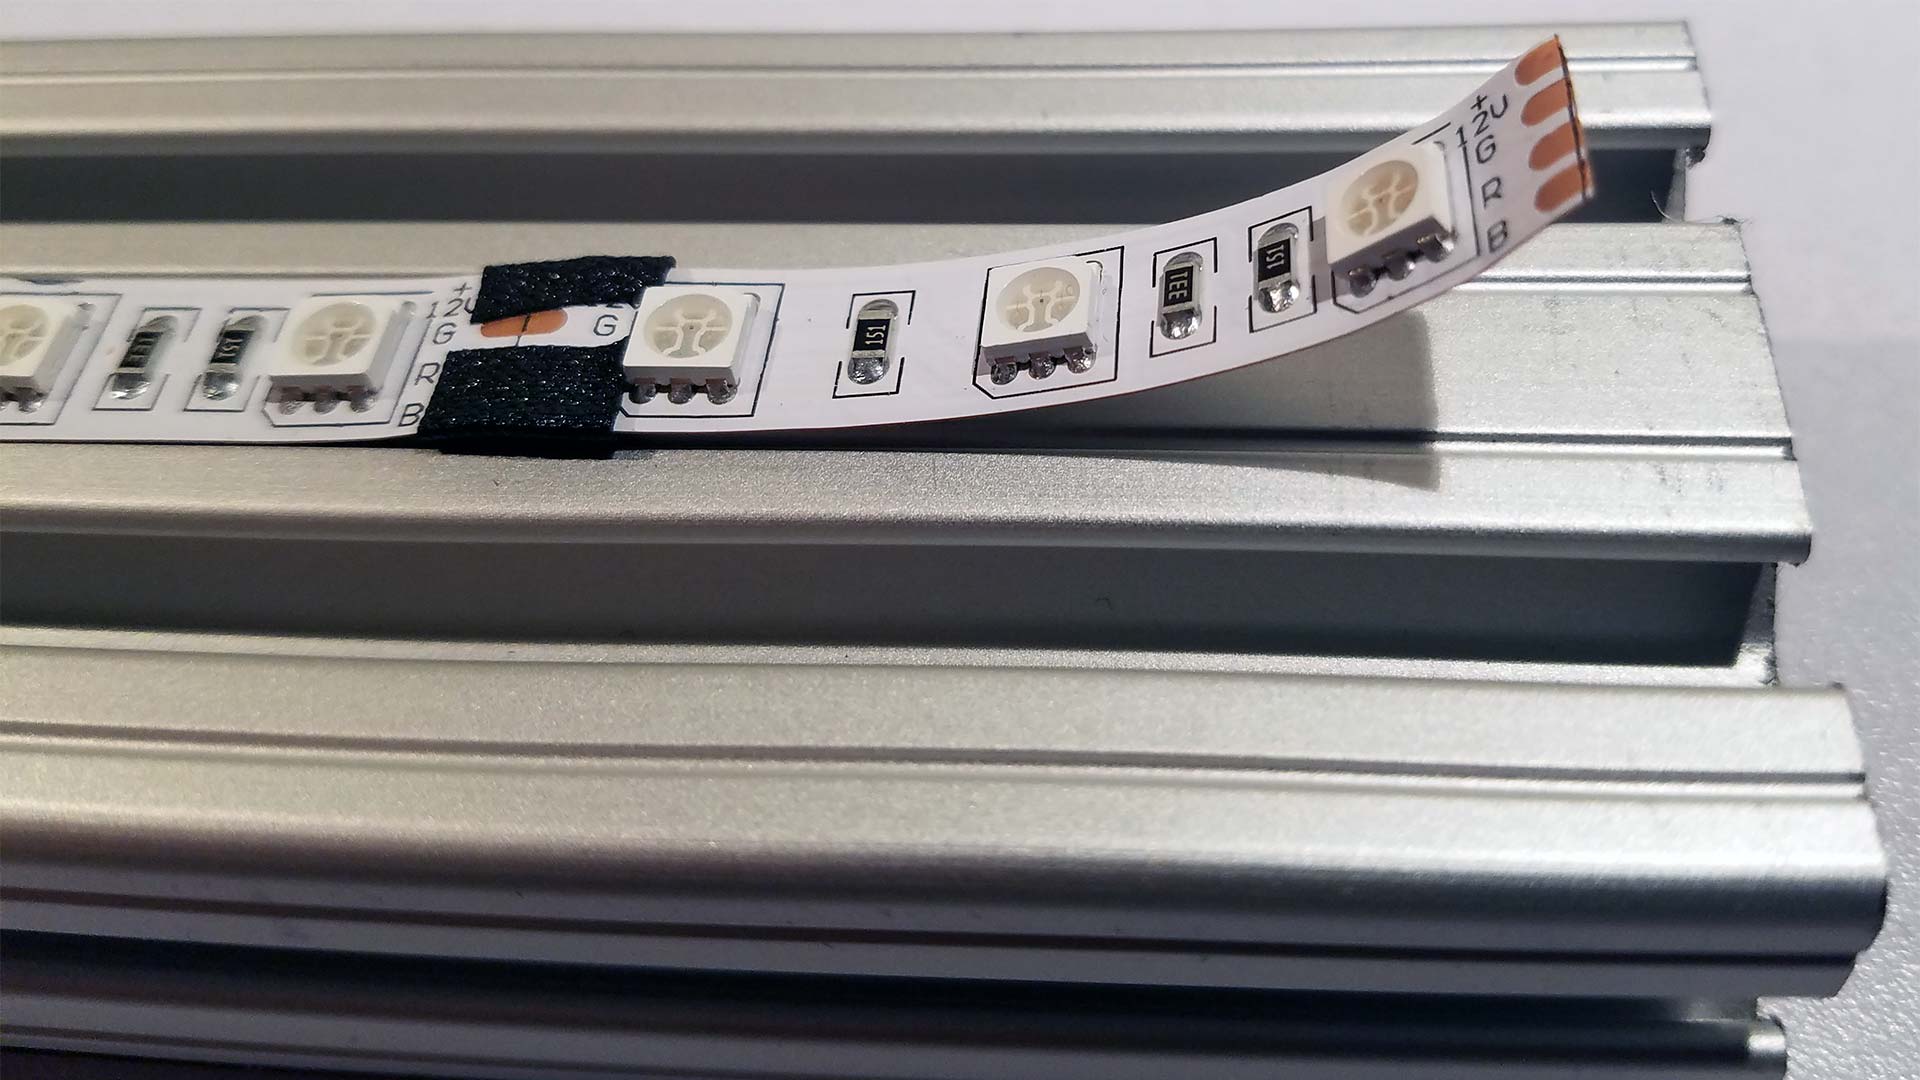 Now if you want you could sand the aluminum a little bit to give it the kind of grip that most glues would come to expect. But it's important to leave the ends free for soldering. Later on, we will wrap the ends aluminum to further protect the areas where wiring is exposed.
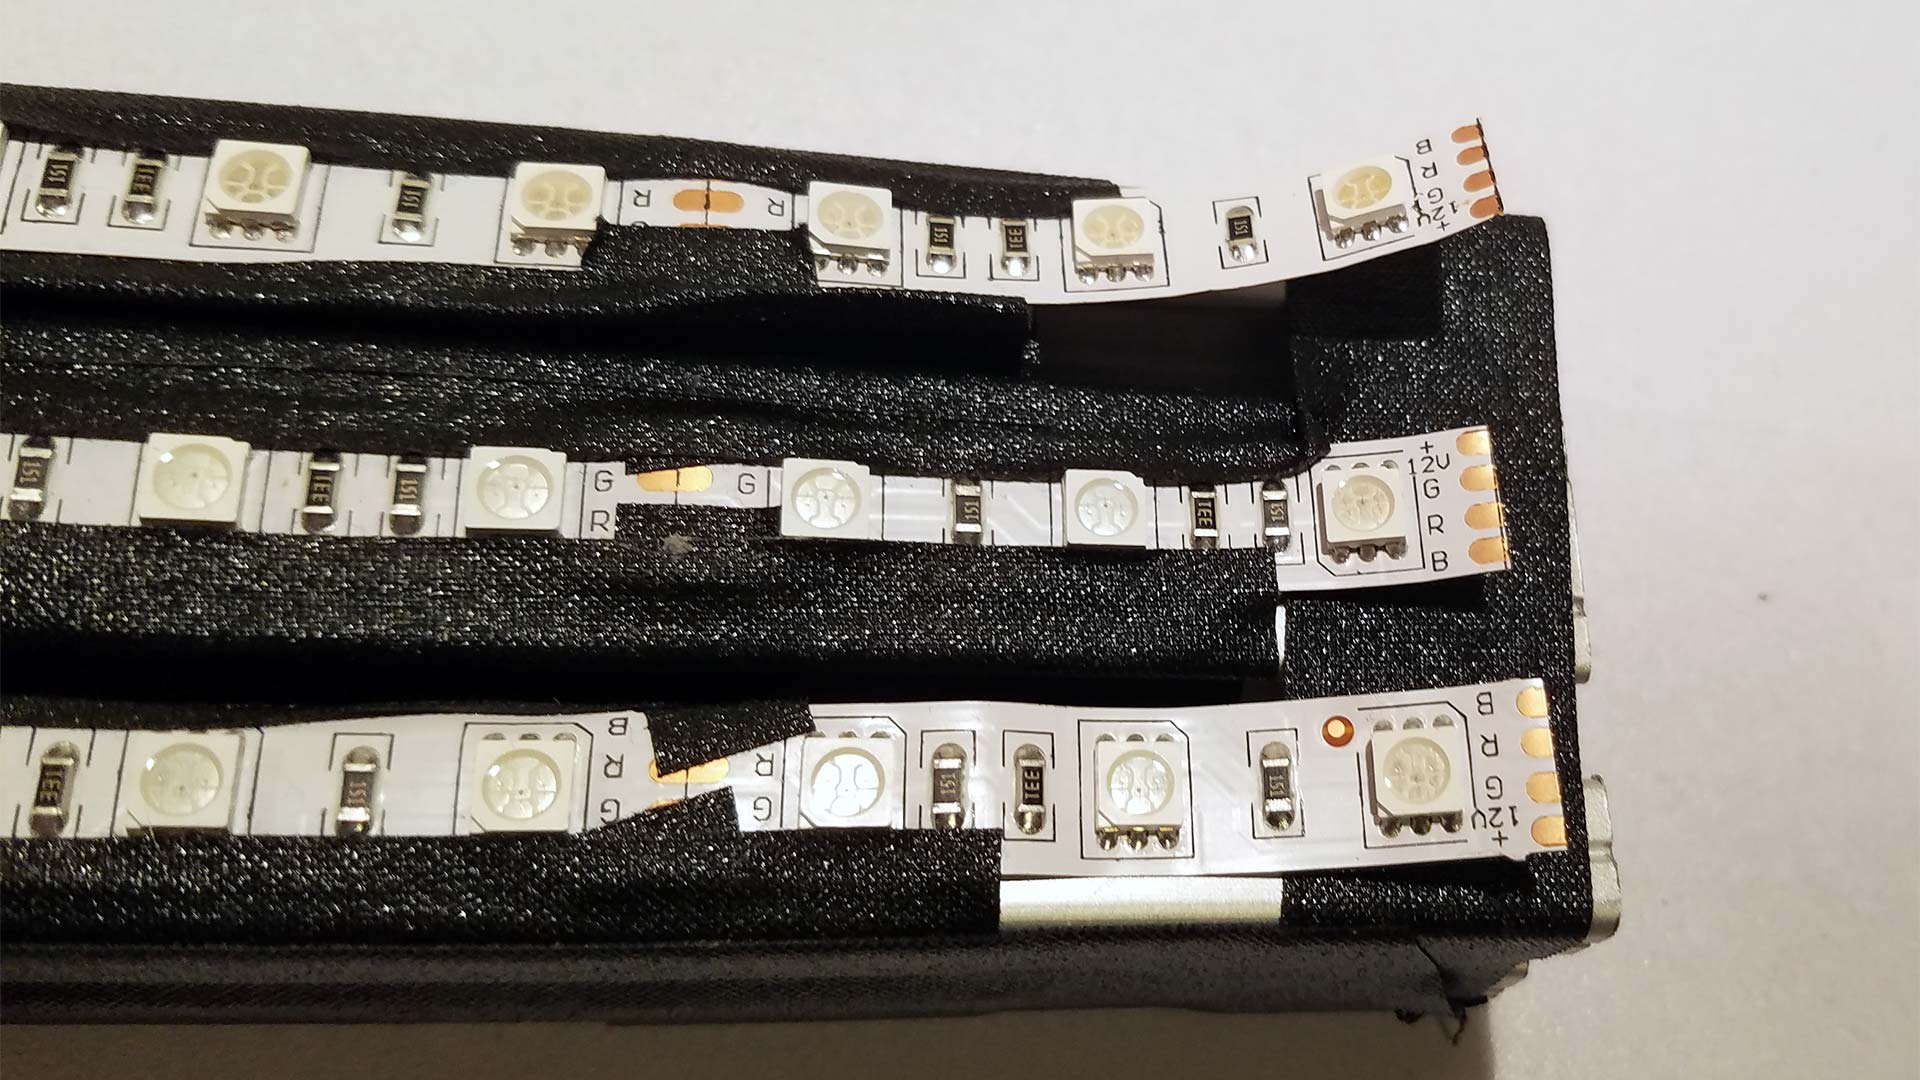
After that, we just simply repeat the steps by adding two more strips lining them up with the aluminum tubing as best as we can. In hindsight, there are a few things that we could've done differently. One of them is to have to tire such as the +12v, G, R, B face the same way to avoid any wiring issues. Another issue is we should've just said fuck it and removed the crappy double-sided tape china gave us and just lined the aluminum tubing with heat-sink grease since we're going to use other means or keeping the strips onto the metal such as the use of tape and later on zip-ties. Also, when attaching the zip-ties we did it over the contact portions of the LED strips so that the zip-ties are not crushing any crucial components during the build.
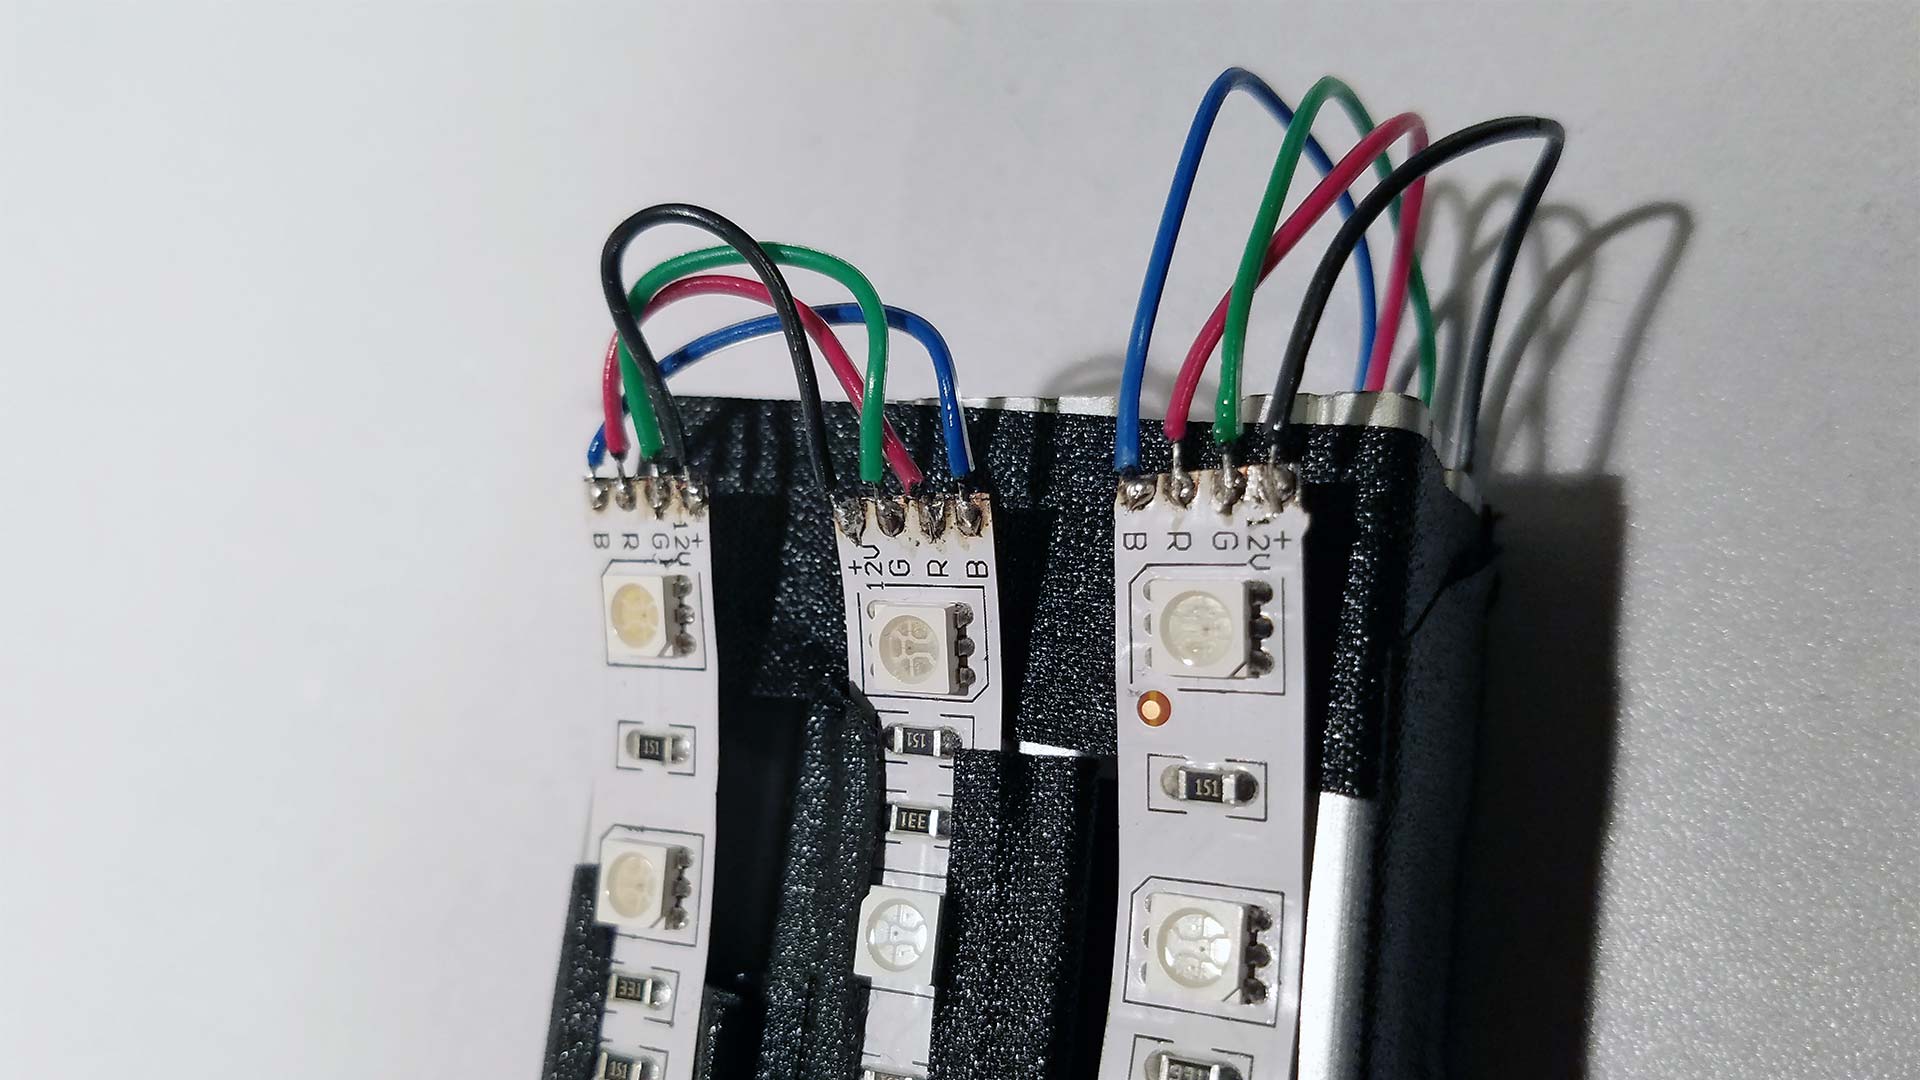
Now we simply bust out some extra wire and solder this bad boy together. I put two strips of LED's one side of my aluminum extrusion and then three on the other. The three will be beaming up at the ceiling of my living room so I figure we should give it a little more LEDs for it to bounce. And the two LED's will shine on the walls and hit the floor. There's a set of wires that cross down to the bottom LED's which is okay and will be hidden by the board plate which will come later in the article.
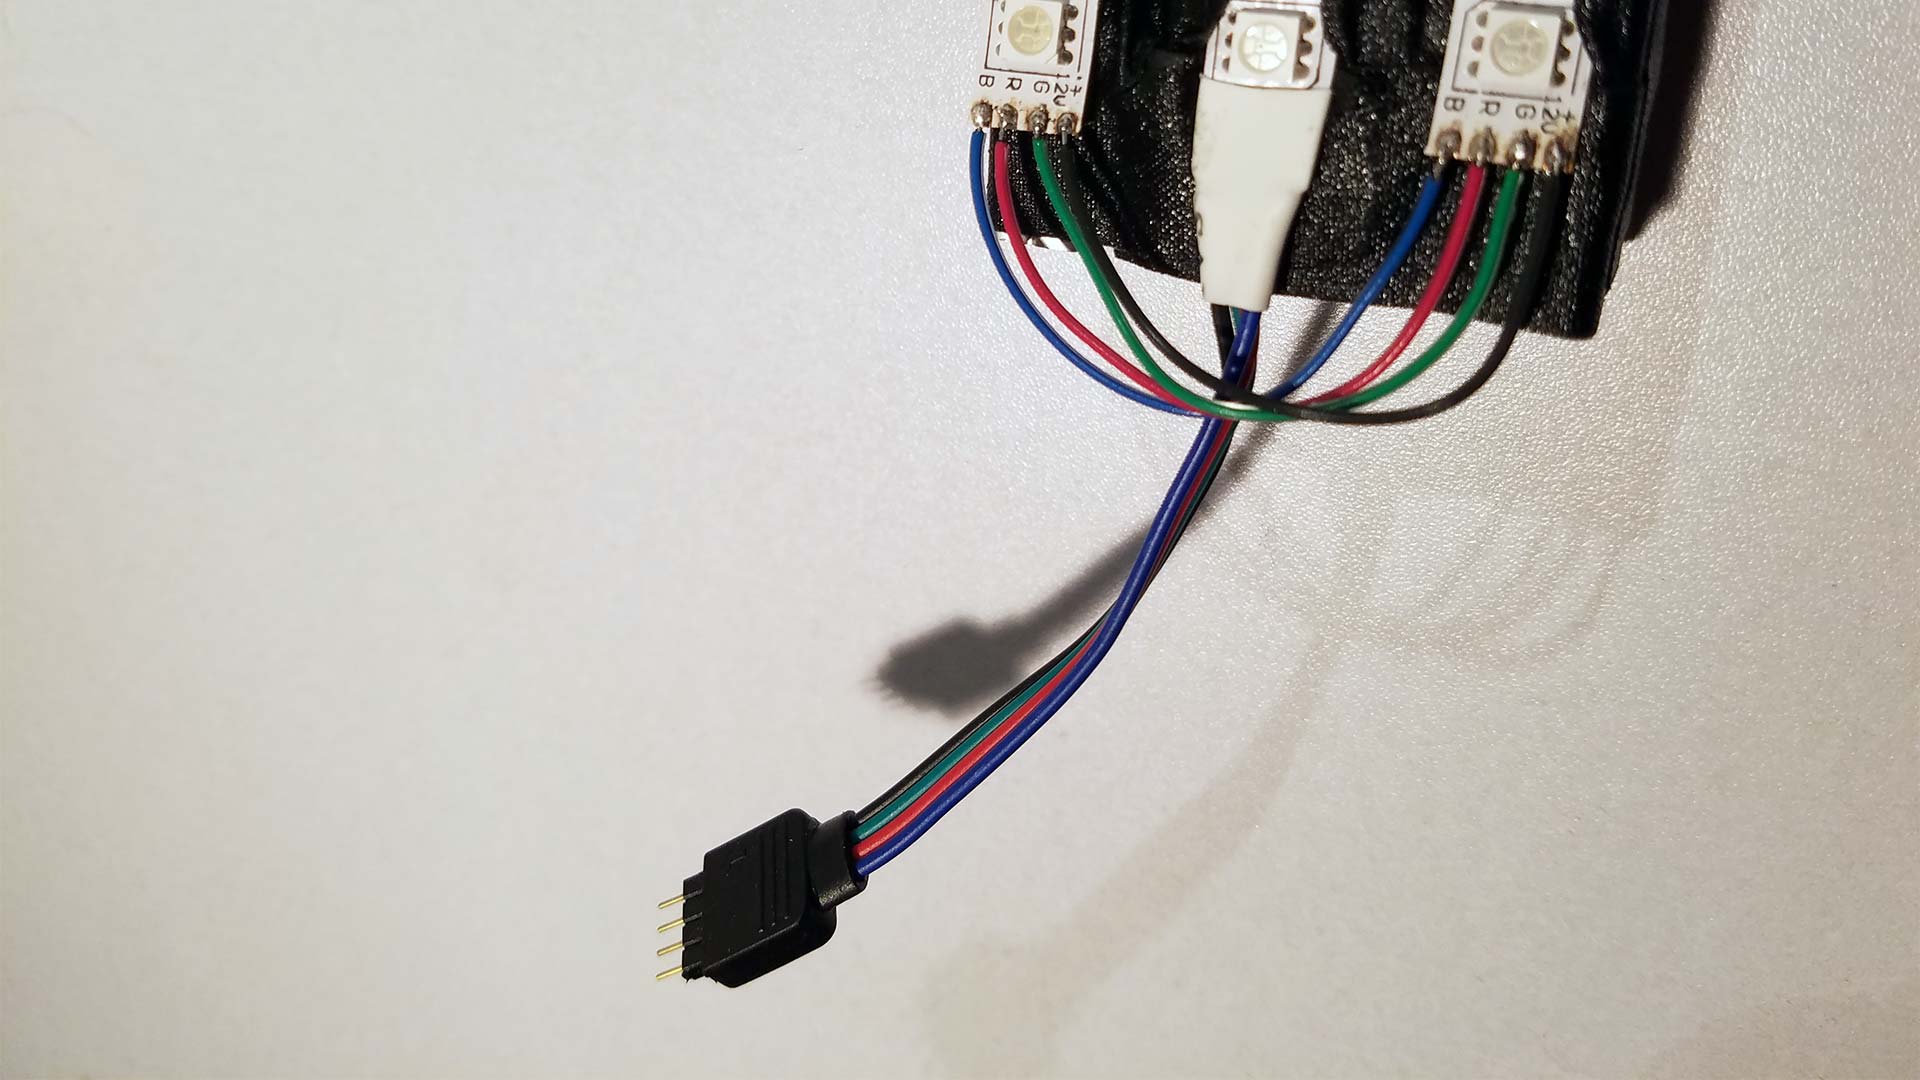
For those wondering how this connects to the controller there you go. We simply left the pre-soldered end attached and will connect it to our controller later.
Always check your work!
As a final precaution before we hook it to our LED controller and power supply. We are going to use our multi-meter and set it to continuity mode to check to see the ground and any of the hot wires are connecting at all. This is super-important because between the grounding of the aluminum and the solder work of the wires the last thing we want is to have any shorts within our circuit. Also, there's no excuse to NOT have a multi-meter as you could easily pick up a cheap one from a hardware store ranging anywhere from five to ten U.S. Dollars.
Burn-in test.
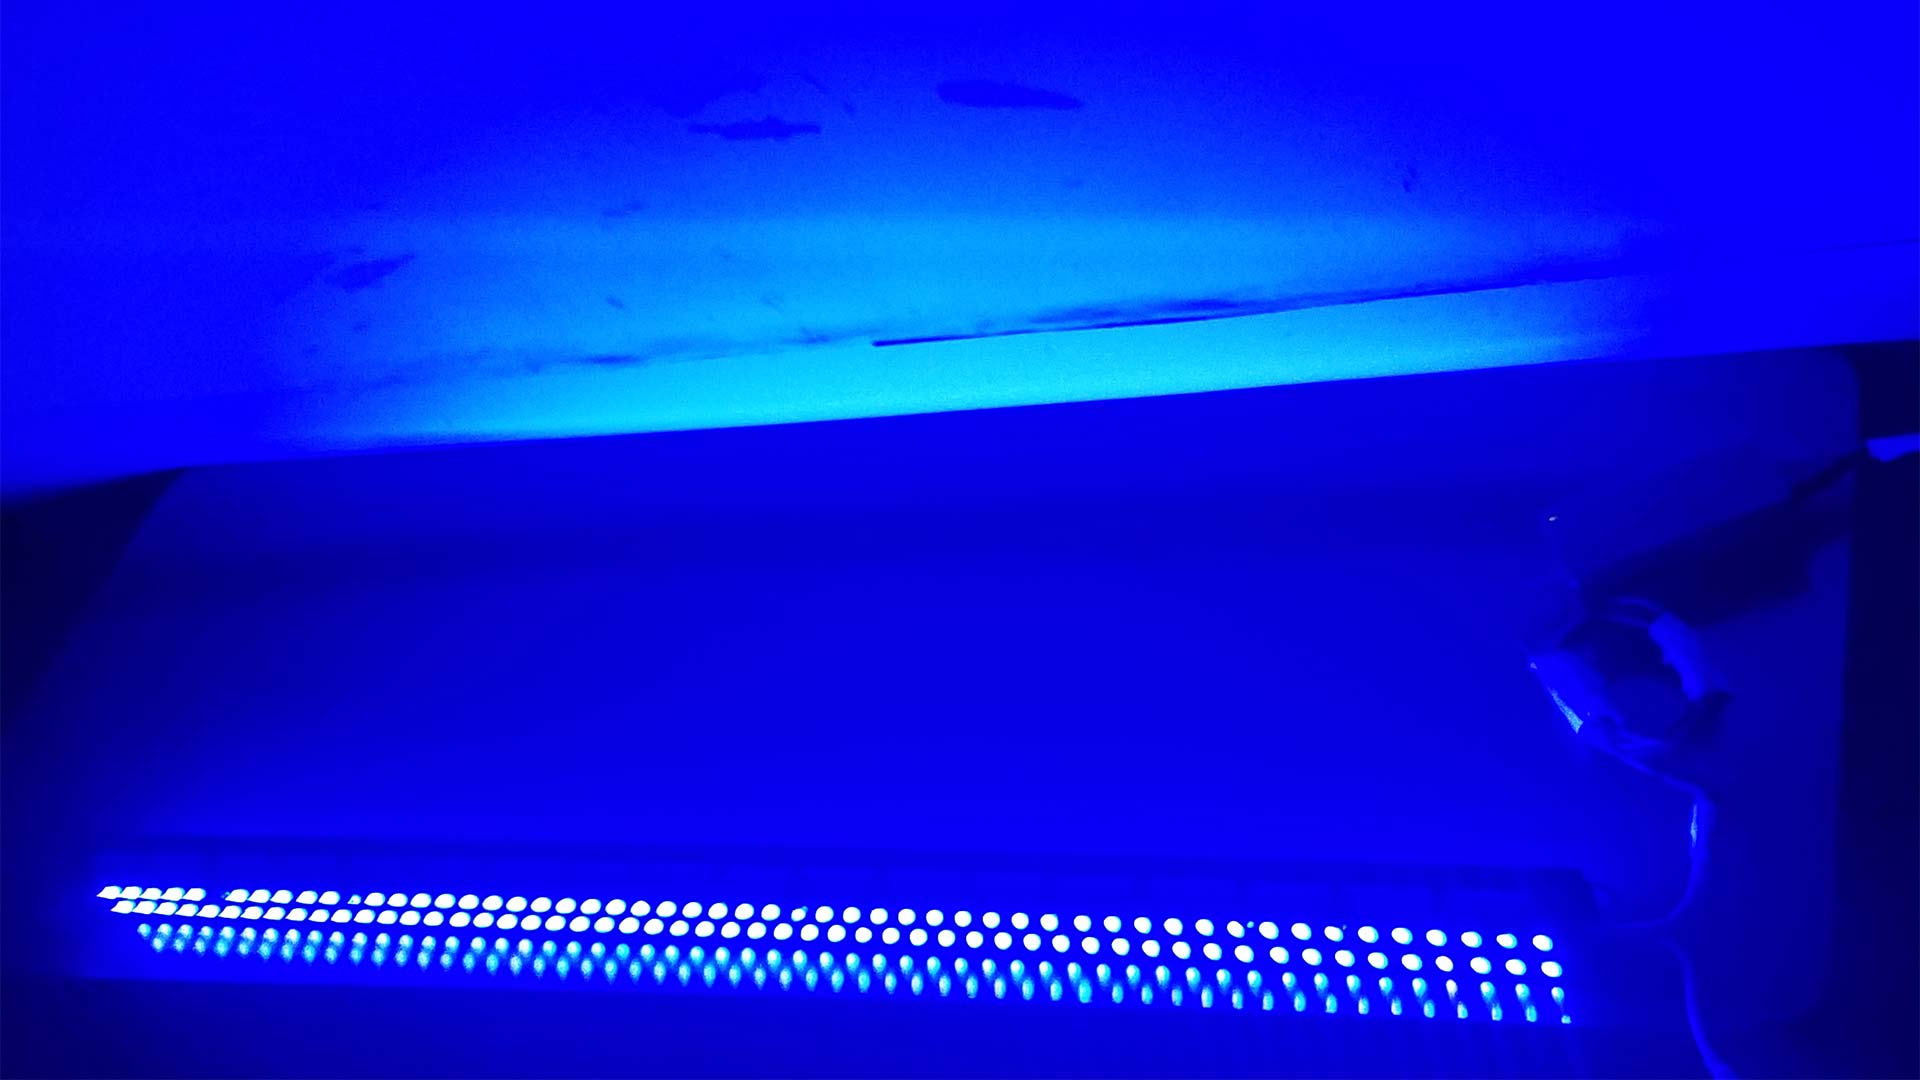
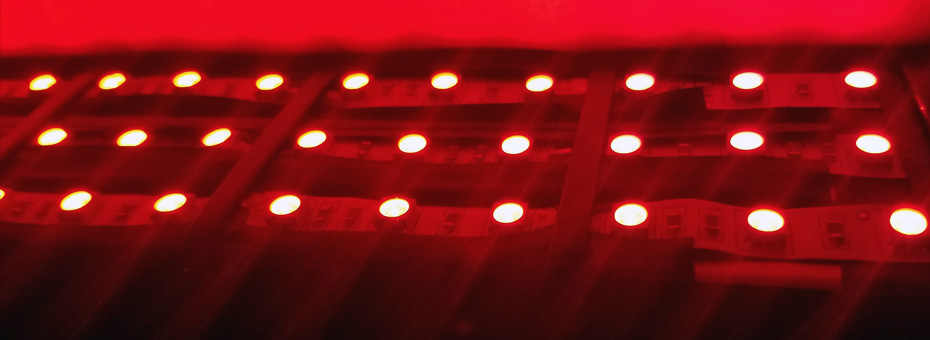
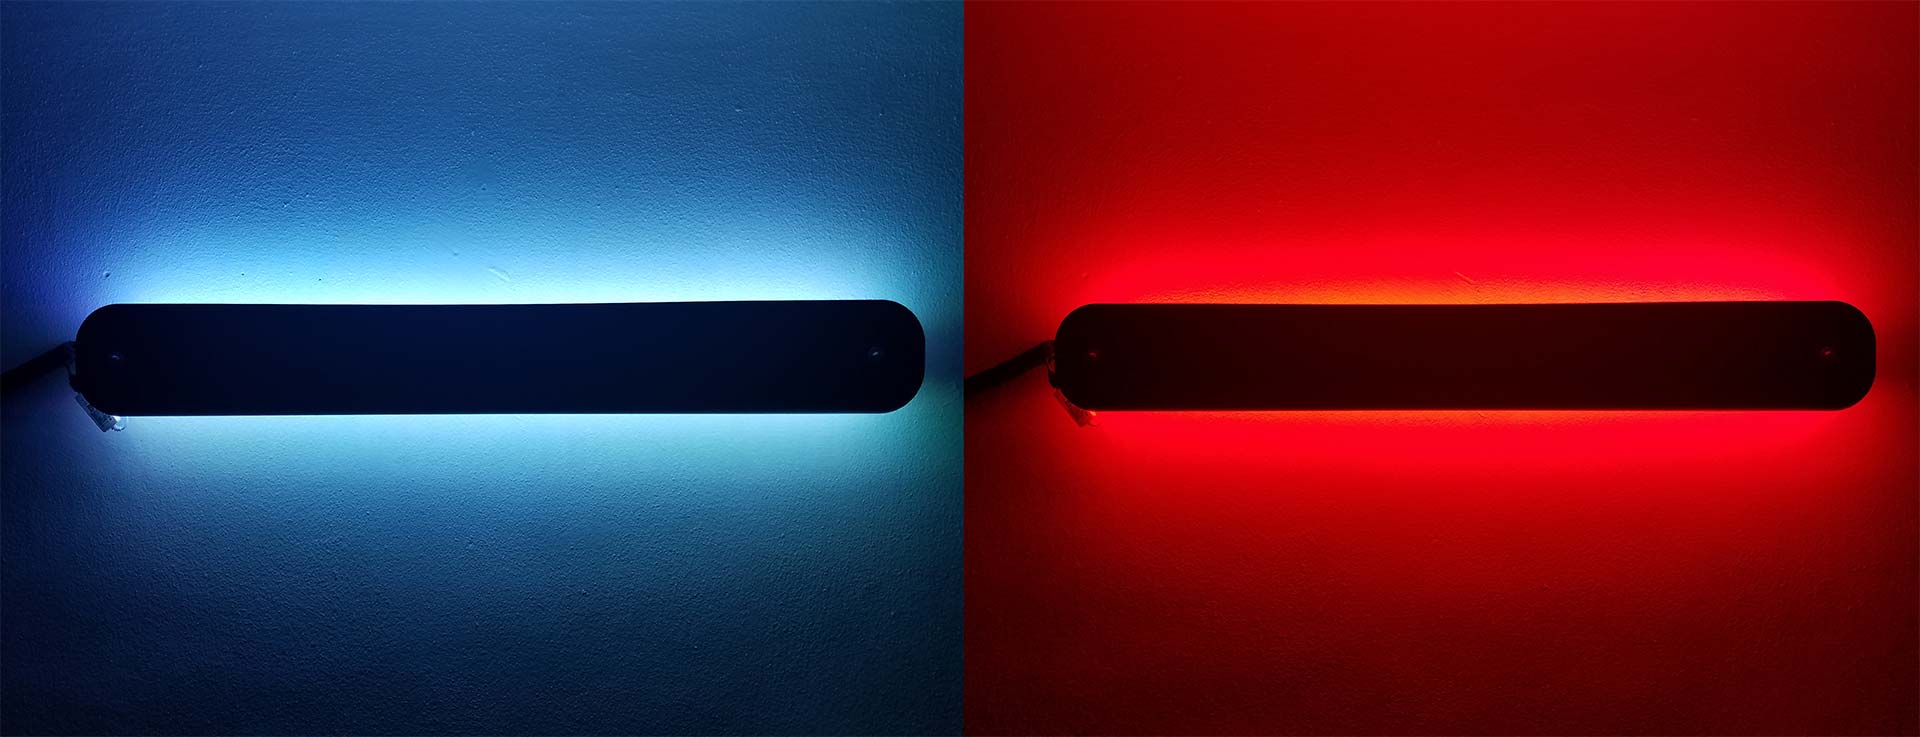
Apologies for the terrible camera work while trying to capture this. But we placed our newly constructed project onto a table and powered it up. Letting the lights cycle from color to color for a solid 24 hours WITH supervision! This is called a burn-in test. we want to make sure that the aluminum is doing its job distributing heat and that none of the lights are burning out during this test. This picture is good because you could see that a few lights don't look like they are working.
That was actually because some of the tape peeled up and blocked the lighting. So after a bit of Exacto blade action, we were able to correct that with the quickness. Also for those wondering why there are two strips. That's the bottom of the light. The one with the three strips is facing the wall. and bouncing light off of it hard as it should!
The deflection plate for our RGB LED Lights.
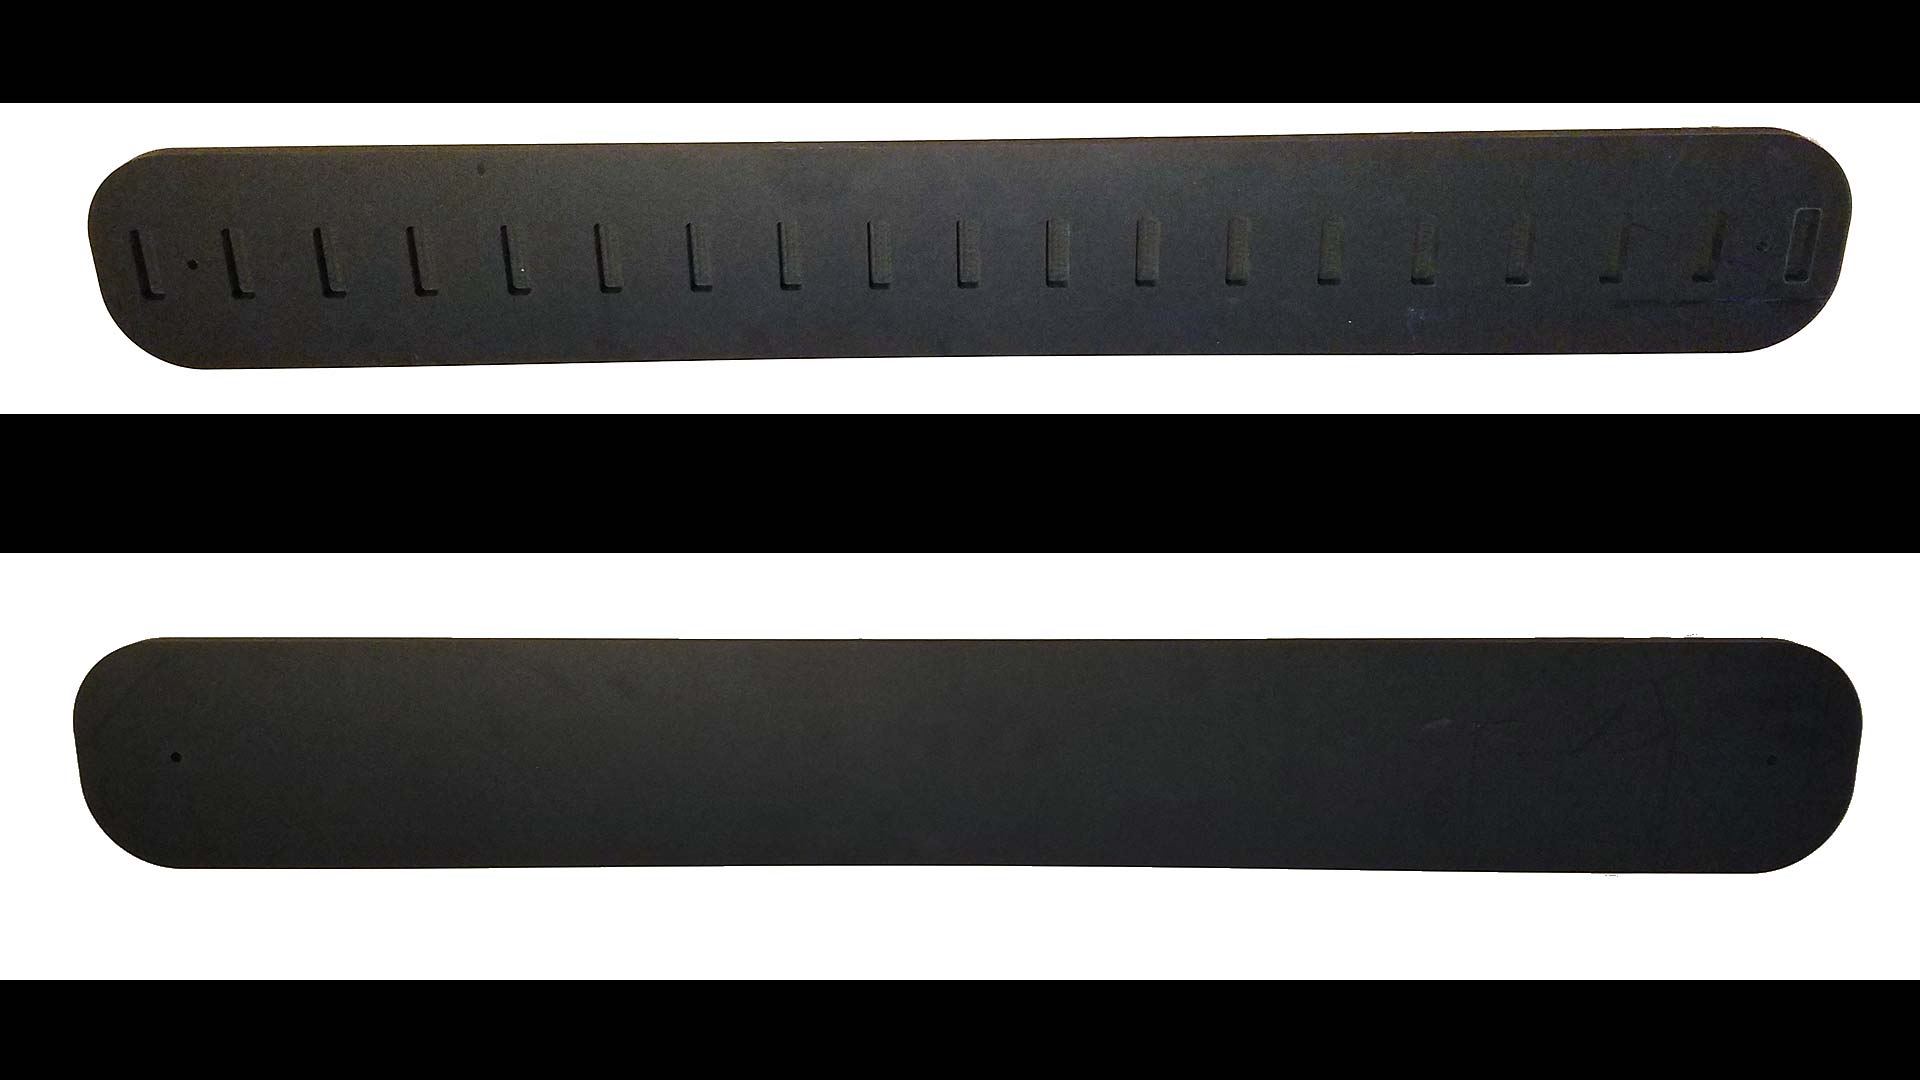
The deflection plate is something we cut out using "Grandma's Router" but you can use something like a RotoZip or a hand Rotary tool to accomplish the same task as well. The slots along the inside are engraved 1/8th of an inch with 2-inch spacing to match the zip-ties that wrap about the aluminum extrusion that we added for support. Finally. we placed two quarter-inch holes into the foam where the machine screws are going to go through and bolt into the lighting system.
Optional - Aluminum tape:

Because we've chosen a black material that aesthetically looks good. Black absorbs light. We are losing some of our ambient radiance because we choose to place something over our LED lights instead of staring directly at the LED strips in our living room getting spots in our eyes. Crazy us right?!? A way of reclaiming that light back is by putting something either white or highly reflective on the side where it shines. In our chase, we choose to use aluminum tape to get the most out of our LED strips. It was exceptionally hard to get a before/after picture of the results as the camera's light compensation was fighting us. But it is highly noticeable and we recommend applying some sort of backing to deflect the light and get the most out of your setup.
Mounting.
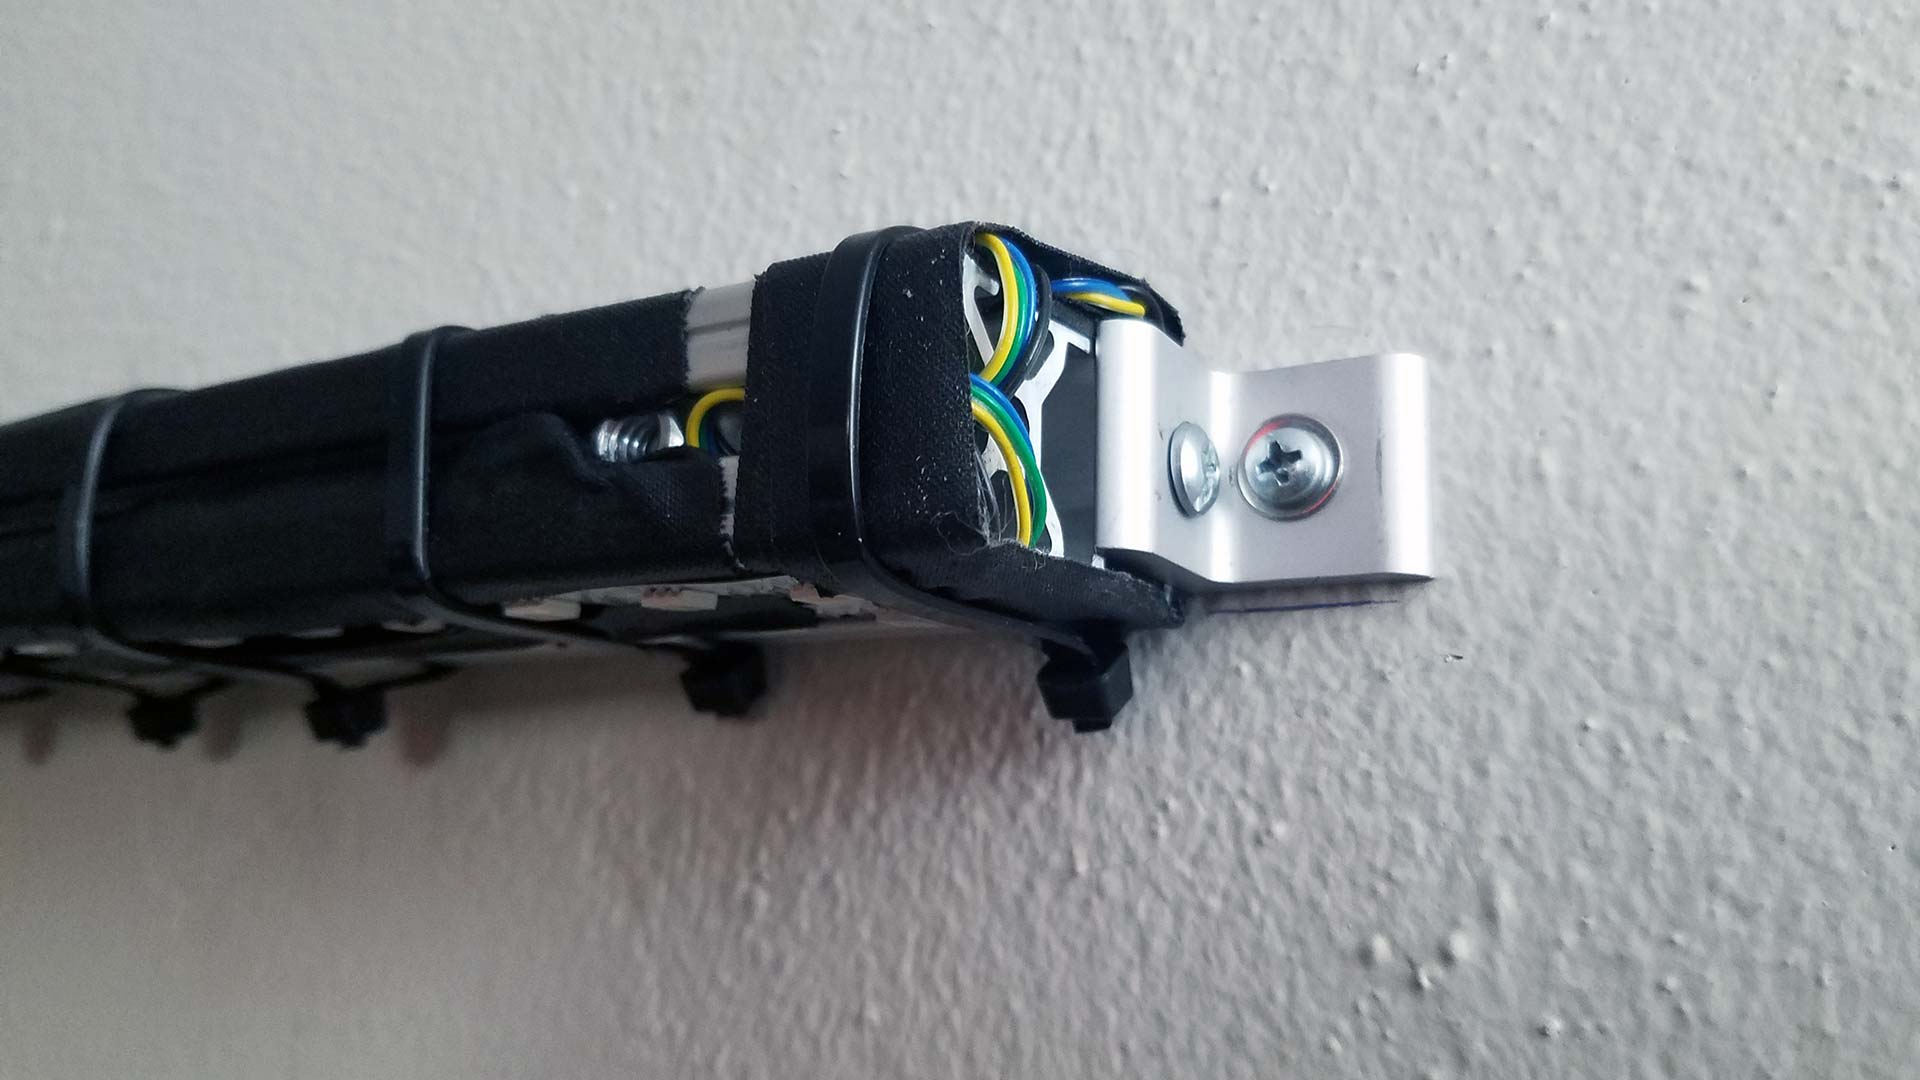
The first thing we did was getting a nut into the aluminum. This involved us using a carbide sanding disc as the nut didn't want to immediately go into the aluminum. Of course, we could've bought the official Fastek nuts that fit right into the slots and saved ourselves a world of headaches but where is the fun in that? Then, we tuck the wires away as neat as we could and proceed with drilling our hole into the dry-wall and placing a plastic stud where our screw will go into. We wouldn't recommend just dropping a screw into a wall without that plastic stud because it could fall out from the weight. Finally, we placed out foam board plating on and we are done! Easy peasy! As for the piss poor cable management well! That's the perils of living in an apartment complex where you can't embed power supplies into the walls or rig an AC Outlet just behind your lighting.
Final thoughts.
Would we recommend this project as a cost savings over simplifying buying a Phillips LED bulb? No! If I had to pay for the scrap aluminum as well as the power supplies combined with all of the equipment to put it all together that I didn't already have. We would say this would be a terrible investment to add RBG level aesthetics into your house! However, it does make it unique and original to us as we were the ones who built it.
We did purchase the upgrade for the Wi-Fi version and initially, we did have a lot of problems with their "Magic Home" application that you get on Google Play to control these lights. A lot of the problems stem from us wanting to add our RGB strips to the existing network and the fact that for that to happen my mobile device had to jump between two SSIDs. Halfway through the jump, it assumes the mobile network is the correct SSID and instantly fails the connection. We had to place the "Magic Home" application into airplane mode but with Wi-Fi on so that it could make the transition between the two SSID's and thus connect our lighting to our home network. Kind of annoying but it's a hell of a lot better than the shitty IR remote control and receivers that came with the whole setup. Is the aluminum extrusion worth it? Given the lighting and the amperage, we're throwing out. We say "yes!" The aluminum does get warm to the touch after hours and hours of it being on but never exceeds that temperature range.
This is excellent because since we're not only using the aluminum for the structure we're also using it to extract heat away from the LEDs. This will give us a far longer life then those which simply string them up in their grocery store. Anyhow this little project took us less than a day and it took more time to write this up than it did for us to do it! If it inspires you to make your own LED lighting system for setting that special mood awesome. If you think it sucks then great! I know for a fact there's better interior designers out there which can give you the aesthetic of wanting to put your Peloton training cycle underneath your lights. But this is fine for us.
Until next time that's what server said.
+++END OF LINE.
good photos. iv made something similer to this