
Sleeper PC update time.
Two years ago we published our Sleeper PC build. No, we have not moved on to flashy lights or AIO liquid cooling. Perhaps we're old or stuck in our ways. However, it is one of those questions that is asked on chat servers, and social networks and is also the content of videos with everyone having their own unique PC build. It's one thing to buy a Gateway, Dell, Packard Bell, or Wang. It's something else to pop open and put high-performance hardware inside of it.
A bit has changed since thing. Read onward to see the pics and get overwhelmed with too much typing
In the beginning.
This was the snapshot of my PC. Something that we've had close to 8 years with some minor upgrades to hard drives to SDD, and video cards. For those who want a refresher instead of reading that old blog here was our PC specs:
- ASUS MSA97 R2.0 Motherboard
- AMD FX-8350 Eight-Core Processor @ 4.00Ghz
- 4x – G.SKILL Ripjaws X Series 4GB 240-Pin DDR3 SDRAM DDR3 1600 (16GB Total)
- Samsung 500GB SSD drive.
- LG DVD-RW drive
- Noctua NH-D15S 140mm Heatsink and CPU Cooler
- Zotac 1050Ti 6gb DDR5 graphics card.
- Creative Audigy 5rs
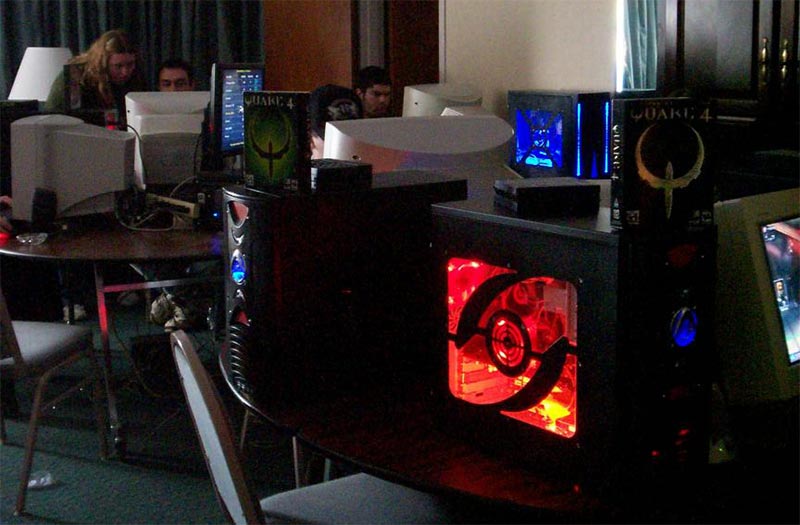
My motherboard existed in some cheap $40 Newegg special PC that got dented and eventually became virtually unusable due to cracked Plexi and bending frames (didn't take many pictures of it but here were some of the cases we had back then whilst doing some LAN gaming). At one point in our lives, we had access to a bunch of E-Waste from a local retail store. In the pile of old computers, this IBM X3200 was sitting there. It was super roomy and decided to take the journey to modify the case to accommodate a standard ATX-style motherboard. And the price was right too. It cost us -$50.00 USD because we sold the IBM motherboard to someone else.
Yay recycling!
Time for upgrades.
COVID, Chip Shortages, Crypto-Currency fuckery, politics, inflation. Pick your poison as to why we waited as long as we did. When I first played and enjoyed Cyberpunk 2077 on my Windows 7 OS loaded box at the time. Let's just say the framerate was not awesome! 5fps in Night City and 20-30 fps out away from the city. It hurt to play. Now, there were mods that removed all of the cars off of the street which helped. But about 6 months after we placed our board into that IBM X3200 case we were looking for a better card right away.

With a little help from friends, we purchased this PNY Geforce 1660 Super XLR8 card with 6GB of DDR5 ram for $200 (US) direct order from best buy. This was purchased just as the COVID lockdowns started to happen and one of the last cards to ship before pricing went to total hell.

At the time of this posting, which is almost a year and a half from when we purchased our card. its USED price for the GTX 1660 is the exact same price as when we purchased it NEW. Now, if we were to trend this card over the course of the year. This card actually spiked up to $600 while 30xx cards were (or are) in the thousands of dollars. It's truly a crazy time to try and build something new for yourself.
Now, the card did help. But looking at my system specs I knew that the number one thing that was holding us back is that we're still rocking an Althon 8350 8-core processor. Manufactured in 2011 which means that bad boy has been going for close to 11 years! There are some people that don't keep cars for as long as we kept our processors. But that was not the main reason we decided to upgrade. I guess this is because we kept fixing it over and over again. It never really died.
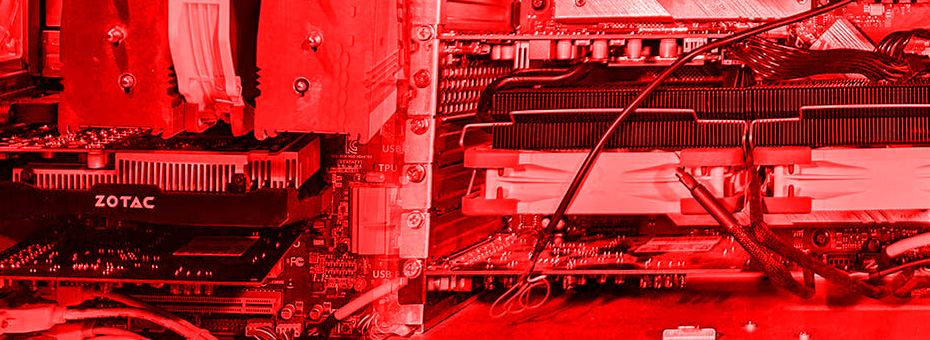
The lockups were real.
About 6 months into the life of our Geforce 1660, we began to experience lockups to the point where we didn't even get a blue screen of death. But just a system reboot. Looking at the temps on this hard just idling it was at around 58 degrees Celcius which video cards naturally get hot. but when we tracked our temps in gameplay it was getting up to 70 degrees C and chances are the thermal throttles were real and we thought it was our card that was bad (Turns out after everything we are about to perform, there was a BIOS update we did to our ASUS which it decided to overclock our G.Skill DDR3 ram. which is a bad idea.) However, the heat that the card is throwing out is a problem. And we intend to do something about it.
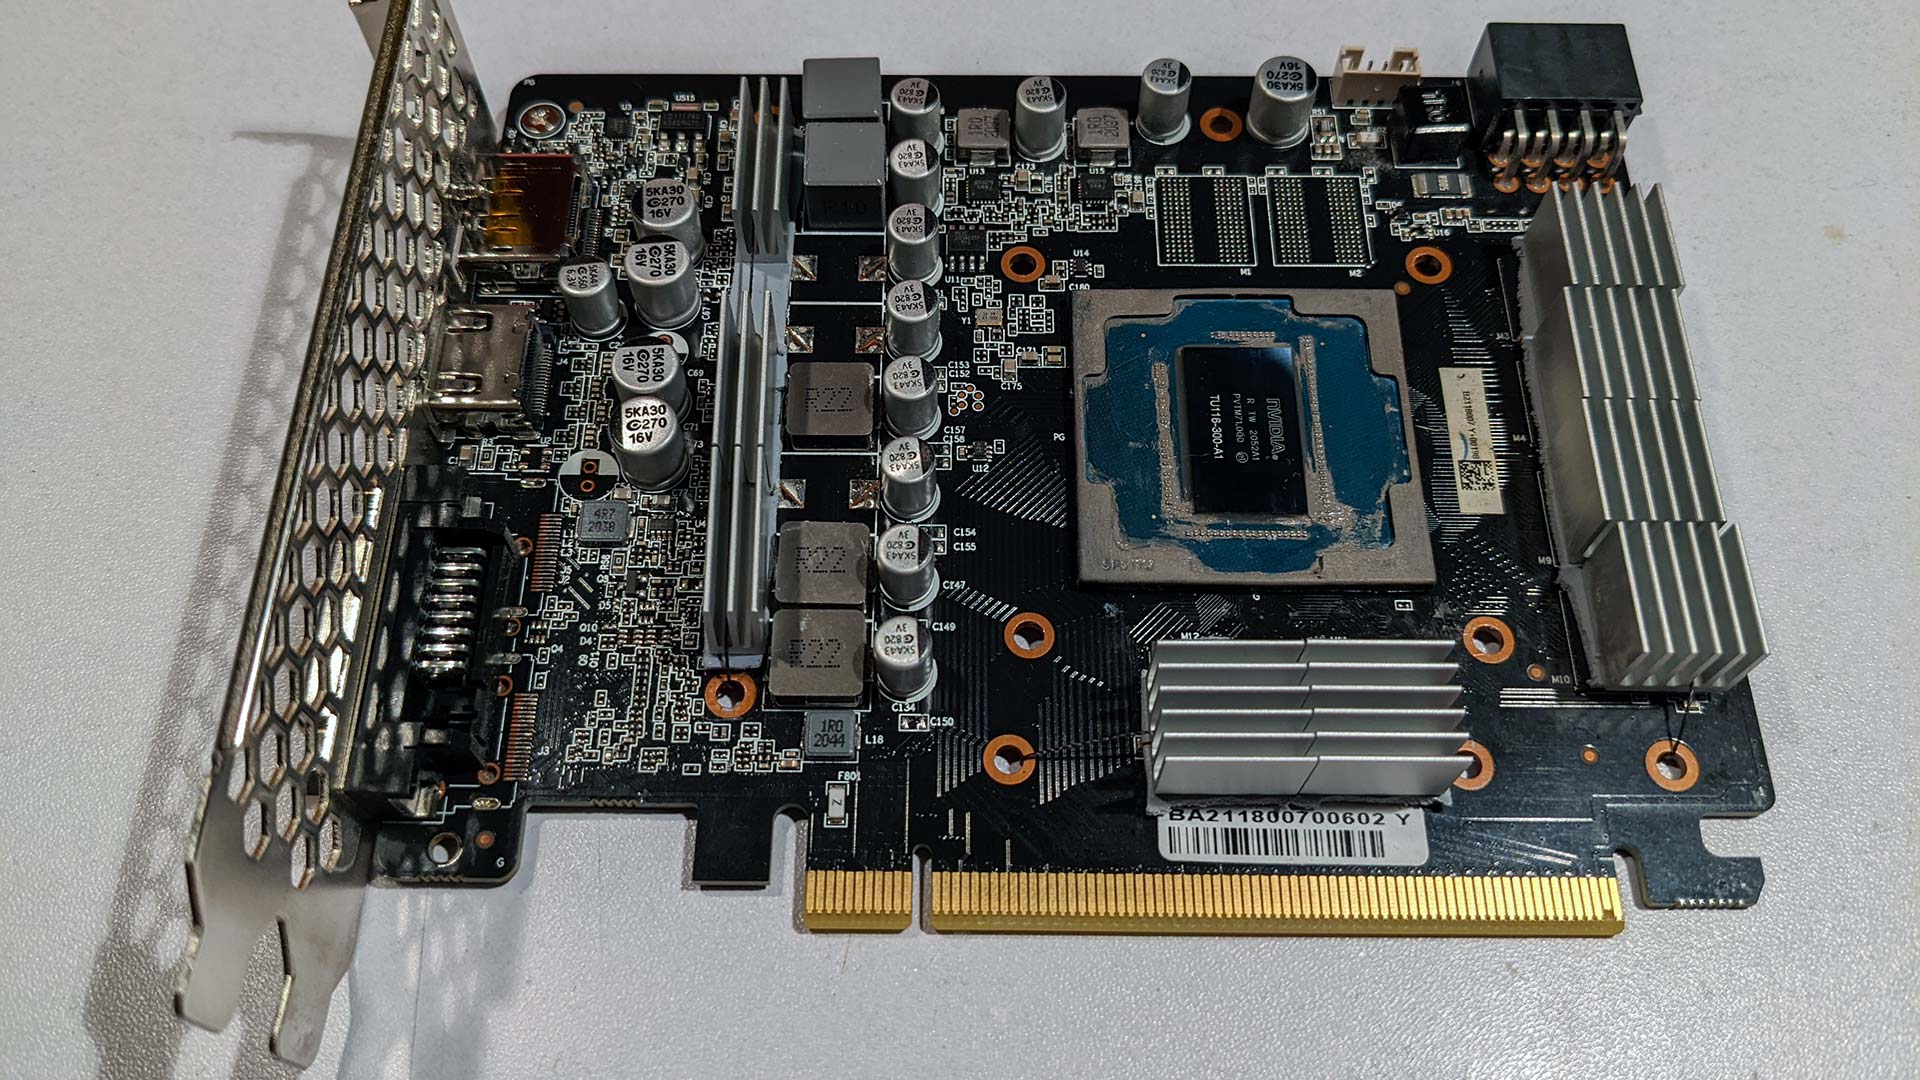
Cool that video card!
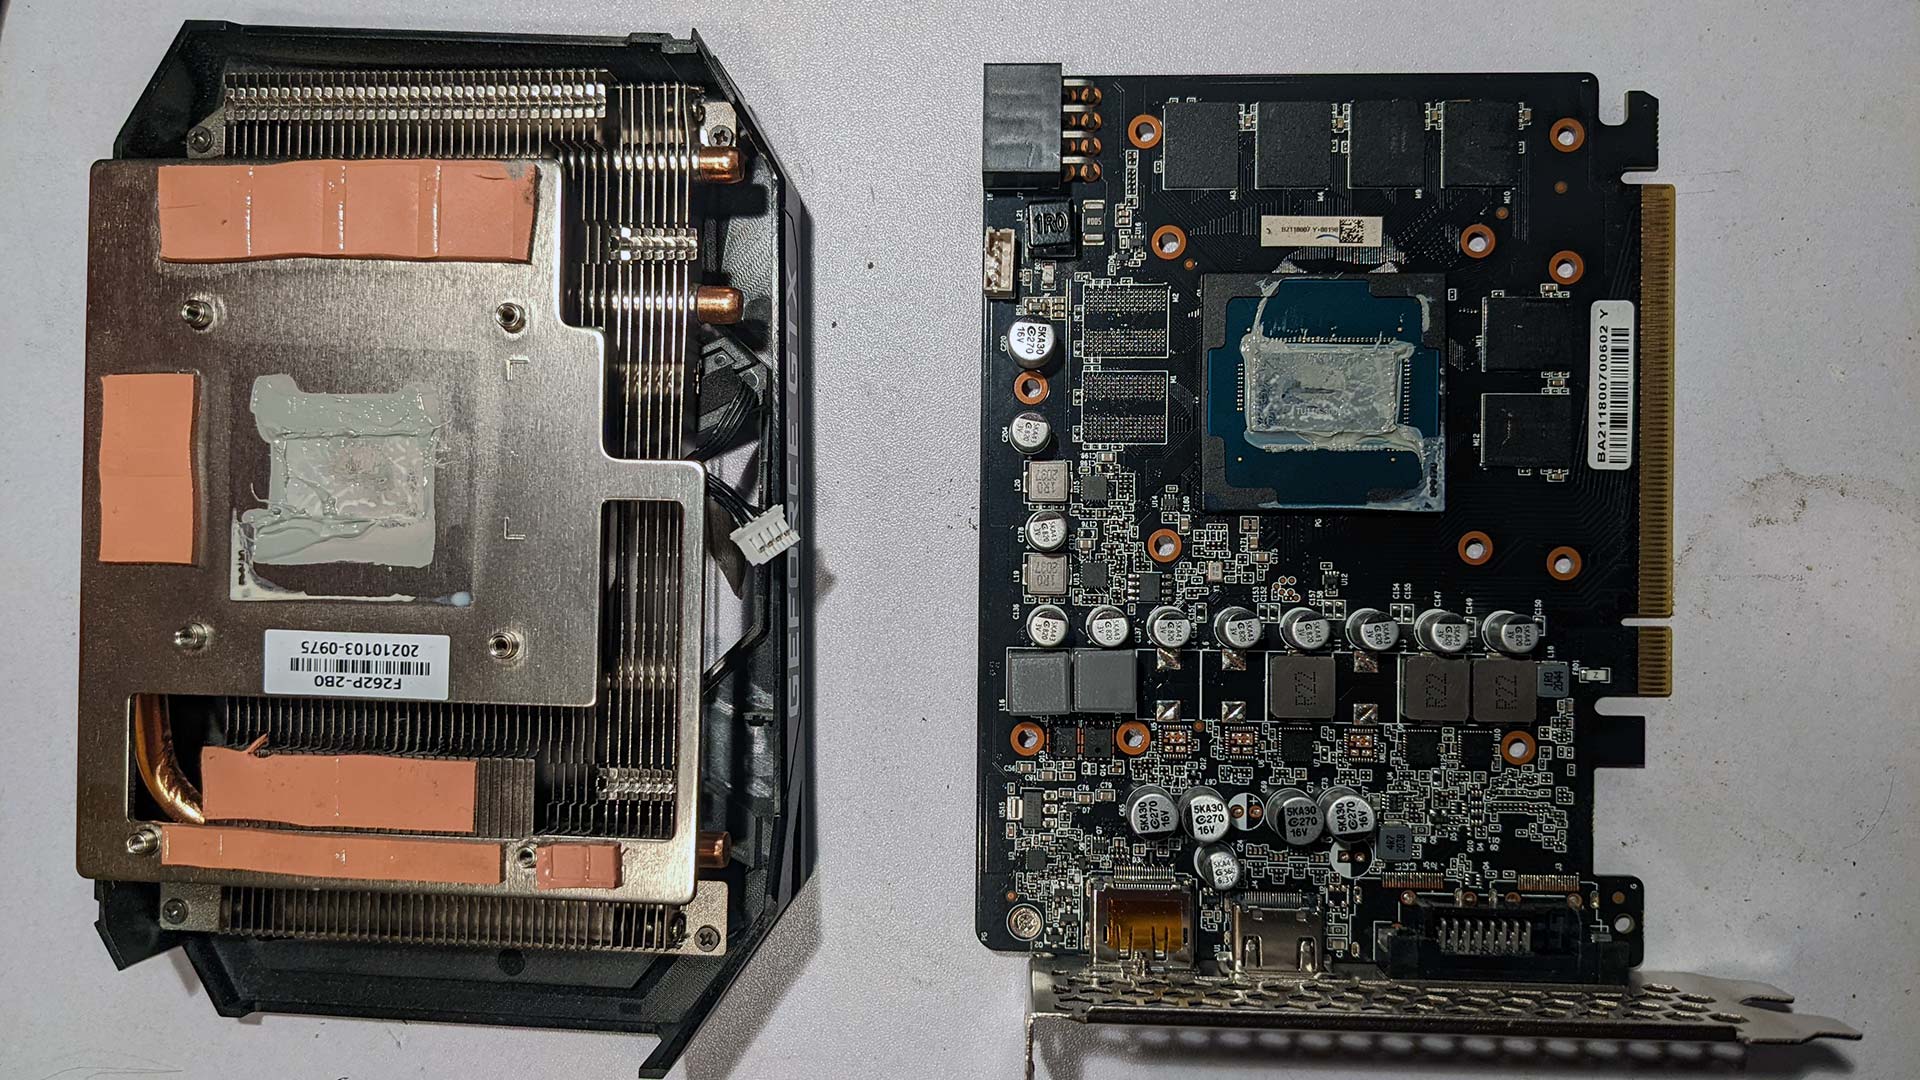
Okay, this isn't the worst thermal cooling setup we've seen in a video card. But this certainly isn't the greatest either with a 1mm thick base plate with no milling in thickness between ram and GPU resulting in the manufacturer using 3mm thick thermal pads for the ram and FETS. At least they didn't thermal pad the GPU as we've seen in some Chinese cards. The plus side is at least it's easy to clean up and they didn't commit the ultimate sin of stacking thermal pads on top of MORE thermal pads for the ram. Heat is at the very least getting up to the pipes and fins. so at least it's working. It's just far too lean on metal to work effectively.
Overkill time.
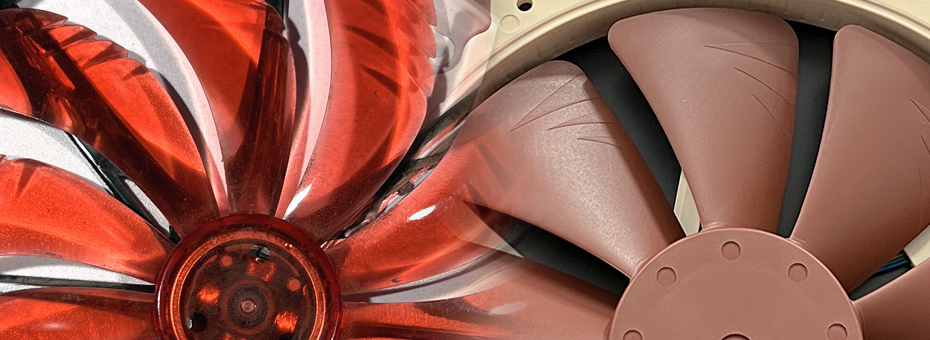
First things first. The fans.
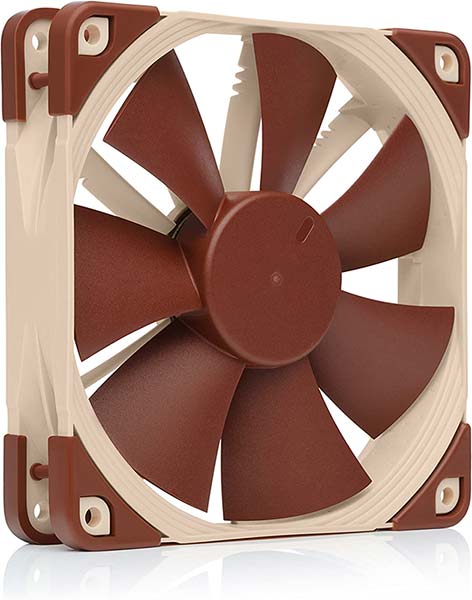
We first got some Noctua Fans for our video card just to keep the theme of our fans all the same inside of our PC. They are 120mm which if you read on you'll be seeing where these bad boys are going.
As a note: We probably should've spent a little more for the Noctua A12x25 just to get more airflow. But! These are perfectly fine!
Buying and modding that heatsink.
In the old days of computing. There was a selection of aftermarket GPU coolers. the "Iceberg" is one that I purchased for my Geforce 480GT. Wish we had pictures of it. But the fans would eventually make too much noise and locked up rendering the entire cooling system useless. On top of that, the fans were completely proprietary which was crap in itself.

So after a bit of looking around in 2022 we were brought to this heatsink. Although the compatibility specs call out a lot of older cards there have been users that have been mounting this bad boy onto their 20xx series Geforce cards. So, we gave it a shot for $80 USD.
Guess what? the Dye on the GT 1660 is different than everything mentioned above! Fuck!
I can't blame the manufacturer for this. They can't predict the future. As for WHY Geforce changed their spacing we simply do not know. We guess our brains are far too small to understand why it was necessary to change the spacing of the dye to accommodate that style of the heatsink. But the fact of the matter is that this is a mod. We accept this as a challenge to make it work.
Now, two of the screws would line up perfectly on the card. in the photo, the upper left and lower right are lined up without any modification. There was no way we were going to bolt in two screws and call it a day. We're not monsters. At least we don't think we are!
This required some extra hardware:
- 8mm (I think) brass standoffs with 2mm screws, we got a kit of all kinds of standoffs on amazon and choose the ones closest to the screw-in standoffs Morpheus 2 provided.
- 2mm screws - as we will be tapping our own holes we will not be spending the time to thread the screws. instead, we'll reinforce the bracket with our own screws.
- 2mm drill bits for our rotary tool - we burned through 4 bits to punch two holes through the brackets. Taking a lot of time to make sure we didn't hit any of the heat pipes or damage the fins.
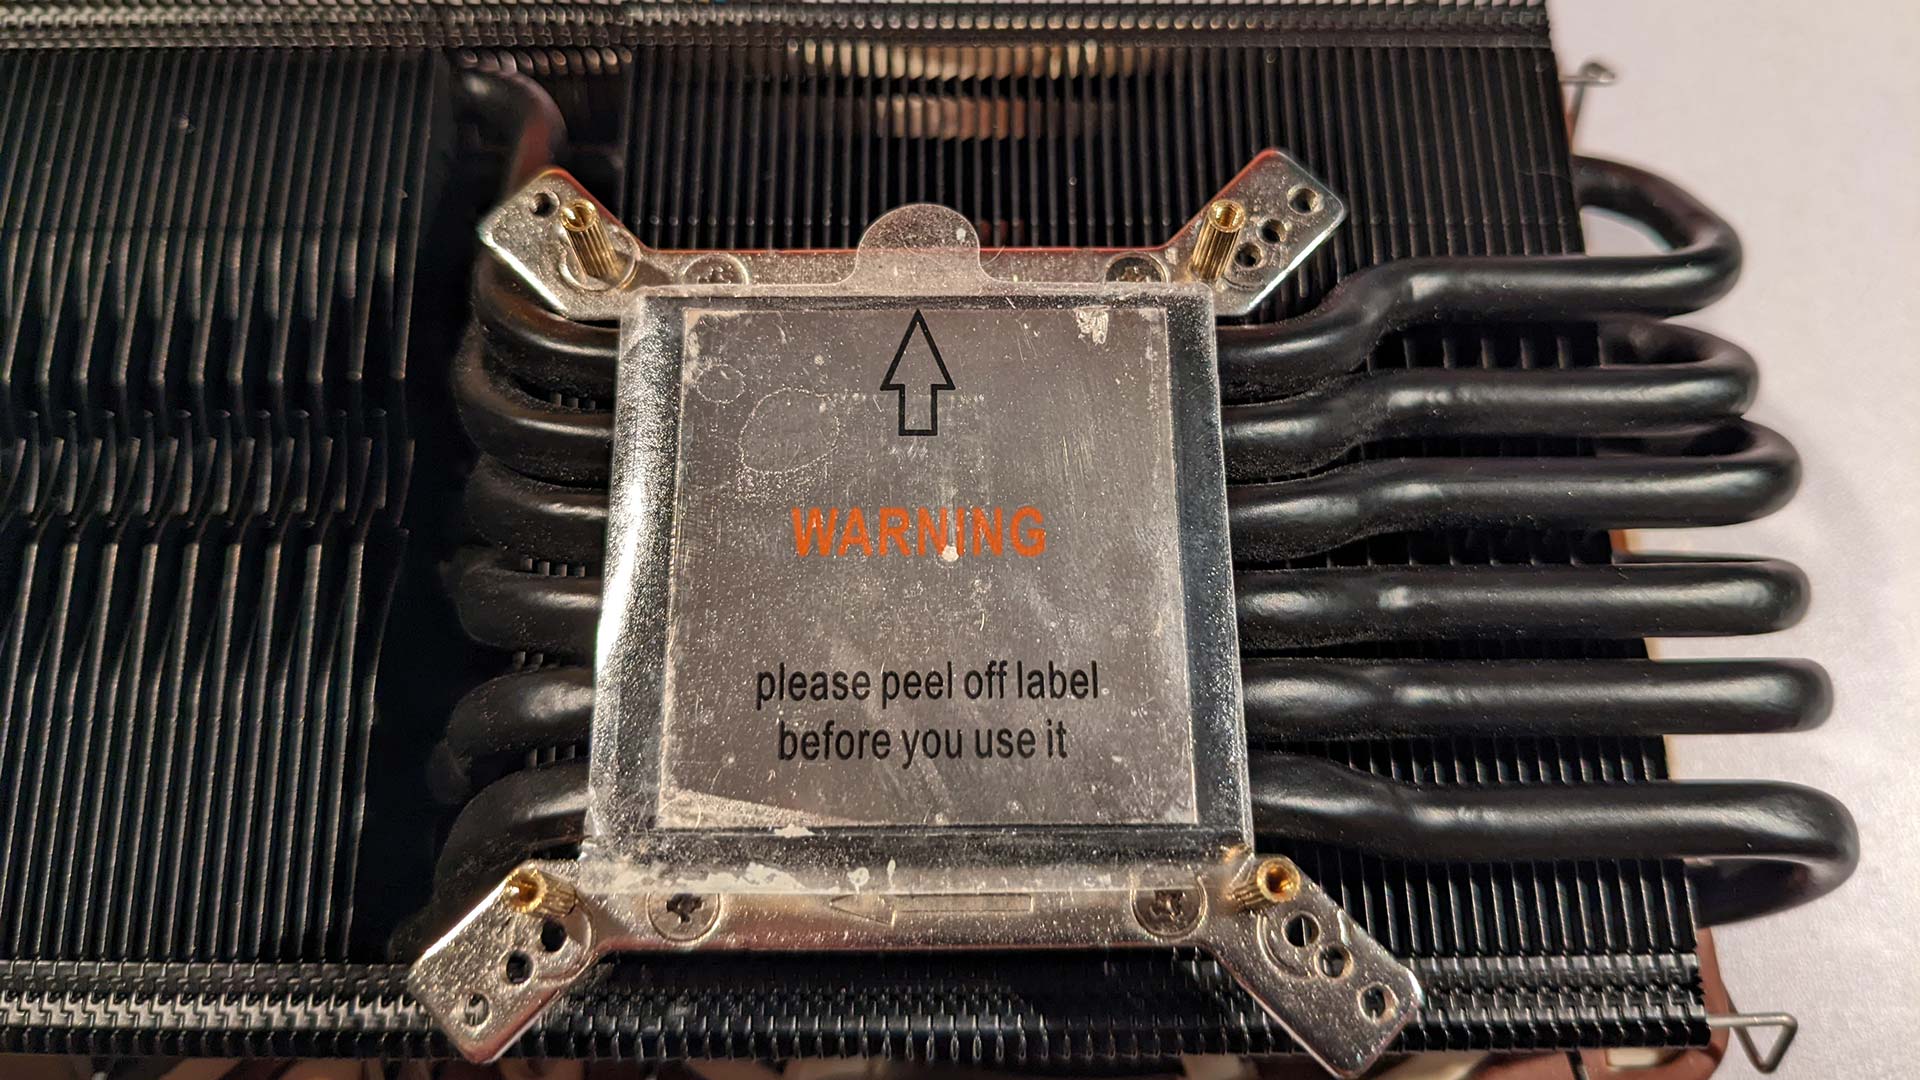
We waited until the last possible second to remove that label which underneath had a mirror polish finish to the heatsink.
One of the complaints we saw in the comments section of the Morpheus II is the thermal pads that come with it do not stick to the heatsink at all. Even with purchasing some premium GELID 1mm heatsink pads it was still difficult to keep them on. Ideally, you need the heatsinks to warm up a little for the thermal pads to actually do their magic and stick. So, I ran some threads to temporarily hold them in place. We purposefully left the fans unplugged, put the main heatsink on, and let the card heat up a little. After that, we cut the thread and they were solid.
So, I didn't have to buy premium thermal pads. There's just not enough surface area for them to grip all too well.
One final thing. Because the heatsinks are a little too close to the heat pipes because of the GeForce 1660 being a half-height card. I had to shave about 3mm off the center two heatsinks on the right with a carbide bit from my rotary tool to make sure it all fits.
Now with some Grizzly Cryonaught grease let's put this bad boy together!

another super-fun mod to do to the Morpheous is the cross-bar provided by them was perfectly solid in the middle. This is a major problem because on almost every modern GPU card the capacitors are in the center (Those giant black or sometimes orange chips on the opposite side of your GPU location). It's not just a bunch of SMD-mounted caps and resistors that can easily be squeezed down with some 60 shore-A durometer rubber. So, for those who performed the mod on their Geforce 20xx, We seriously have to question if all of the pressure is riding on their caps. If true; How did they NOT crack them?!?!
Anyhow, the Carbide disc and rotary tool took care of the issue. Granted we were not the cleanest about the mod. But it worked regardless!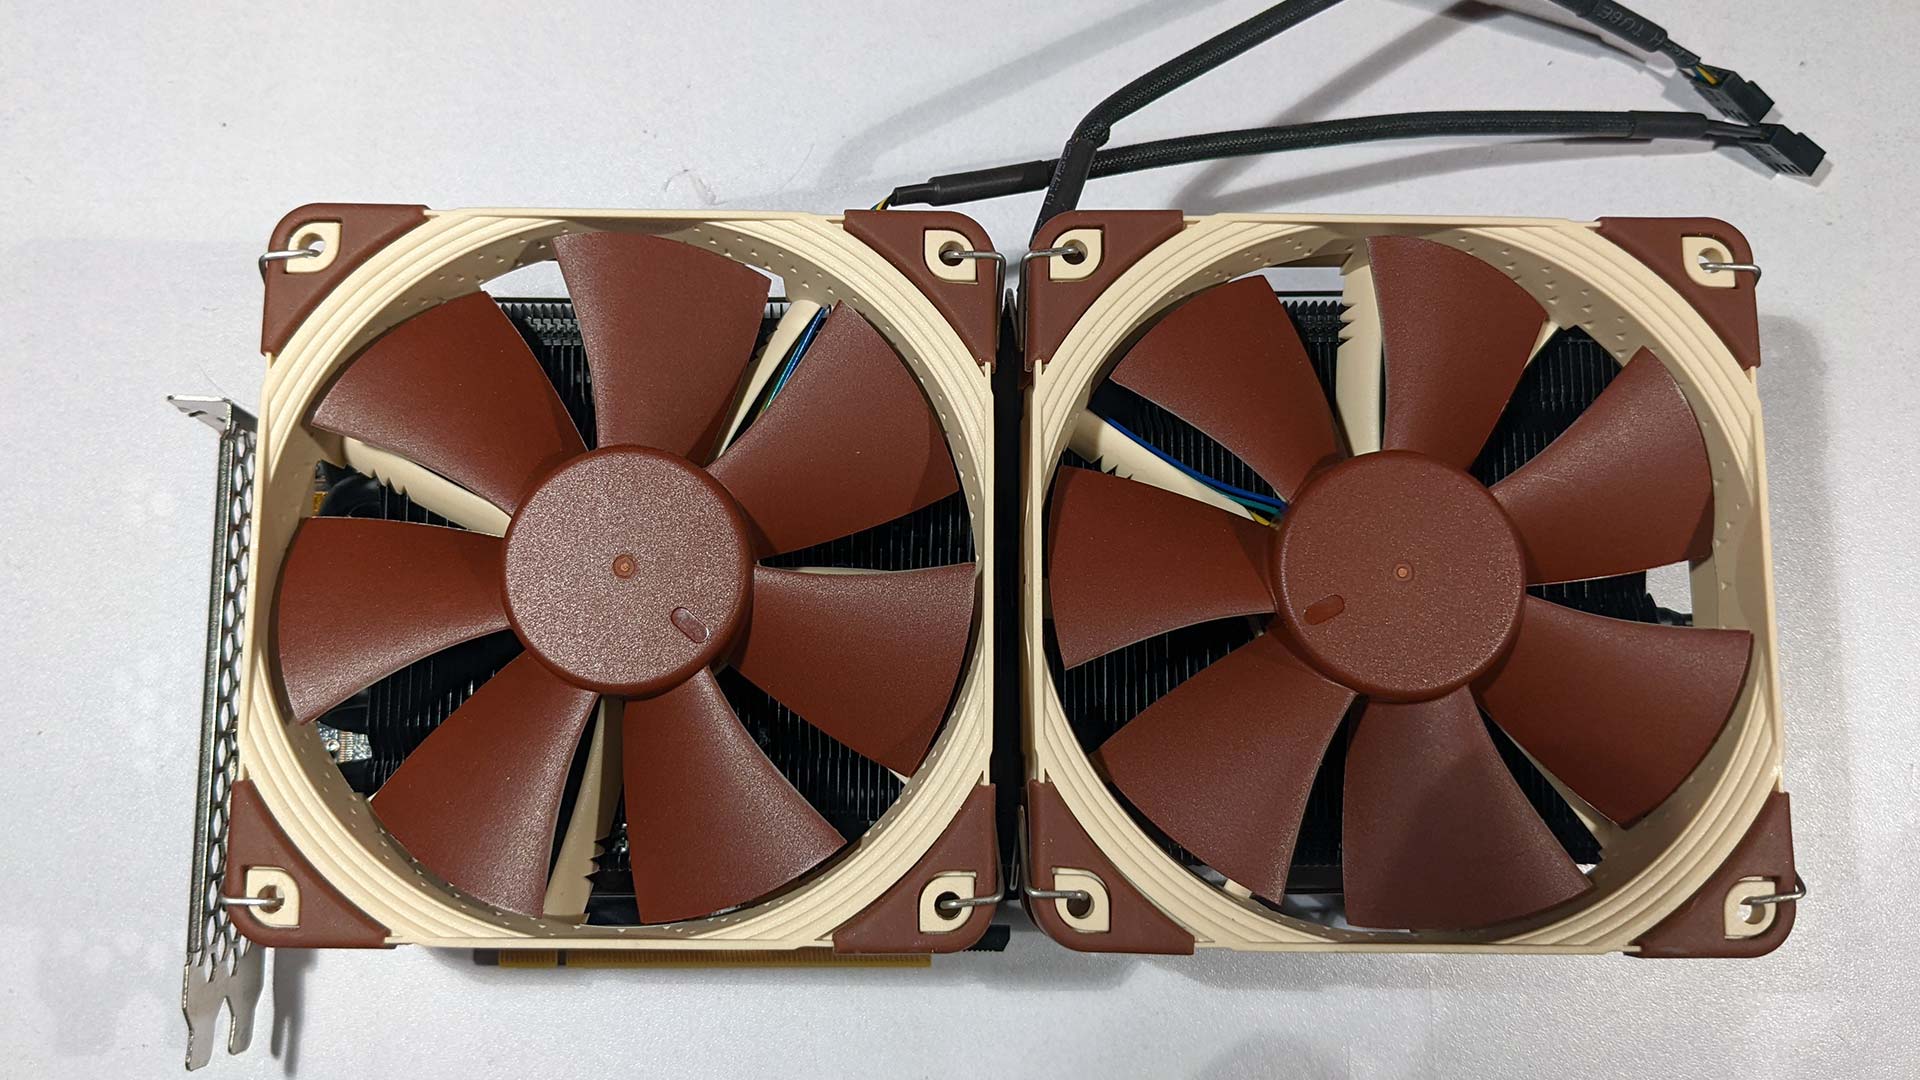
So, we turned a simple half-sized Geforce 1660 that had some heat issues into a behemoth that eats up to 4 PC slots. The 120mm fans immediately make me grateful for the size of my PC case. And because we're one of those old-school peeps that have a Sound Blaster card. We will require a full-sized motherboard as the video card will eat up 4 whole video slots and we totally were not feeling like getting a PCI-16x riser card as the Crypto-People do.
Another thing, Although they sell cables to convert the onboard 4-pin port for fans on the GeForce to regular fan connectors. The Noctuas simply did not want to power up that way. This means we'll just route them right to the motherboard and control them from there.
That was a lot for just the video card! Should almost be an article on how we modded the 1660 but it's all about the grand design!
The motherboard and "odd colors = saving money?!"

Okay, after a little bit of shopping and watching motherboards go for $200-300-400 dollars. We're totally not feeling that and decided to go with the ASUS Strix 8550-A. Why this model? Because the 8550-B which is a different coat of paint and that was it somehow costs $40 more. PC shopping got really weird where unpopular colors mean legit affordable hardware. The color thing even happened when buying RAM too.
Which is cool by me! Give me the pink barbie Geforce 3080 with OSHA orange accents while you are at it NewEgg! It won't matter on my PC! ;)
I guess it also has RGB support which we are totally not going to use as well.
Processor
As for why we went for the Ryzen 7 X3800? I was going to get a Ryzen 9. But when this popped for $120. Fuck, I'll get that too!
What's perfect about this board is my gigantic video card will fit and we're still able to access my M2 and PCI 1x slots. perfect.\
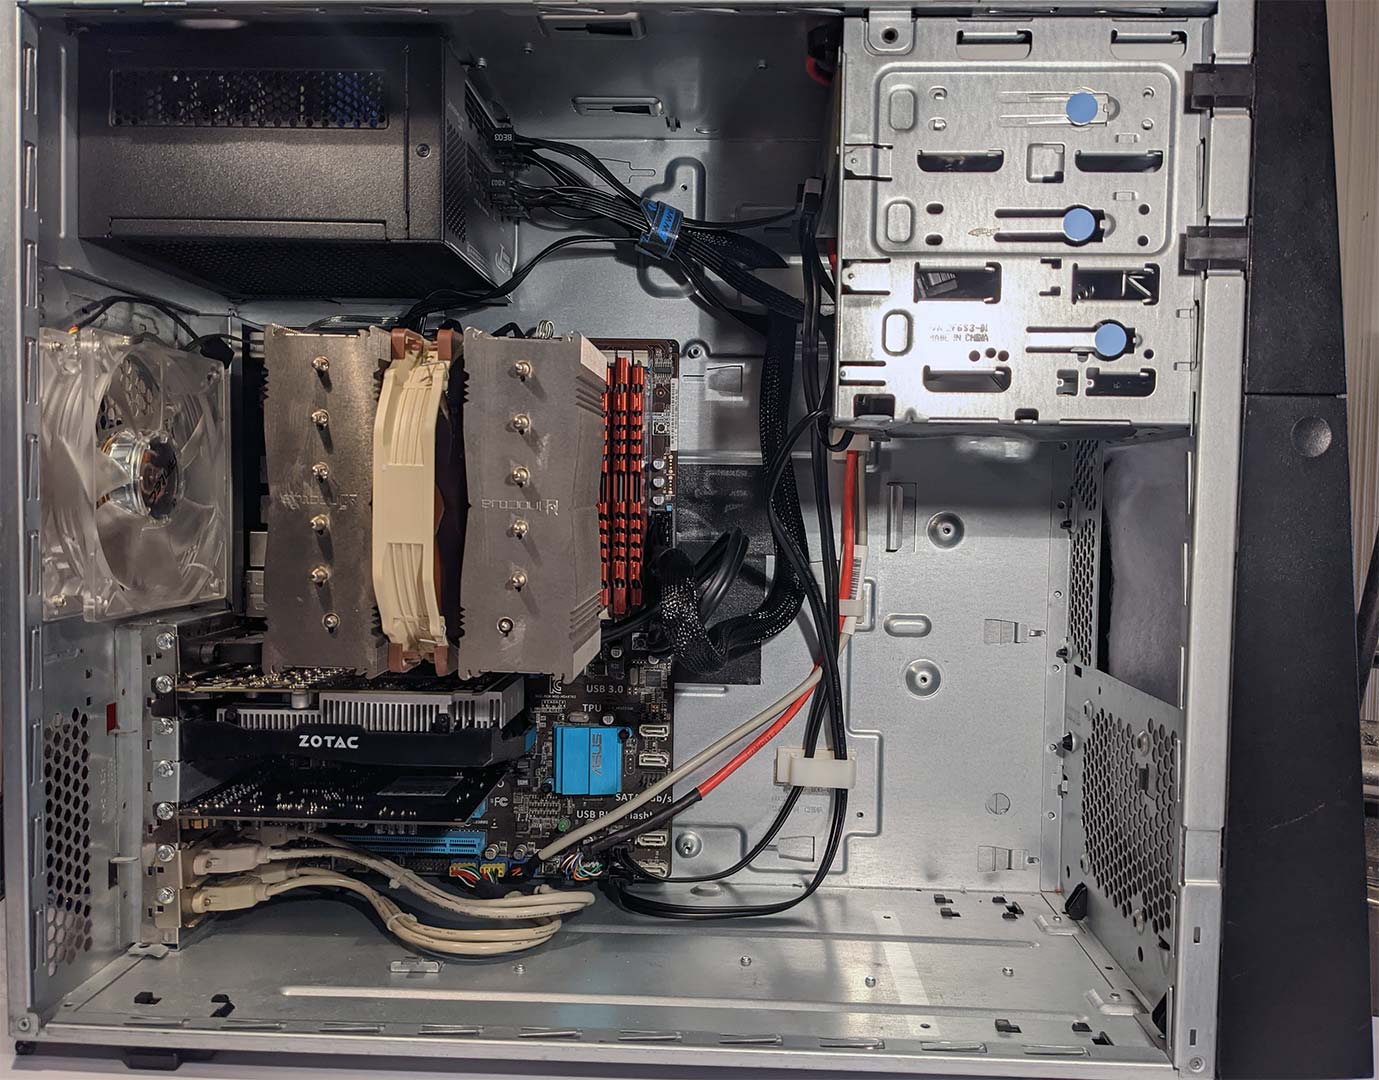
Assembly time.
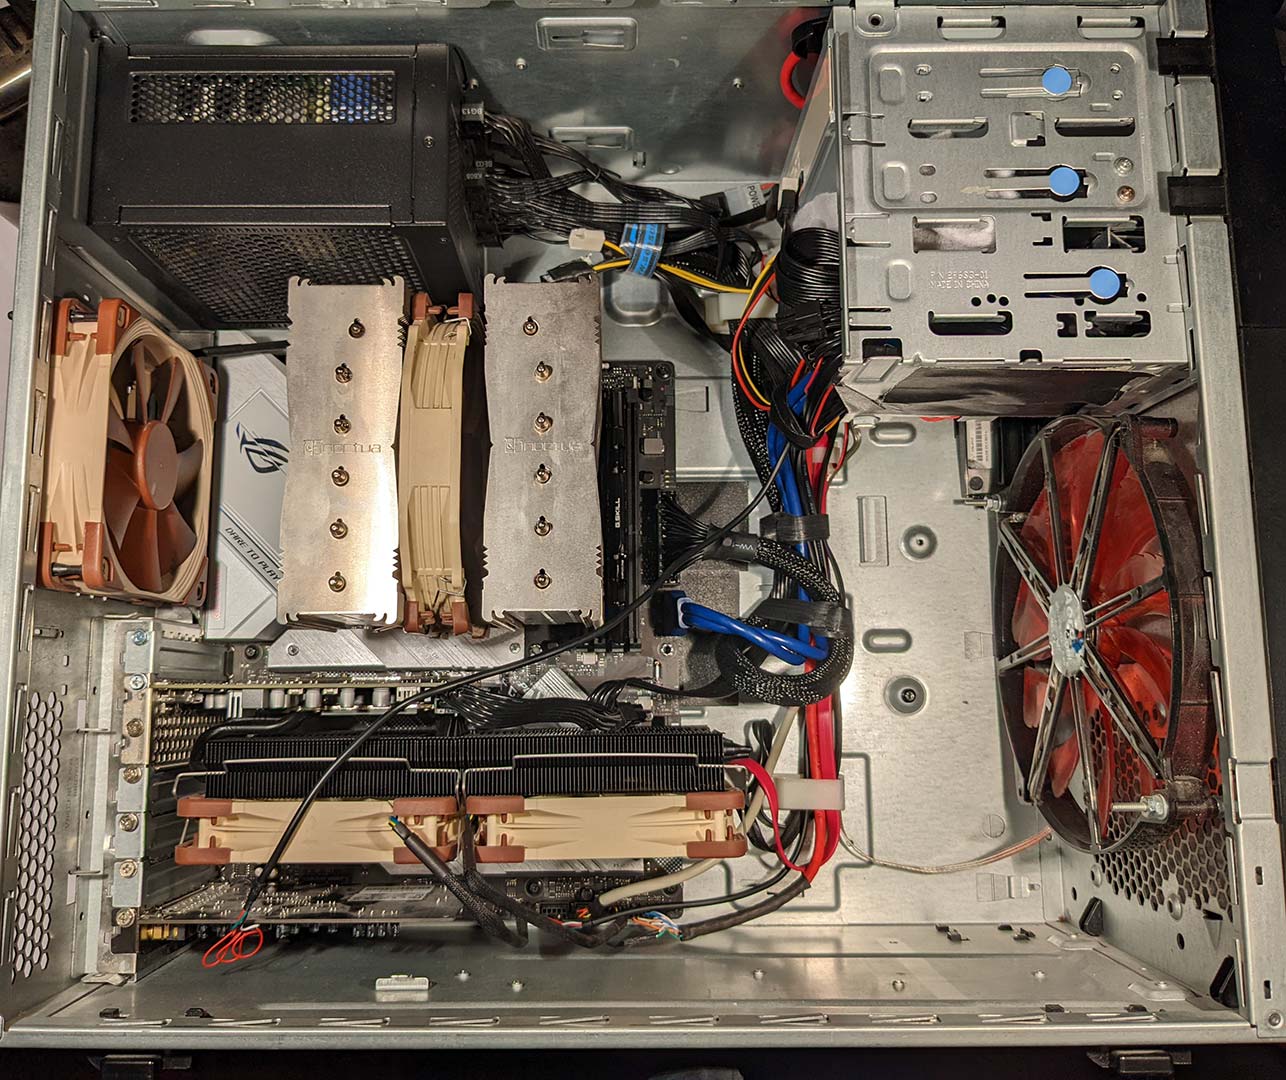
There were a few points of re-installing everything that worried the hell out of us. First, is the spacing between AM3 and AM4. Luckily I didn't have to buy a new bracket as there were holes for the Noctua to simply mount to the AM4. Just had to flip it over and change the spacing. So, super-bonus points to Noctua for making such a well-engineered product.
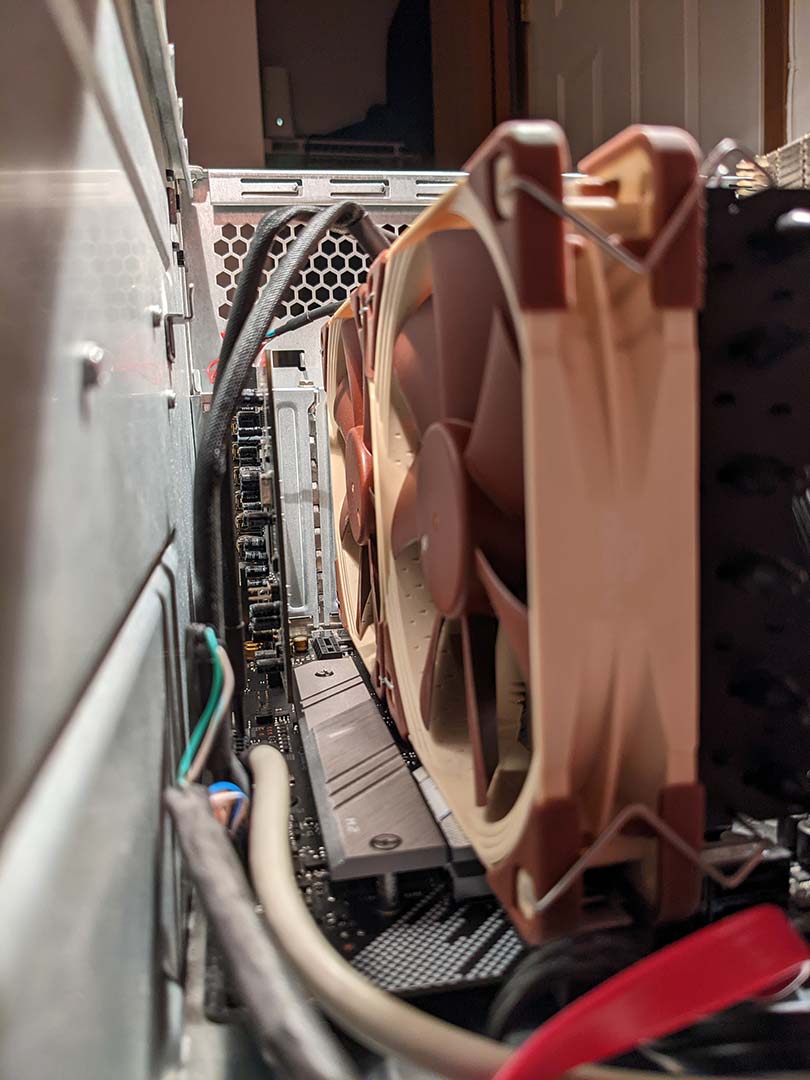
The second thing was the video card. With respect, we were worried the heatsinks of the motherboard would not allow us to mount the video card. After minor adjustments with the dual fans, it was taken care of leaving a rather snug fit between the motherboard heatsink and the GPU heatsink.
Cable management.
Some may rag on us about cable management. To which don't worry! we got a headphone audio extension cable on order so it'll be a part of the cable wrap system. That lone cable bothers us too. Despite all of the wires running from the front panel to the rest of the system. We tried our best to keep those cables tidy. We actually like our front headphone panel because when editing I wish to hear everything at a higher volume than normal gameplay.
TO-DO list.
- Still got to put in some soundproofing foam.
- remove that 200mm red fan with a Noctua.
- get the audio headphone/microphone extension cabling.
- Buy an M2 drive. Because I'm starting to actually feel the lag off of that SATA SSD drive.
Results.
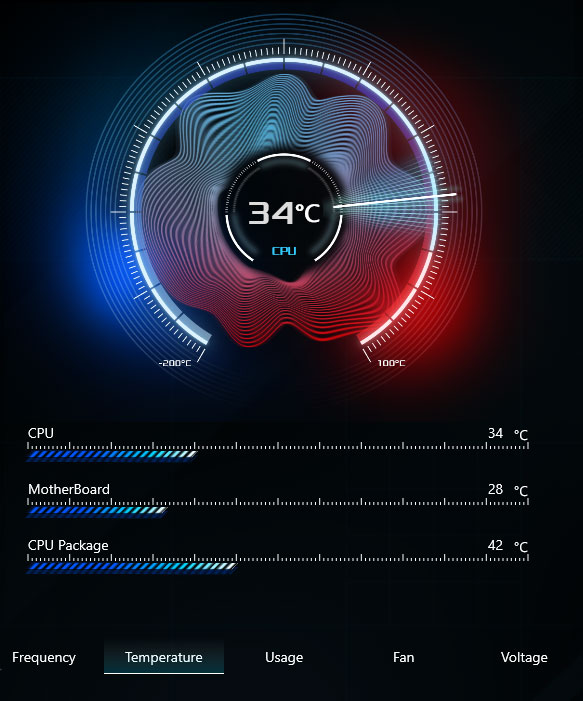
after spending about $630 on it. I'm super happy with this build! Now, in case you are wondering about what my temps are with all of that heatsink action here's a screenshot from my ASUS Armoury Crate Dashboard. Ambient temps are 22.7C
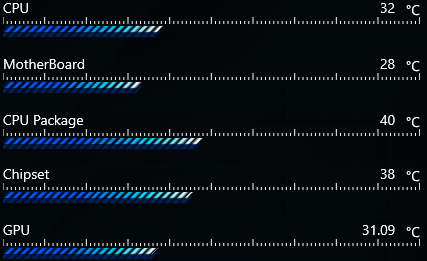
I think it's kind of funny that when the PC is idle. the chipset is the hottest part of the motherboard! This is amazing! And if you are wondering about what happens when the PC is under load. when playing Cyberpunk 2077 the GPU would jump up to 53C and stop. which effectively under load temps are the same as an idle temp with a stock cooler.
The CPU Package sensor is a new thing. Apparently, that's the sensor in the cores of the CPU itself. It likes to bounce around a lot by +/- 8C! Not sure if anything can really be done about that however, temps are not terrible so it's within operating specs.
Now, is installing a giant heatsink onto a graphics card in this day and age an original idea?
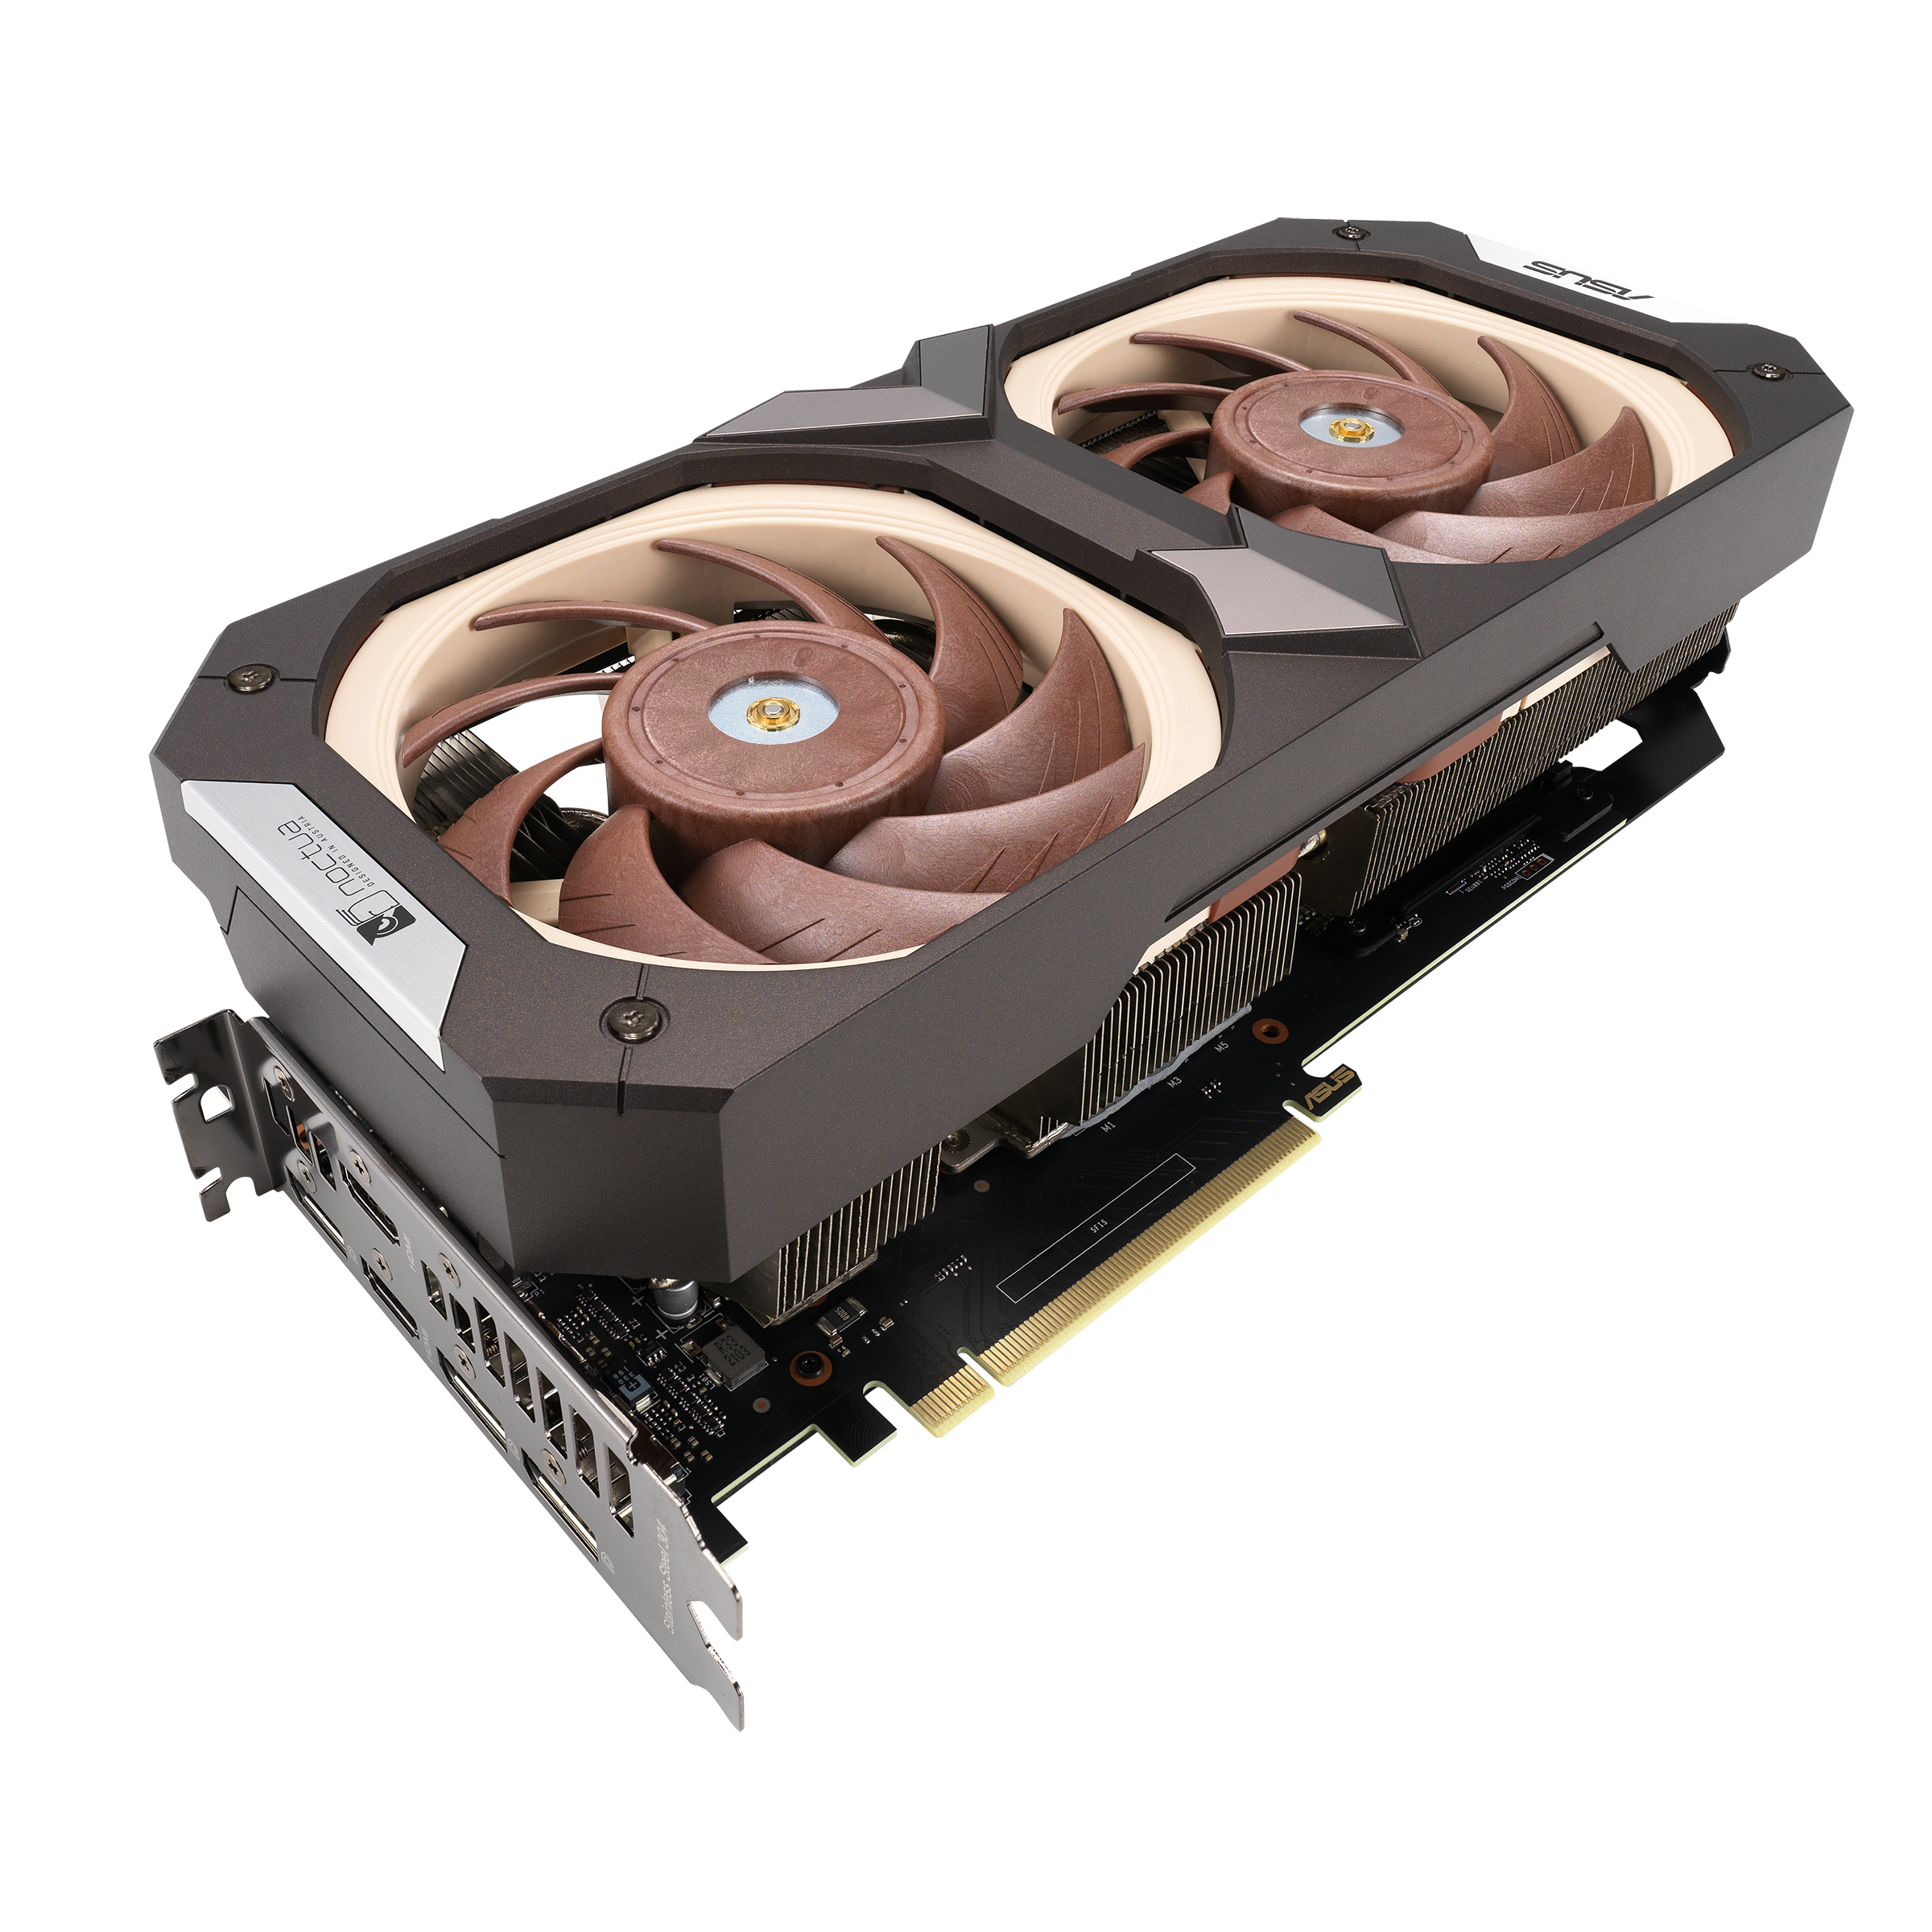
No, it isn't thanks to ASUS releasing a 3070RTX Noctua Edition. But the PC is cool (at least in temperature!), and the PC is silent. And that's realistically all we care about!
So! My specs as it stands!
- ASUS ASUS Strix 8550-A Motherboard
- AMD Ryzen 7 X3800 @ 8-core 3.8Ghz
- 2x – G.SKILL Ripjaws X Series 16GB DDR4 SDRAM DDR4 4000 (32GB Total)
- Samsung 500GB SSD drive.
- LG DVD-RW drive
- Noctua NH-D15S 140mm Heatsink and CPU Cooler
- PNY-XLR8-1660-Super 6GB DDR5 graphics card.
- Creative Audigy 5rs
And we're totally digging the FPS in Cyberpunk 2077.
Memory Issues.
For some reason. My memory is stuck at 2666 GHz. When checking the forums there is a LOT of fingerpointing as to why. However, since my processor is running at 4.4Ghz using all of the stock BIOS settings. This could be because ASUS is sensing our processor's low temp and decides it's going to push it a little. Not entirely sure. we'll just leave it be and wait for some BIOS updates on the ASUS to see if RAM detection gets better as it often happens.
Update 12/03/2022
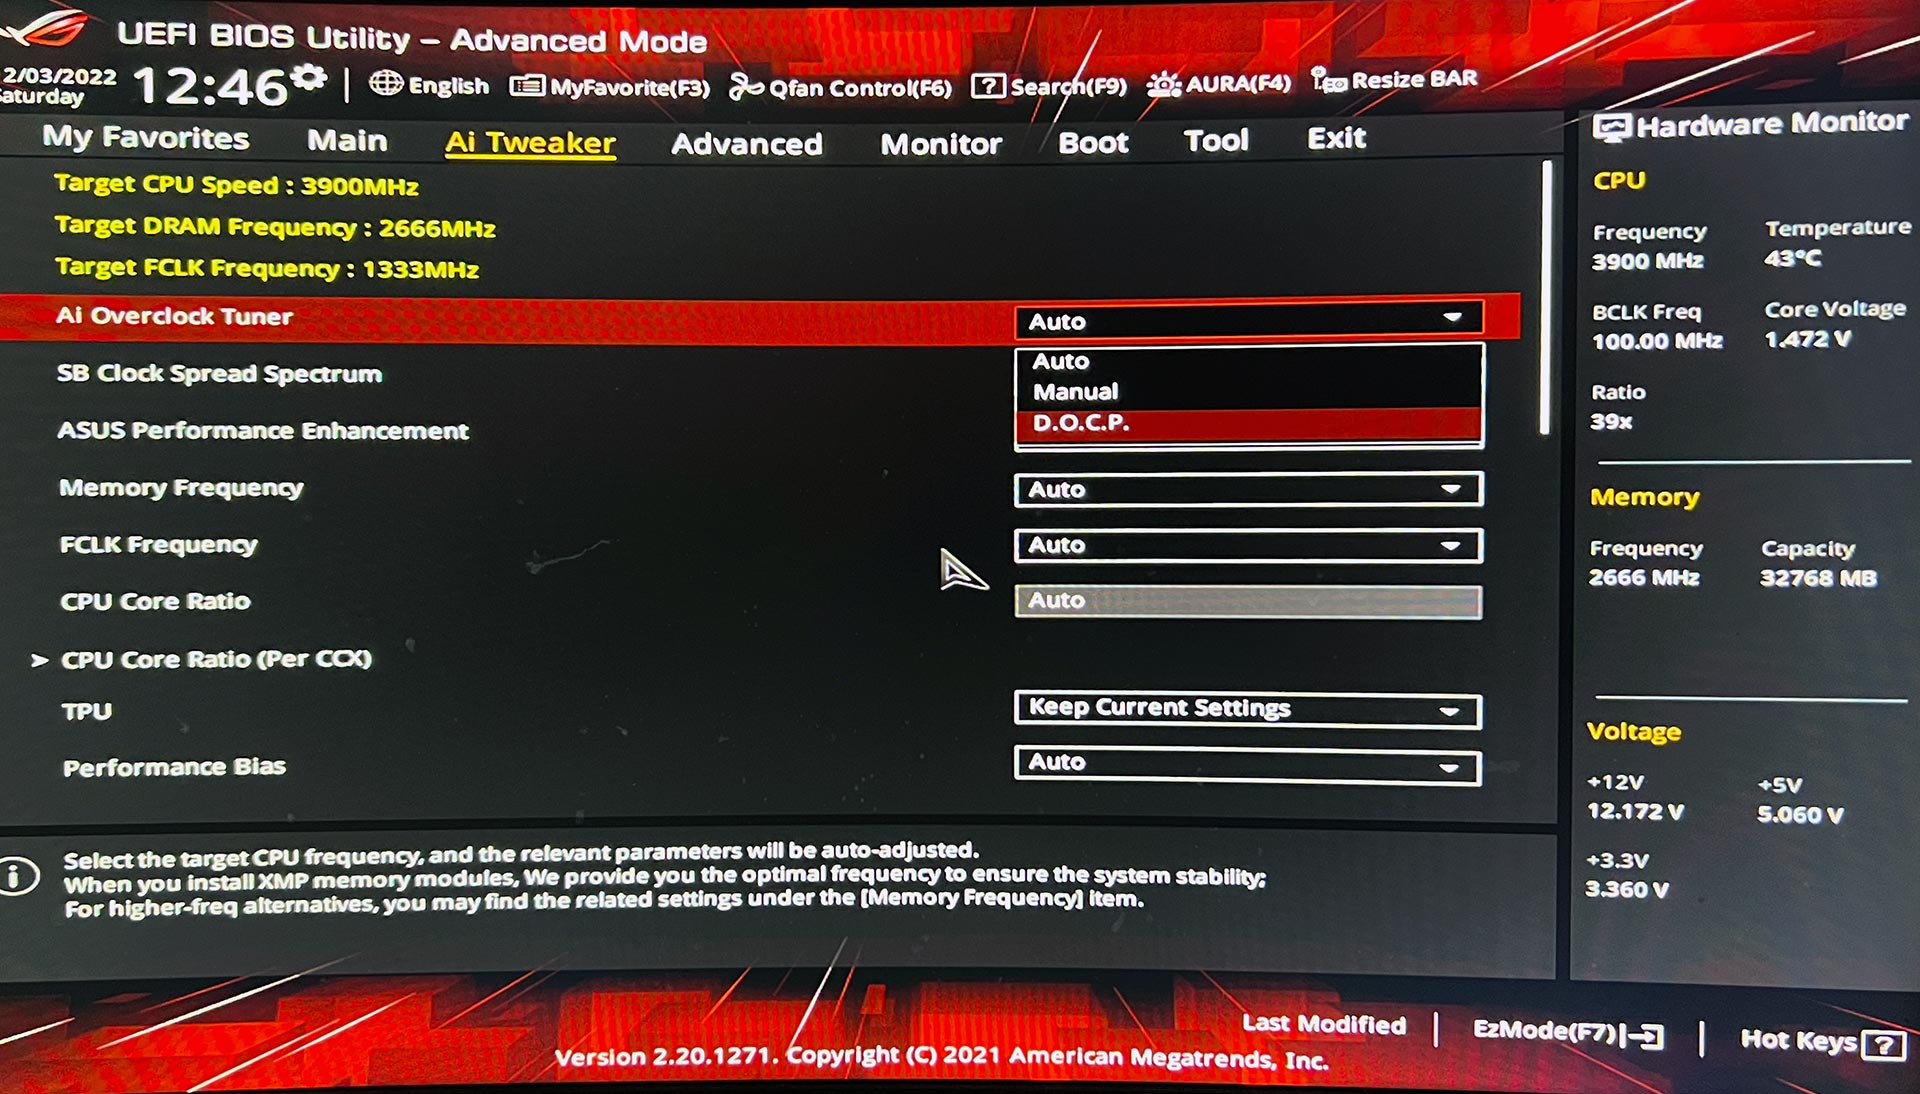
Thanks to a reader "KK" for pointing this out. But when we first ran the AI-Tweaker to turn on XMP / DOCP . It was discovered that auto-detection to bring it up to 4000Mhz isn't elegant at all.
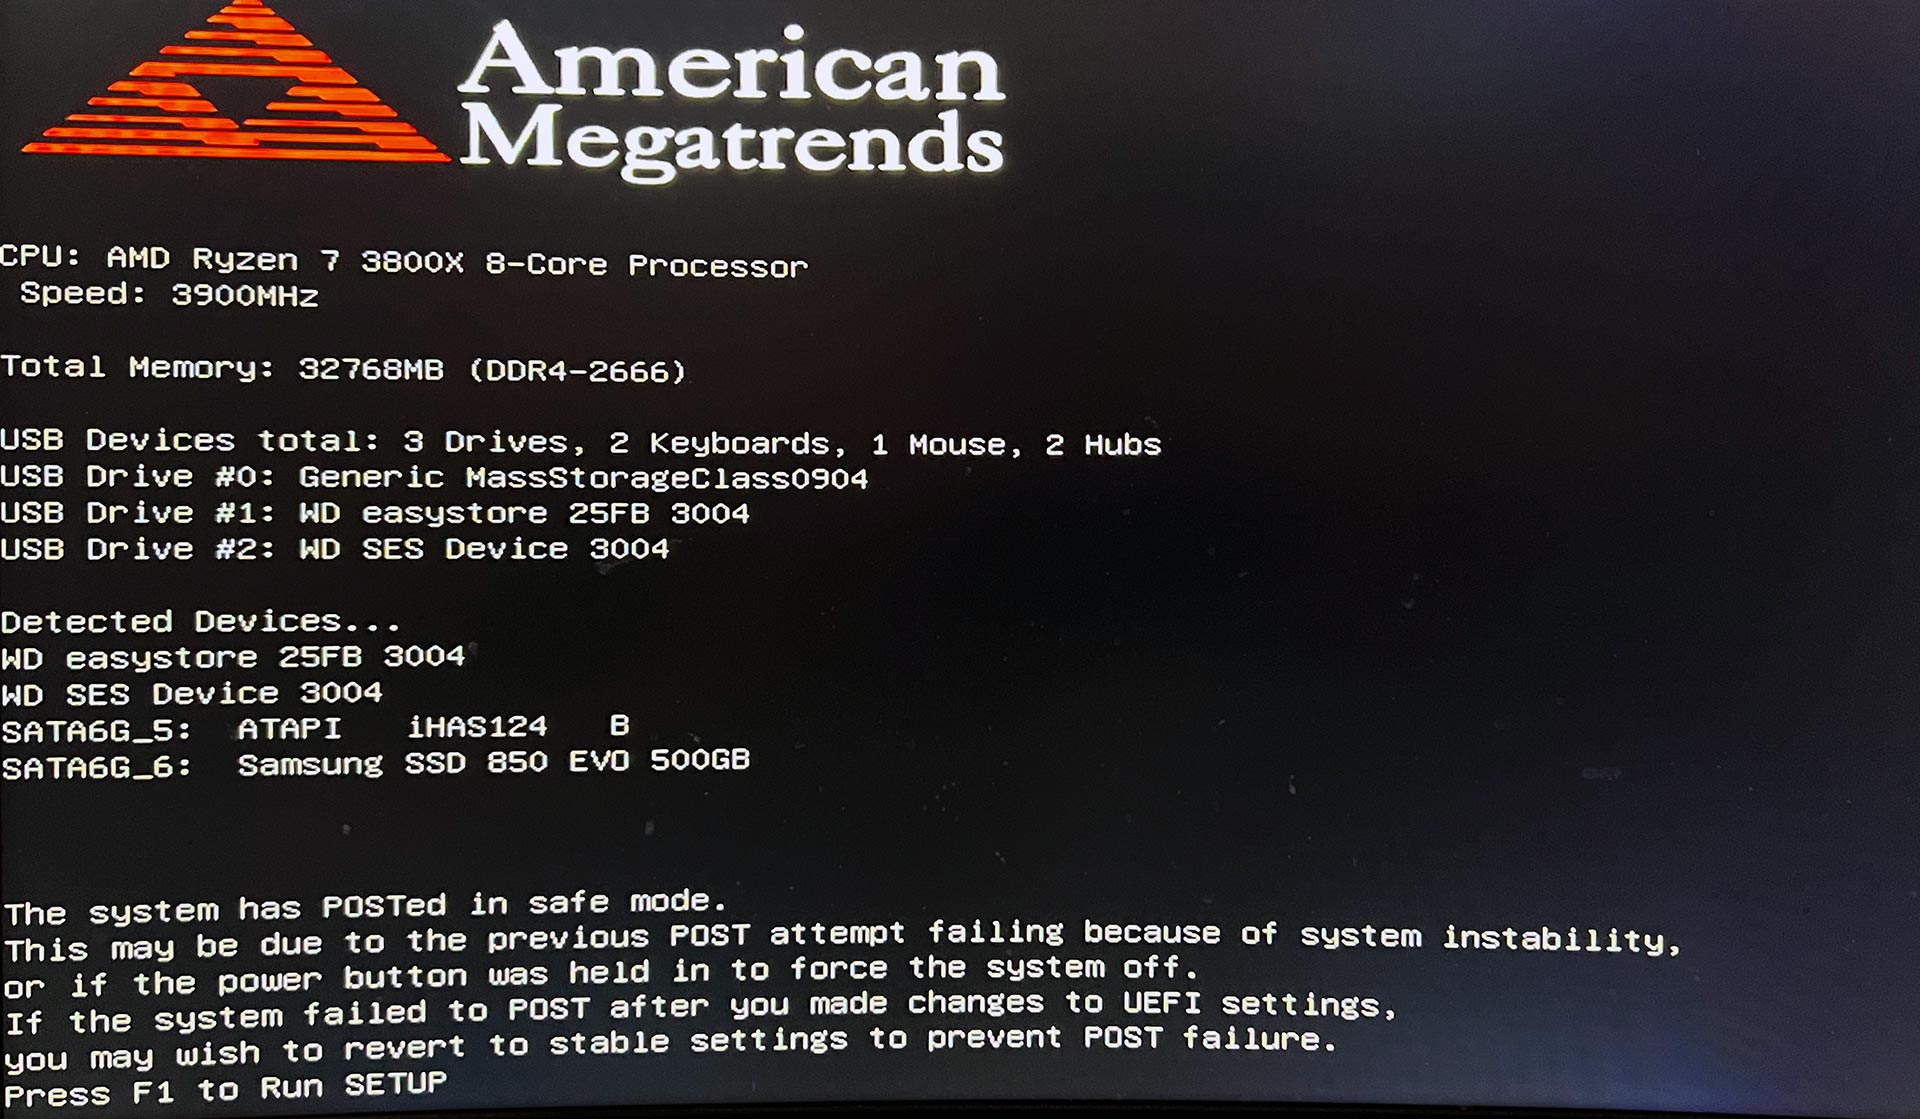
This resulted in my system restarting 3-4 times before coming up with the error above.
It was discovered with DOCP that we had to slowly step ourselves up to the appropriate RAM speeds. Turns out the best we can get G.Skill is 3200Mhz. Which is certainly better than 2666Mhz. But nowhere near the advertised spec of the memory speed. More tweaking of timing and power may be required to go higher. In the meantime, we'll take this as progress but not a resolution as to why G.Skill failed to deliver. And thus, the finger-pointing continues if it's ASUS or G.Skill that is at fault here.
Final thoughts.
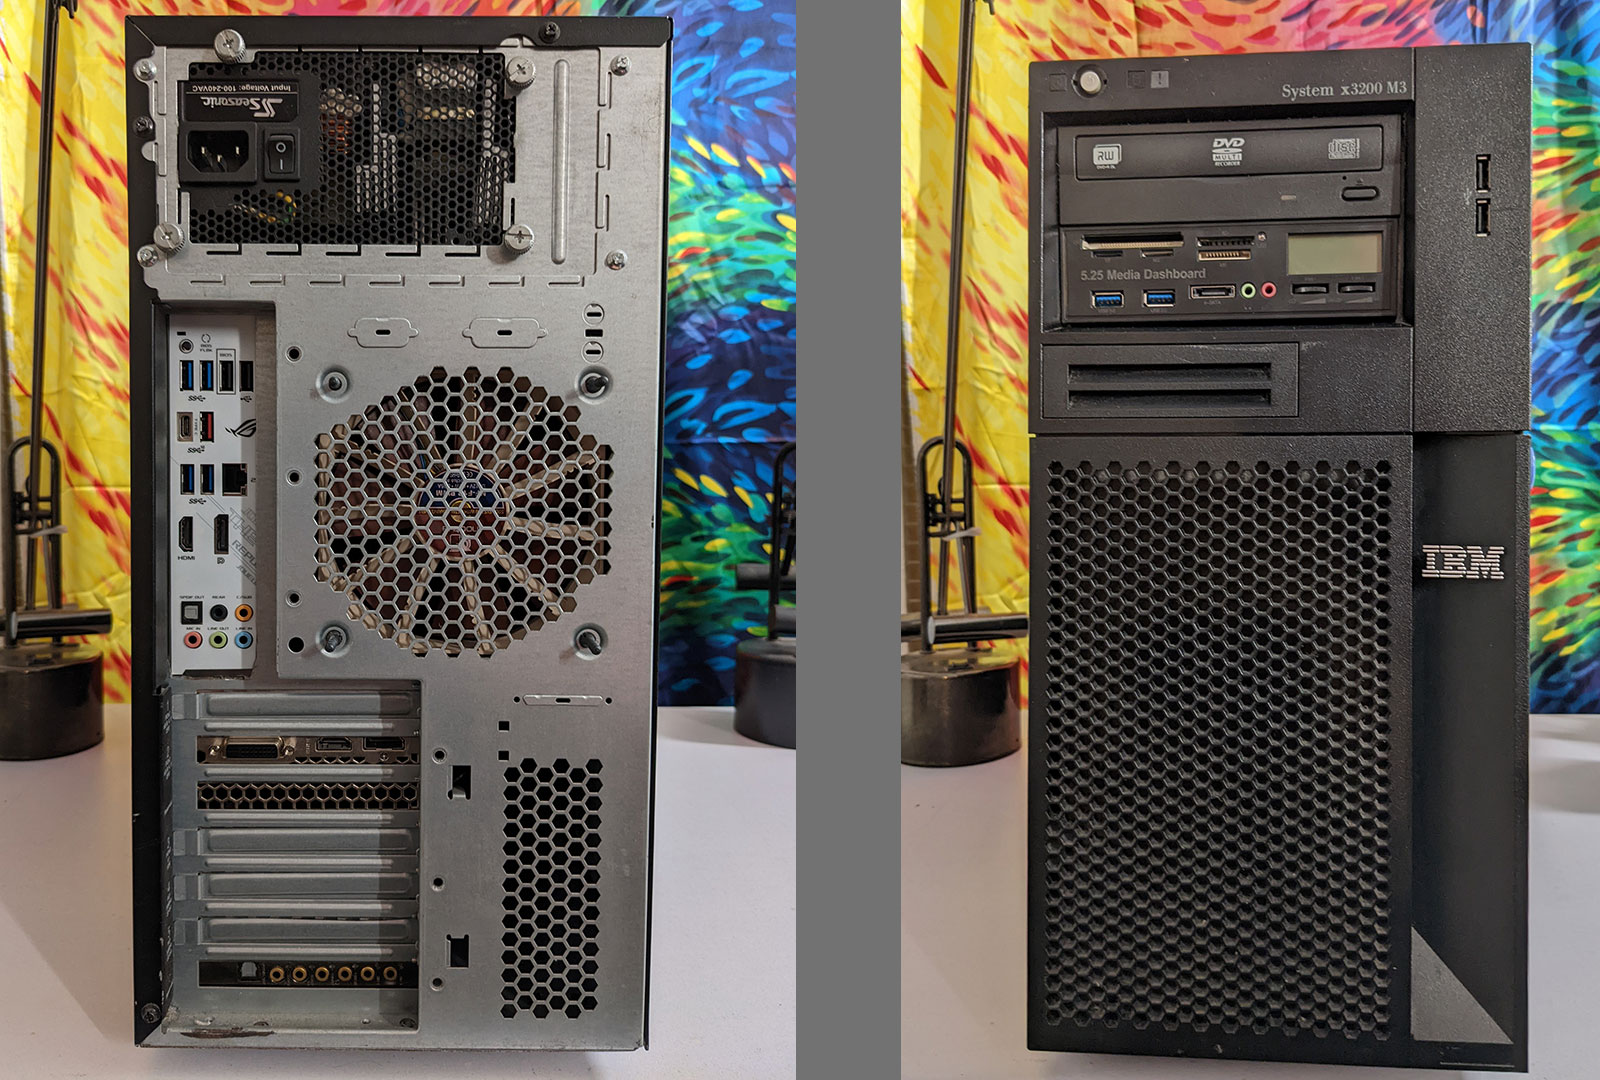
We love this PC! It's fast. It doesn't freak out when we render video anymore. It doesn't lock and crash. We added that front panel to my system a while back because we work with Raspberry Pi's and thus we need that SD and CF card for retro-computing. But also having USB 3.0 in the front instead of reaching around the back all of the time is so much better.
We thought that the white front plate ASUS has built onto their board would be an issue mounting the motherboard. But it turns out it fits just fine. Making the back of the unit that much cleaner. With the ASUS control panel, we had an easier time adjusting the fans than with the manual front panel purchased. At full speed we can -feel- the air moving in the front of the case and out the back as it should.
We don't have cool tempered glass, or UV reactive fluid pumping through my new rig. Or even a pit to put my wires away so no one sees them. To us, however, this is perfect. a Y2K case for a Y2k boy. A big, serviceable monster that knows how to keep itself stable and running for a long time. Sure, it's heavy as fuck. But with that much metal inside it sure as hell isn't going to warp if we move it or take or somewhere for some LAN gaming action (Yes, we still do that.)
Dear Asus,
What is up with your temperature gauge in the armory crate utility?!? -200C?!?!? Are your core customers and daily driver PCs liquid nitrogen-based? I seriously want to know what you were thinking when you designed this type of GUI. And you can't turn off this gauge ether and only show the important information down below which is the temps of all of your devices.
Dear GPU companies (in general),
We're not sure if the engineers are just being pushed to make the product cheap, or if there is planned obsolescence happening here. But a better job in heatsink design can go a long way. They don't have to attach a 4lbs brick of aluminum to their card as we did (and ASUS too apparently) but a little more metal can go a long way.
Dear Morpheous Heatsink Company,
Your heatsink is amazing. The only thing we changed was the bracket. So, if you just sold newer brackets People would buy them! Guaranteed.
Bonus?!?
 200mm fans in this IBM case? It's more likely then you think!
Our case modding continues with 200mm case mods in the next blog. Wherein we make a ACM Jig and get all sorts of pro about it.
We'll keep you posted if anything changes with our PC in any major way. We hope you found the article informative and until then.
May server protect you!
+++ END OF LINE
yo i just got a system like this(xeon version) and was searching around for what other people did to fit a standard atx motherboard since I was planning to upgrade to a 5900x or wait for second gen AM5 and use this as a sleeper build, when I found this post. I like what you did, though I think you probably had enough space to keep that hot swap hard drive enclosure lol. I think you forgot to enable XMP for your ram in the BIOS since the max stock ram speed for this motherboard is 2666Mhz.
Hello!
Thanks for pointing me in the right direction on the BIOS setting. it turns out the Asus board calls it DOCP instead of XMP. And DOCP isn't as forgiving when it comes to detection. I got my ram up to 3200Mhz now which hey! It's better than sitting at default!
Now as for removing the RAID. I choose to remove the cage and instead replace it with a 200mm fan that covers the entire area of the front of my case. I figured that eventually, I'd start populating the multiple M.2 slots on my ASUS; thus, the requirement of hard drive slots would become a moot point. But I would totally see keeping the raid cage if you want to update the hardware.
But good luck with your conversion project. This is by far one of the most accessible sleeper build cases I've done. It was free (actually, negative money since we sold everything inside) and unless the ATX standards change massively this will probably be my case for the next 10-20 years.