
Li-Ion Batteries and multiple game controllers.
Okay, I have already done a Li-Ion Batteries in a controller article just dedicated to the Xbox controller. We're pleased to report that despite the only controller in our house. That was an original launch Xbox 360 controller. That the Li-Ion Battery packs have been operational. But what about a simpler non-destructive approach to using Li-Ion batteries? Not just in Xbox controllers but in all other controllers?
Read on for a simpler solution for Lithium battery integration.
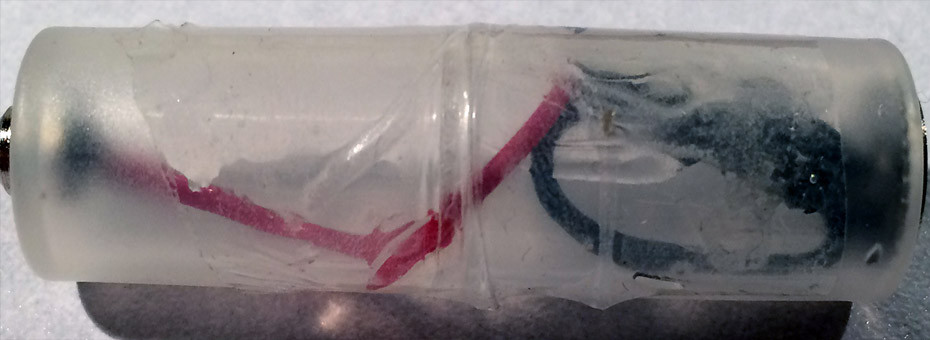
The Li-Po Battery problem.
 Li-Ion batteries are fully charged at approx 4.2vdc but quickly drop to 3.7vdc while they are in use. The problem is even when using just one 14500 Li-Po battery; That voltage can be a little high for a common regulator to use. Also, note that most devices expect you to place two alkaline batteries in series (2S1P) to achieve 3.0vdc. If you lined to Li-Ion batteries in Series that would be 8.4vdc at full charge and 7.4vdc average. That kind of voltage would burn most power regulators in devices.
Some history of inspiration.
Originally I was trying to find a way to regulate the power of a Li-Ion battery using something like a DC-DC circuit. The problem is that you can't put that into a chain of AA batteries. That you won't really have access to a "Ground" per se. Without a ground, there is no way circuits like DC-DC units would work. I then remembered this trick of using Diodes in a chain to effectively drop the voltage. In that project, they recycled an Xbox receiver from a console. By dropping the current from 5.0vdc to 3.3vdc via USB power. This is perfect! So I got to work On doing this.
Disclaimer!
As always, this net denizen is not responsible for any physical, psychological, or financial damage caused when performing a hardware hack such as this. Always have the proper testing tools on hand to test every single thing before plugging it into your favorite controller. If you feel uncomfortable performing such a hack you can stop now or find someone who can help you with the hack. Follow all safety guidelines when handling lithium batteries and bench tools.
Li-Po 14500 adapter Parts list.
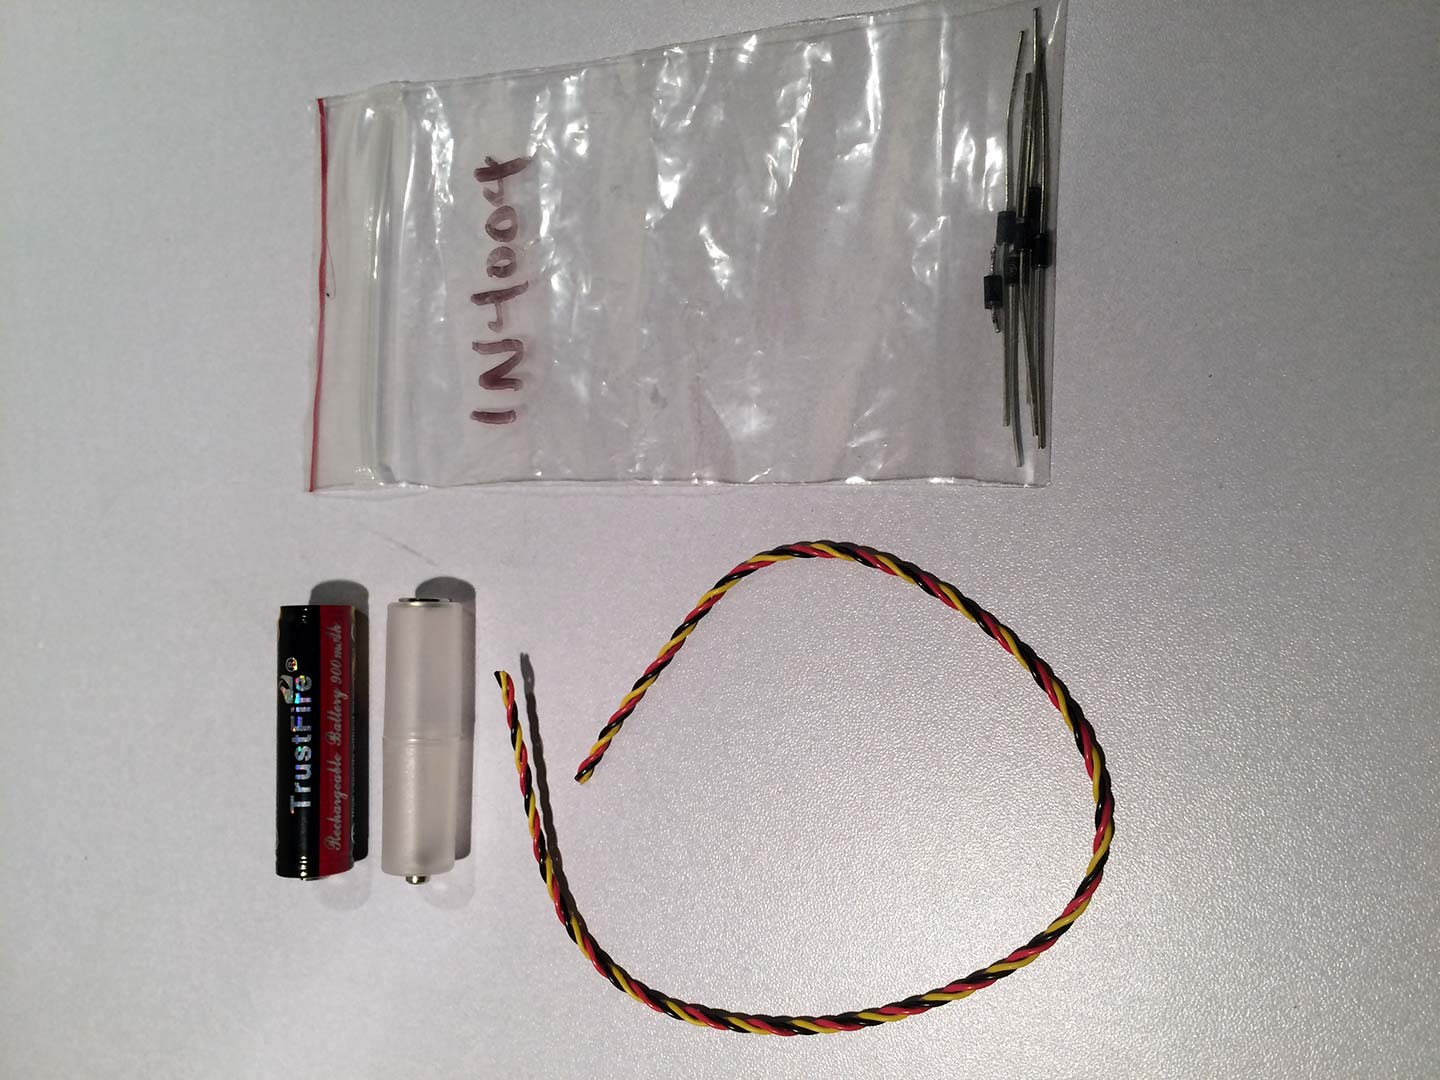 The parts for this project are very cheap.
- Some scrap wire. We easily obtained it from various electronic devices. I extracted this cable from a 3com power-on over LAN cable.
- 1n400x Diode. This is a very standard edition Schottky Diode. Maximum 1Amp current which is more than enough for this project. Approximately 0.15(USD) a piece. Datasheet example available.
- AA to AAA battery converter. You can get a pack of 10 from China for 2.88(USD) .
- A Lithium-Ion battery. I have been going with TrustFire as it has an under/over voltage protection circuit already installed. And its power rating is not bad for the price. A set of 4 will cost $10.40(USD).
Although not pictured. You will also need a way to charge your lithium-ion batteries. Either by purchasing a full battery charger kit. Or simply make your own as described in previous blogs on the cheap.
Tools for assembly.
- Pliers and/or wire strippers to strip and cut the wire to length.
- Soldering Iron (Ideally 60watts)
- Solder
- Hot Glue gun or quick setting bonding adhesive to make your battery shell strong so it doesn't split apart upon ejecting from your device.
- Multi-Meter for testing the voltage coming down the lines.
Let's begin.
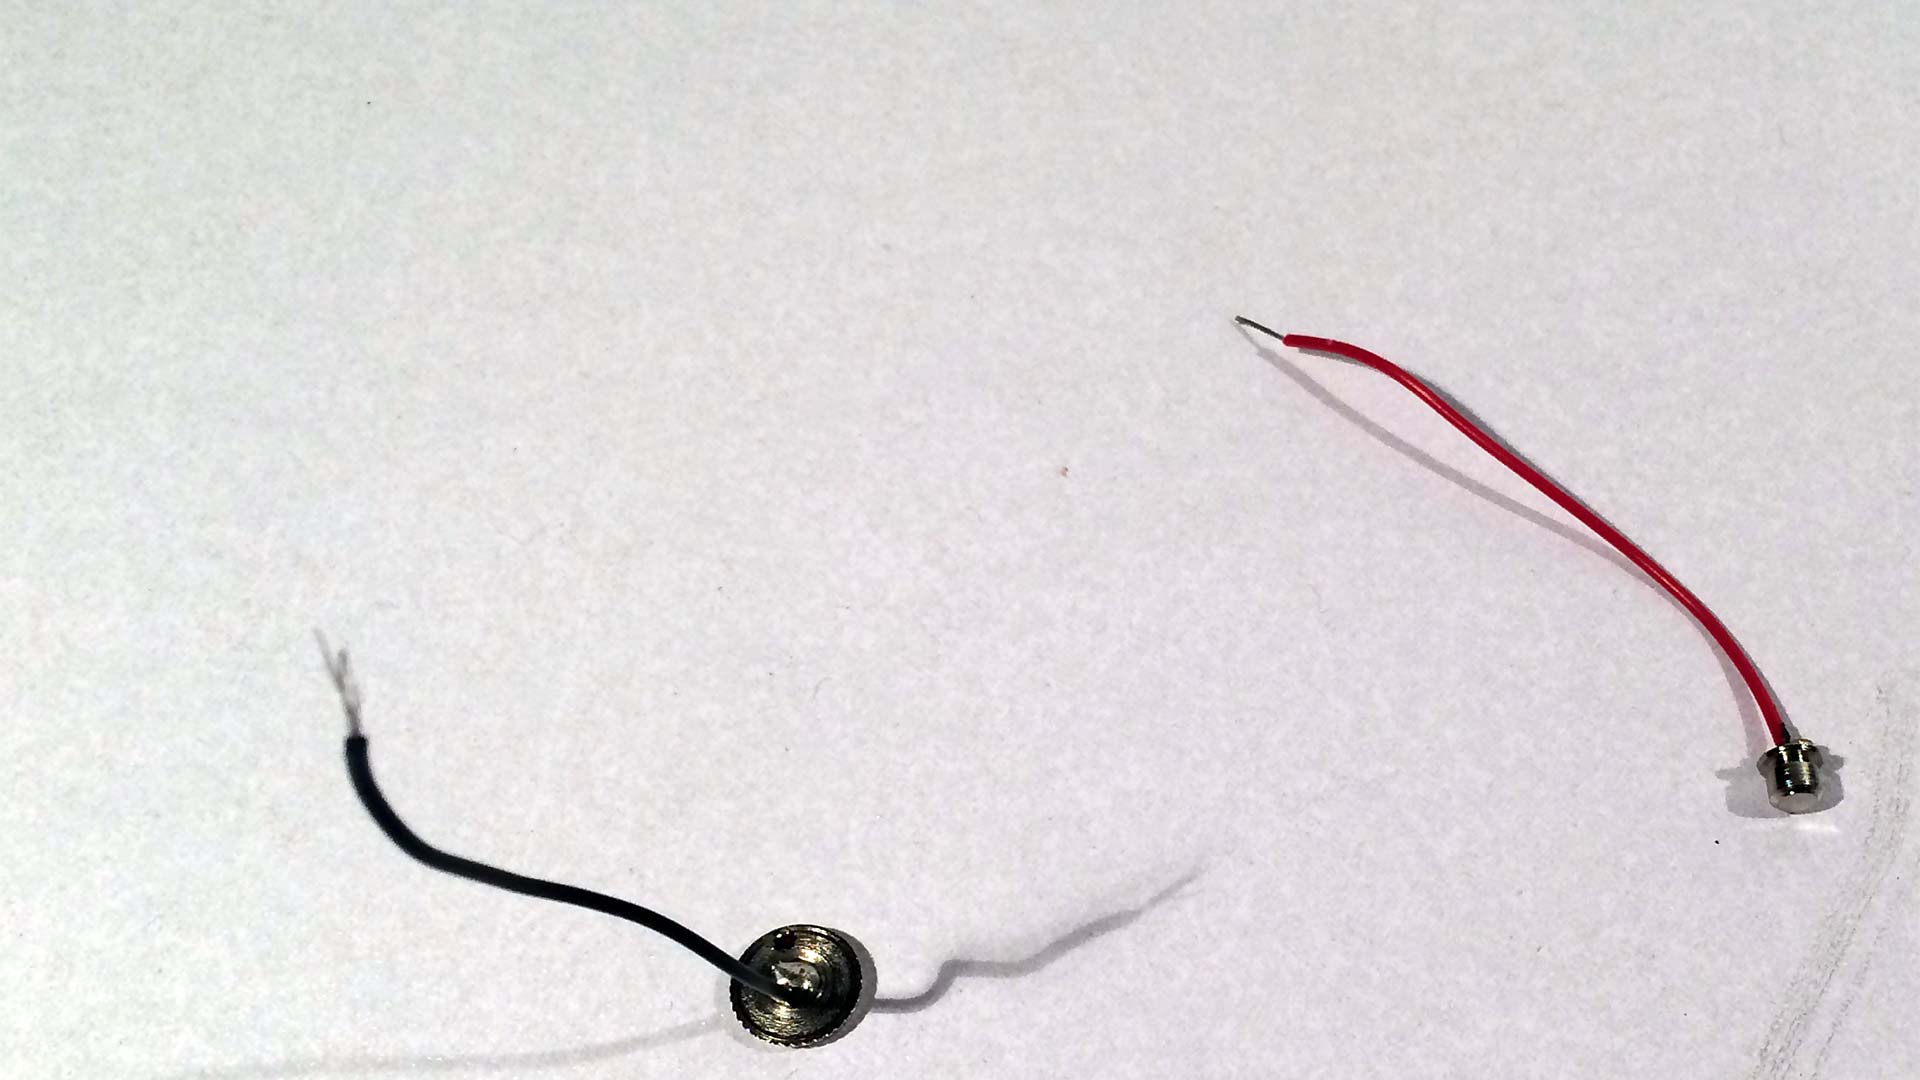 Starting with the AA to AAA battery converter. Pop the container open and use a little bit of force to pop out the positive and negative terminals. You'll find that they are held in by a little bit of friction and nothing more. From here you can solder the wires to each of the terminal ends of the battery holder. We made the wires about as long as the entire battery shell so that we can take it apart to service the diode as we were testing.
 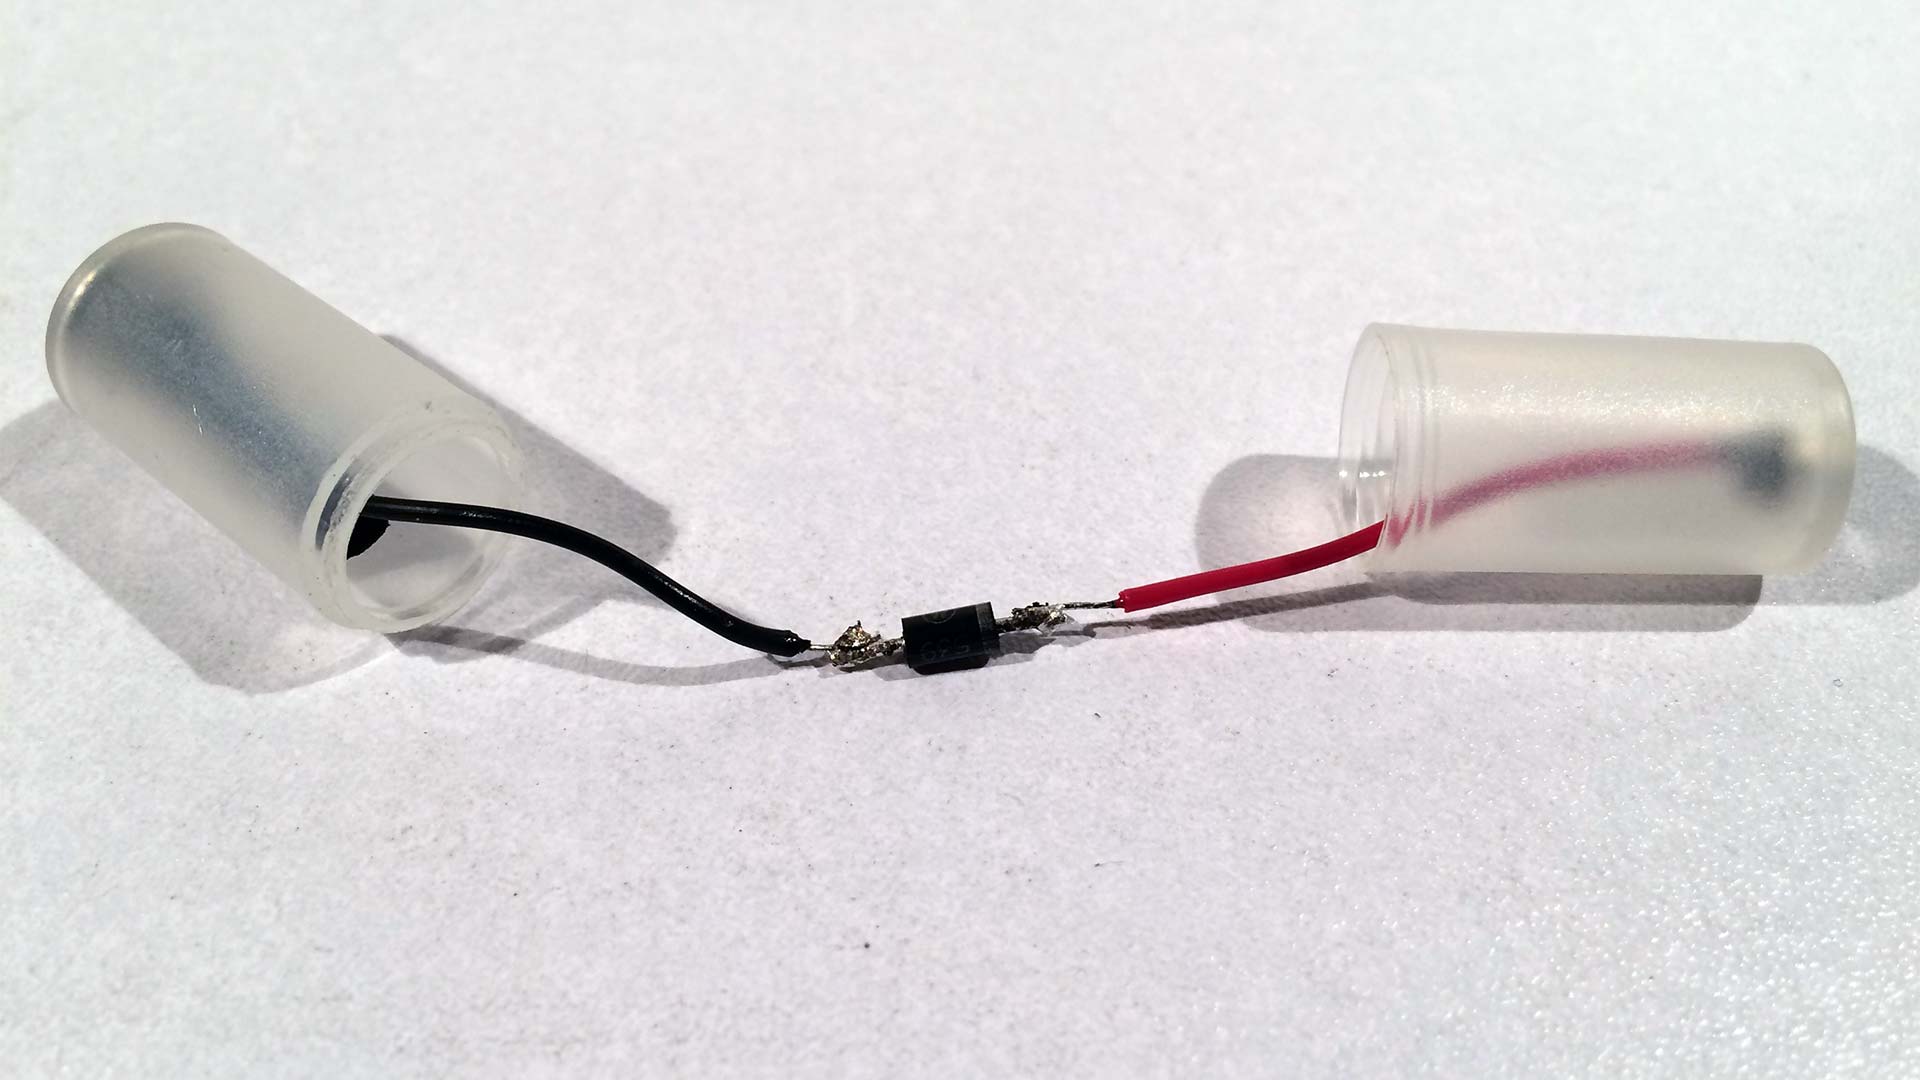 I did a quick solder just to show you what it would look like. Although you can barely see it we also made sure my shrink tubing was resting on the negative side of the housing. The moment I get a job done then this crap-tacular cold-solder job. We will sleeve the entire diode to ensure it does not ground out on either terminal.
 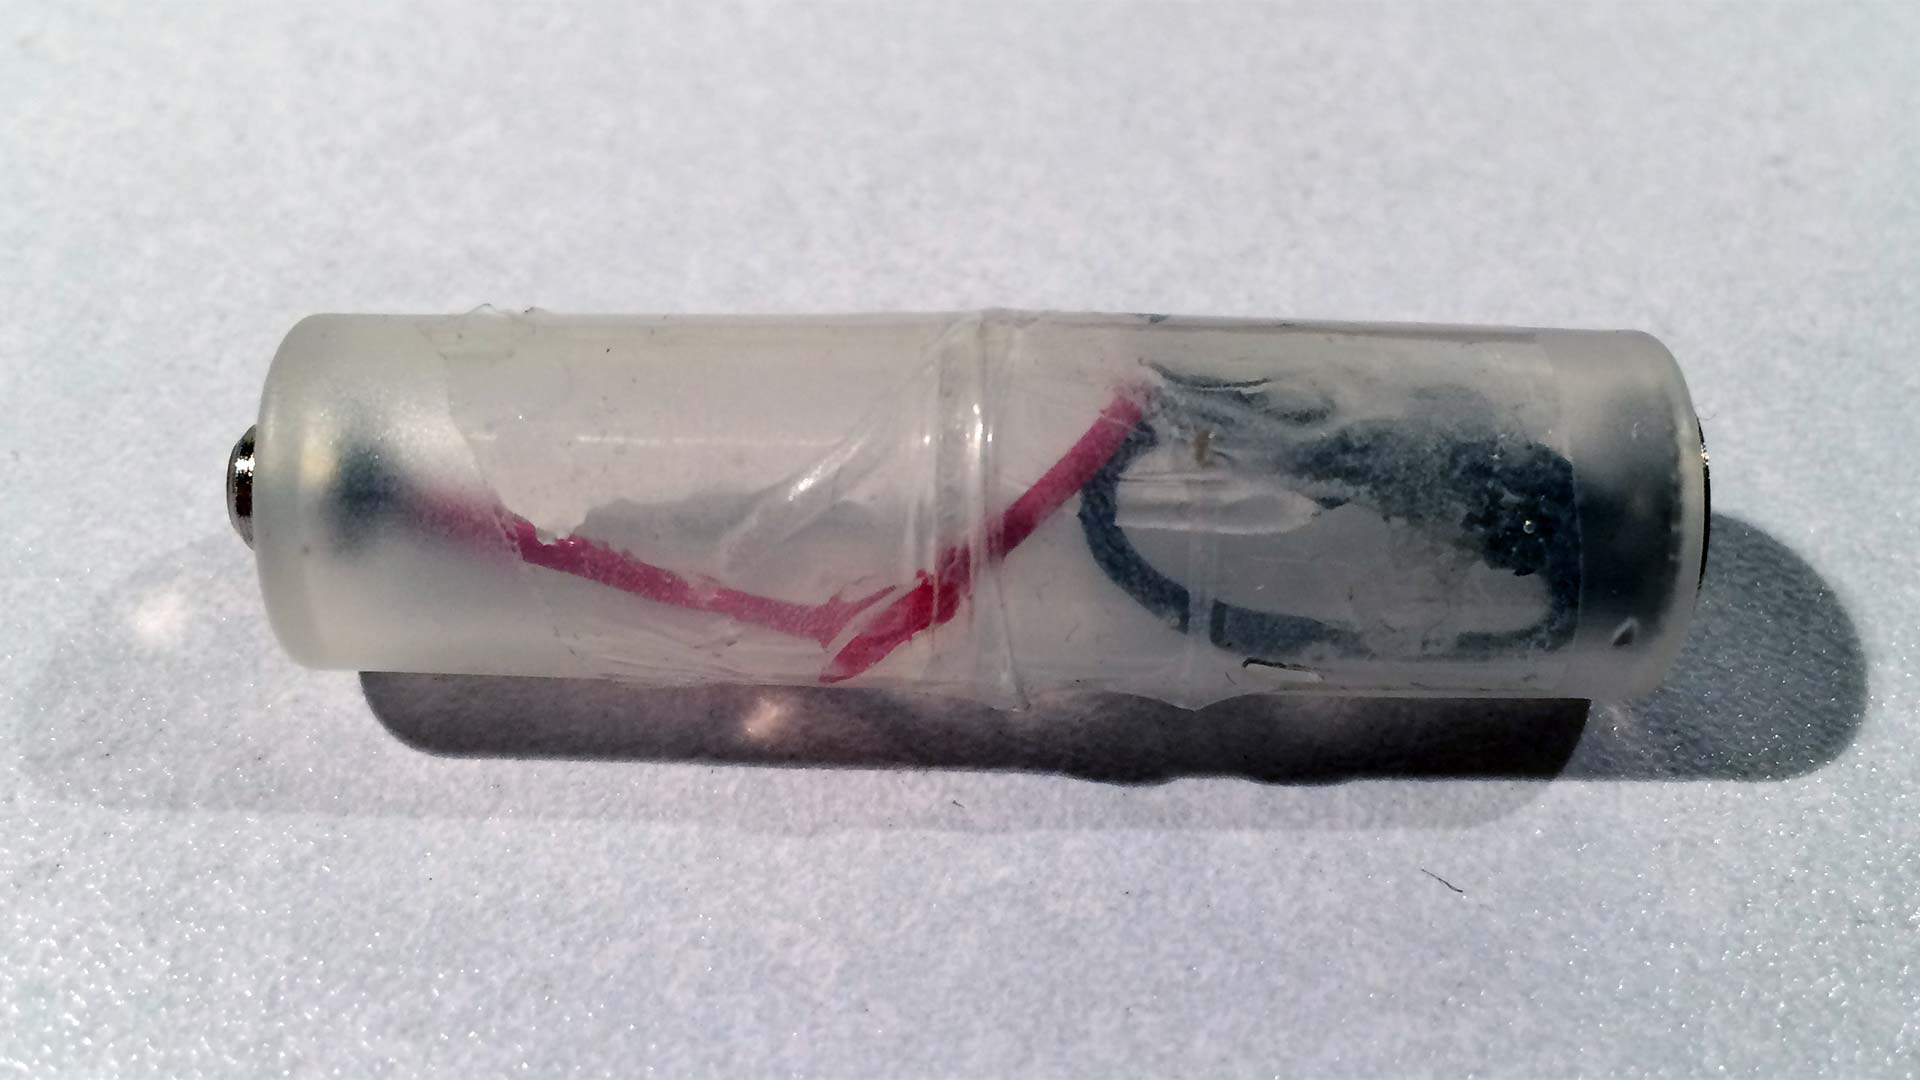 Now I just glued it up but you may want to test this adapter in a battery loop. If the diode is installed the wrong way you simply will not get any voltage going to your device as it's pointed backward at that level.
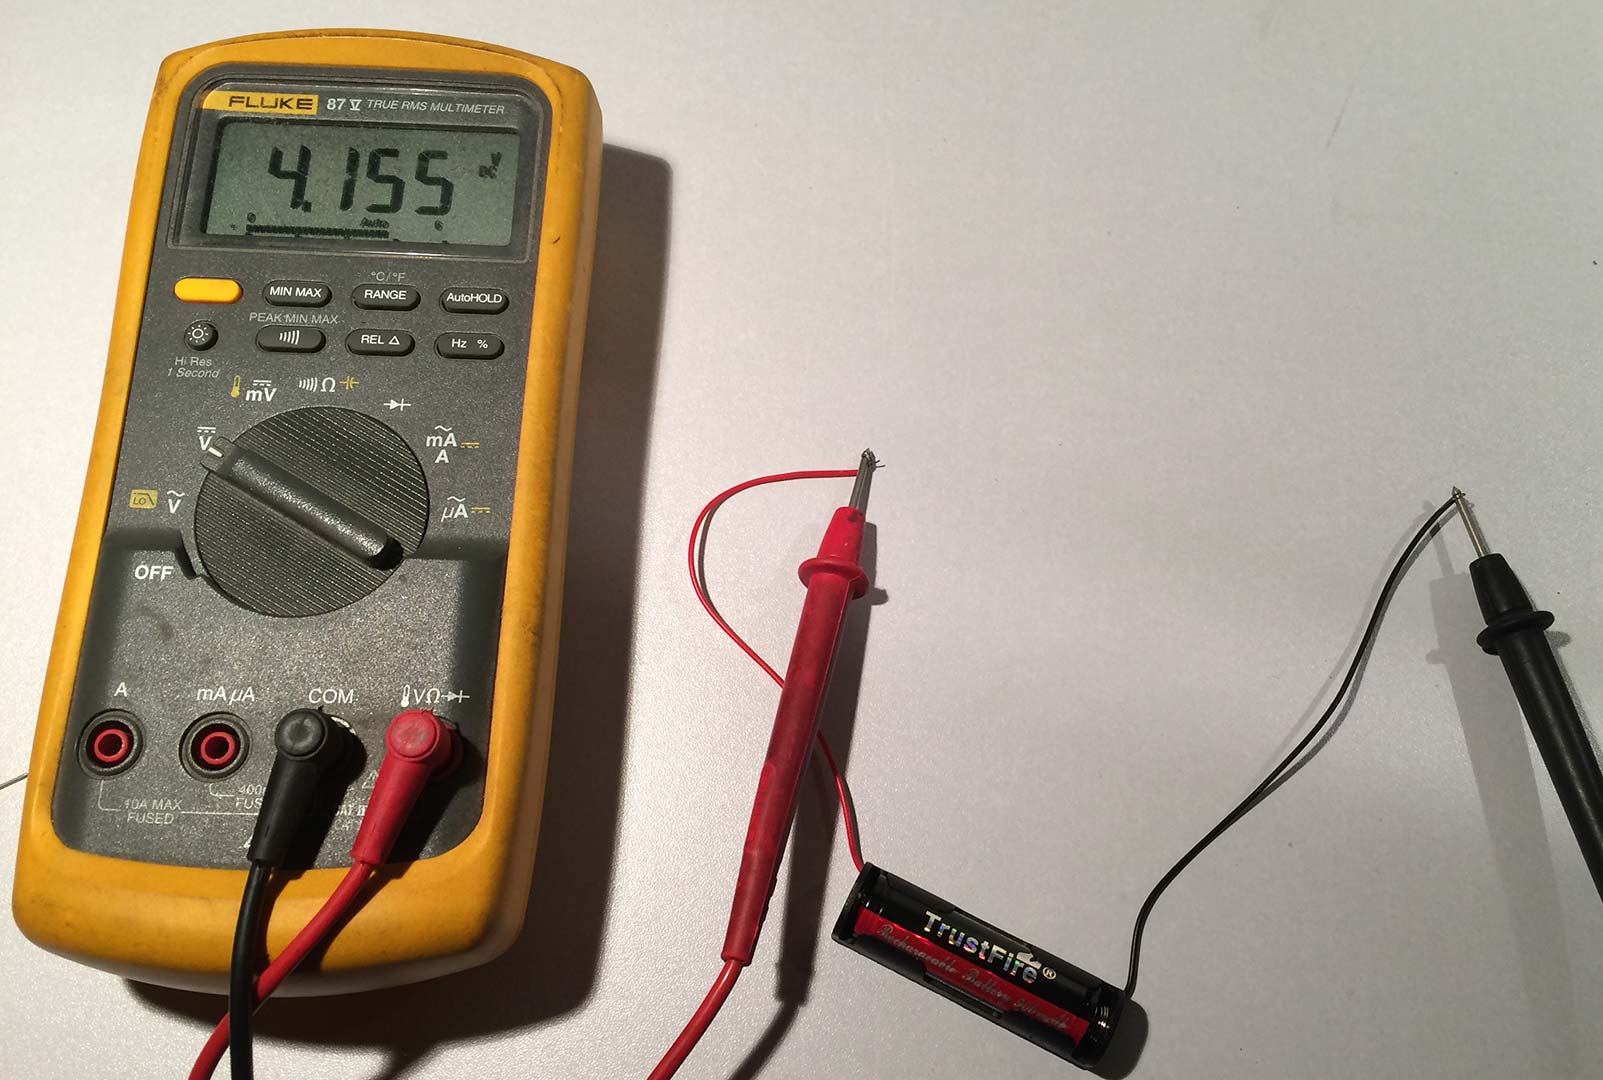
Initial test with no load.
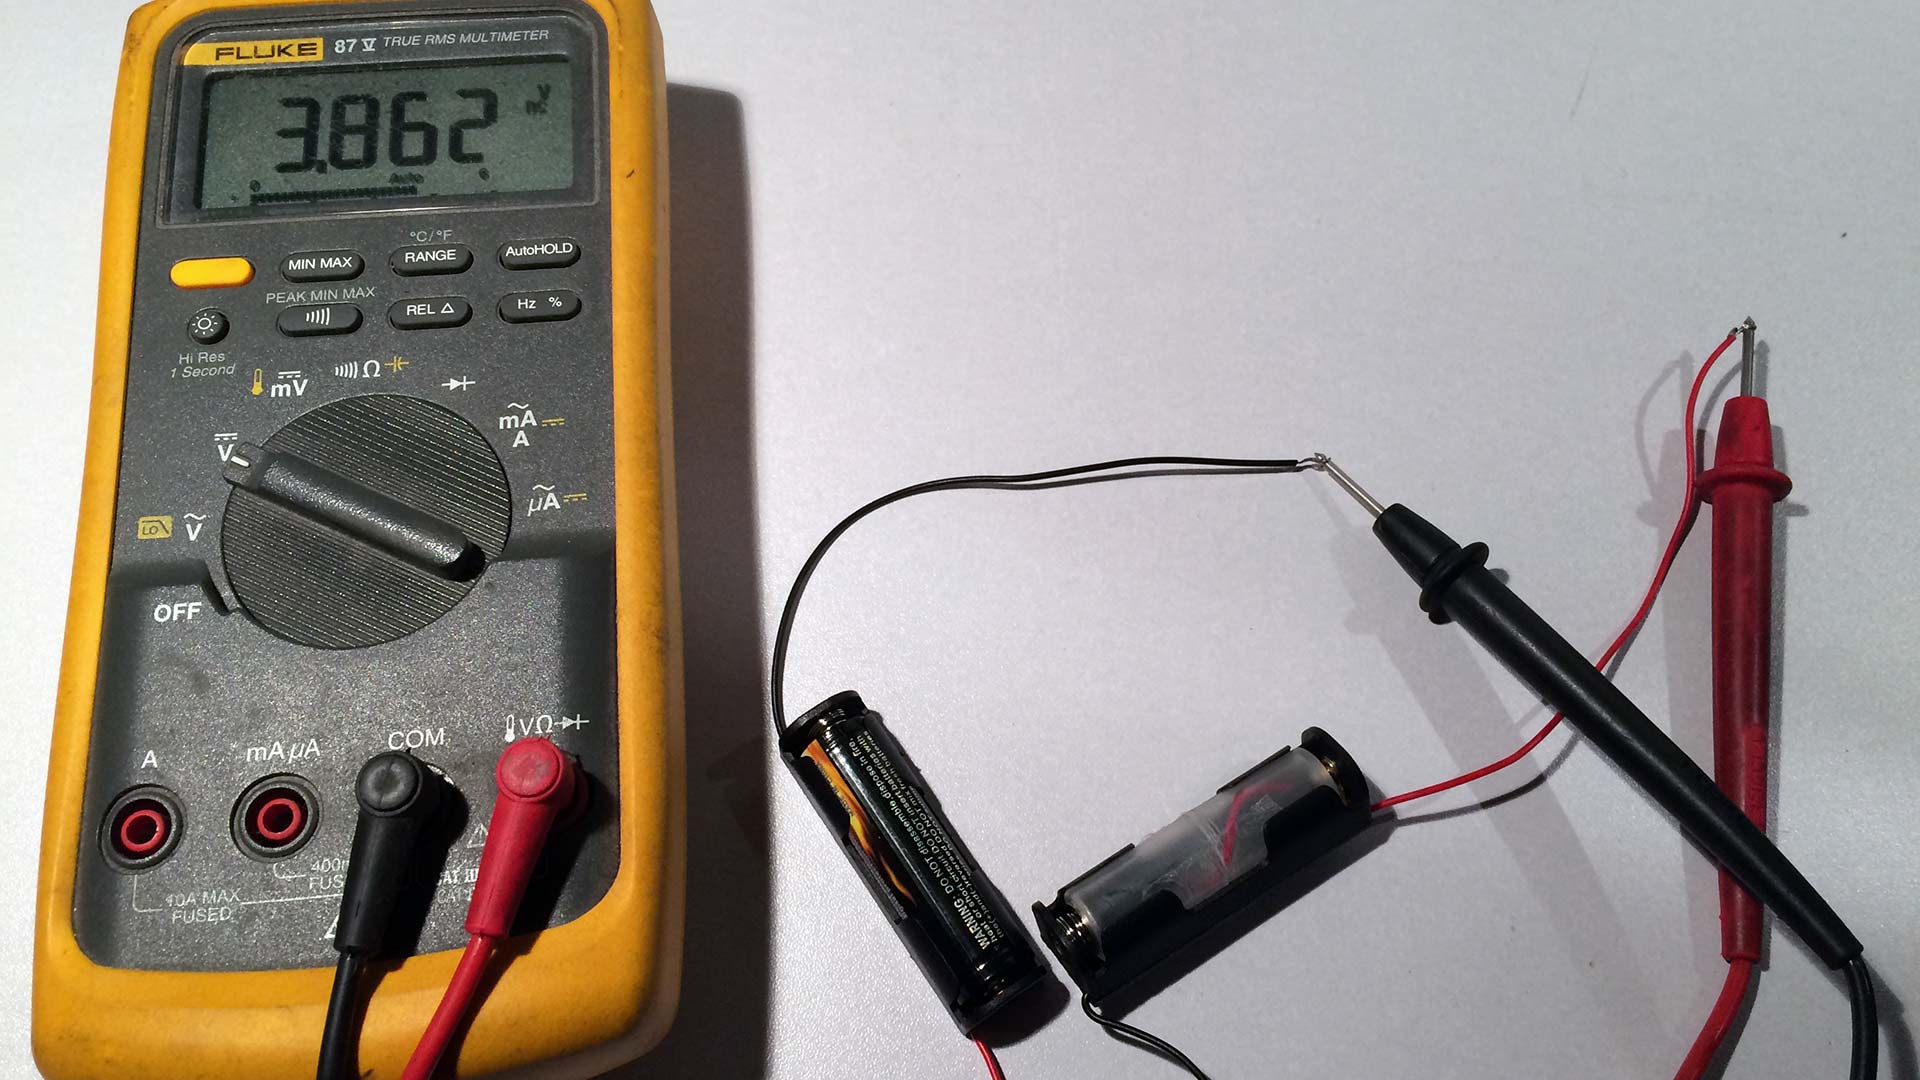 Hooking this up to my meter we find that we only receive a disappointing 3.8vdc which may not seem like enough. But understand that diode are under almost no load. So our forward voltage drop according to the datasheet with perhaps a 1mAh draw is only giving us at best a .4 to .5 VDC drop. Which is not acceptable for use in a Controller as this still may be too high for the regulator to use.
Testing with the load.
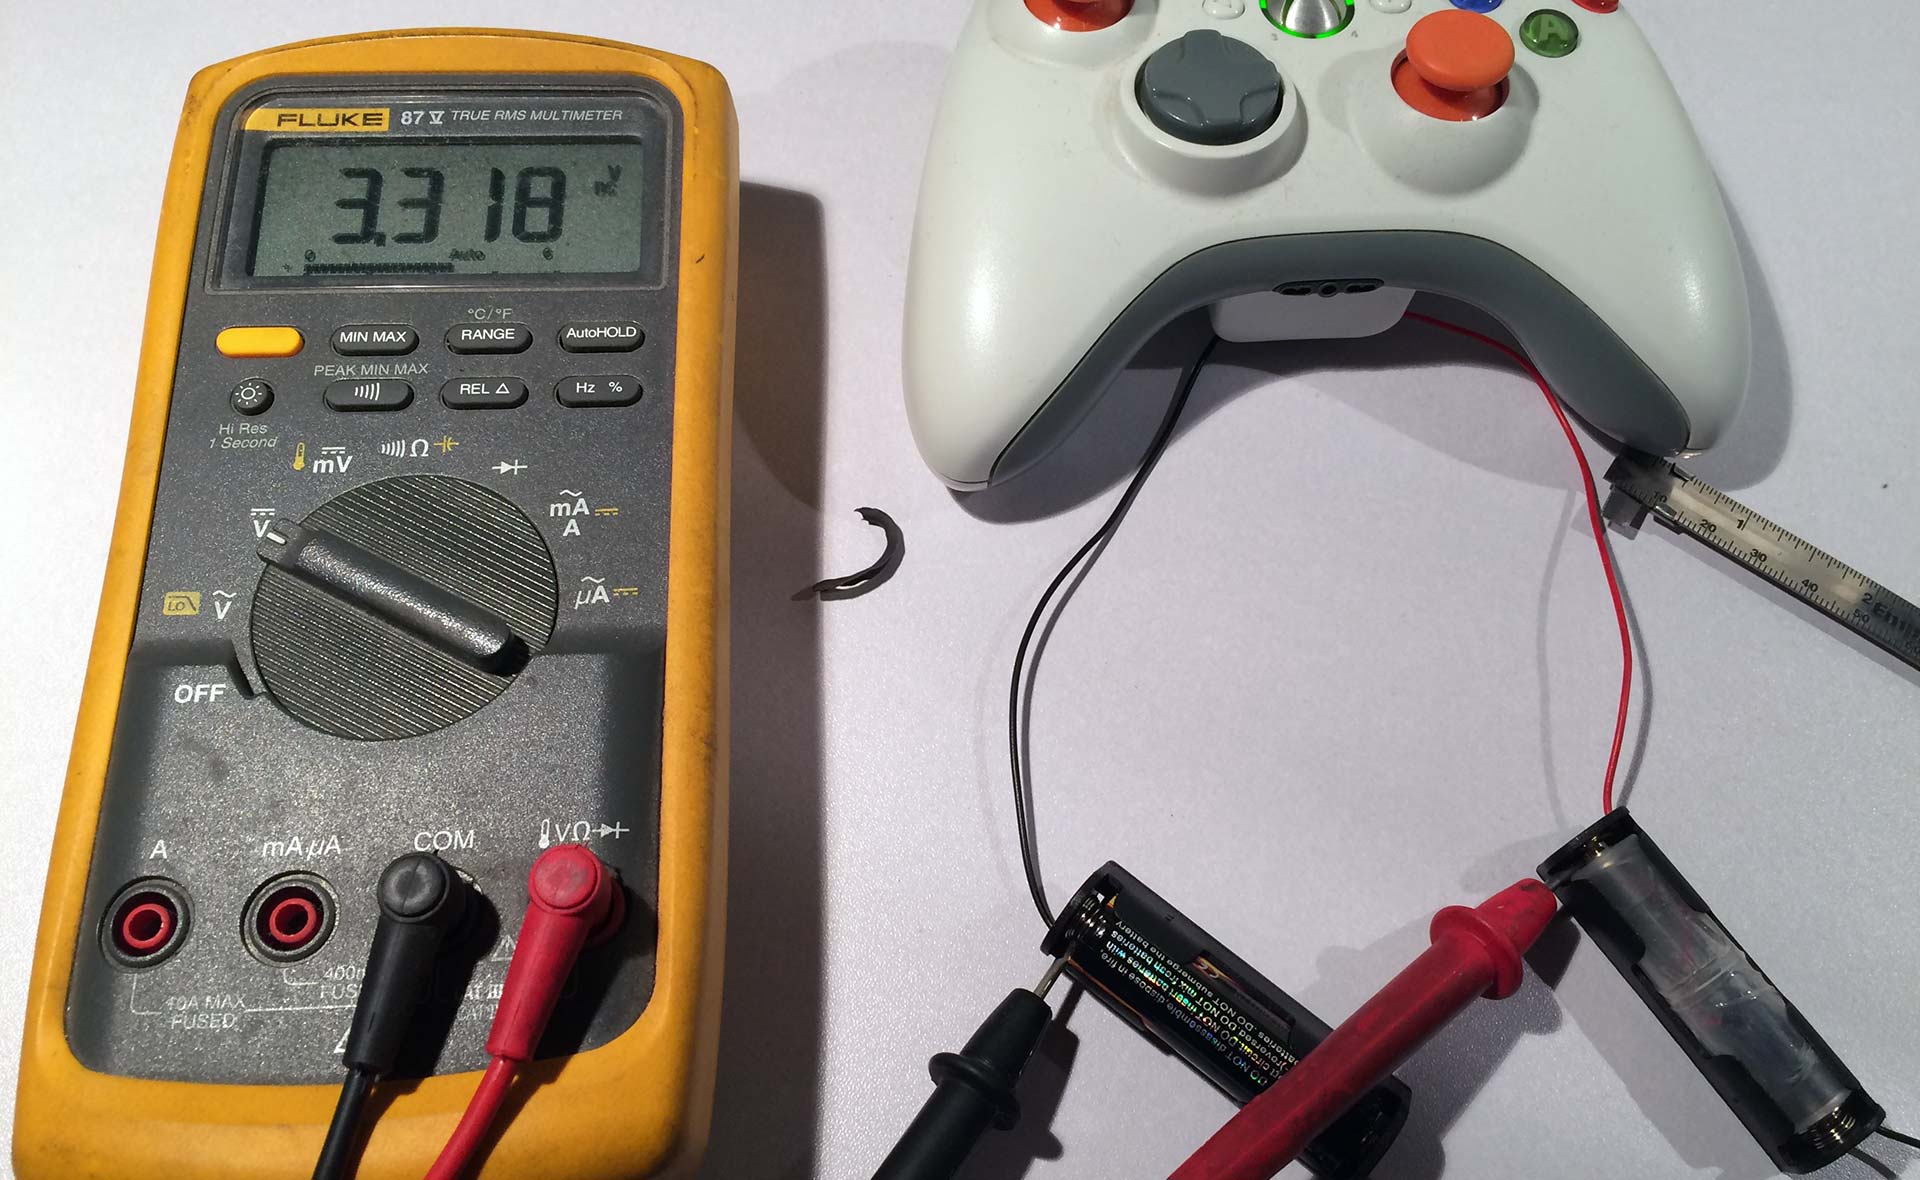 Now, if we place a load onto the circuit such as hooking an Xbox up and powering it on. You'll notice how the voltage drops more radically. This is because the Xbox Controller pulls anywhere from 80mAh to 100mAh and sometimes up to 120mAh if the rumble is engaged. Your Forward Voltage drop jumps from 0.4vdc to 0.8vdc. 3.3vdc puts us in a healthy range for the batteries to be in. Kindly note that when you get fresh Alkaline AA batteries from the store and hook them to your meter. They will read anywhere from 1.62vdc up to 1.72vdc. Although very temporary this gives us a voltage of 3.2vdc to 3.4vdc. Most modern power regulators can accept up to around 3.5vdc. This puts our Li-Po battery well within the parameters of usage.
Testing in different controllers.
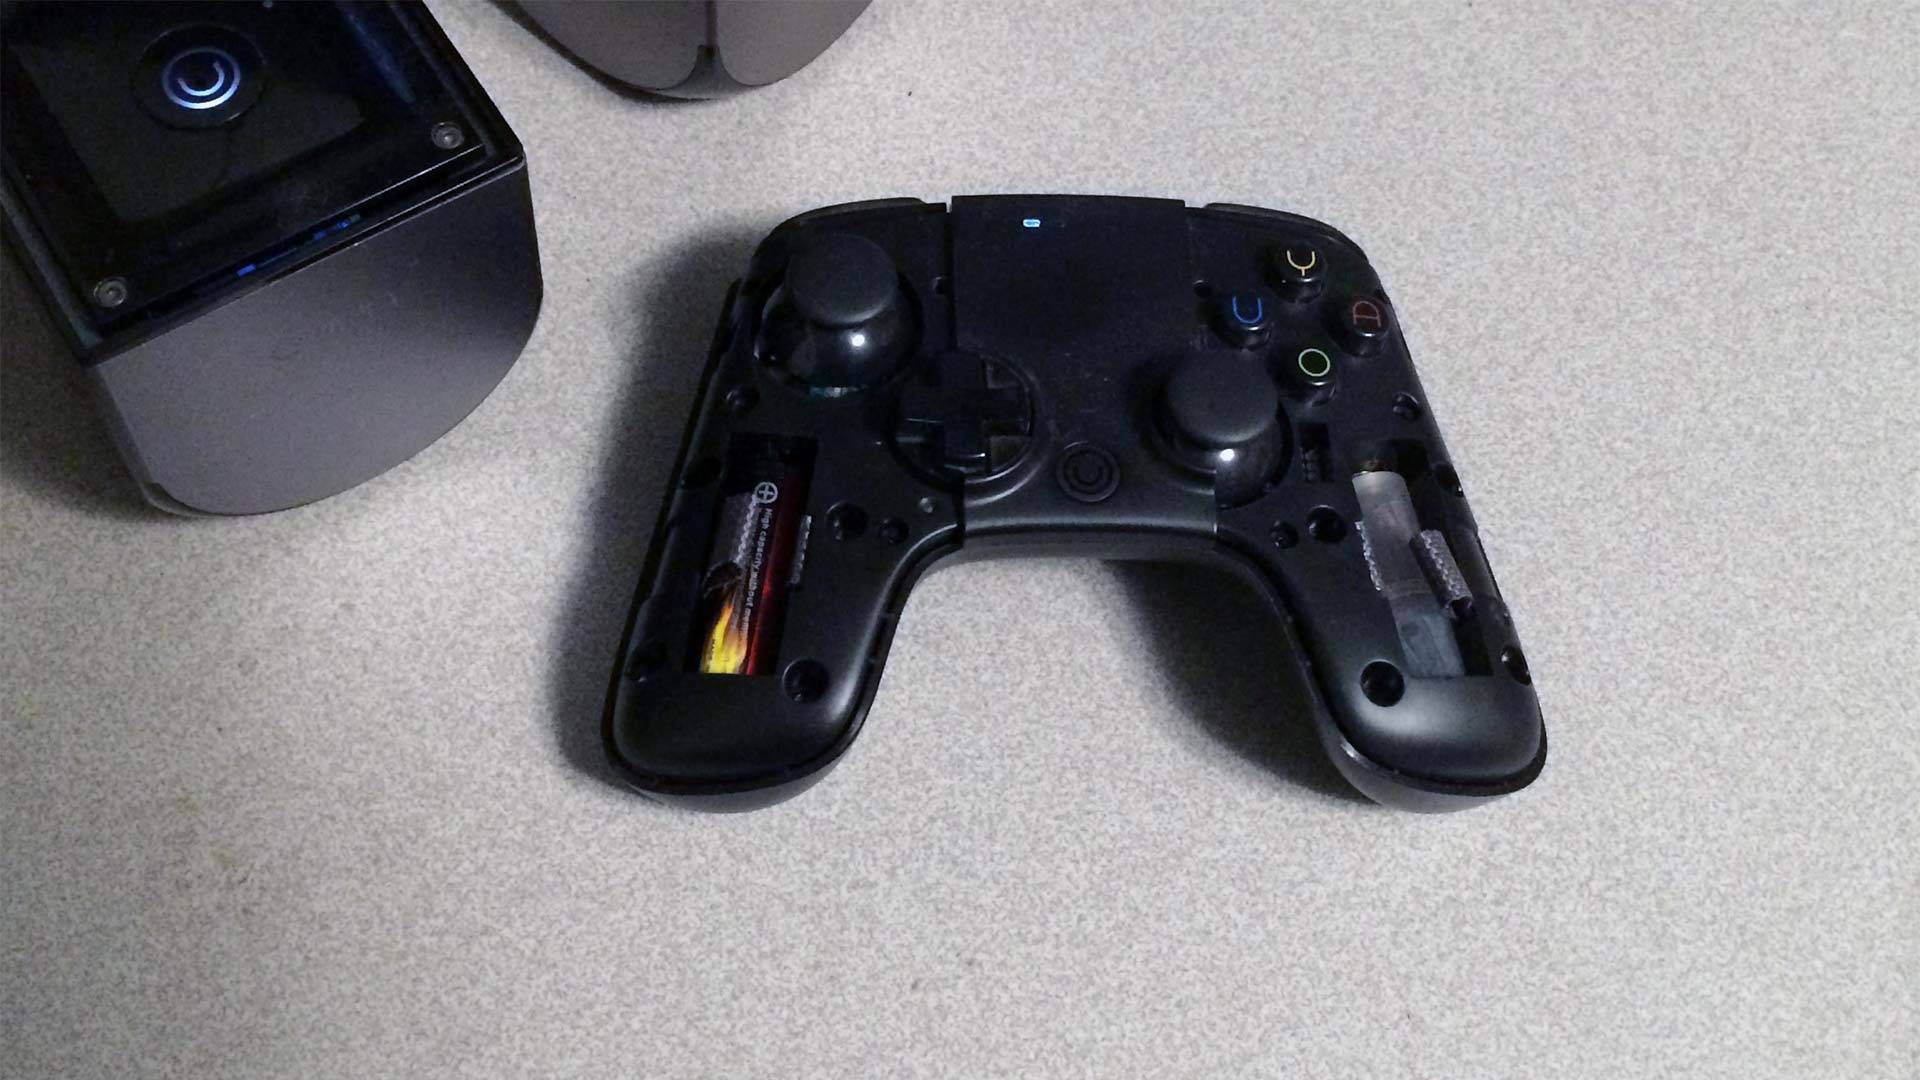 We've so far been playing with just Xbox Controllers. We dropped in this kit into my Ouya Controller and it powered up fine reporting my battery was very healthy at %100 charge! Since the Ouya controller is only 30mAh it may be pushing 3.5-3.6vdc of current but the regulator in the Ouya Controller can obviously handle it totally fine.. On top of that since the battery is around 810mAh tested that means this Ouya Controller can get around 20-30 hours of gameplay off of a single charge.
Finding the polarity of your controller.
Because the Diode has to be facing the positive end of the battery series chain, you may have to do a quick continuity test to see where the link is. In the Ouya controller, the upper-left side and the lower-right side give us a connection with just about 0-Ohms resistance. This is the connection point between the two batteries. Once the diode was installed on the left-hand side you don't need to remove it really. Just simply remove the Li-Ion battery for charging and re-insert it.
Final thoughts.
Li-Ion batteries are of course dangerous if mishandled. But when you do all of your tests and keep everything within voltage they can be very nice to have around. In case I want to have some 4-player couch co-op we no longer have to wait 5-8 hours for the NiMh batteries to fully charge. That is of course provided they charge. Since they've been sitting around for a long time. Lithium-Ion gives you the ability to quickly charge in under an hour and get back into the game with ease. Granted 800mAh isn't a whole lot for the Xbox, 7-8 hours of game-play. But this technique is by far the least physically destructive towards the plastics and shell of whatever controller you are using.
That's what server said.
END OF LINE+++
https://www.???.com/products/lfpbatterycells.???
You don't get free advertisement here. Nice try.
A hearty bunch of thanks (duckits on the way) I seldom commit (or comment) even to those sites which I suspect are up to good, despite their best efforts. You mortals seem to achieve it yet seek not nor desire the direct or reflected glory bestowed on those those whose precious well intentions go viral...you cool in an fuzzy laid-back way...not every body has to know...when it's time, you'll be there...May the gods take a liking to y'all....