

It's time for Png Optimization yo!
For PNG Optimization: PNG (or Portable Network Graphics) was a replacement to GIF and is one of the most widely used lossless graphic formats on the net. Whenever you are setting up a website that has a heavy amount of images going for it; You often have to rely on other formats then JPEG or .jpg because although the .jpg is good for most cases such as photos it is often a self-destructive file to have as every time you re-compress the quality of the .jpg gets worse and worse. Also known as lossy compression where the image is compromised to better suit the compression of the file. .jpg however cannot do alpha-channels natively, so if you wanted to show an image on your website that has a transparent background as an example. This is not possible. .jpg also cannot do palette limiting to simplify the image further to make it easier to compress. It just makes the image more blocky!  To give an example lets say that I grabbed a screenshot of a window for a tutorial of mine and I wanted to save that screenshot. I don't care about colors as it's just a window with some text in it and the save for web inside of Photoshop. As you can see, the JPEG file with almost zero quality cannot quite perform to a PNG-8 format with 32 colors. If I wanted to be pixel-perfect on a particular window I could even save it as a PNG-24 and be at around 99Kbps which is only slightly bigger then the lowest (and most blockiest) jpeg image-standard out there. A .png file uses lossless compression, meaning it compresses the file type much like .zip file while retaining the original data. Every pixel is perfect in a .png and it does not lose any of its alpha layers for transparencies. I should note that predating .png there was .gif. The only thing .gif can do differently is .gif files can have animated frames. But for the sake of this article we're going to focus specifically on .png
Webmaster does not like your .png!
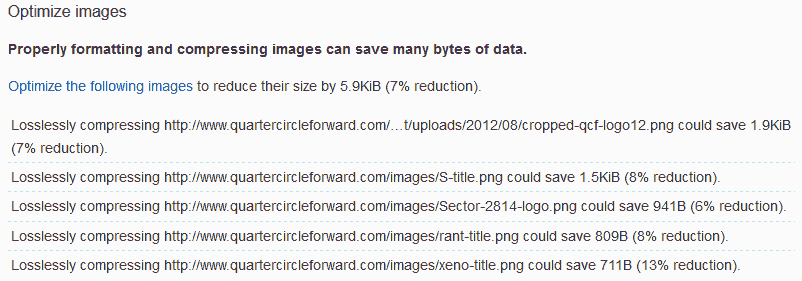 If you use Google Webmaster like I do and decide to launch the PageSpeed application to see how optimized your website is. It starts to complain about all of the .png files that are not compressed enough. Photoshop tries but their compression ratio isn't all that great. And these are just the ones that are on the front of the page. Also, WordPress will make additional .png files depending on your theme and if the file is going to be used differently say in the title of a website as an example. This means for every .png you upload to WordPress there are 3-4 .png files that it generates. You are probably also noticing the percentiles are very small. You could be thinking "whats 1k of data saved on a file." well, if you have thousands of png files. it means megs of data, but it also means less data that has to be downloaded per page. Faster response times is the end result. Thankfully we are not trapped in the '90s were processing power is scarce and a website will max out the CPU decompressing all of those images. :)
Getting started.
To get the most out of your WordPress site, you will first need to download the contents of the /wp-content/uploads folder to your hard drive. If you are hosting your WP blog on your own PC that's great. Otherwise, you can also FTP download it like I do. The next thing you'll want to get is a program called PNGOutWin my by Adfry imaging. You can, of course, find other programs out there which will do the job. This is the one that I have chosen. 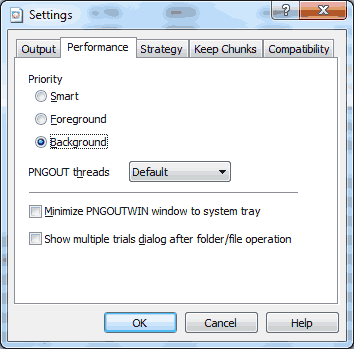 First thing you'll want to do in the program is go under PNGOutWin is go under Edit and Settings and then tab over to Performance and set it to Background then hit OK. This will keep your computer actually usable while we go through your entire WordPress uploads folder for PNG Optimization.
 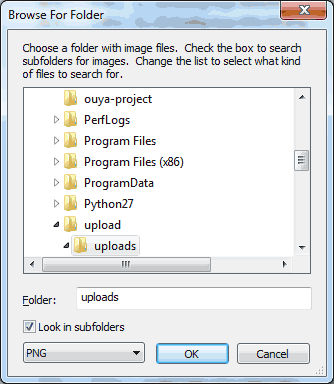 Next click on File and New Folder Conversion and from there choose the directory that you placed your WordPress /uploads/ folder. Check the box stating to Look in subfolders leave the PNG file only option default and click the OK button.
 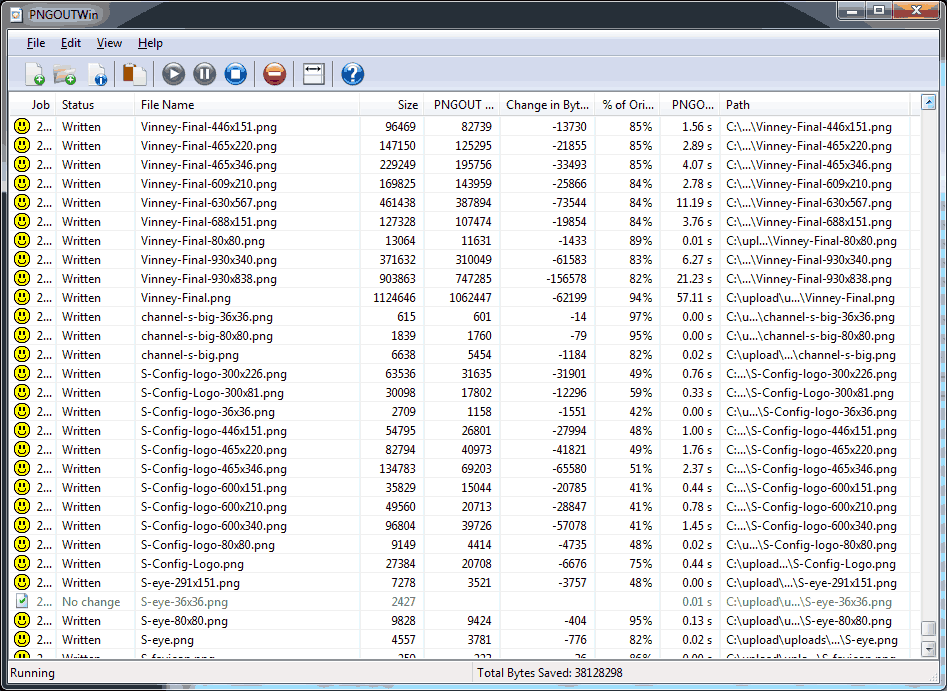 Even on my quad core machine, it took approximately 3 hours to reprocess 2,000+ files in my WordPress Folder. The total size at the time of Publication is around 450Mb. As you can see, the Savings is around 38Mb with savings of around 8-9%. Once this is done you can simply re-upload your entire folder to your /wp-content/ folder of your WordPress. Afterward Google Webmaster be cool with how optimized your PNG images are. This is something that I will probably run on my WordPress every few months or so just to ensure that all of the images are in order.
Aren't there any free PNG compression tools out there?
There are! But a lot of the ones that are free are command-line only which would be a bit of a pain. If you want to check out those command-line only versions you can click on this link to visit part 2 of PNG optimization. For what it's worth. It helped out my site. And saved a few megs of data in the process. END OF LINE+++
good guide