
Relics from the 90's return to us.
Sometimes you hang out in old industrial warehouses. Like normal human beings do. Perfectly average thing. Wandering about seeing the leveling pits where machines used to be, as well as flooded warehouses with tables holding up tube monitors with Wyse terminals for machines that haven't been powered on for over 35 years.
In the corner of one of the rooms was this beauty of a keyboard. It was covered in ash initially, but we ended up cleaning it up. It cleaned up well! It's time to get an antique going.
Read onward as we put the KMFDM CD "Attak" into an equally ancient player while we repair this thing.
Enter the industrial keyboard!
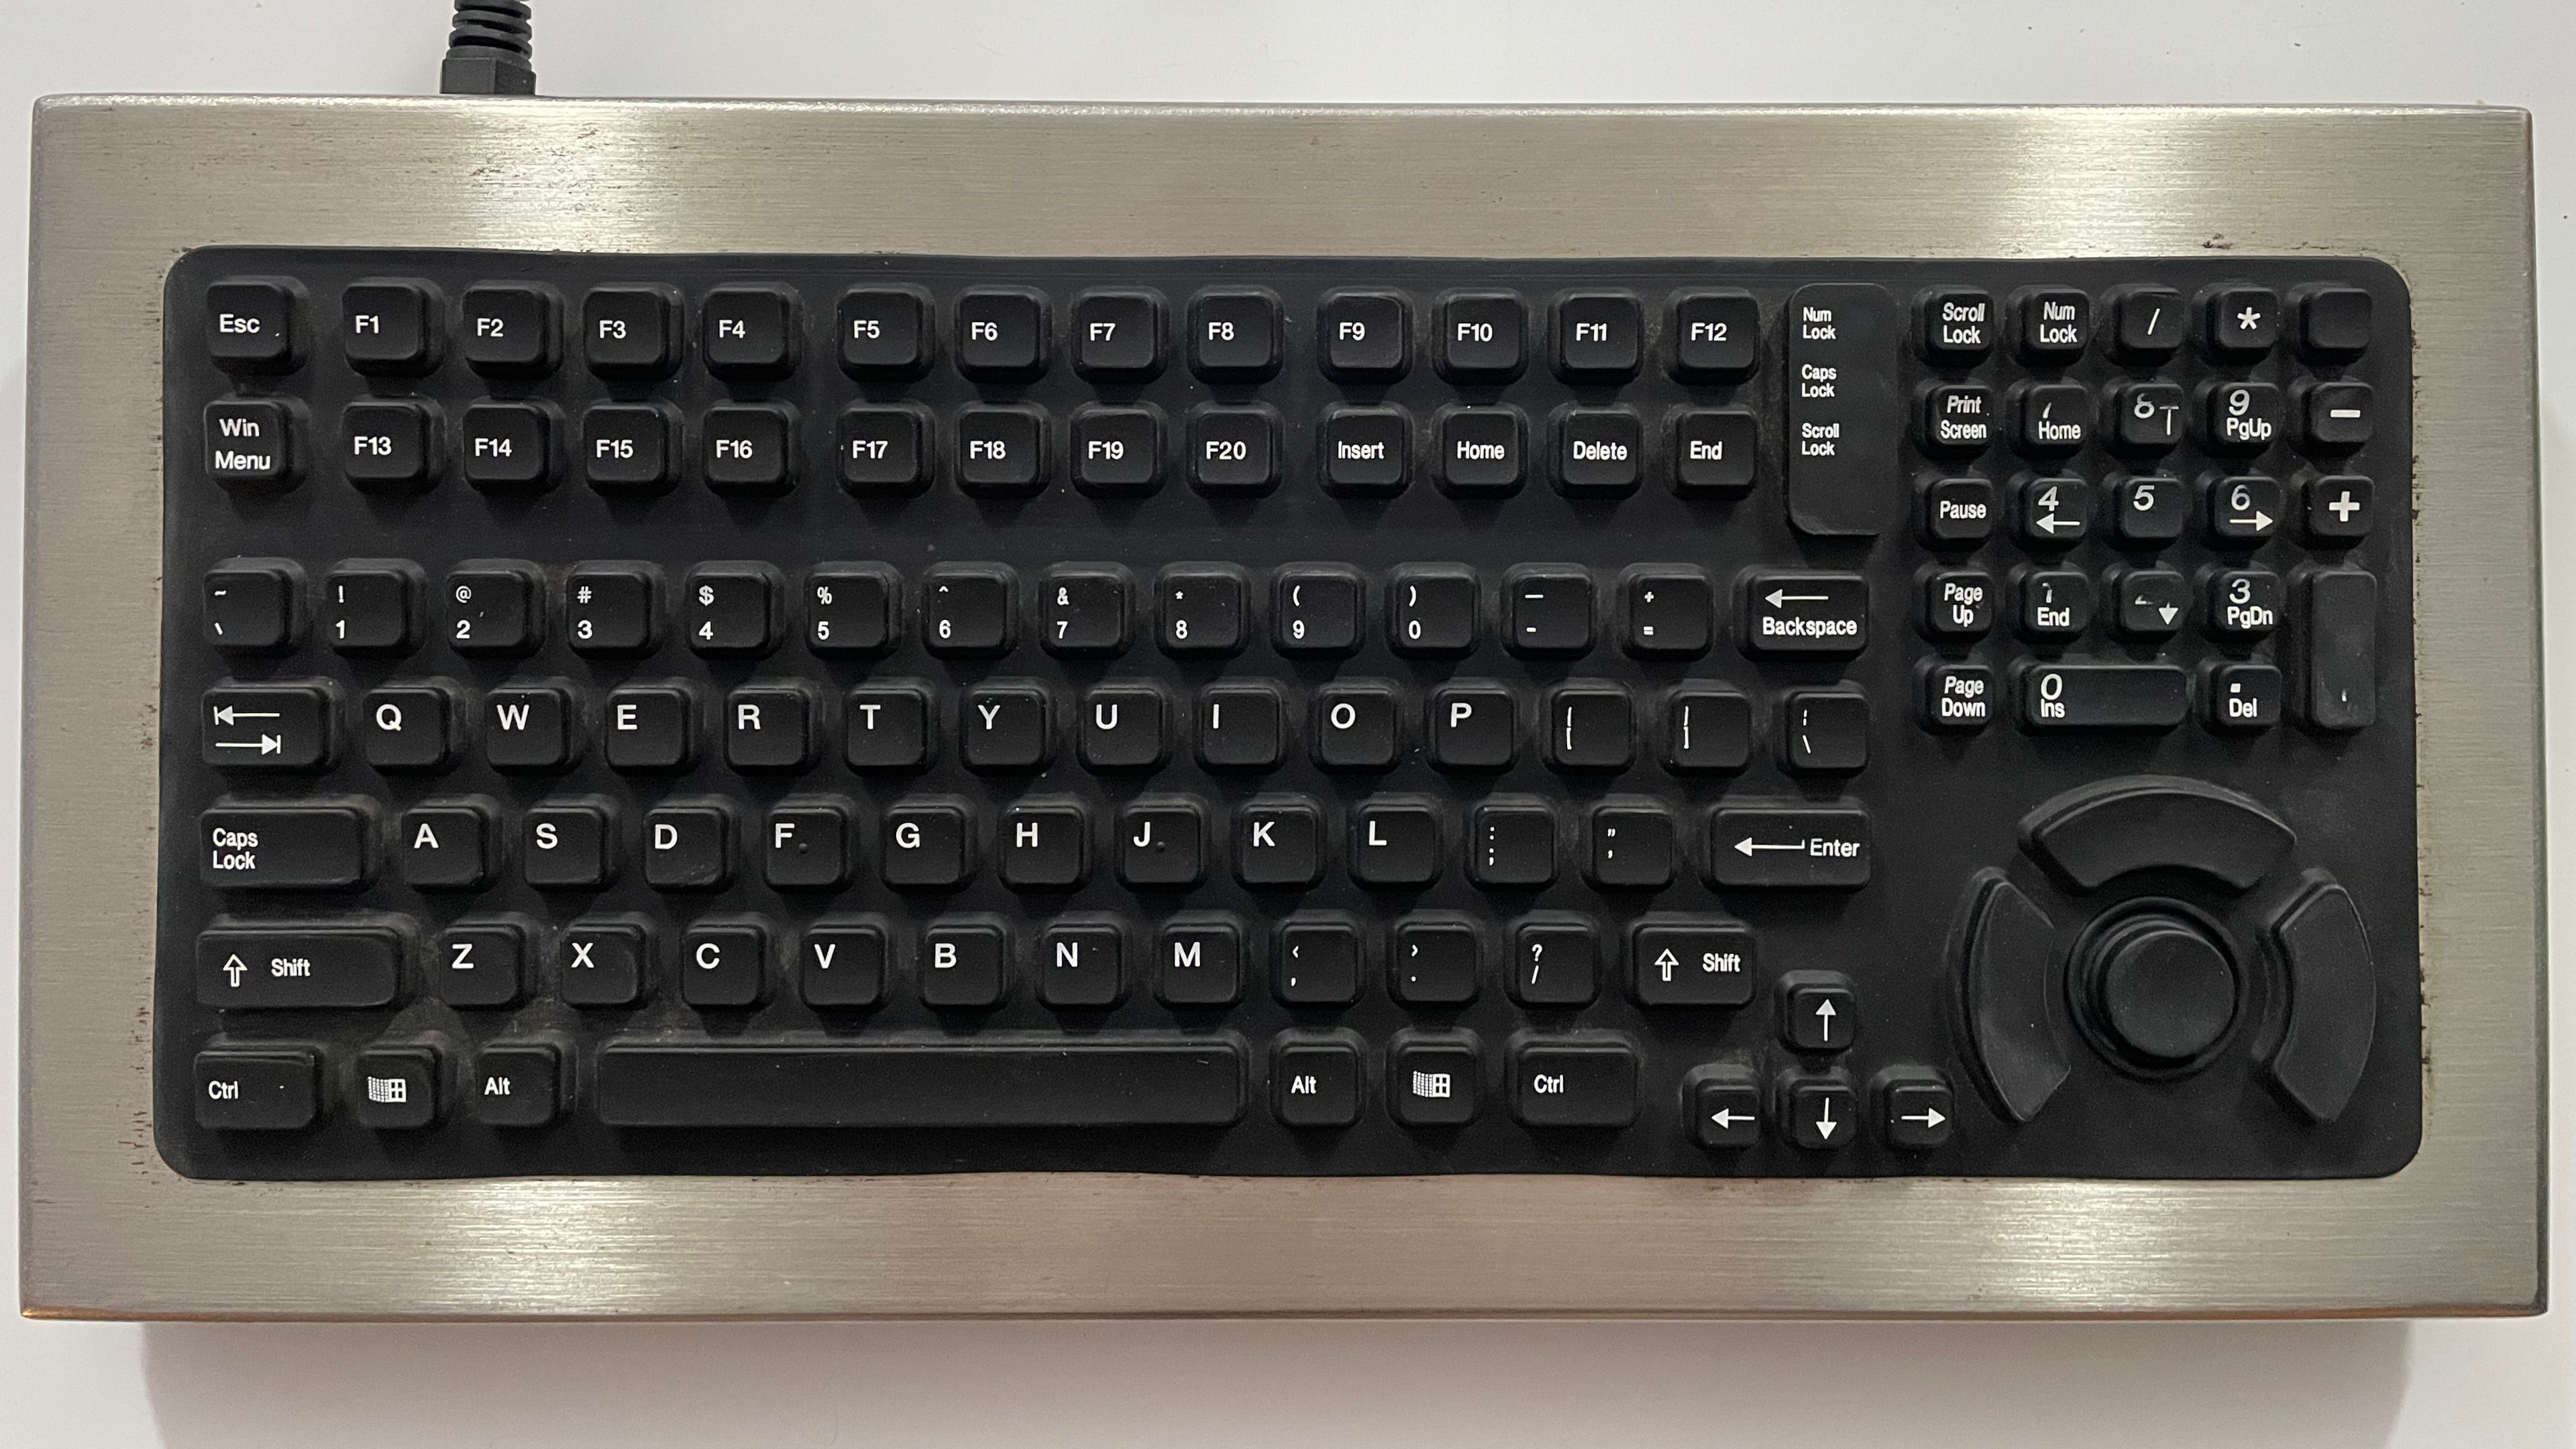
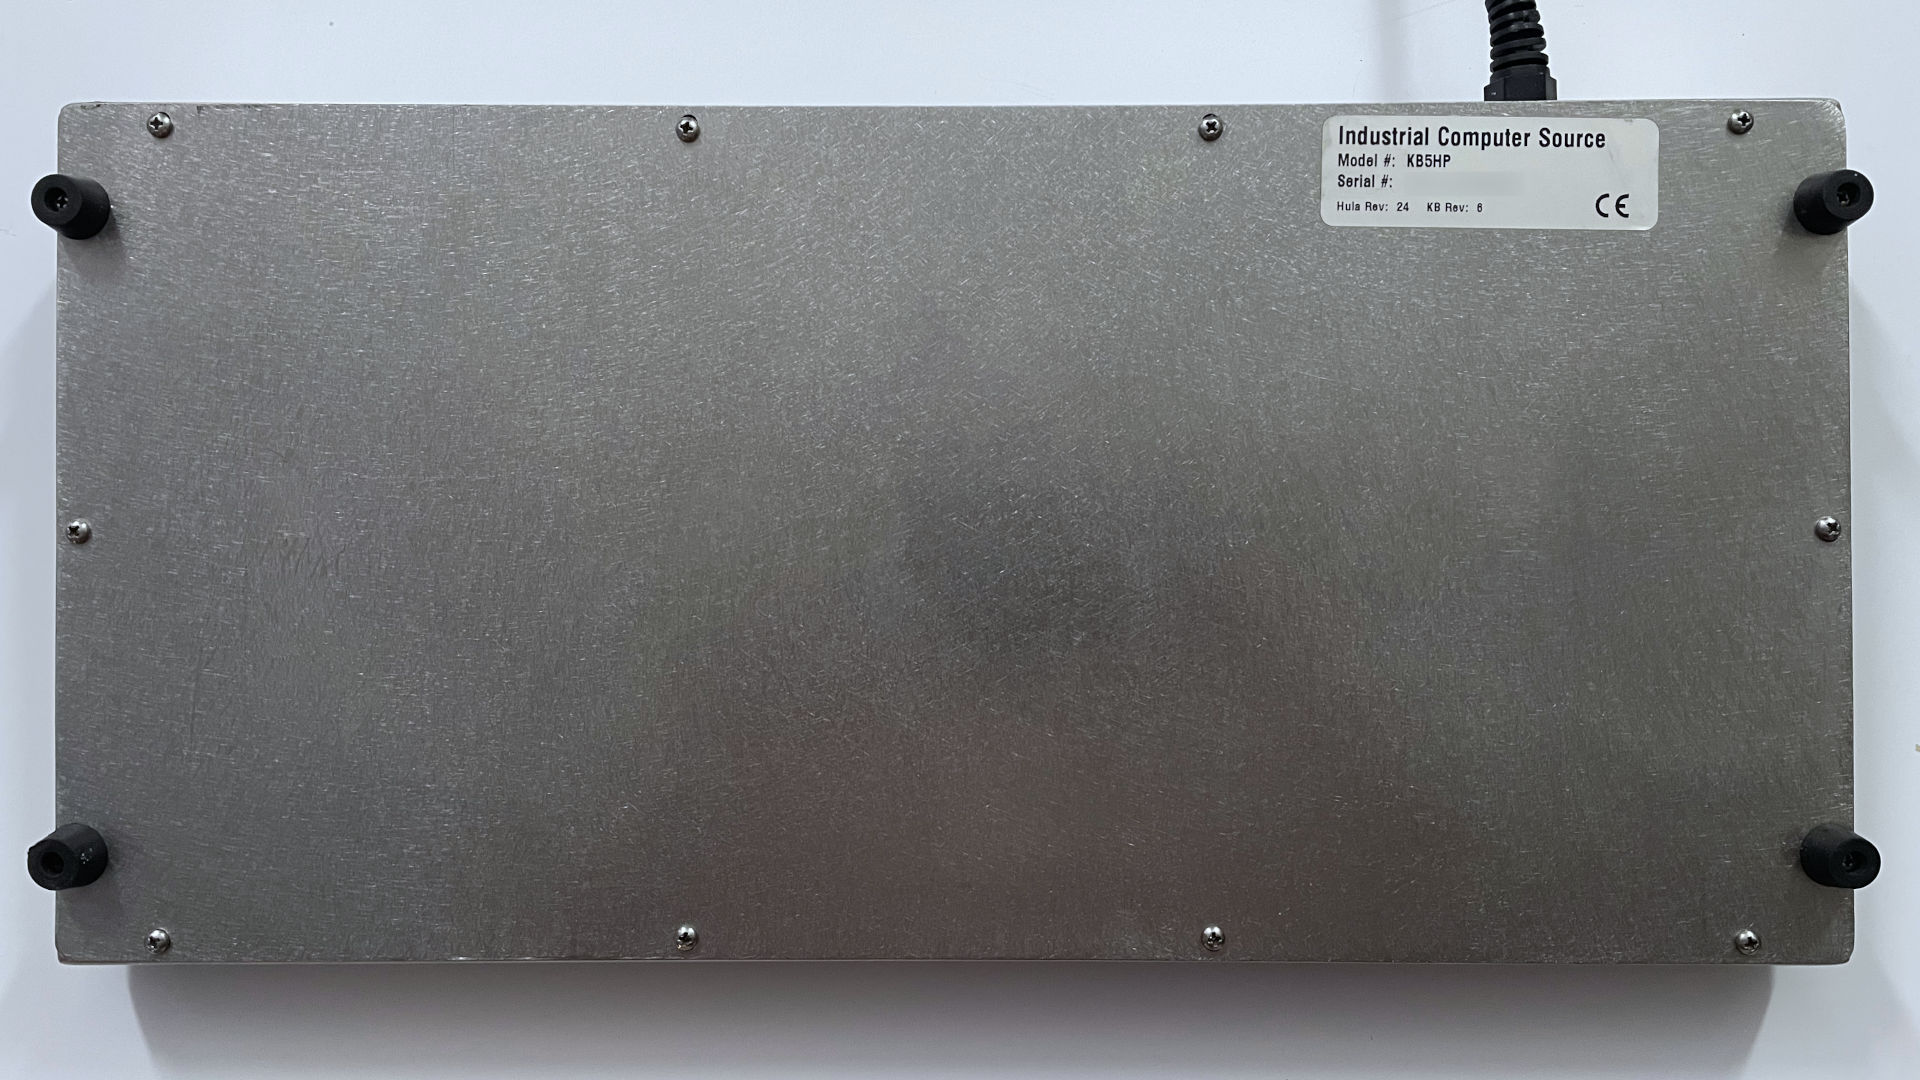
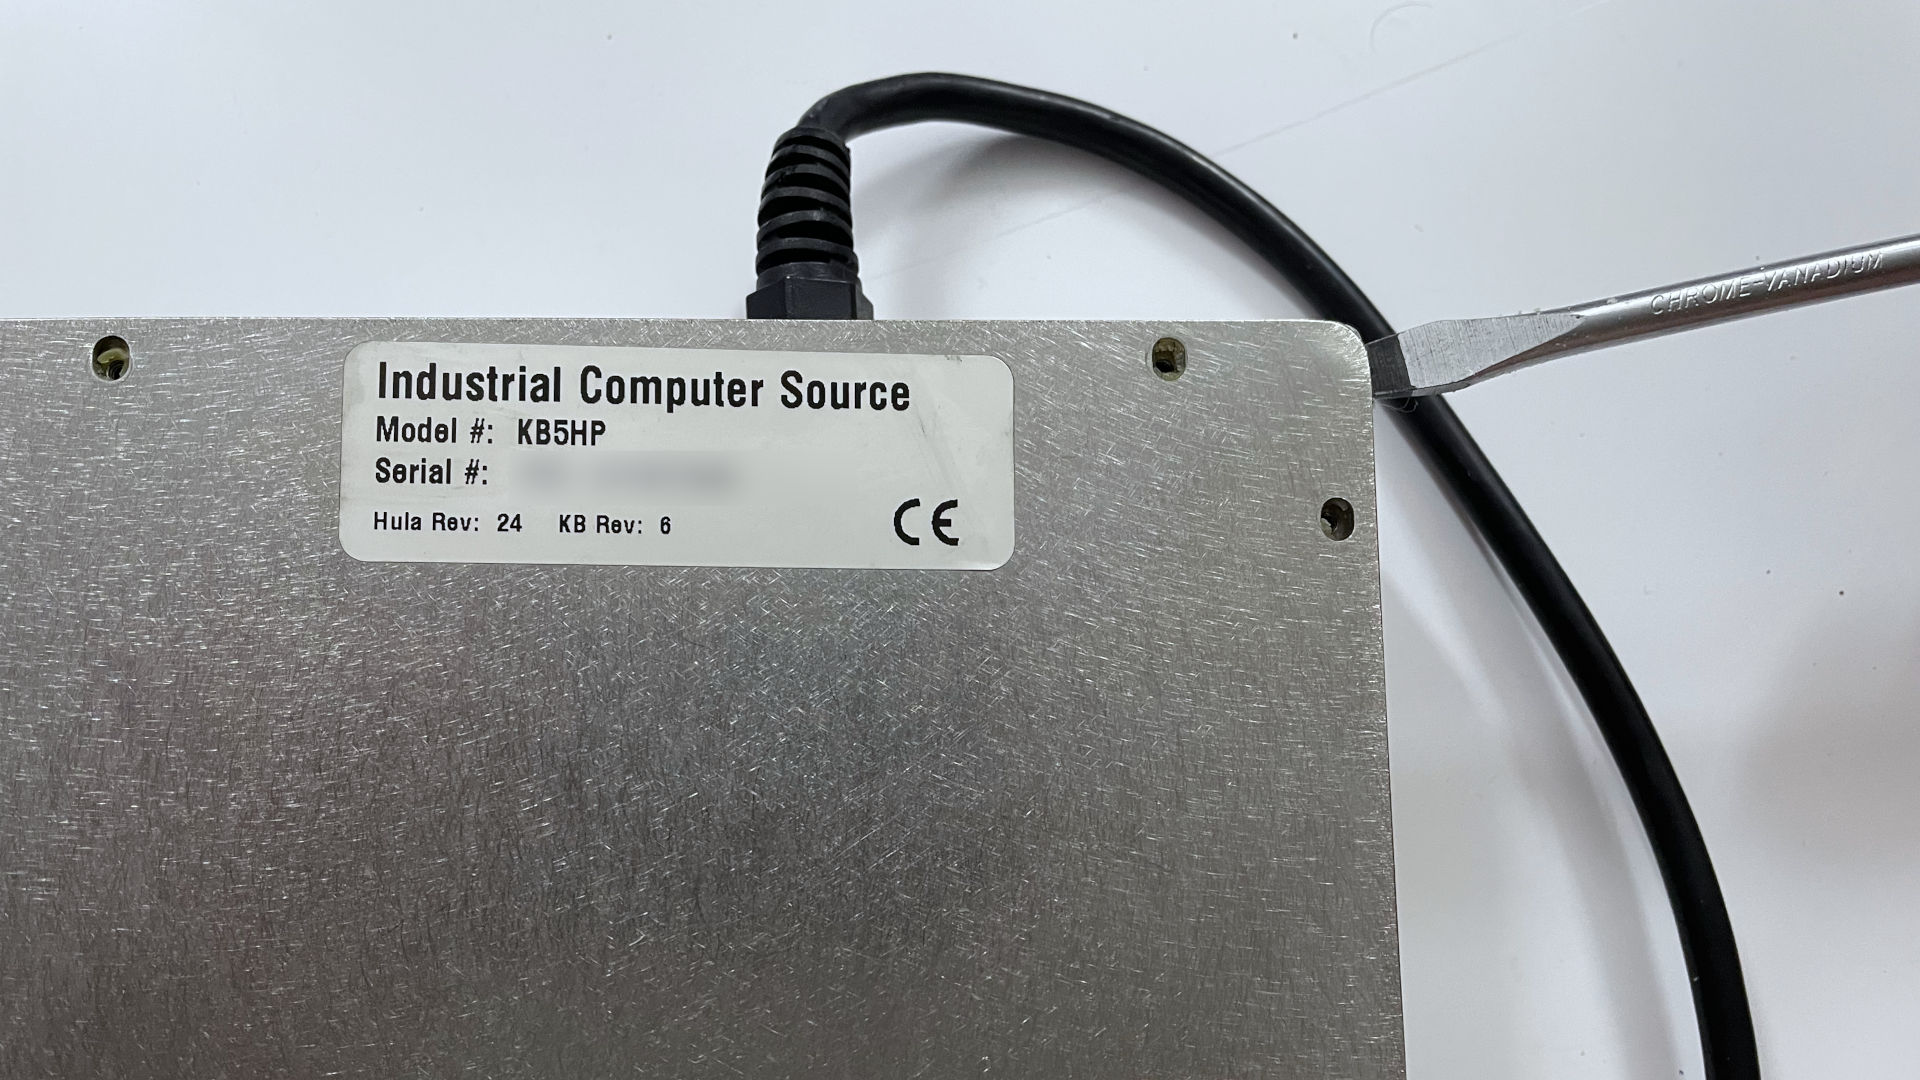
This is the Industrial Computer Source KB5HP. Never heard of their name before? No? Neither have we. Since this keyboard was manufactured around 1996-1997, the odds of this place being on the forefront of Y2K and leaving some impact on the net are pretty much non-existent. Talking to some people, they mentioned that keyboards like this, because they were "industrial," were typically purchased by factories for around 500-700USD using mid 90's pricing.
This should make this keyboard the most expensive in our inventory. Nowadays, however, these keyboards get about $50 or so on eBay as the industry is dead, er, we guess, when you can get membrane keyboards for $9 on Amazon, and IT departments are rewarded for how many tickets/cases they close, not necessarily the quality of how they close them, so spend away?
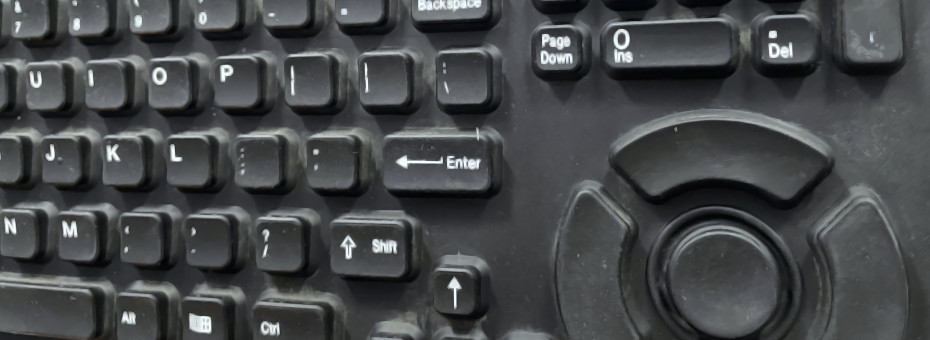
We will say that it cleaned up rather well for being left to die in a factory for 35 years, as well as whatever usage it may have had. But as you could probably tell in the picture. It seems that whatever this company is doing legitimately should've given the factory people a number pad. As the only part of the keyboard that seems to wear away is the number pad, and perhaps some wear on the trackpad area. Indicating the factory floor was doing a lot of numerical typing, even though the keys are tiny.
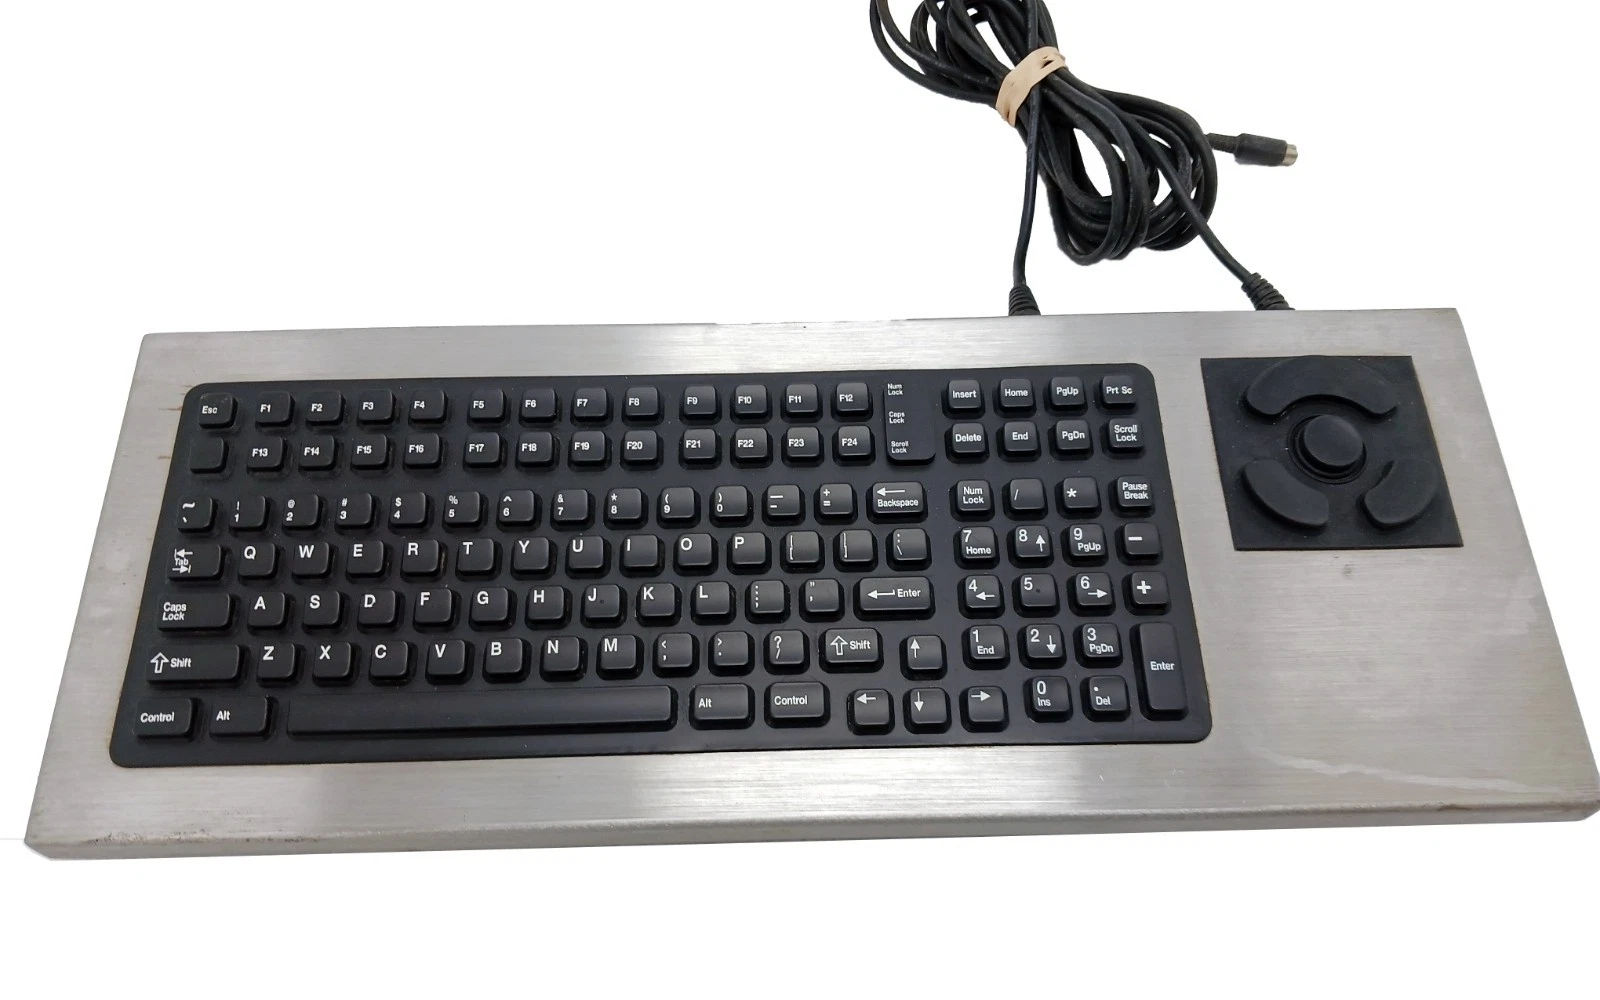 Now we did ask ourselves if Industrial Computer Group is the only game in town at the time, making keyboards like this? and the answer is "No" because Texas Instruments came out with their own keyboard, the DT-2000-PS/2, which is eerily similar and, in our opinion, a little superior to the keyboard that we have. Having the mouse way off to the side like that requires a heavy amount of desk space. All of the keys are the same size.
The only thing that I would say Industrial Computer Group did a little better is having a 'Windows' key, but that's about it. Some of you may be wondering why F20 is on our keyboard or F24 on the TI keyboard. Well, if you're rocking an ERP system known as AS/400, which is this screen terminal that your employees can login to and track everything. Some of the menu shortcuts did call out for that many function keys. It's crazy. However, as we discovered with our ArduinoDECK, those F-keys are still fully mappable to apps like OBS to this day.
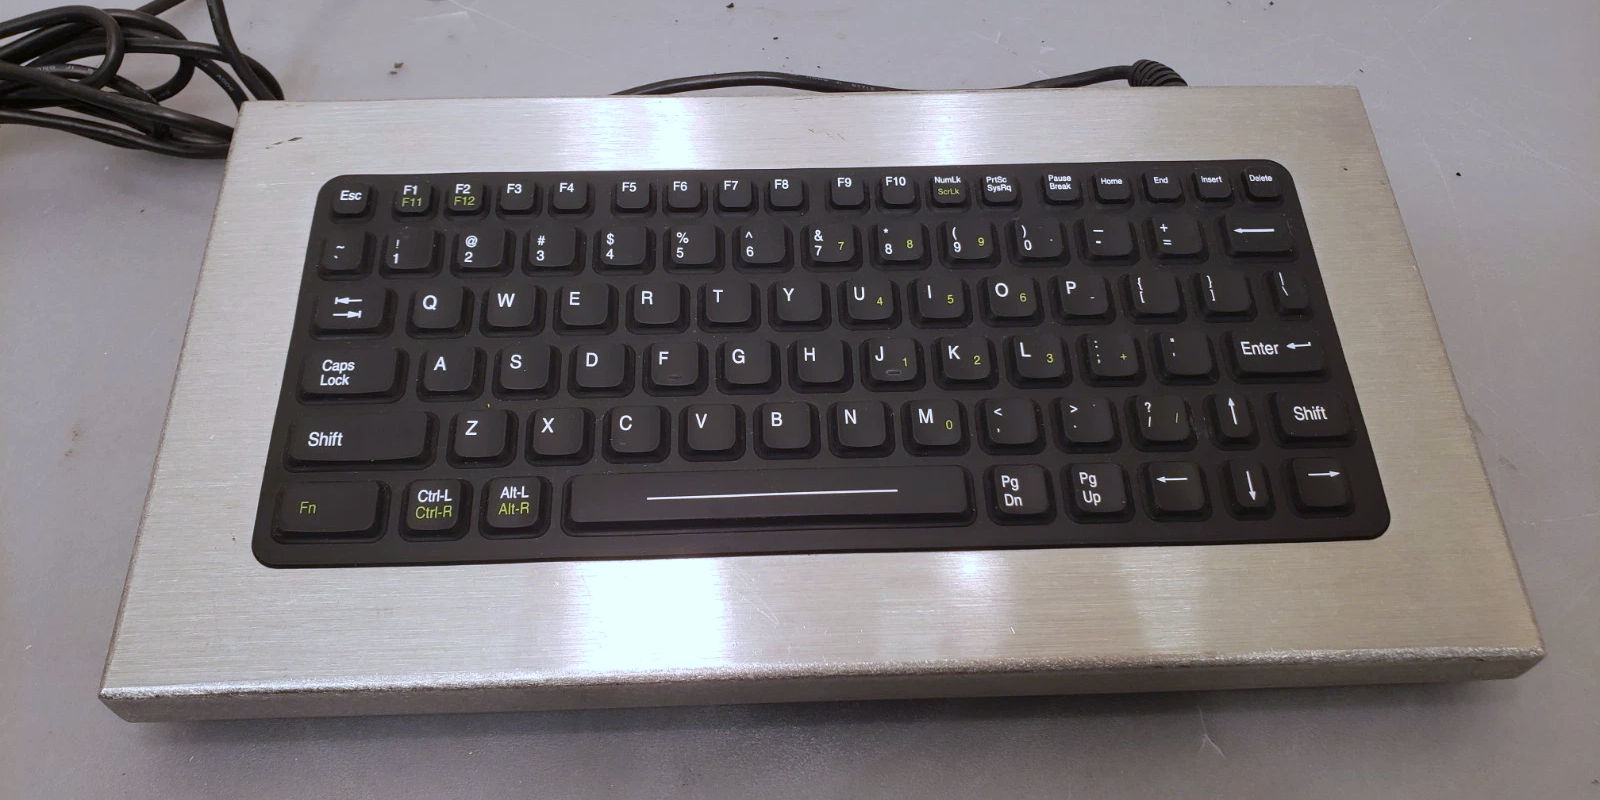
Texas Instruments also made a smaller version of this keyboard, which would probably piss off those companies that want their factory and foundry people to also be accountants, as apparently bean-counting is how you really grow a business in America. Especially in a thriving place like where we were. Too much sarcasm? Fair point. Back to our keyboard.
Plug it in?
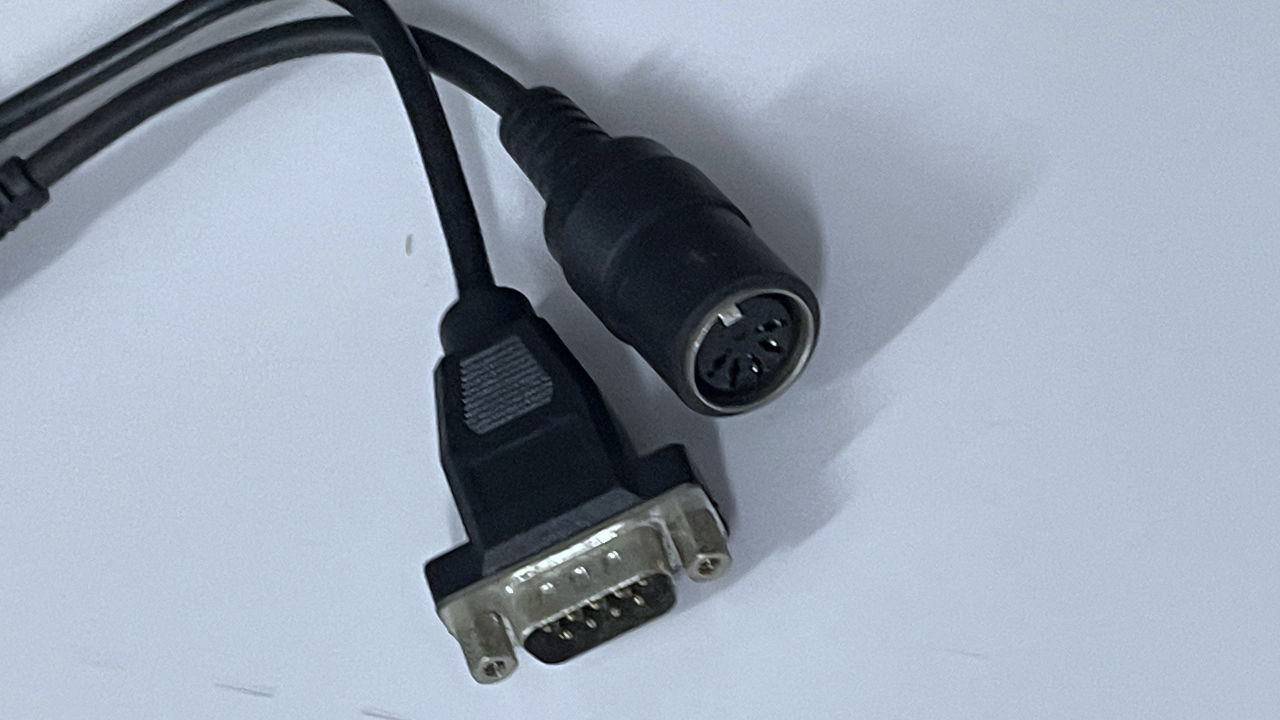
This industrial computer sports an AT 5-pin DIN connector and an RS-232 connector. Now, for those who aren't fucking dinosaurs like we are. The AT connector was something that existed on every motherboard dating back to the 8088 sporting an 8MHz CPU, into the 486/Pentium 1 area, before they started to come out with a new standard (ATX) cases, and along with that, transitioning over to PS/2 connectors. The concept of a mouse was considered an 'option', especially in the industrial world, because everything was dumb-terminal or DOS screens to drive some of the earliest CNC, where you had to calculate where that bit is going to go and type in the 'program' manually.
If you wanted a mouse for Windows 3.1 or Metaframe, you had to install a serial/parallel card into your box. But having a GUI meant that the machine was for talking to the office. Whereas any computer hooked to a CNC (which was rare, it was all PLC driven using latter logic via precious RS-232 serial or even better! tape cassette holding 16kb of data!) was isolated.
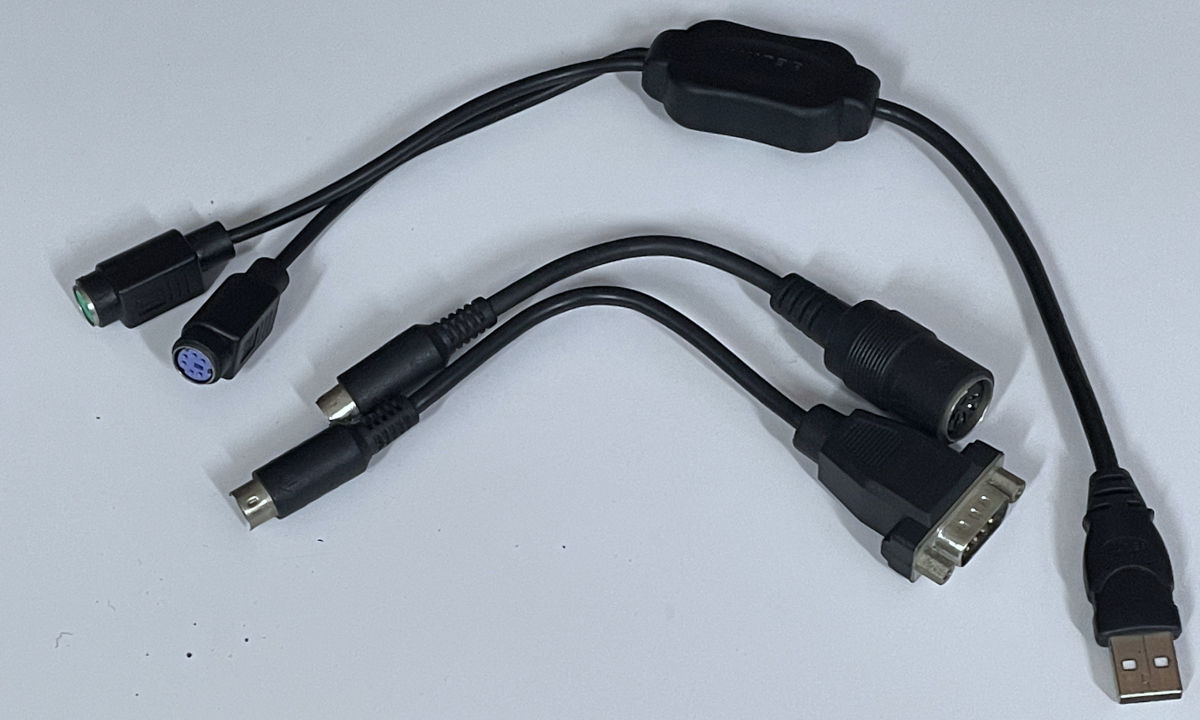
This is, of course, where we embrace adapter hell. First, converting AT/RS232 over to dual PS/2 adapters, this gets us up to Y2K generation technology. Then we convert AGAIN. Using a PS/2 to ACTIVE USB cable. Emphasis on the "active" part, which allows us to hot-plug this keyboard/mouse combination into a modern PC. Now that we've got this far. Let's start typing!
The issue.
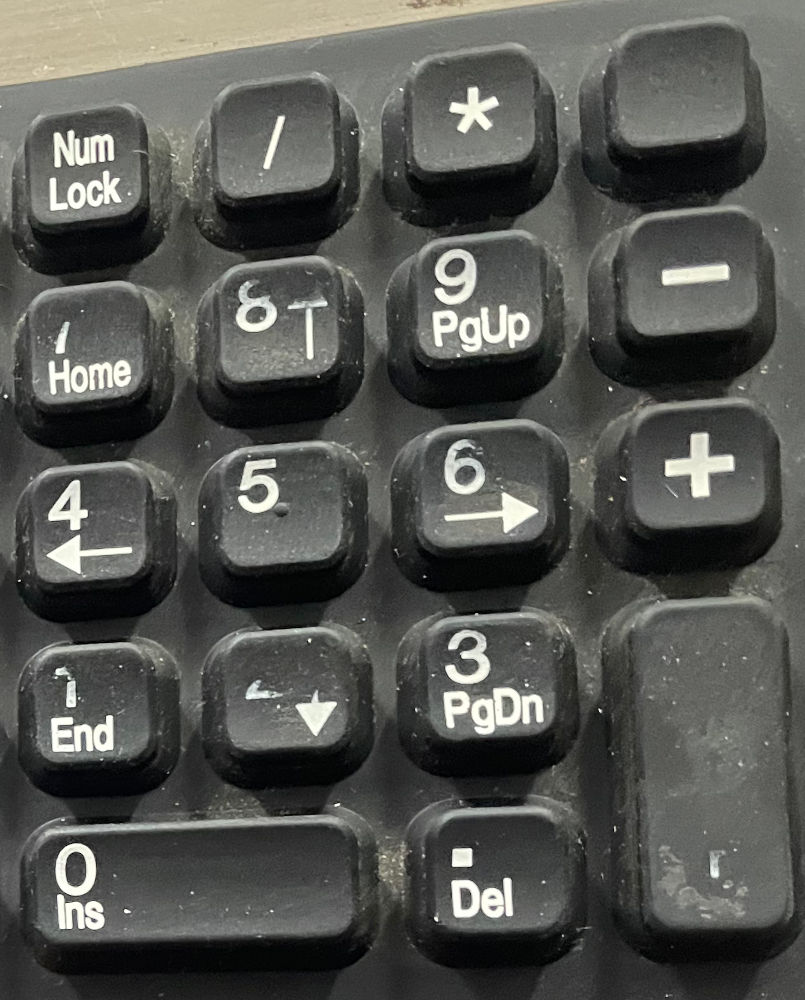
Remember that number pad we were talking about earlier? On how tiny it was compared to the Texas Instruments, where it was hard to type in? Yeah, apparently, the people in the factory thought so too and kept pressing until the numbers 1-2-3 and ENTER all stopped working.
The rest of the keyboard is perfectly fine! So since we're not going to be doing my Excel spreadsheets on this keyboard, we could happily put it onto some PC.
But you wanna know what? Let's pop this bad boy open and see if we can do something about it.
Serial Numbers blurred to protect the guilty.
Well, this is refreshing. #0 Phillips screws all around! I really dig classic construction sometimes. Got all of the screws off, but the case didn't budge at all.
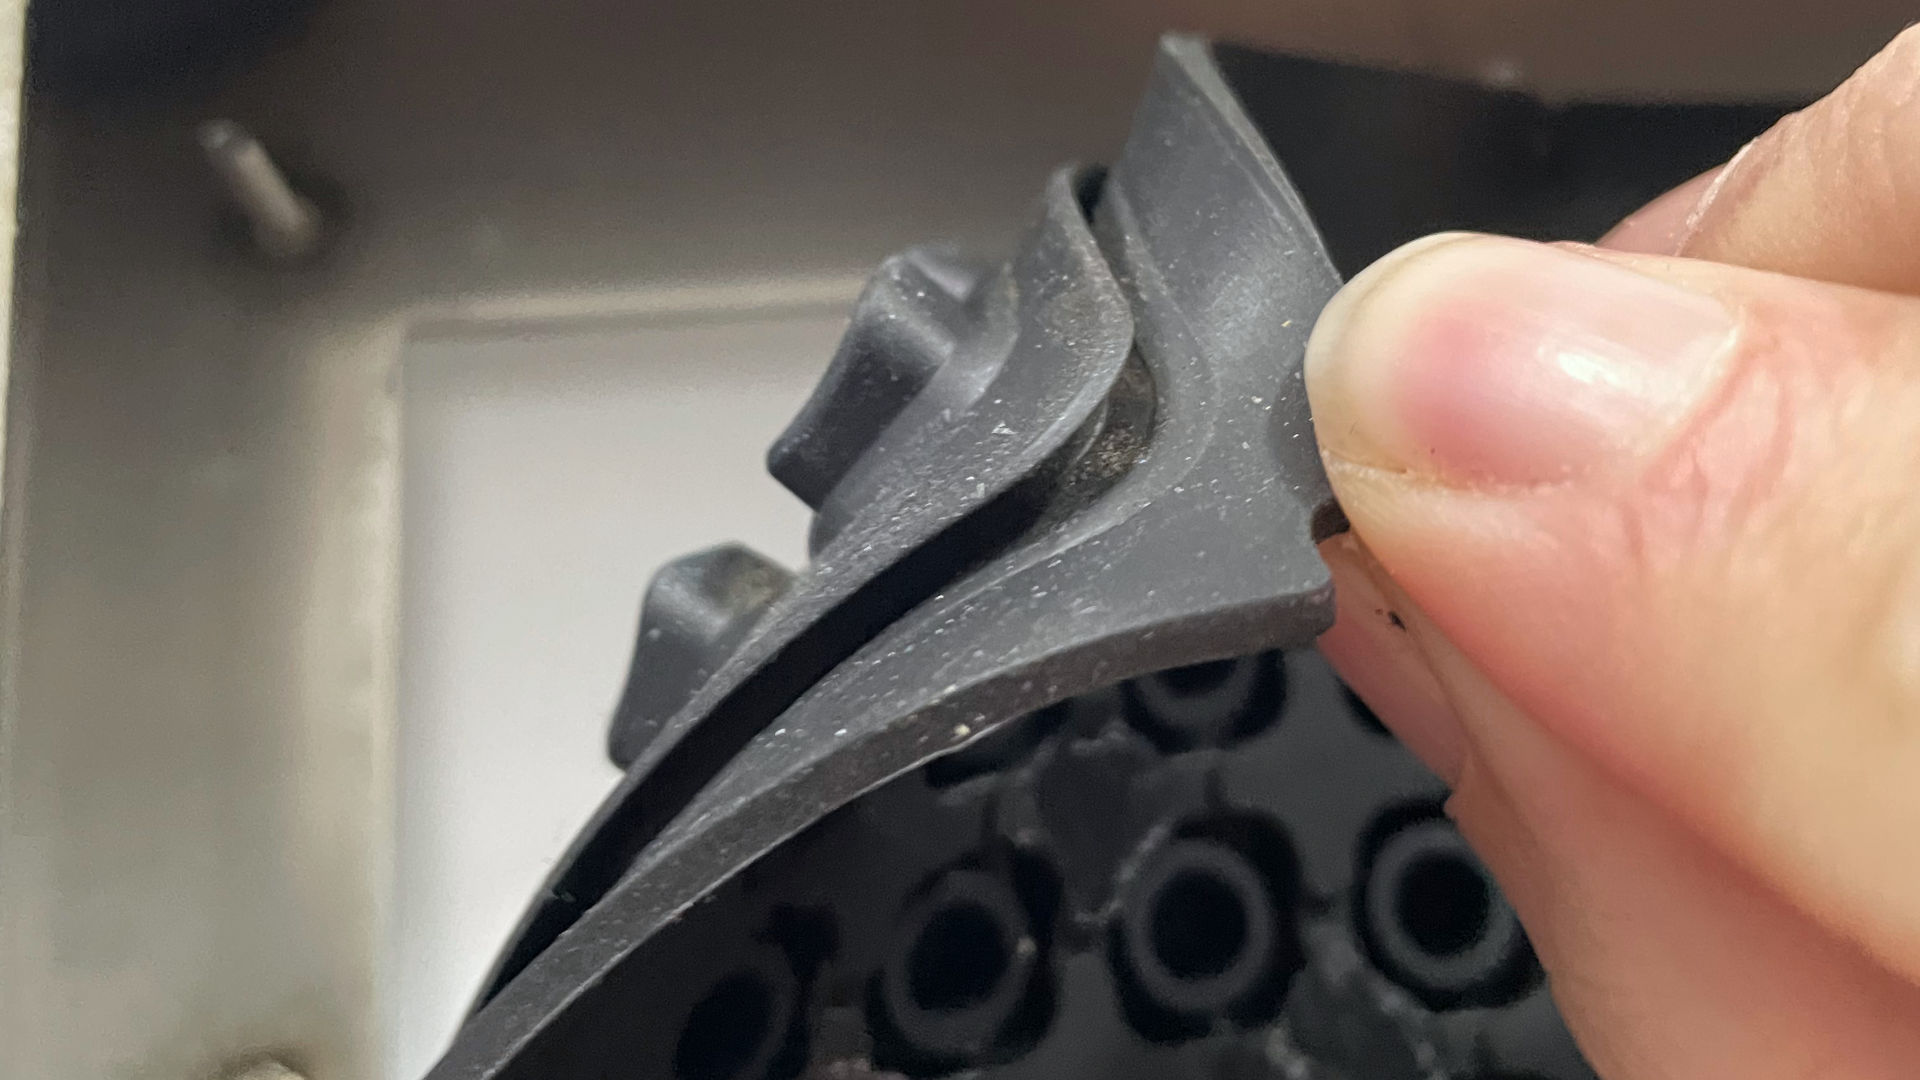
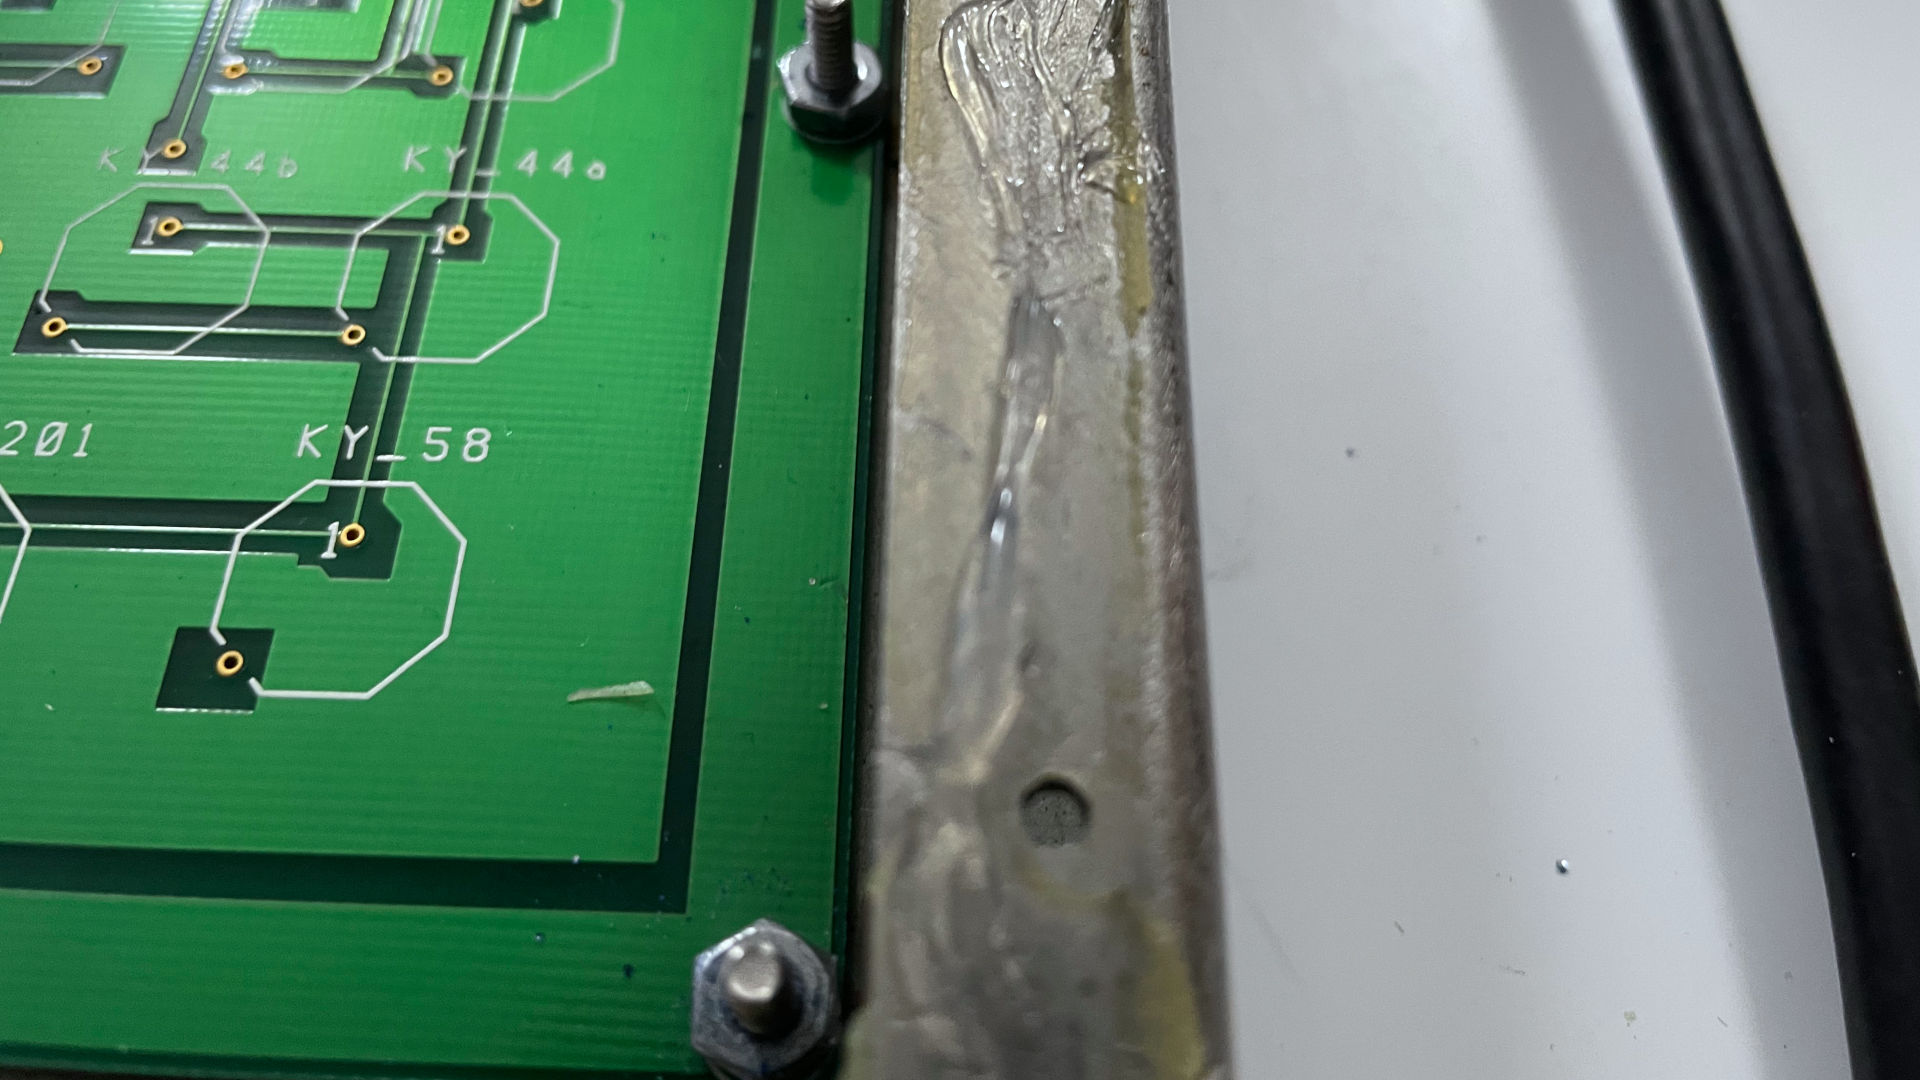
Well, started to pry the case and it appears that the whole sides of this case the company applied Silicone Glue to keep the moisture out of this unit. Interesting move, but apparently, even after 35+ years, the glue was holding on stronger than ever. Once we got the cover removed.
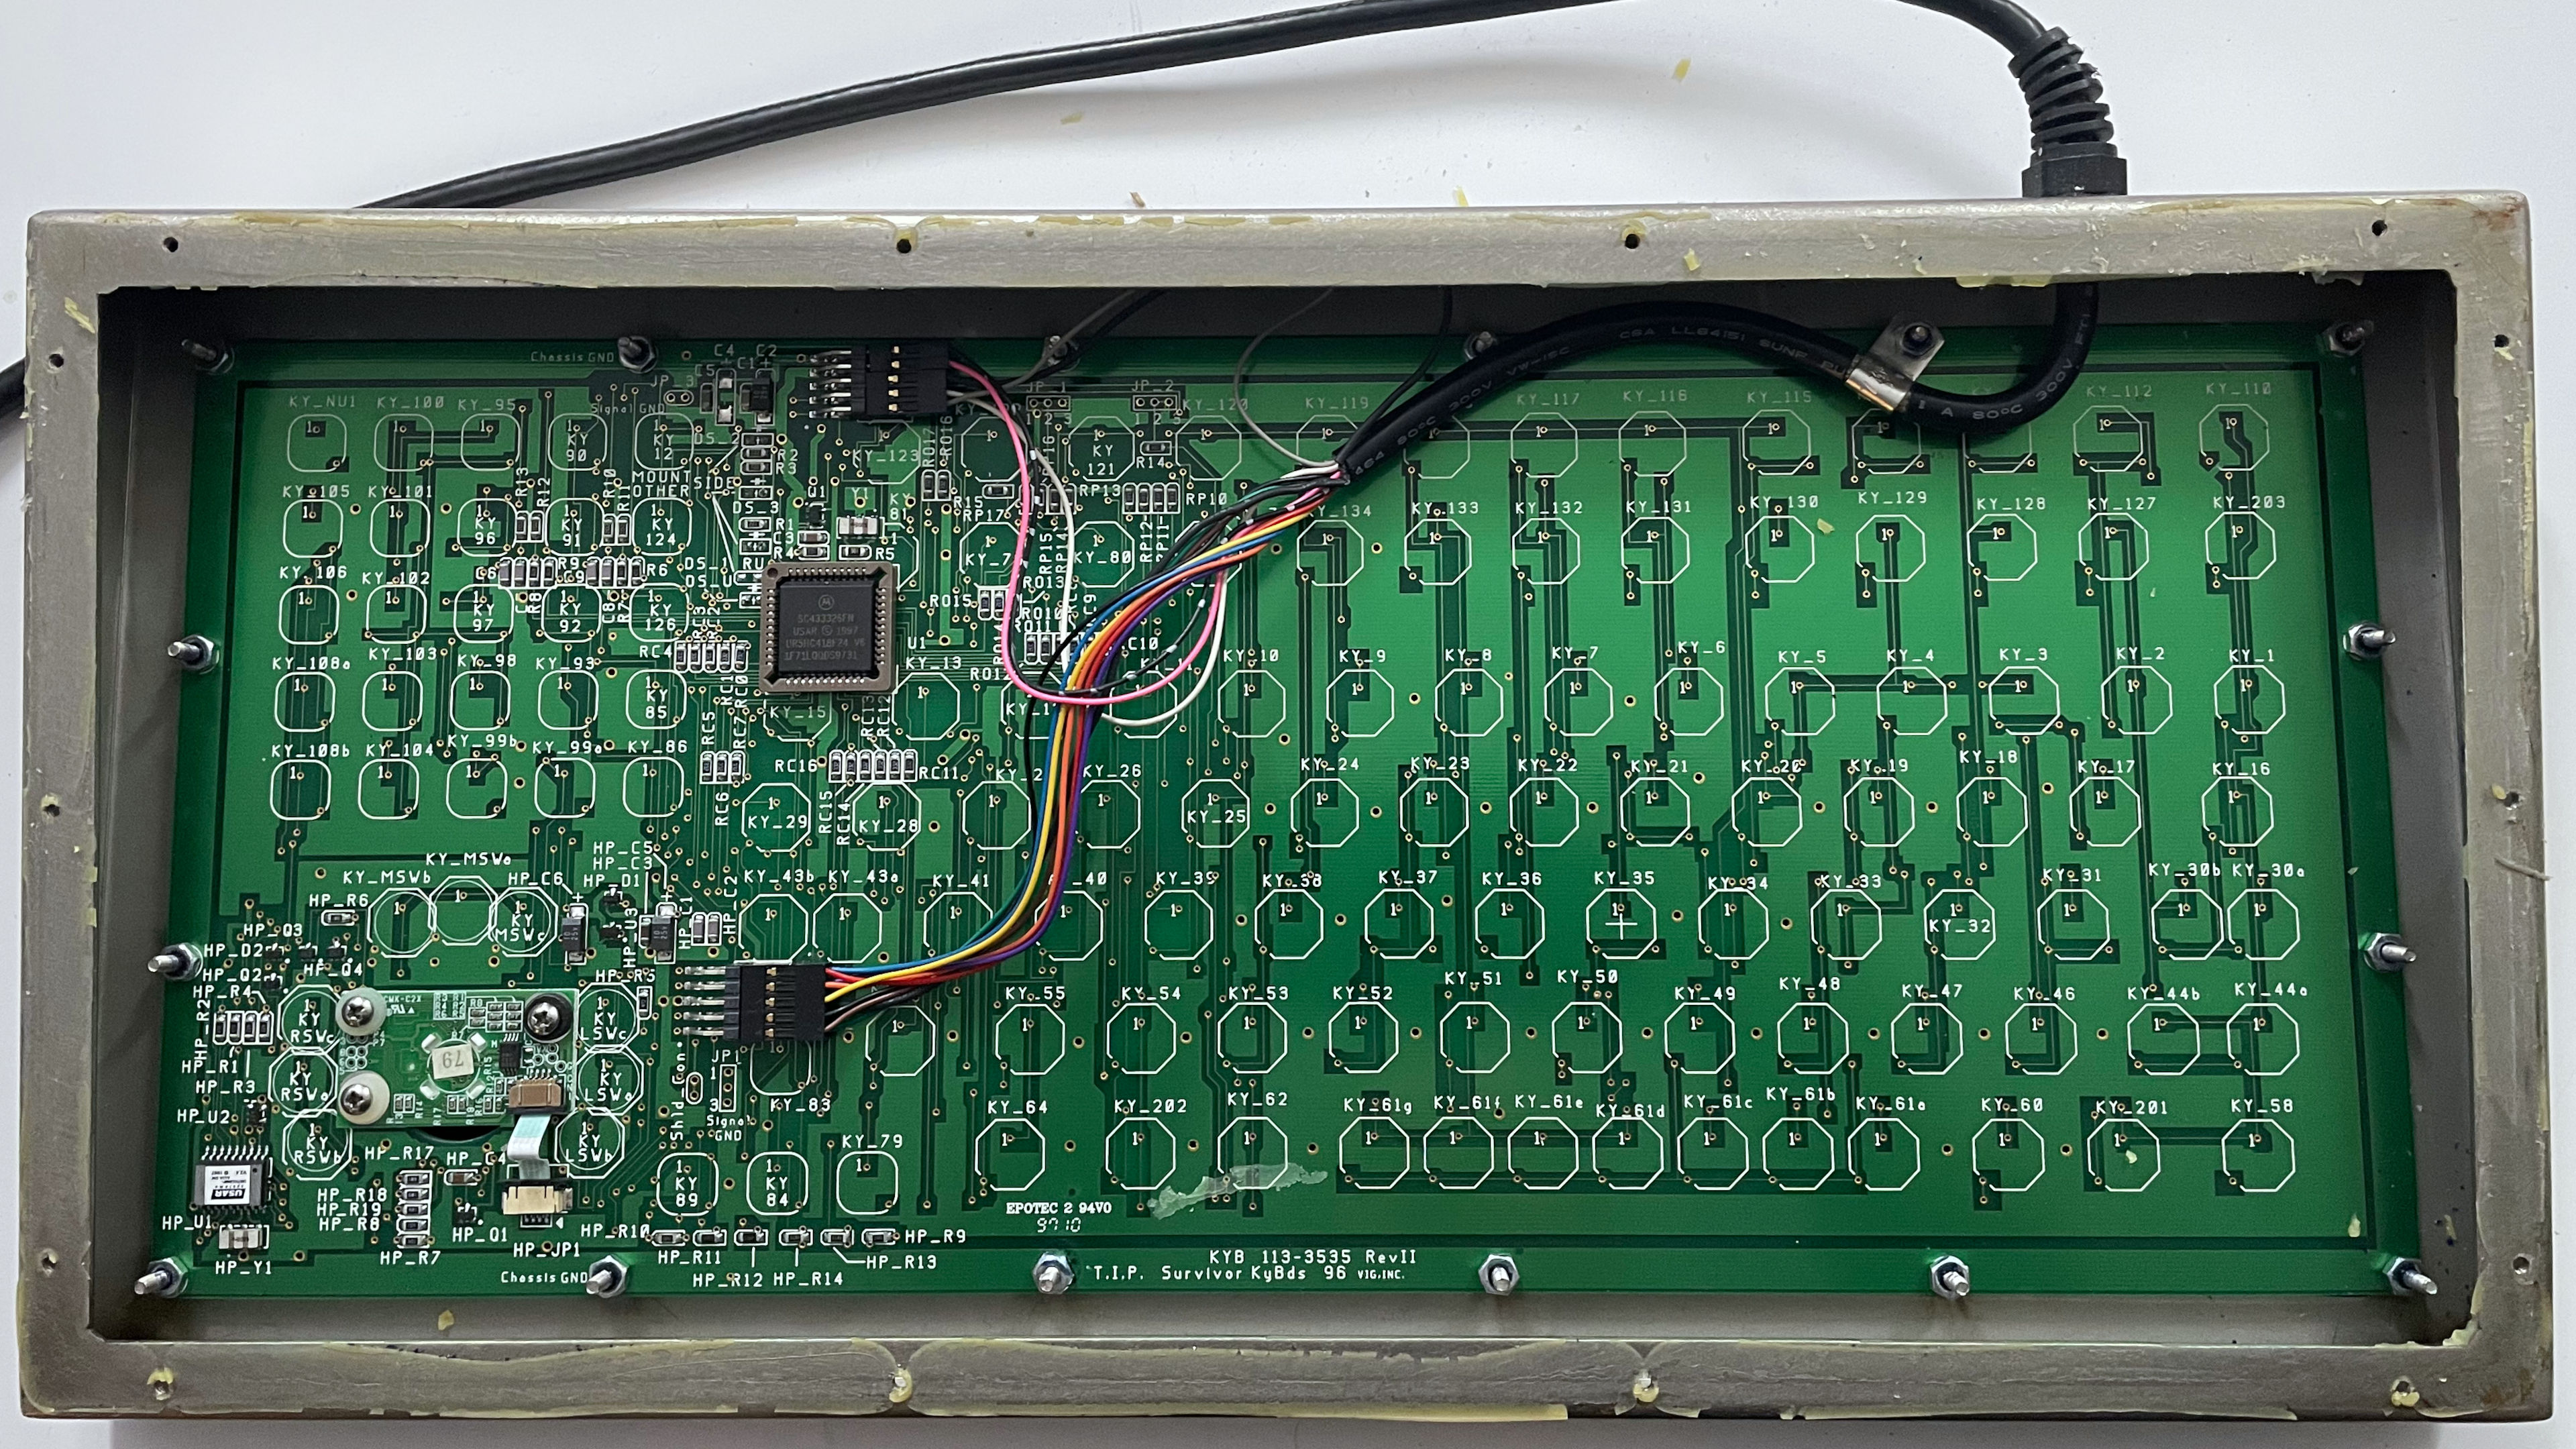
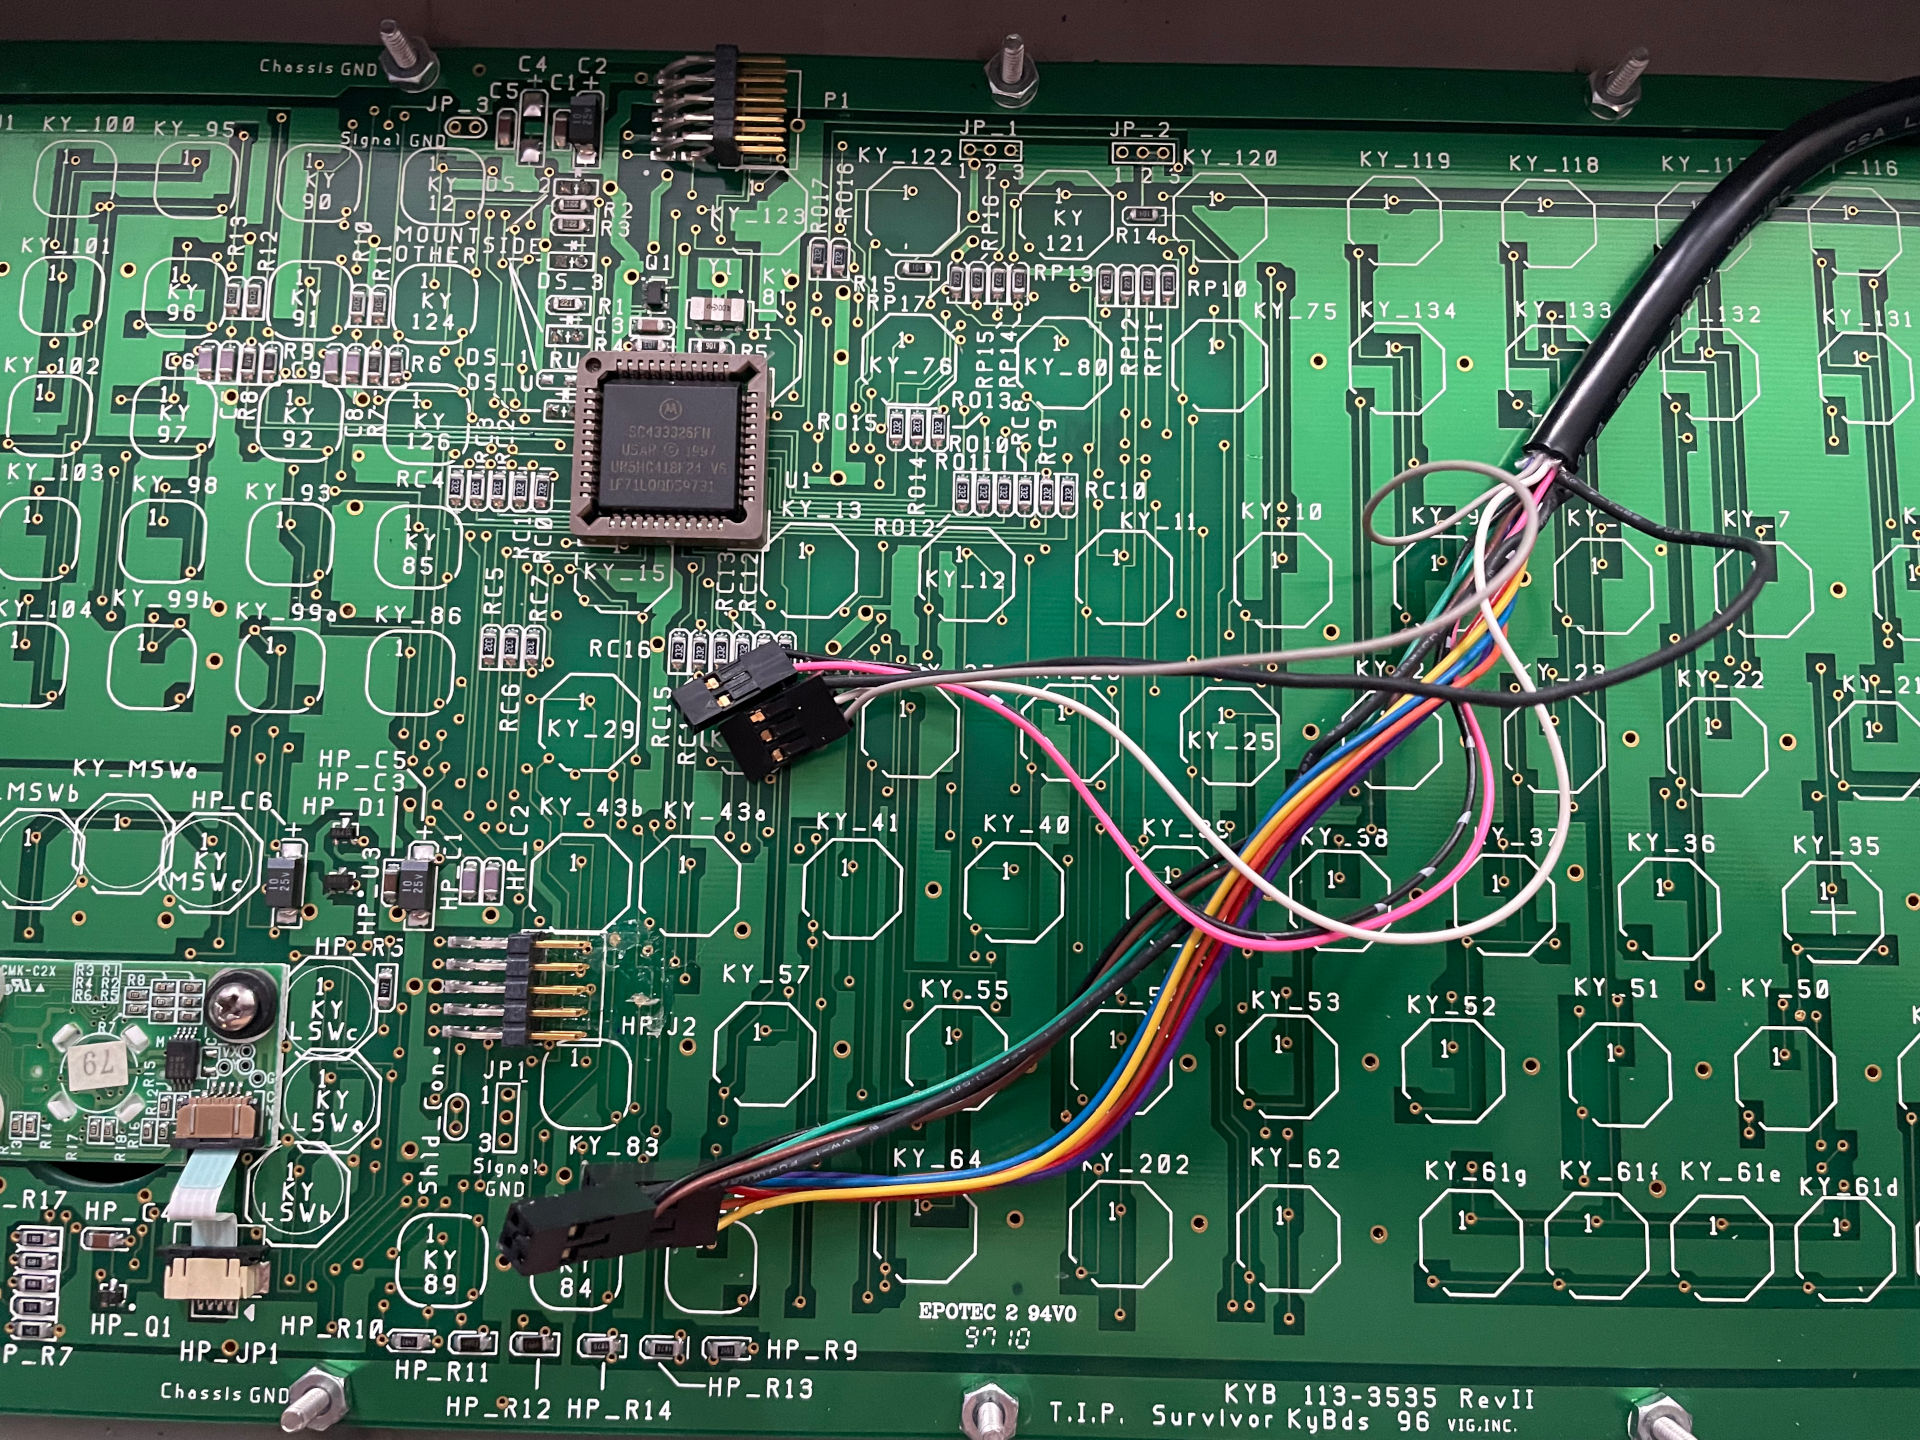
Holy shit. This is a thing of absolute beauty on the inside. Almost as impressive as when we repaired our Ableton, where it's just pure PCB! Is it natural for me to take pictures even when we're not blogging? From a repair tech point of view, you betcha! Because those connector cables are actually not all molded together. Thus, if we took them out, we run the guessing game as to how they go back inside.
I was expecting a shitty membrane like some of the IBM keyboards we've seen over the years. But we guess you do get some quality for paying hundreds for a keyboard.
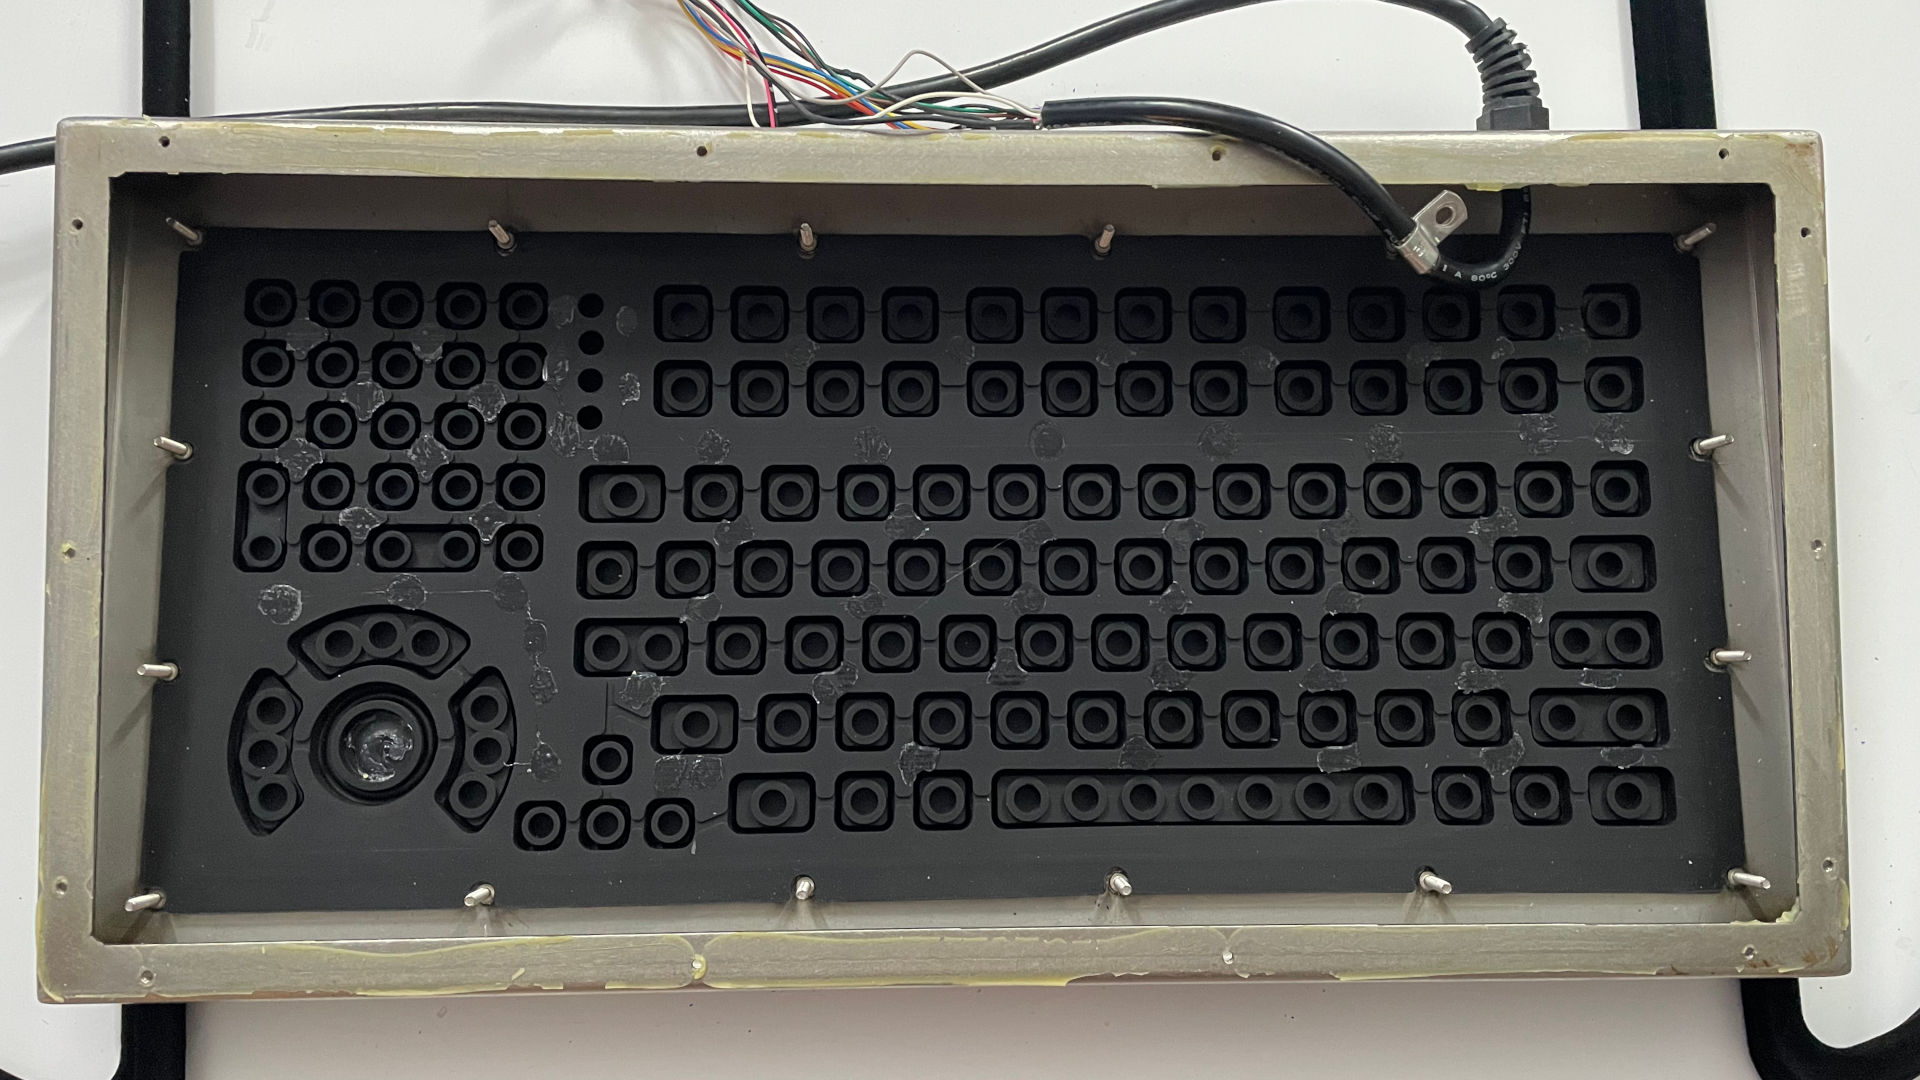
Beyond that, everything is pressed onto the keyboard gasket with a series of nuts around the outer perimeter. Hell of a ground plane you got there, guys! But there's no need to break out another tool as we can just remove the #0 bit from our screwdriver and undo the nuts (provided the magnet doesn't suck them inside, this is why we loosen then take them out the rest of the way with our fingers.)
Just like removing the case, however, they used more silicone glue to lock the rubber gasket onto the PCB. We had to be exceptionally careful to remove that silicone glue so it would not tear the rubber nor damage the PCB, but we did get it out to expose the underside of the PCB.
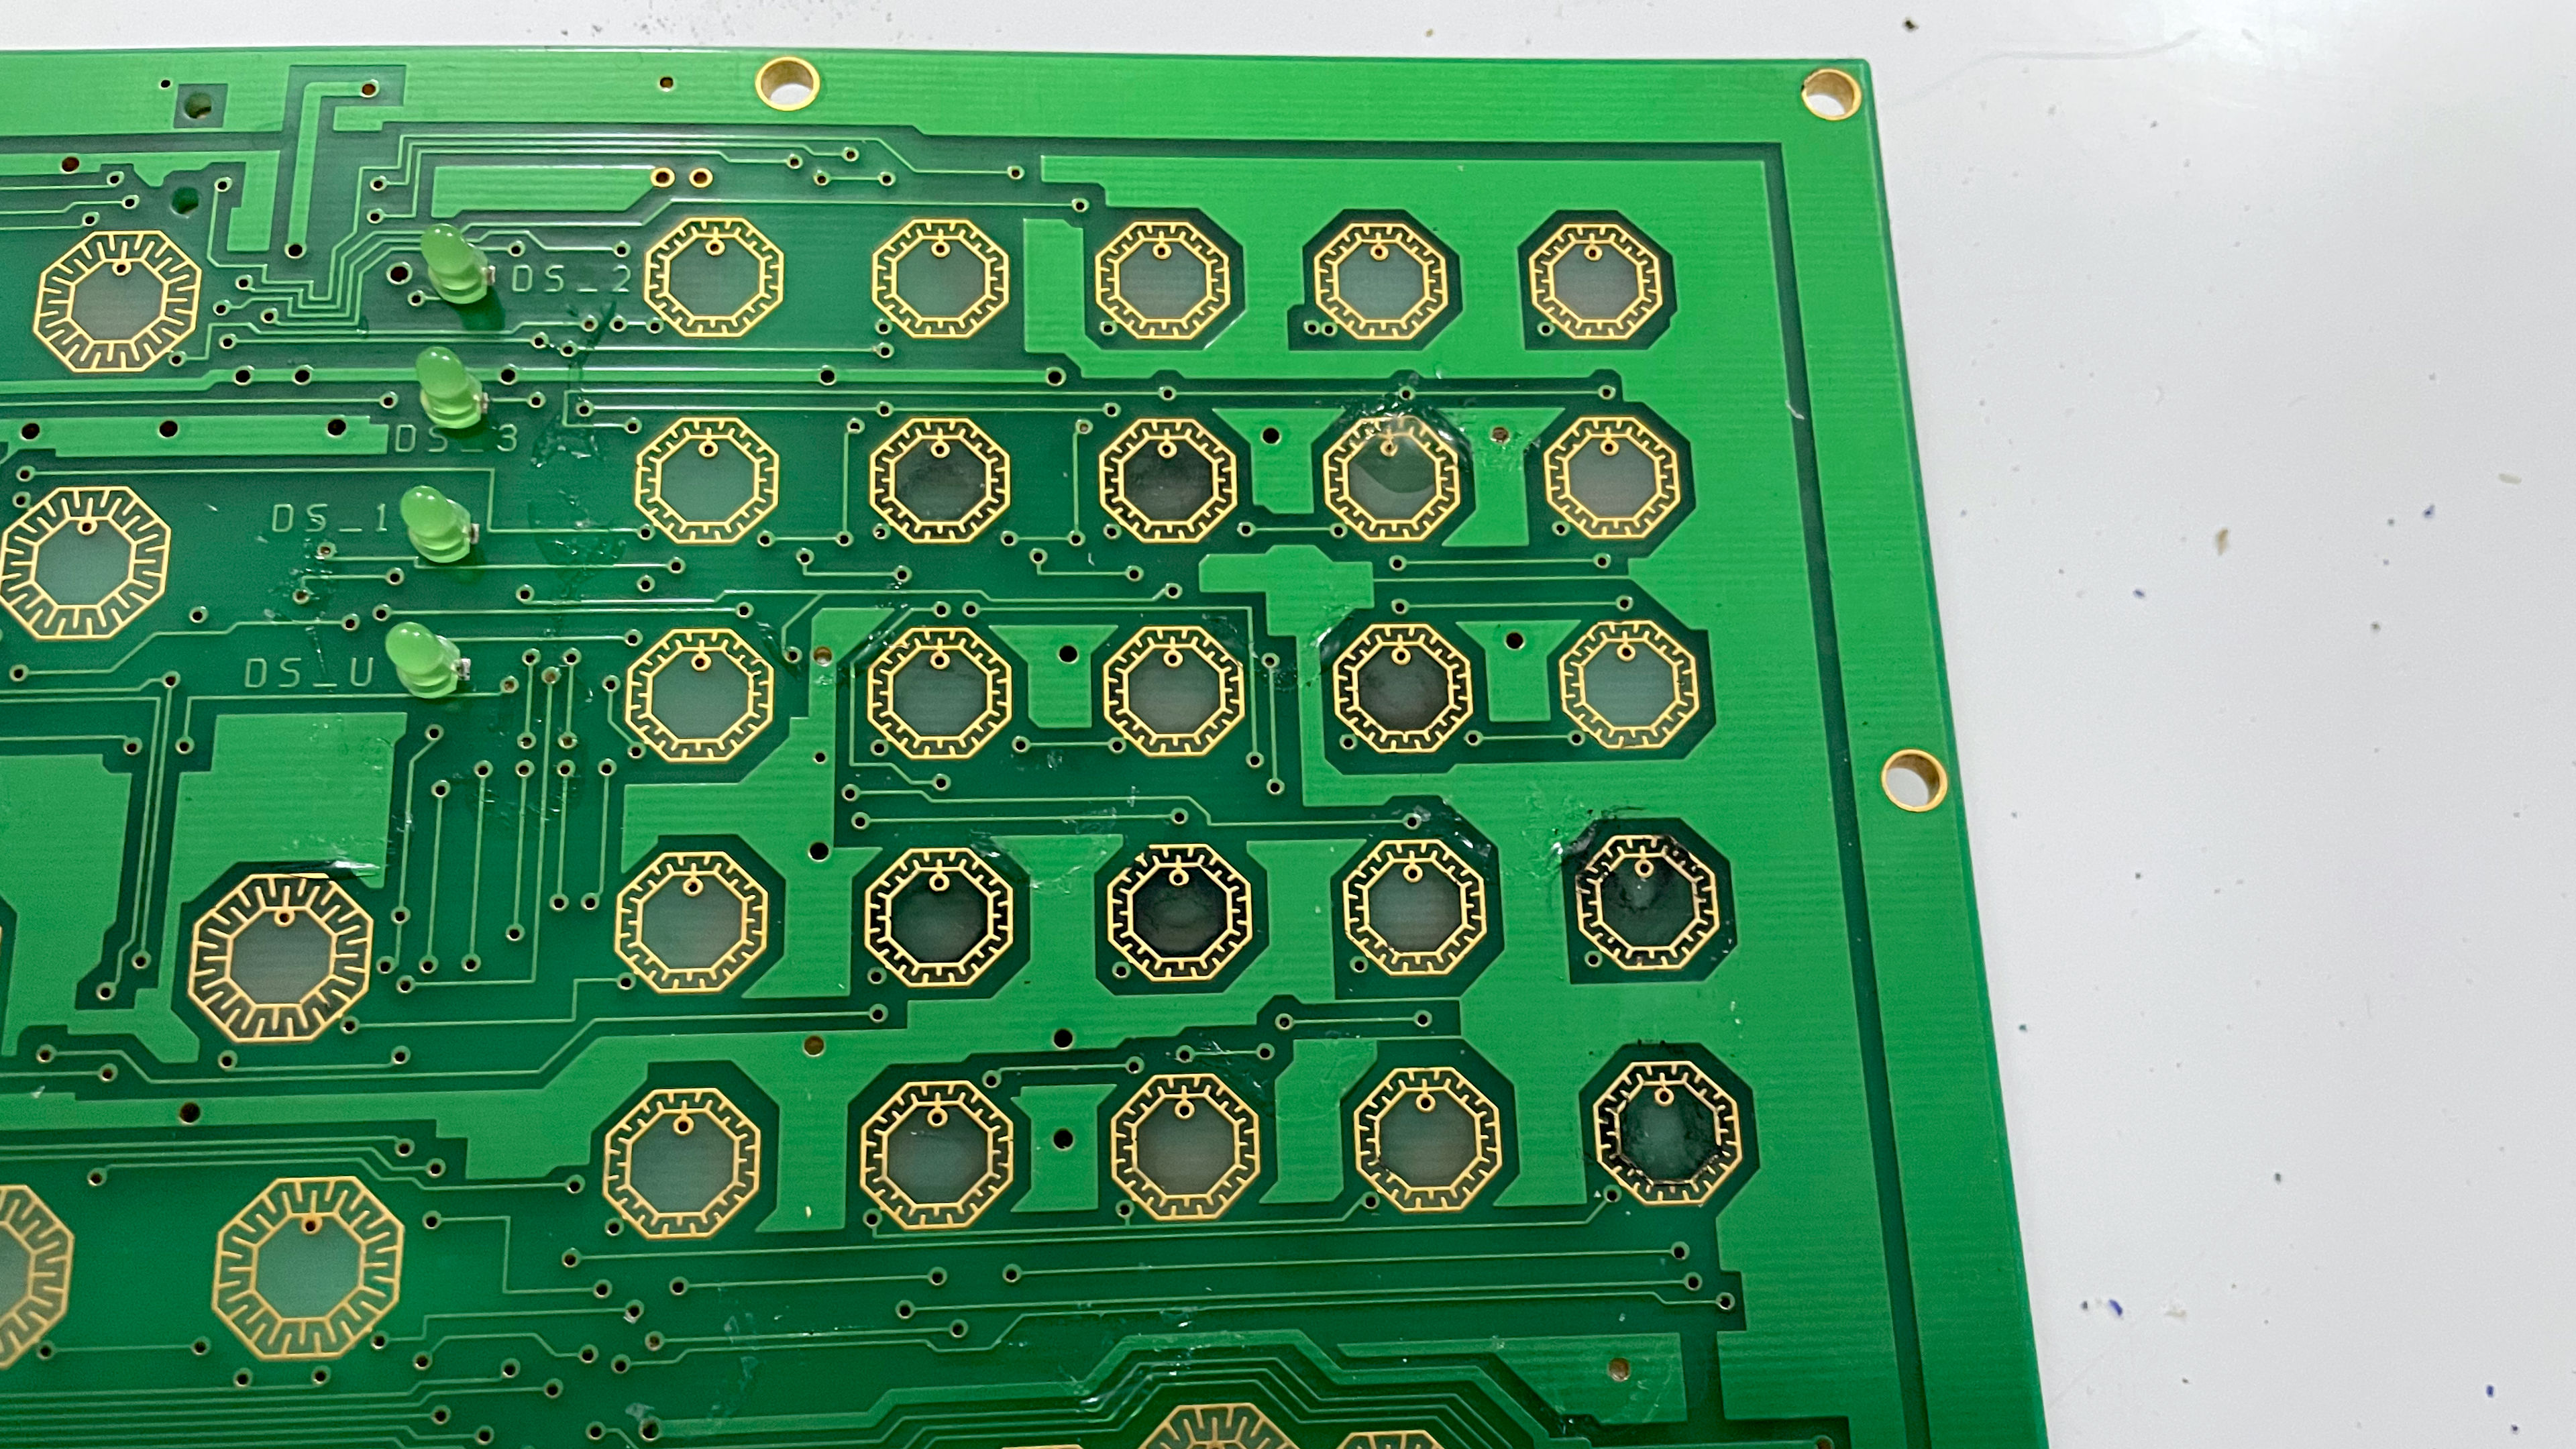
We start ot see WHY those numbers were not firing. It appears some corrosion got onto the PCB right where the numbers were failing on the pad. Because of how well it was designed, it was remarkably easy to clean up with some 90 percent alcohol and then just let it try.
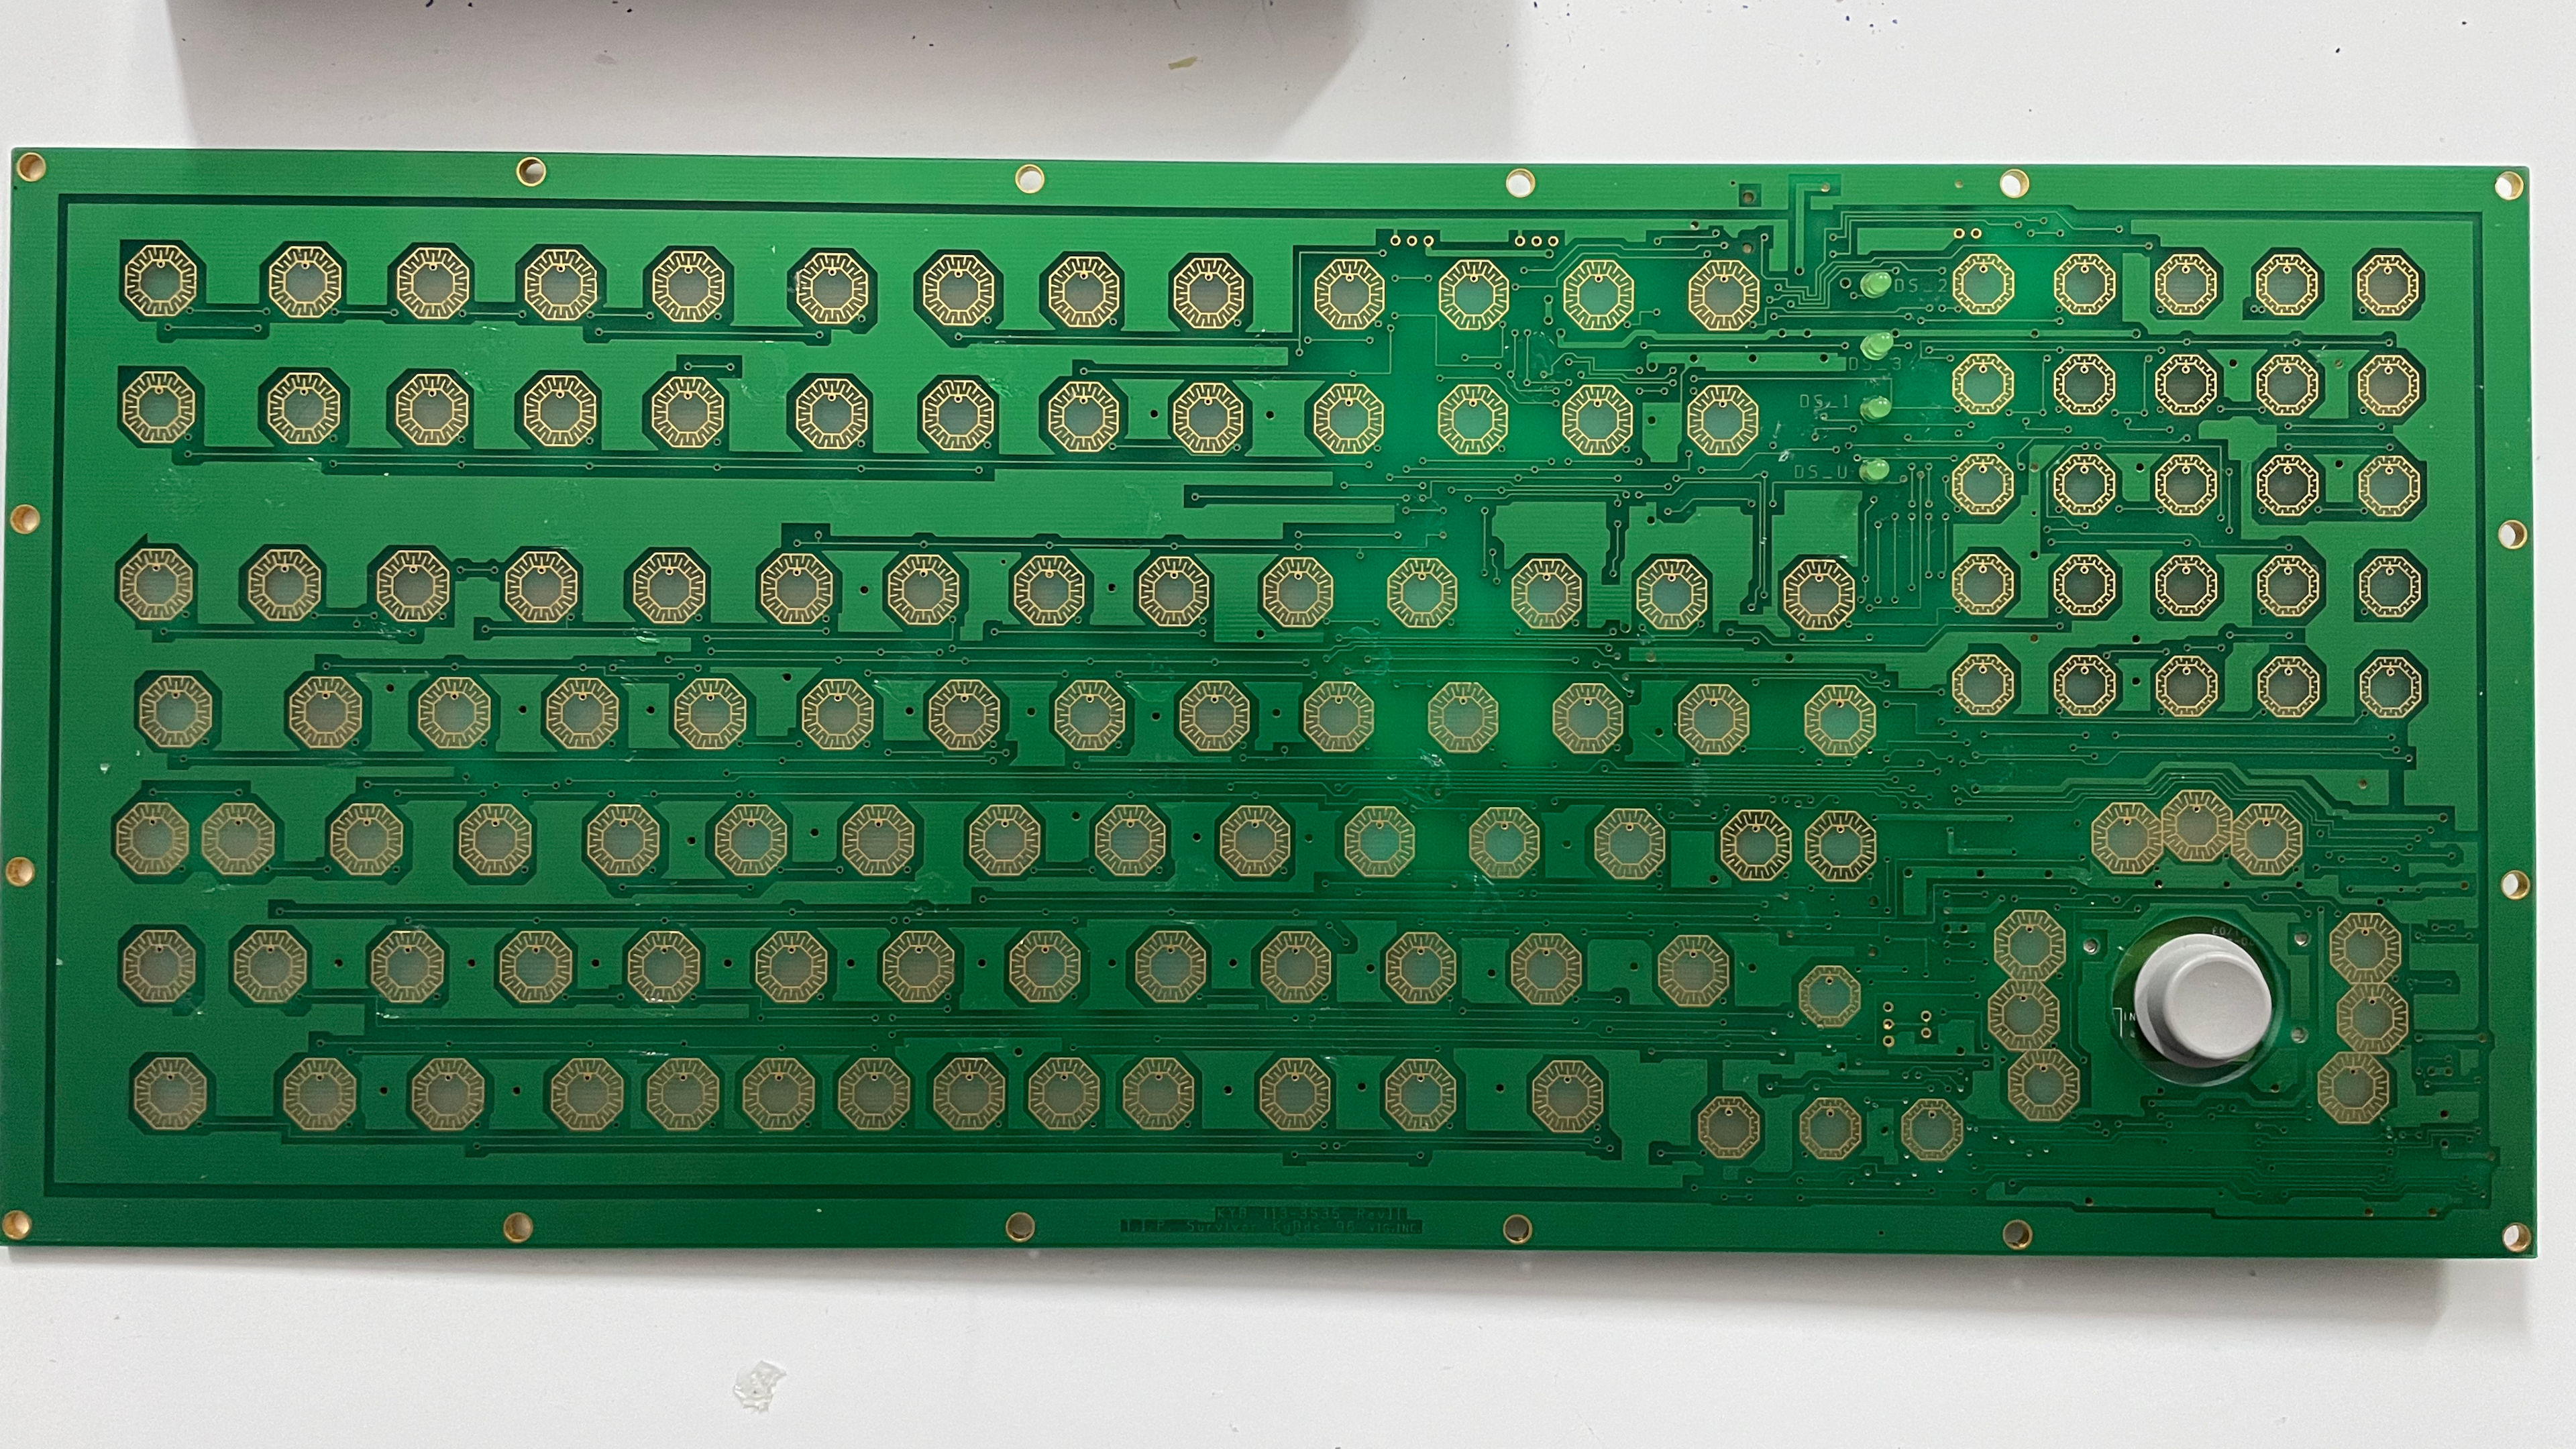
With a quick wipe-down, the pads are now identical throughout the entire assembly of this motherboard. which looks fantastic.

Looking at the membrane portion, we see almost no damage to the plastics at all. We're a little bit surprised they didn't tip the bottoms with a conductive carbon filament so that they wear down first before the plastics. With a quick cleaning as well as a bit of sanding to the frame to remove some of that excess glue.
Re-Assembly Time!
Alright, after we were done cleaning the metal around the case and the keyboard gasket (at least the best we could without damaging either with harsh solvents). We first put the gasket into the keyboard. This was a bit of a trick to get installed because you have to stand the keyboard frame up and push against the edges so that the keyboard gasket goes around the lip of the entire frame.
I had to place coat hangers underneath so we could get that 5-6mm gap, so the rubber keyboard gasket is perfectly flat as we line everything up. Now, a great indication that your gasket is in place is just by seeing how centered the gasket is around each of the screws. In our case, we found that the screw posts in the center were not aligned, indicating we didn't push the gasket all the way through the frame.
It's crazy important to clean off as much of the residual glue as you can and to make sure it's level when you reinstall.
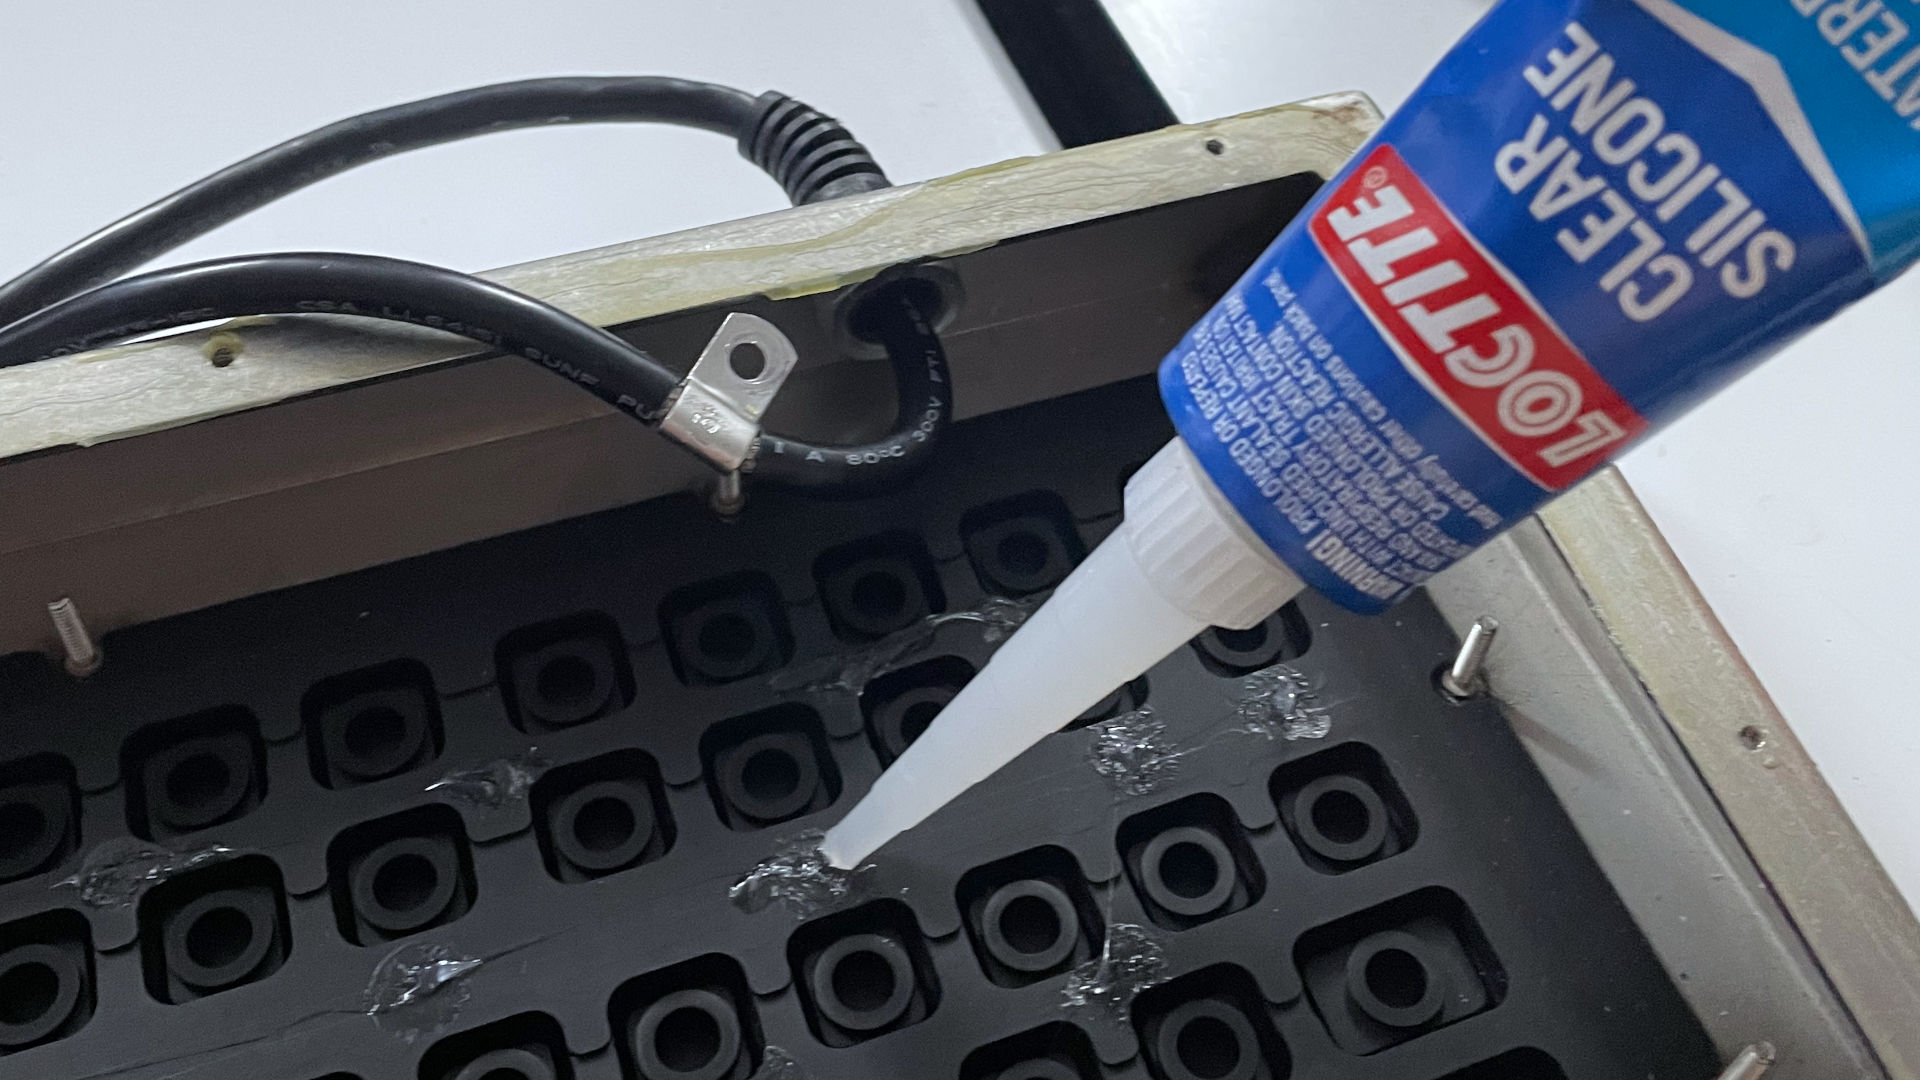
This is one of those moments where you just do not go crazy with the silicon glue. Ane drop is more than enough! If you add too much, then the silicone glue could leak into the contact pads, stopping that keypad from being pressed. We went with the most generic glue possible. Avoid ultra-strong glues like Gorilla Glue, as in the future this assembly may need to be taken apart again.
Remember when we talked about taking pictures of your cables first before you pull them? This is why. Also, this is the part where we drop the PCB in place. Make sure it's totally level as it goes down, since we don't want to smear the silicon glue around. Plug in the cables, and at this stage, we can test to see if there was any change in our board.
Test results.
Well, the 1-2-3 on the number pad is back. The enter key on the numberpad is a little bit of a pain to press bit it does fire at least! It's still not fun to type in, but testing the other numbers on the pad was about the same feeling. The enter key is a little tough to press at times on the number pad, but at least it works! This is probably the best we'll get.
Back to re-assembly.
This is a preference thing. But since Industrial Computer Source lined the outside casing with silicone glue to keep moisture out. We shall follow the same technique, so it could potentially last another 10-15-20. We attempted to scrape away as much as we could before re-applying a bead of glue.
Just as a note: Silicone Glue is fairly forgiving, taking about 45 minutes to set. So if you get a spill-over on the case. It wipes away nicely with some alcohol on a towel.
Final thoughts.
Coming in at just over 6lbs or 0.45kg. This keyboard is a fucking majestic beast! The kind of keyboard that, if you whip it across the room, drywall and wooden doors will be destroyed before anything happens to the keyboard itself! We would say the only thing that's missing from modern industrial design is a quick disconnect for the cable, because in general, you don't want to really touch a wiring harness on a PLC or a CNC machine unless you absolutely have to. Finally, they did a great job with the cabling on this as well. 30+ years and it's still reasonably flexible. Also, we think we've seen these keyboards appear in various science fiction movies as background props just because of how industrial they look. Coming from the era where IT was rewarded for providing solutions instead of generating tickets, spending $600 for a harsh environment like a foundry is more than justified.
We will say that if this company wanted to use something like this as a glorified calculator they should've went with the Texas Insturments as the normal keys on this board are somewhat consistent with how you type on it versus the enumber pad were we feel the contact pads and smaller contact points make it a little more of a pain in the ass to type in that area.
Segwaying into typing, one may ask:
Is it good to type on? What's the aesthetic.
Well! If you give a keyboard like this to children, I'm sure that with the amount of force you press on each key, it's a great way of training your fingers to perform kung-fu death grips on people when you are older. If you type with any level of speed, you have to really use as much of your finger strength as possible to smash that rubber! Which then you get that low-level and deep 'THOCK' that is expected coming out of banging on a giant metal box.
How will we be using this keyboard? It goes on our media PC. Yeah, that's right! The one that plays movies. Even though we have a remote control, a remote keyboard, and a remote mouse. Sometimes, when doing maintenance, you really don't feel like powering all of that up, and instead, just having this keyboard plugged in, ready to rock and roll is good enough.
Servicibility is a solid 9/10 with only one point taken away for fighting with silicone glue. Doesn't need firmware updates or drivers. Just needs power, and it fucking works. Also, not sure what to do if the membrane starts to wear down on this bad boy.
This is such a niche article, we just wanted to make it for the fuck of it. If you enjoyed it. Great! If not, wow, sucks to be you.
Until next time, that's what server said.
+++ END OF LINE.