
AirPlay audio only on the Raspberry Pi
Airplay (or in previous revisions from apple this protocol was called "AirTunes") audio is the ability to transmit audio from your smartphone device (The Apple I-phone does this natively and android users can actually download a plugin protocol for this) to another device which is hooked to a home stereo system. I know there are countless articles talking about how it's done. But since this is my blog I sometimes use my blog as just a random dump on how I get things going so in case I forget with my countless other projects I don't have to look for a particular site to show me how to get it working again. It's just annoying to find a site that talks about it just to have it disappear on you. So! Without further delay, my short little guide on how it is done.
Software pre-requisites for AirPlay.
I will be using the latest Raspbian Image 9/25/13 from the download section right off of Raspberry Pi's homepage.
raspi-config
After you get it all hooked up to your SD-Card and ready to go you'll want to do the basics first such as configuring your user and passwords and of course updating your packages to the latest release. (This is of course presuming the fact that your Raspberry Pi that you are configuring for airplay is hooked up to your network). While we are at it, we will download the dependencies needed for this project.
sudo apt-get update
sudo apt-get upgrade
sudo apt-get install git libao-dev libssl-dev libcrypt-openssl-rsa-perl libio-socket-inet6-perl libwww-perl avahi-utils libmodule-build-perl make gcc pkg-config
Setting up the AirPlay!
Now that all of your pre-requisites and troubleshooting is all done. You're ready to install AirPlay!
Good! Now we're going to download the perl code which AirPlay requires.
git clone https://github.com/njh/perl-net-sdp.git perl-net-sdp
cd perl-net-sdp
perl Build.PL
sudo ./Build
sudo ./Build test
sudo ./Build install
cd ..
Finally the AirPlay source:
git clone https://github.com/hendrikw82/shairport.git
cd shairport
make install
cp shairport.init.sample /etc/init.d/shairport
cd /etc/init.d
chmod a+x shairport
update-rc.d shairport defaults
and then we will have to modify the start up file so that it reads the AirPlay name I want it to read.
sudo nano ./etc/init.d/shairport
Now find the line that says this:
DAEMON_ARGS="-w $PIDFILE"
change it to
DAEMON_ARGS="-w $PIDFILE -a YOURPINAMEHERE"
In my case I have it named "EvilPi".
reboot your Pi or type
service shairport start
And you should see your AirPlay servers like on some of these IOS7 apps on my IPhone.
![]()
As you can see, the icon appears in different locations based on your application. You will not have this icon appear unless your ShairPort service coming from your Raspberry Pi is visible. In my configuration I have two Raspberry Pis already setup (One for my living room, and another for my bedroom. )
 AirPlay via wired network or wireless
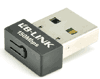
AirPlay via a wired network is better versus a wireless configuration as it reduces the latency of receiving off of your smart device down to less then a second. However, if you do not care if a song goes for a few seconds longer after you'd hit the stop button or takes a little bit to turn on when you hit the start button. OR if your sterio receiver is in a location that is nowhere near a wired second. Then you'll want to buy one of these little guys (appoximatly $10 on ebay) then you'll want to configure the wireless section.
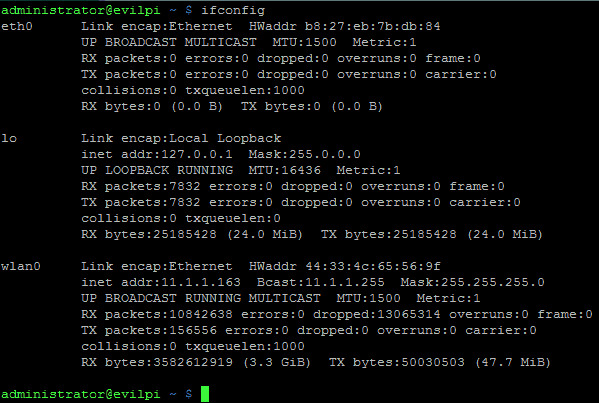
you can type ifconfig to see if you have at least a wlan0 card. In this example, the card is already setup with an IP, however, as long you show a WLAN card the Raspberry Pi detected your wireless card properly and you can continue on with setting it up to connect to your wireless router.
If you are not booting your Pi into a graphical interface via the raspi-config then we have to start it up.
startx
And then you'll want to find the wpa_gui program to help configure your card.
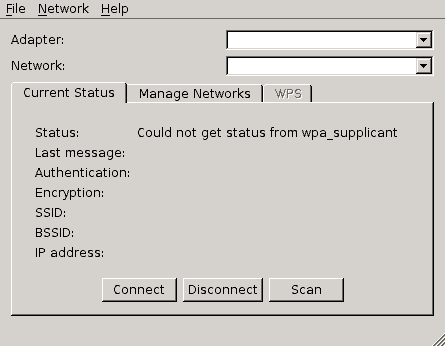 By default your status will either say not connected or simply blank. That is okay! we want to click the Scan button to find our access point.
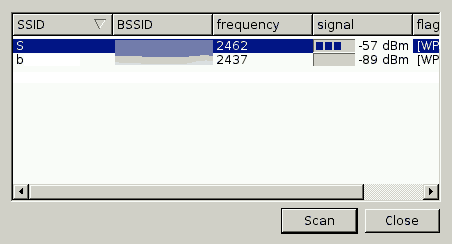
It should be populated with at least one access point which is what your smartphone should be connected to as well. In my example, it will be "S". Double-Click on that access point to configure it.
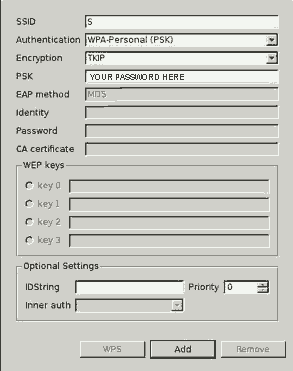 From here if you have it configured with a WPA-TKIP encryption you can enter in your password under PSK and then click the Add to add this profile to your Raspberry Pi, if everything goes well you should see the first menu populate with all of the settings and an IP address set for yoru wlan0 adapter.
 USB Sound and Speaker setup for AirPlay
Adding a USB sound card is Highly Suggested but not necessary when configuring AirPlay for the Raspberry Pi! The reason being is although the on board sound card works and can in fact be forced to output through the audio jack with the following command.
amixer cset numid=3 1
Then to test to make sure your analog output is going
aplay /usr/share/sounds/alsa/Front_Center.wav
The audio of the on-board Raspberry Pi is very low quality and while improvements are being made constantly to the Raspbian OS there's still the dull walkie-talkie sound coming from the audio jack combined with the occasional pops and clicks which come out of it.
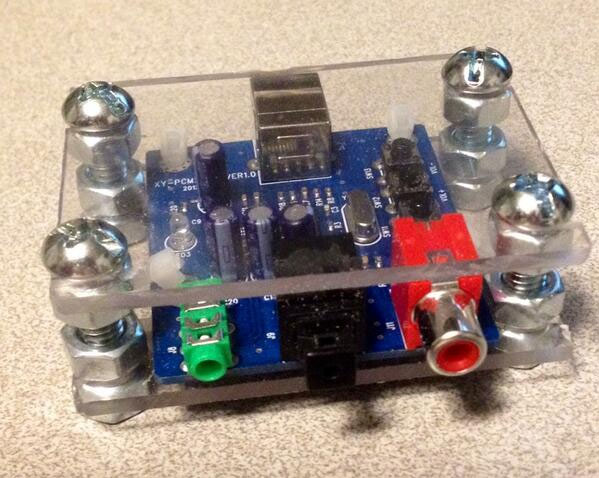
USB Configuration for AirPlay.
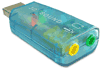
If you DO have a USB audio jack like the one in the picture you can modify one of your alsa-base.conf file to disable the onboard sound chip.
nano /etc/modprobe.d/alsa-base.conf
find the line that says this.
options snd-usb-audio index=-2
put a pound symbol to comment it out so when the Pi detects the soundcard on startup it assigns it as primary
#options snd-usb-audio index=-2
Ctrl-X and save out of nano and reboot your pi. Test it out and your USB audio device should be responding now.
aplay /usr/share/sounds/alsa/Front_Center.wav
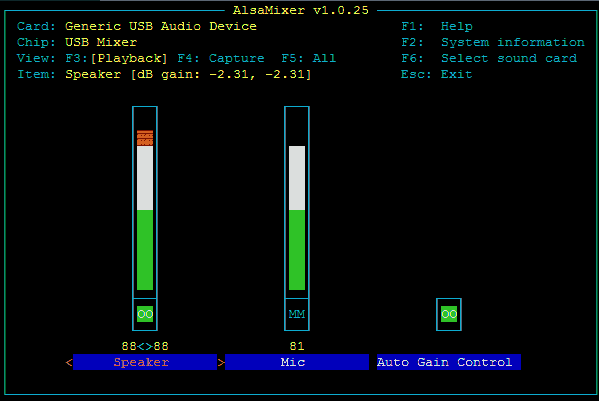
You can also type in "alsamixer" at shell to verify the USB device is your primary and the volume control is good on it.
![]() 12/24/2014 - Updated notes for Banana Pi
12/24/2014 - Updated notes for Banana Pi
Since I recently got a Banana Pi. There is one additional file that you have to generate.
nano /etc/asound.conf
And then enter the following information into it.
pcm.!default {
 type hw
 card 1
# card sunxicodec
 device 0
}

ctl.!default {
 type hw
 card 1
# card sunxicodec
}
Since the onboard sunxi card cannot be moved from card 0 like you can with the Raspberry Pi. You have to simply assign Card 1 as the default audio player on Banana Pi. This should get USB audio working once again on the Banana Pi for those who want it.
I should also note that the onboard sound coming from the Banana Pi is as good as having a USB analog DAC. It is nowhere near as shitty as it is on the Raspberry Pi with constant hissing and clicking when the CPU load is high. So if you are looking to build a simple radio box with the Banana Pi it will be good. For those looking for the pure Fiber to stereo system. Then the USB DAC is necessary.
Even better sound for your AirPlay
For those who simply will not settle for crap analog sound with clicks, popping, and drop-outs. This is where the USB DAC comes into play. I paid about $12 for a TI PCM2704 (I just checked the price and it has gone down a few bucks) although I was unable to get coaxial digital working out of my Pi and the analog was giving this weird static noise every few seconds even after modifying my kernel's USB buffer value. The Fiber connection is absolutely flawless. So if you have a nice amp that can table Fibre digital signal. This is the way you want to go in terms of strapping your Pi into your stereo console.
If you want to get all kinds of audiophile with your DAC then I would say to click on this link. This guy clearly has had more variety of DAC configuration then I do.
That's all server has to say.
END OF LINE+++
./shairport/shairport.init.example is also empty and I can't event write anything to these once write-save-reopen every thing is blank again.
Huh, weird. I'll post a link to my shairport file. This is the one right off of my banana pi. Simply save it, copy it into your /etc/init.d dropping the .txt off of the end of it. and chown it 777 to make it executable.
If you get a hot-link error you may have to re-visit the blog first and scroll down to comments.
Hi,
somehow my /etc/init.d/shairport file is empty...I am using a headless banana pi pro config. Any ideas?
Did you nano your ./shairport/shairport.init.example to see if there is data in that file? if you you can simply copy that to your /etc/init.d/shairport like it should be.