
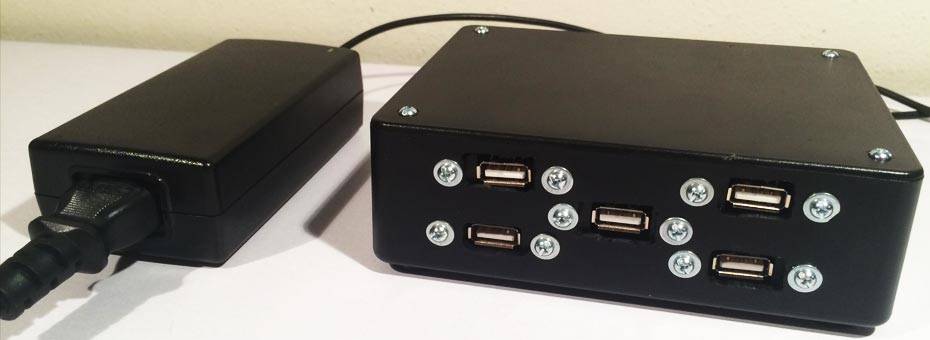
Power station for all of my USB needs wants and desires.
This blog is about the power station that took about 3 hours of assembly and costs under $10 by the time everything is said and done. Sometimes these are called "Dumb USB" as they don't behave like a USB hub but just the basics such as power flow and that's it. As you know I play with a lot of devices that require 5dvc. Simply go through my guides and blog and you'll see that the quality of the power supply can sometimes make or break whatever project that I'm working on. Since I had a lot of parts from the many projects I have done I decided to make a USB power station for all of my charging needs. Something that can easily deliver 3amps while still maintaining the voltage at around 5vdc (I have it set for 5.10vdc to anticipate voltage drop under load and it's where a lot of cel-phone chargers sit at). More below.
Parts for the USB power station.
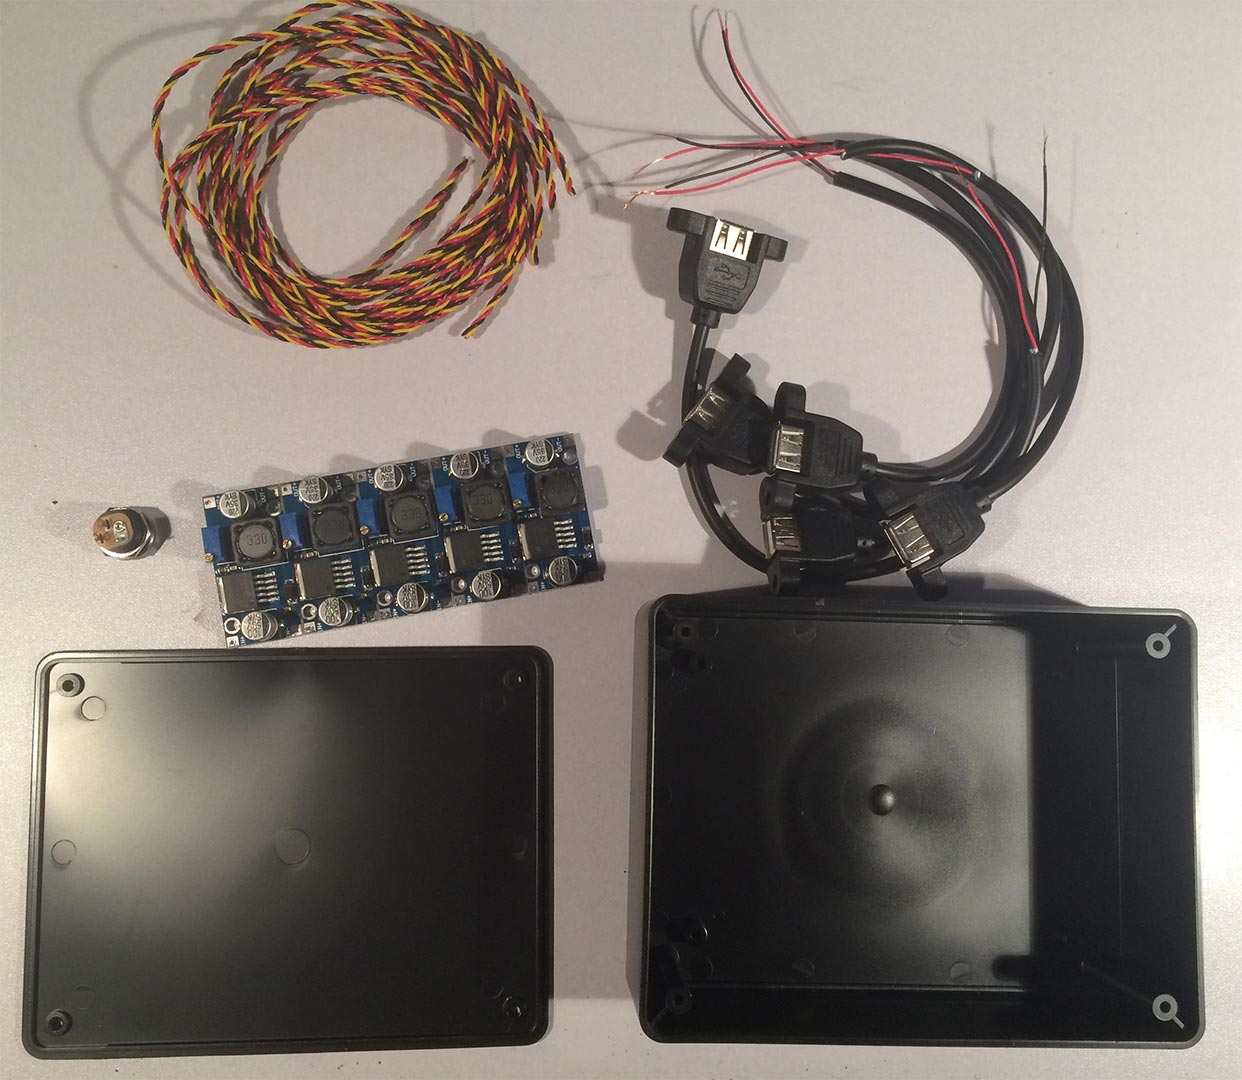 Here's the parts in my listing:
- 5x DC-DC LM2596 Step Down Adjustable Converter Power Supply Module $0.89 cents each on Ebay. I should note that there an even smaller form factor that I've used in my Orange Pi known as the LM2596s but I wanted a larger factor in case it needs to be heat-sink cooled.
- 3x female <-> female USB wall-mount cables $1.11 each - Ebay - These are cut in half to give us 6, more then what we need.
- Barrel plug adapter that I got for around $0.22 American science and surplus.
- Hammond ABS plastic case for around $0.75 also American Science and Surplus.
- Extra Wire for hooking up everything.
What is not shown in the picture:
- 12vdc 3.33amp power brick pulled off of a old retail device that no longer needs it made by Acbel. This was a freebie and 12vdc Supplies seem to be readily available.
Tools Used:
- Soldering Iron
- Dremmel with a drill bit for cutting and shaping.
- pliers, screwdriver, and other hand-tools
Assembly of USB power station:
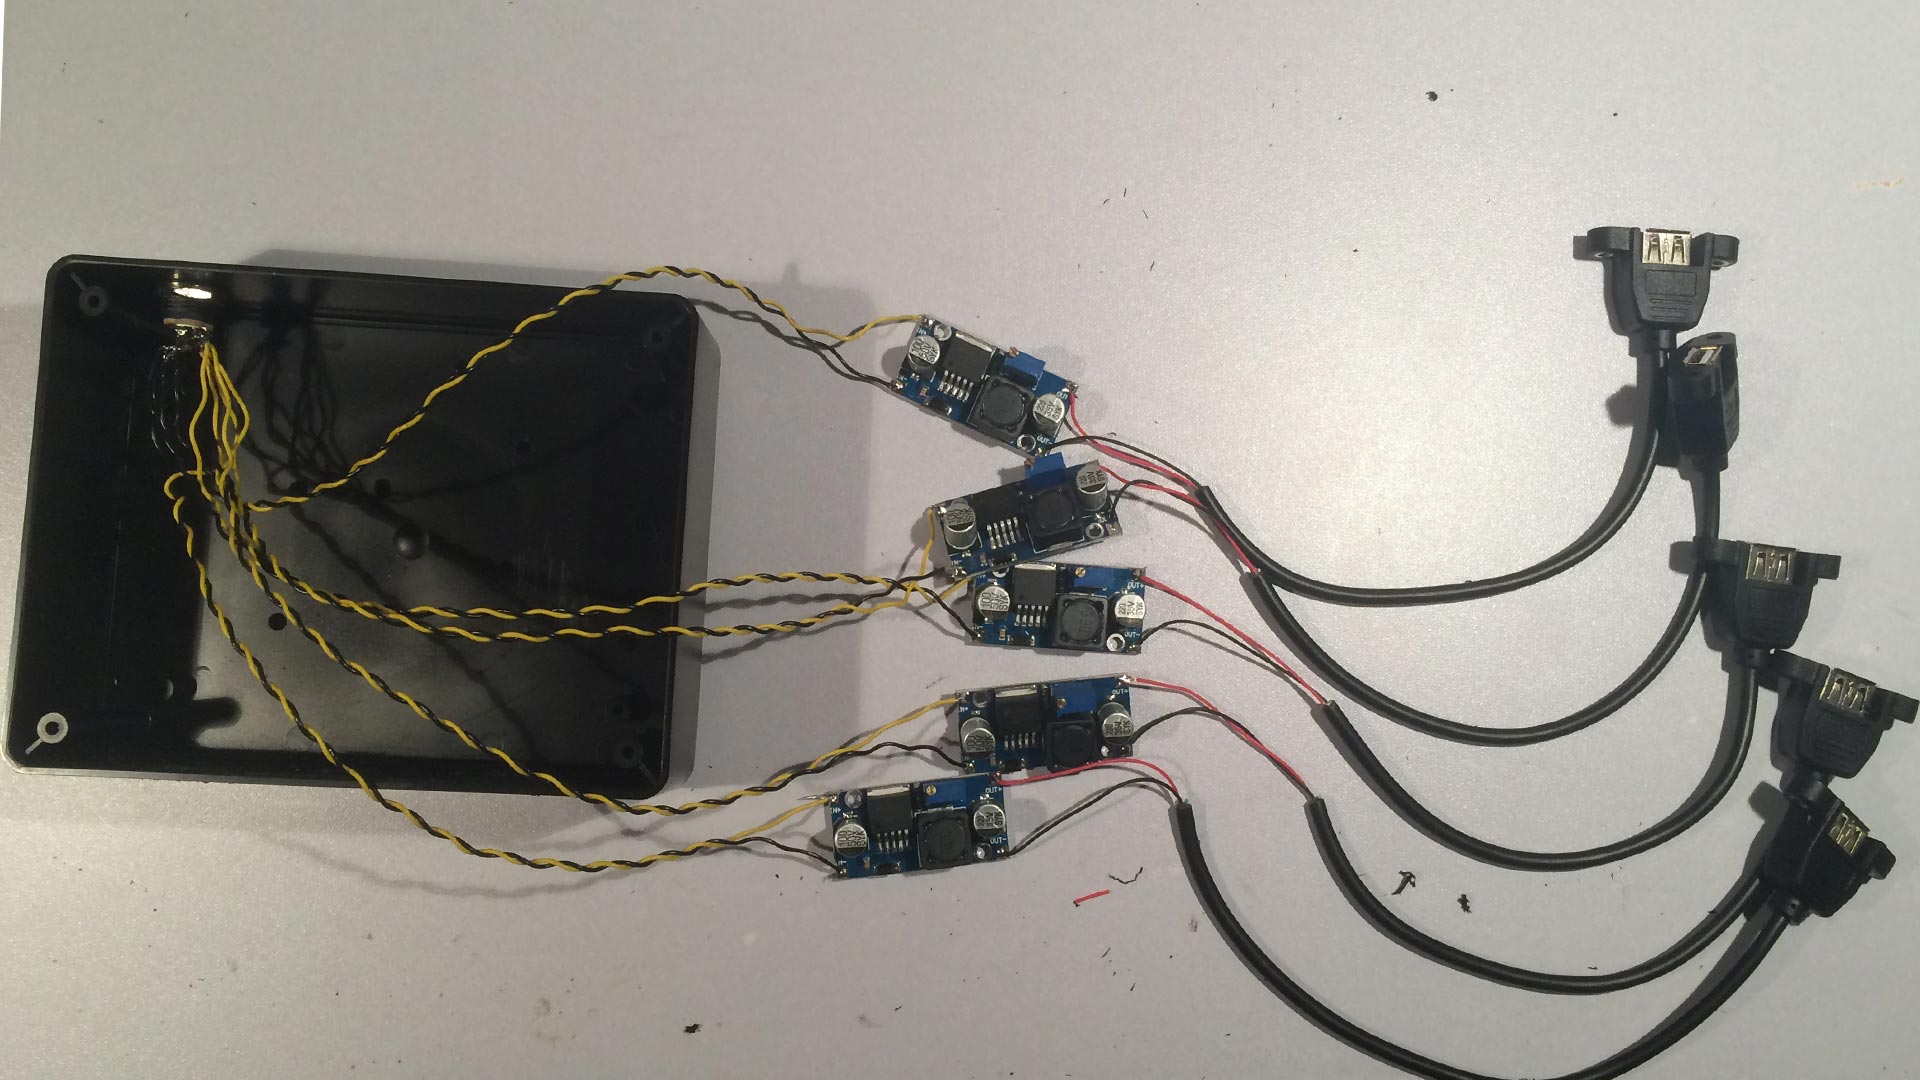 After I did all of the measuring and drilled all of the holes for the front where the USB ports will be and the hole in the back where the barrel plus will sit it was now time to bust out the soldering iron and get to work. You'll notice that I soldered the DC-DC Circuit in a star pattern rather than daisy-chaining them together. It's not terribly important to do with low voltage like this. but when dealing with higher voltage projects daisy chaining is a bad idea because the load on the first wire stacks with every DC-DC circuit you add to the chain. these 5 DC-DC chips at max amperage would be 15 amps which could cook the small gauge wire that I'm using if I daisy-chained them together. Also note: the 12vdc supply we're using has a max output of 3.33amps which means at 6vdc you are looking at around 6.5amps (knocking off a few hundredths of an amp due to inefficiencies of these adapters which is around %97 efficiency.) And that's being fairly conservative without overloading or overheating the Power Supply.
In china, the colors mean whatever the hell you want them to be!
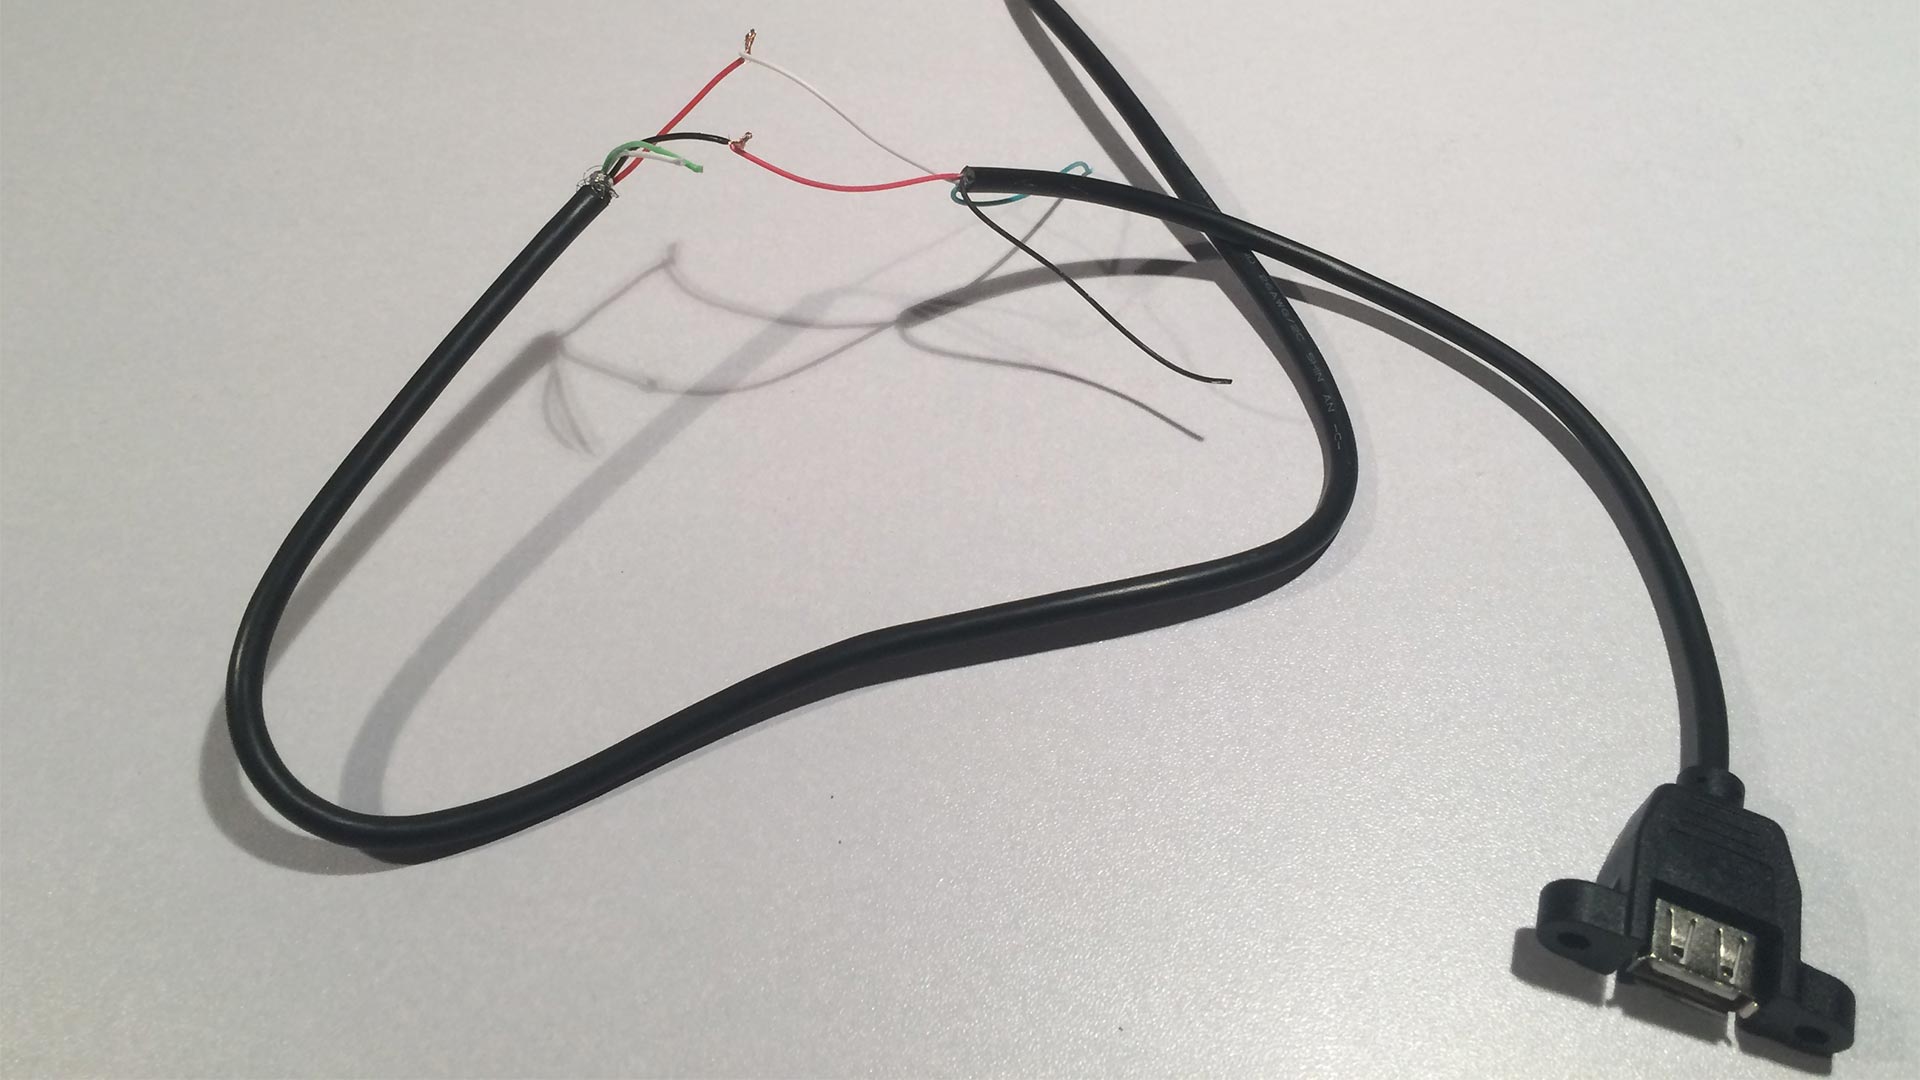 The USB standard when you strip away wire goes a little something like this.
- VCC - Red
- Data Minus - White
- Data Plus - Green
- Ground - Black
However the level of fucks given about this standard at the Chinese manufacturing plants is non-existent and thus I had to redo all of my work in the first picture during the assembly Process. That apparently Red was Ground and White was power. So the lesson to be learned here is always do a pin check whenever you split apart a cable because you could be dealing with some drunkard that is color blind at the plant which only cares if it passes QA.  After a lot of time with all of the fasteners and nylon washers and drilling. And also continuity testing to make sure that went I hooked it up to my 12vdc brick it was not going to explode upon firing it up. The part came where I had to tune all of the DC-DC step-down circuits to go to 5.10vdc or at least as close as you possibly can. Within the USB power supply environment, a USB can accept up to a %5 percent tolerance where the regulators built within whichever device you are powering can accept. A lot of times people will go to 5.20vdc for things like the Raspberry Pi however I play it a little safe at 5.10vdc in case the pots move in one direction or the other nothing would really happen.
Phone charging with the station:
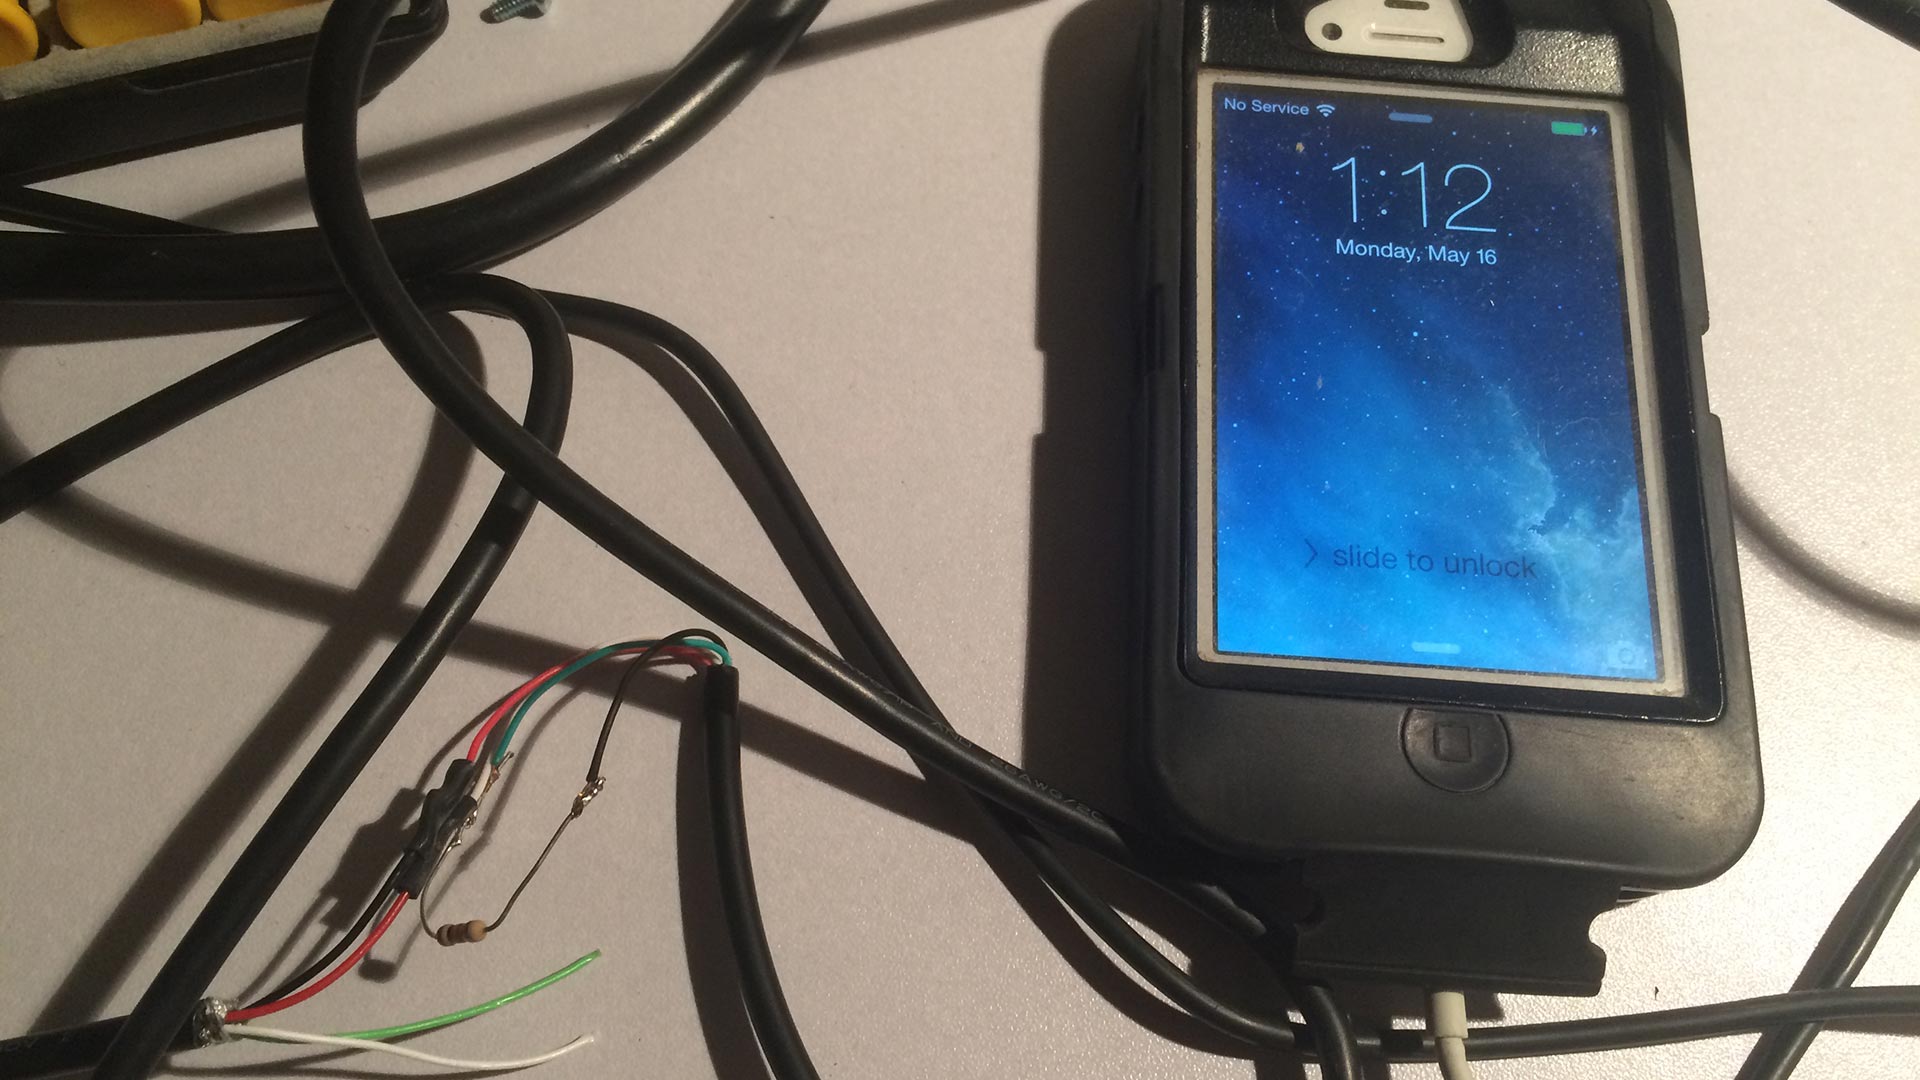 Normally I would say that my hack is complete. I was able to power up my Raspberry Pi, my li-po charge for my Xbox 360 controllers, my Orange Pi, and Even my Pine A64. But something is wrong! Upon plugging in my Iphone 4 that I had laying around not doing a damn thing it didn't want to take a charge. no matter what voltage level I set it wanted nothing to do with my Power station.
 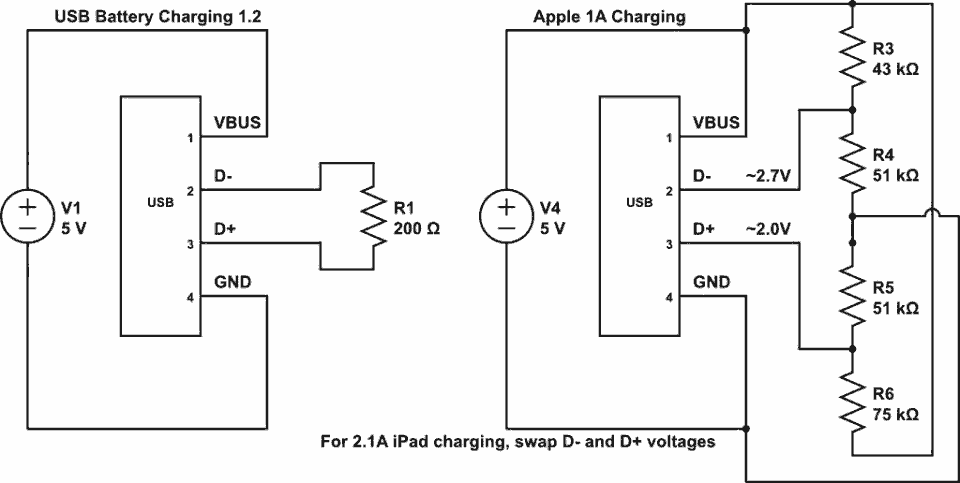 It turns out that even if the cell phone is only using pins 1 and 4 that depending on the device it will also check the data line to see exactly what kind of power supply that it is working with. So once again I had to take apart my USB power station and add 200Ohm resistors onto every data line (which apparently with these Chinese cables is black and green. Yeah) After I did that and used the USB Battery Charger 1.2 diagram for simplicity reasons. My iPhone 4 came back to life and was charging happily off of my USB Charging Station.
Final Results:

For a day project this power station is easy and cheap to build. and also in case I wanted to go outdoors, I could hook this thing up to battery power and the DC-DC circuits will keep regulating happily at 5.10vdc. It would've costed a lot more if I didn't have the initial 12vdc power supply. But 12vdc Supplies are the most made-up mid-grade power supply in existence and are also made in high abundance to it was a no brainer to use one. END OF LINE+++